Subaru Legacy III (2000-2003 year). Service manual — part 959
SE-14
SEATS
FRONT SEAT
Side airbag equipped seat:
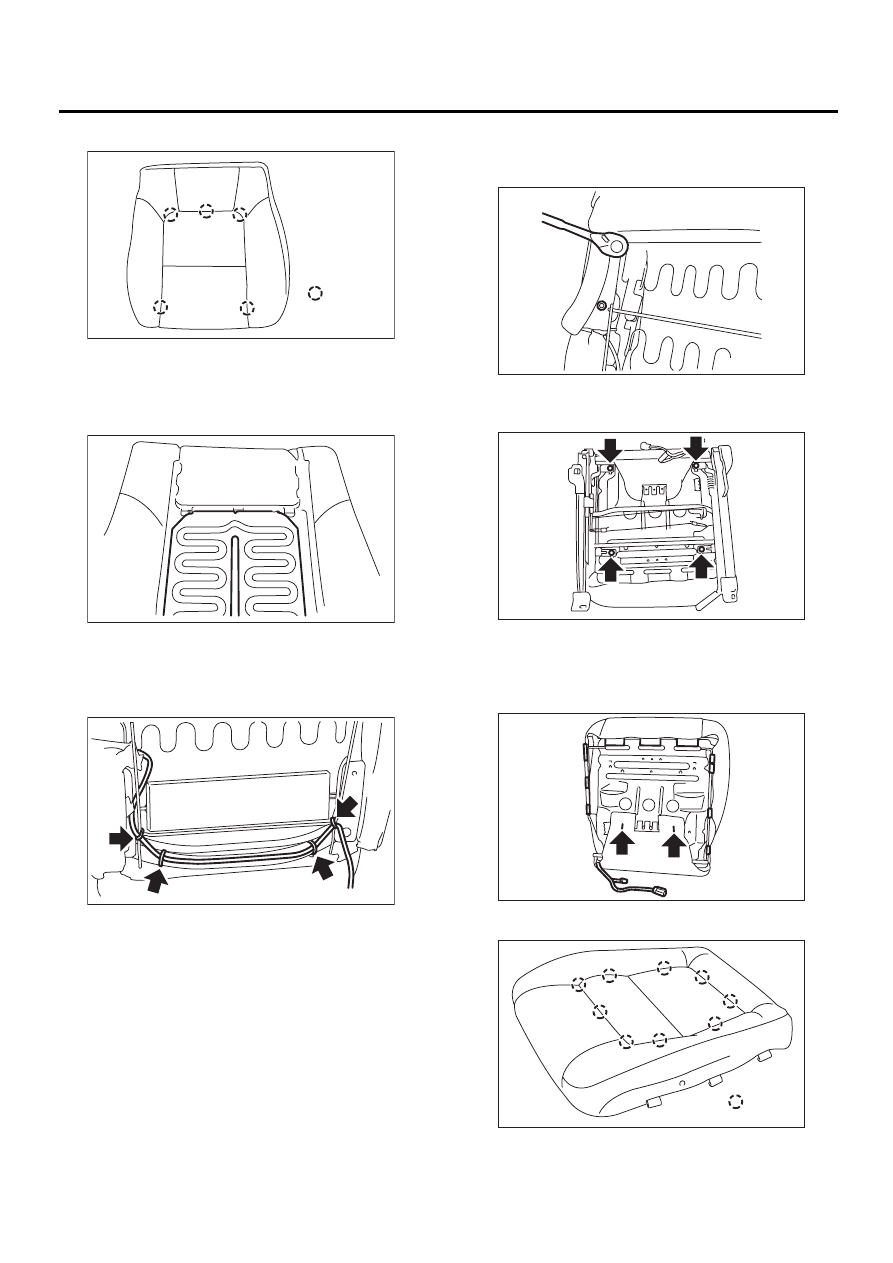
11) Remove hog rings (A), and then remove seat
heater. (Seat heater equipped seat)
12) Remove seat cover.
13) Remove backrest pad.
14) Remove clamp of airbag wire harness on back
side of seat. (Side airbag equipped seat)
15) Remove the two cap nuts, and then remove
side airbag module assembly. (Side airbag
equipped seat)
16) Remove the 4 bolts of seat hinge assembly,
and then remove seat cushion.
17) Remove hook clips on back side of seat cush-
ion, and remove hog rings (A).
18) Remove clamp of seat heater wire harness.
(Seat heater equipped seat)
19) Remove hog rings (A).
(A) Hog ring
SE-00081
: ( A )
SE-00082
SE-00083
SE-00084
SE-00086
SE-00088
SE-00089
: ( A )
SE-15
SEATS
FRONT SEAT
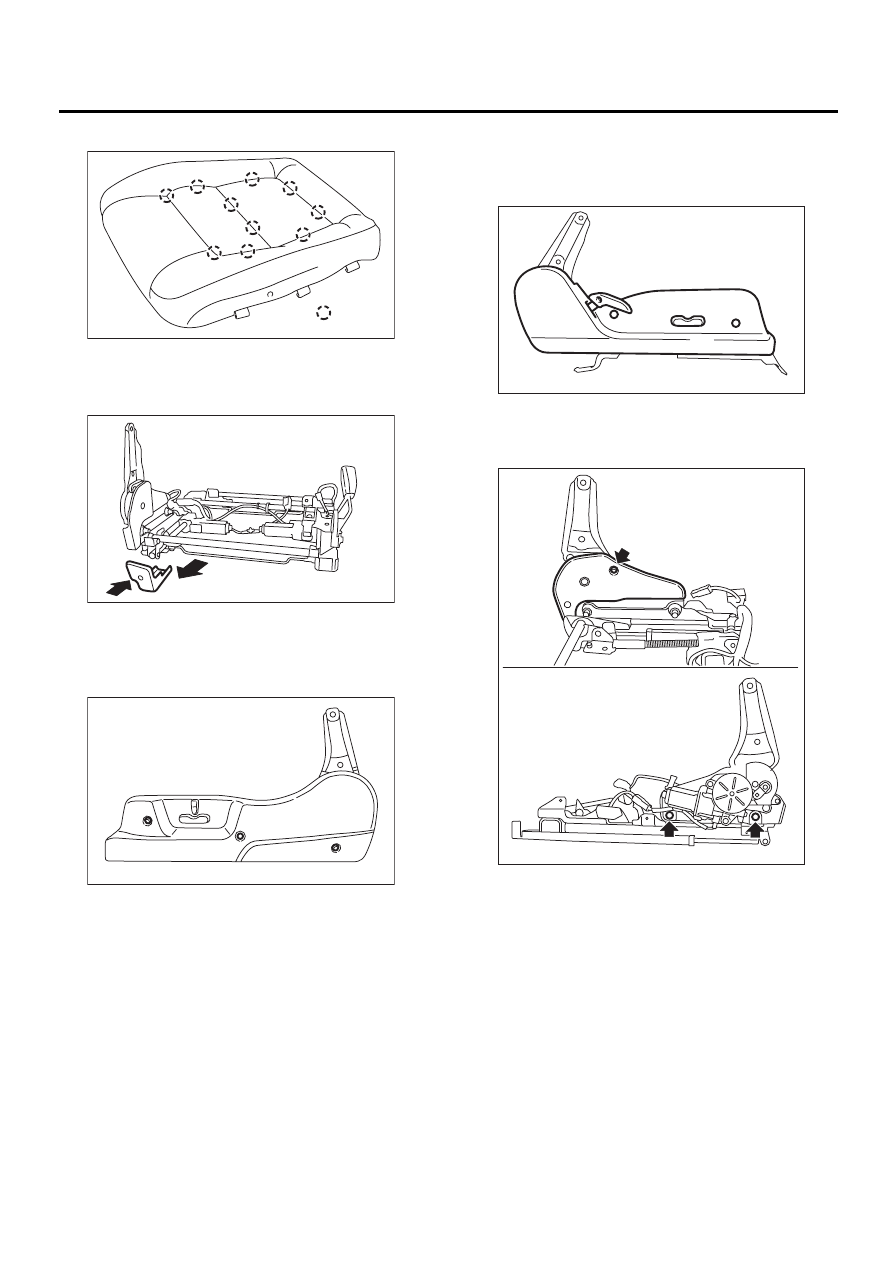
Leather type seat:
20) Remove cushion cover.
21) Remove cushion pad.
22) Remove the screw and then remove the cover.
23) 8-way power seat:
Remove the screw, disconnect the power seat
switch connector on the underside of the cover,
and remove the hinge cover.
6-way power seat:
Remove the reclining lever cover and screw, dis-
connect the power seat switch connector on the un-
derside of the cover, and remove the hinge cover.
24) Remove the cover on the underside of the seat
hinge, remove the two bolts, and remove the seat
hinge.
SE-00091
: ( A )
SE-00115
SE-00116
SE-00117
SE-00118
SE-16
SEATS
FRONT SEAT
D: ASSEMBLY
1. STANDARD SEAT
1) Assemble in the reverse order of disassembly.
NOTE:
• Do not contaminate or damage cover.
• While installing hog rings, prevent seat from get-
ting wrinkled.
2) Attach seat cover end hole to hinge inner. (Only
non-tilt type standard seat)
2. POWER SEAT
1) Assemble in the reverse order of disassembly.
NOTE:
• Do not contaminate or damage cover.
• While installing hog rings, prevent seat from get-
ting wrinkled.
• Make sure the connector is firmly connected.
• Make sure the wire harness is not pinched.
2) Attach seat cover end hole to hinge inner. (Only
non-tilt type standard seat)
Tightening torque:
Refer to COMPONENT in General Descrip-
tion.
<Ref. to SE-2, FRONT SEAT, COMPONENT,
General Description.>
SE-17
SEATS
REAR SEAT
3. Rear Seat
A: REMOVAL
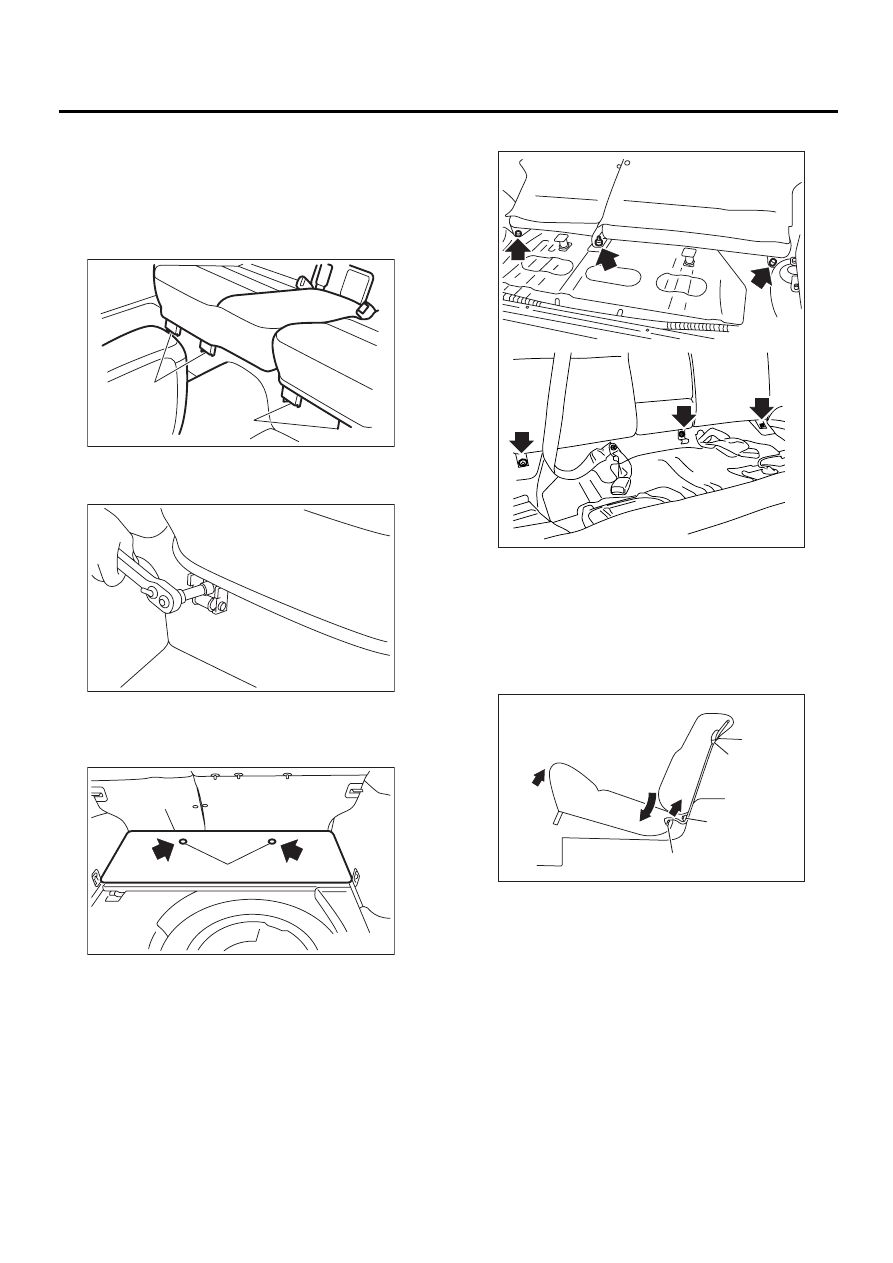
1. WAGON
1) Raise the cushion, and then remove bolt covers
(A).
2) Remove bolts, and then remove rear seat cush-
ion.
3) Remove headrest.
4) Remove clips, and then remove rear floor front
mat.
5) Remove bolts and nuts of bracket hinge.
6) Remove rear seat backrest.
2. SEDAN
1) Slightly raise front of cushion while pushing
down on cushion in the direction of “A”. With cush-
ion held in that position, move it forward until it is
unhooked.
SE-00119
( A )
( A )
SE-00120
SE-00121
( A )
( B )
(1) Raise
(2) Hook
(3) Attaching bolt
(4) Hook
(5) Push
SE-00122
SE-00123
A
B
( 1 )
( 2 )
( 3 )
( 4 )
( 5 )
Нет комментариевНе стесняйтесь поделиться с нами вашим ценным мнением.
Текст