Subaru Legacy III (2000-2003 year). Service manual — part 660
WT-4
WHEEL AND TIRE SYSTEM
TIRE
2. Tire
A: INSPECTION
1) Take stone, glass, nail etc. off the tread groove.
2) Replace tire:
CAUTION:
• When replacing a tire, make sure to use only
the same size, construction and load range as
originally installed.
• Avoid mixing radial, belted bias or bias tires
on the vehicle.
(1) When large crack on side wall, damage or
crack on tread is found.
(2) When the “tread wear indicator” appears as
a solid band across the tread.
3) When extremely biased wear on tire tread can
been seen, after replacing tire, check wheel align-
ment. <Ref. to FS-6, Wheel Alignment.>
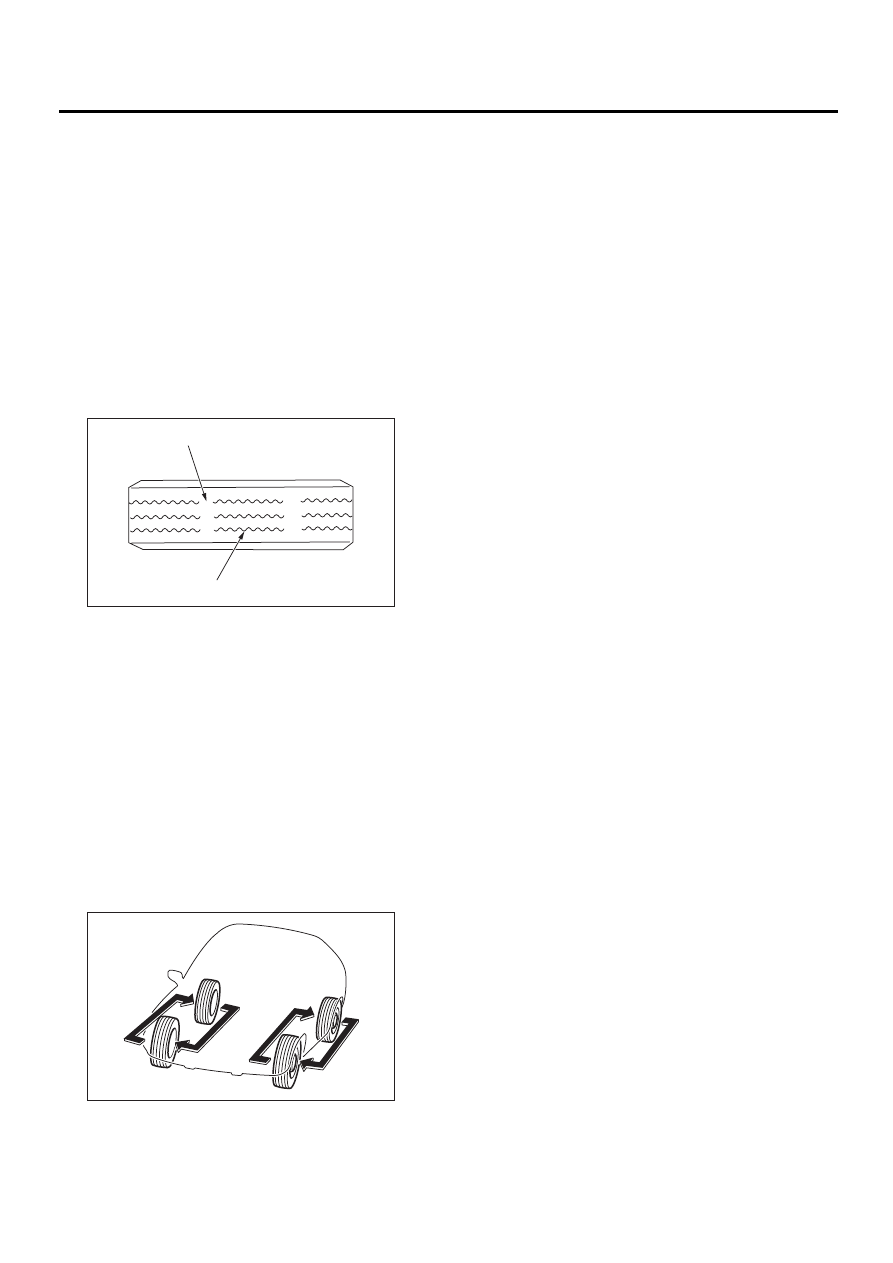
1. TIRE ROTATION
If tires are maintained at the same positions for a
long period of time, uneven wear results. There-
fore, they should be periodically rotated.
This lengthens service life of tires.
CAUTION:
When rotating tires, replace unevenly worn or
damaged tires with new ones.
(1) Tread wear indicator
(2) Tire tread
WT-00002
( 1 )
( 2 )
WT-00003
WT-5
WHEEL AND TIRE SYSTEM
STEEL WHEEL
3. Steel Wheel
A: REMOVAL
1) Apply parking brake, and position select lever to
“P” or “LOW”.
2) Set shop jacks or a lift to the specified point, and
support the vehicle with its wheels slightly contact-
ing the floor.
3) Loosen wheel nuts.
4) Raise the vehicle until its wheels take off the
ground using a jack or a lift.
5) Remove wheel nuts and wheels.
NOTE:
• While removing wheels, prevent hub bolts from
damage.
• Place wheels with their outer sides facing up-
ward to prevent wheels from damage.
B: INSTALLATION
1) Attach the wheel to the hub by aligning the wheel
bolt hole with the hub bolt.
2) Temporarily attach the wheel nuts to the hub
bolts. (In the case of aluminum wheel, use SUBA-
RU genuine wheel nut for aluminum wheel.)
3) Manually tighten the nuts making sure the wheel
hub hole is aligned correctly to the guide portion of
hub.
4) Tighten the wheel nuts in a diagonal selection to
the specified torque. Use a wheel nut wrench.
Wheel nut tightening torque:
88 N·m (9 kgf-m, 65 ft-lb)
CAUTION:
• Tighten the wheel nuts in two or three steps
by gradually increasing the torque and working
diagonally, until the specified torque is
reached. For drum brake models, excess tight-
ening of wheel nuts may cause wheels to “jud-
der”.
• Do not depress the wrench with a foot; Al-
ways use both hands when tightening.
• Make sure the bolt, nut and the nut seating
surface of the wheel are free from oils.
5) If a wheel is removed for replacement or for re-
pair of a puncture, retighten the wheel nuts to the
specified torque after running 1,000 km (600
miles).
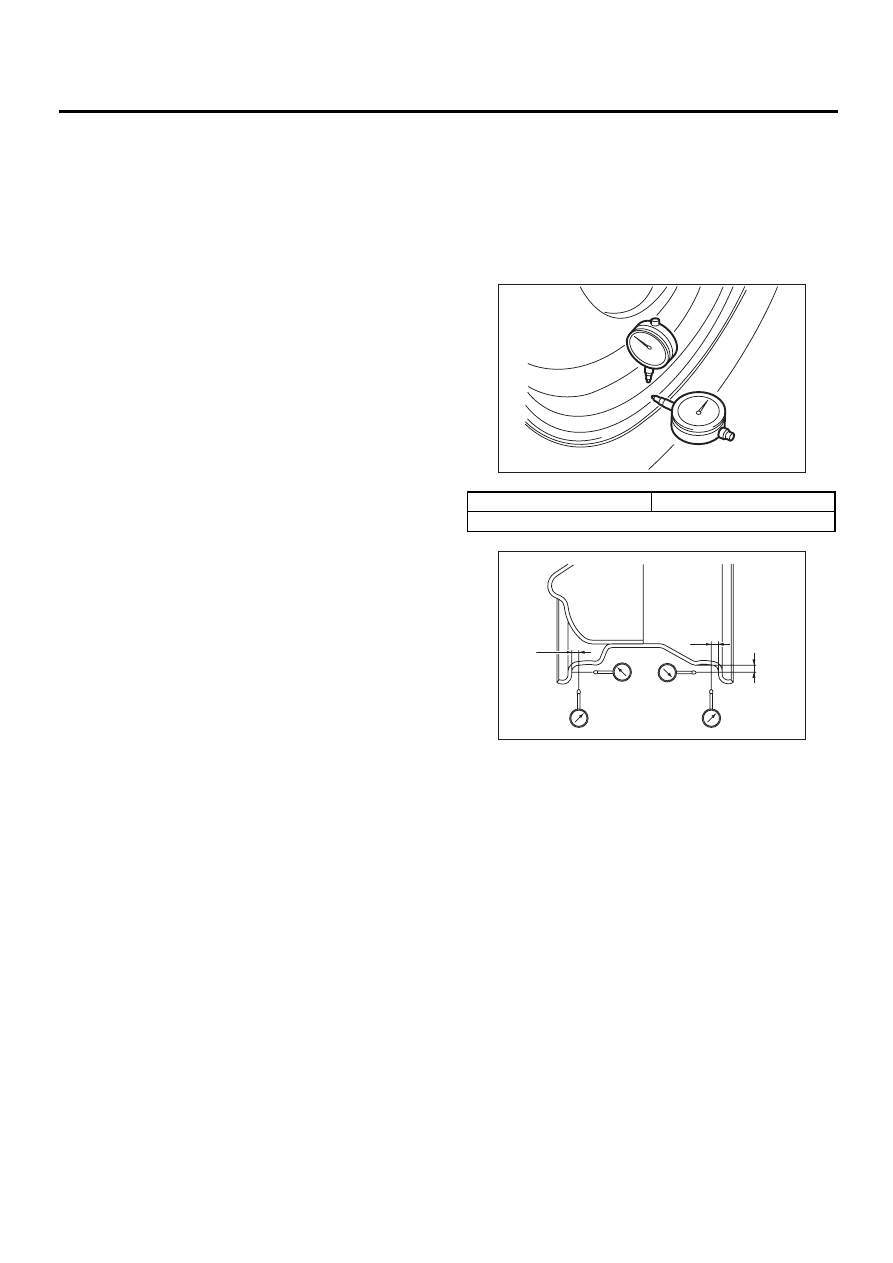
C: INSPECTION
1) Deformation or damage on the rim can cause air
leakage. Check the rim flange for deformation,
crack, or damage, and repair or replace as neces-
sary.
2) Jack-up vehicle until wheels clear the floor.
3) Slowly rotate wheel to check rim “runout” using a
dial gauge.
4) If rim runout exceeds specifications, remove tire
from rim and check runout while attaching dial
gauge to positions shown in figure.
5) If measured runout still exceeds specifications,
replace the wheel.
Axial runout limit
Radial runout limit
1.5 mm (0.059 in)
(1) Approx. 7 mm (0.28 in)
WT-00004
WT-00005
(1)
(1)
(1)
WT-6
WHEEL AND TIRE SYSTEM
ALUMINUM WHEEL
4. Aluminum Wheel
A: REMOVAL
Refer to Steel Wheel for removal procedure of alu-
minum wheels.
<Ref. to WT-5, REMOVAL, Steel Wheel.>
B: INSTALLATION
Refer to Steel Wheel for installation procedure of
aluminum wheels.
<Ref. to WT-5, INSTALLATION, Steel Wheel.>
C: INSPECTION
Refer to Steel Wheel for inspection procedure of
aluminum wheels.
<Ref. to WT-5, INSPECTION, Steel Wheel.>
Rim runout:
D: CAUTION
Aluminum wheels are easily scratched. To main-
tain their appearance and safety, do the following:
1) Do not damage aluminum wheels during remov-
al, disassembly, installation, wheel balancing, etc.
After removing aluminum wheels, place them on a
rubber mat, etc.
2) While vehicle is being driven, be careful not to
ride over sharp obstacles or allow aluminum
wheels to contact the shoulder of the road.
3) When installing tire chain, be sure to install it
properly not to have a slack; otherwise it may hit
wheel while driving.
4) When washing aluminum wheel, use neutral
synthetic detergent and water. Avoid using the
cleanser including abrasive, hard brushes or an
automatic car washer.
Axial runout limit
Radial runout limit
1.0 mm (0.039 in)
WT-7
WHEEL AND TIRE SYSTEM
WHEEL BALANCING
5. Wheel Balancing
A: REPLACEMENT
1) Remove balance weights.
2) Using dynamic balancing, measure wheel bal-
ance.
3) Select a weight close to the value measured by
dynamic balancing.
4) Install the selected weight to the point designat-
ed by dynamic balancing.
5) Using dynamic balancing, measure wheel bal-
ance again. Check that wheel balance is correctly
adjusted.
B: INSPECTION
1) Proper wheel balance may be lost if the tire is re-
paired or if it wears. Check the tire for dynamic bal-
ance, and repair as necessary.
2) To check for dynamic balance, use a dynamic
balancer. Drive in the balance weight on both the
top and rear sides of the rim.
3) Some types of balancer can cause damage to
the wheel. Use an appropriate balancer when ad-
justing the wheel balance.
4) Use genuine balance weights.
CAUTION:
Balance weights are available for use with any
of 14- to 17-inch wheels.
Service limit: A
Weight for steel wheel;
2.16 mm (0.085 in)
Weight for aluminum wheel;
4.5 mm (0.177 in)
Balance weight part number
(For steel wheel)
Weight
28101AA001
5 g (0.18 oz)
28101AA011
10 g (0.35 oz)
28101AA021
15 g (0.53 oz)
28101AA031
20 g (0.71 oz)
28101AA041
25 g (0.88 oz)
28101AA051
30 g (1.06 oz)
28101AA061
35 g (1.23 oz)
28101AA071
40 g (1.41 oz)
28101AA081
45 g (1.59 oz)
28101AA091
50 g (1.76 oz)
—
55 g (1.94 oz)
28101AA111
60 g (2.12 oz)
Balance weight part number
(For aluminum wheel)
Weight
23141GA462
5 g (0.18 oz)
23141GA472
10 g (0.35 oz)
23141GA482
15 g (0.53 oz)
23141GA492
20 g (0.71 oz)
23141GA502
25 g (0.88 oz)
23141GA512
30 g (1.06 oz)
23141GA522
35 g (1.23 oz)
23141GA532
40 g (1.41 oz)
23141GA542
45 g (1.59 oz)
23141GA552
50 g (1.76 oz)
—
55 g (1.94 oz)
23141GA572
60 g (2.12 oz)
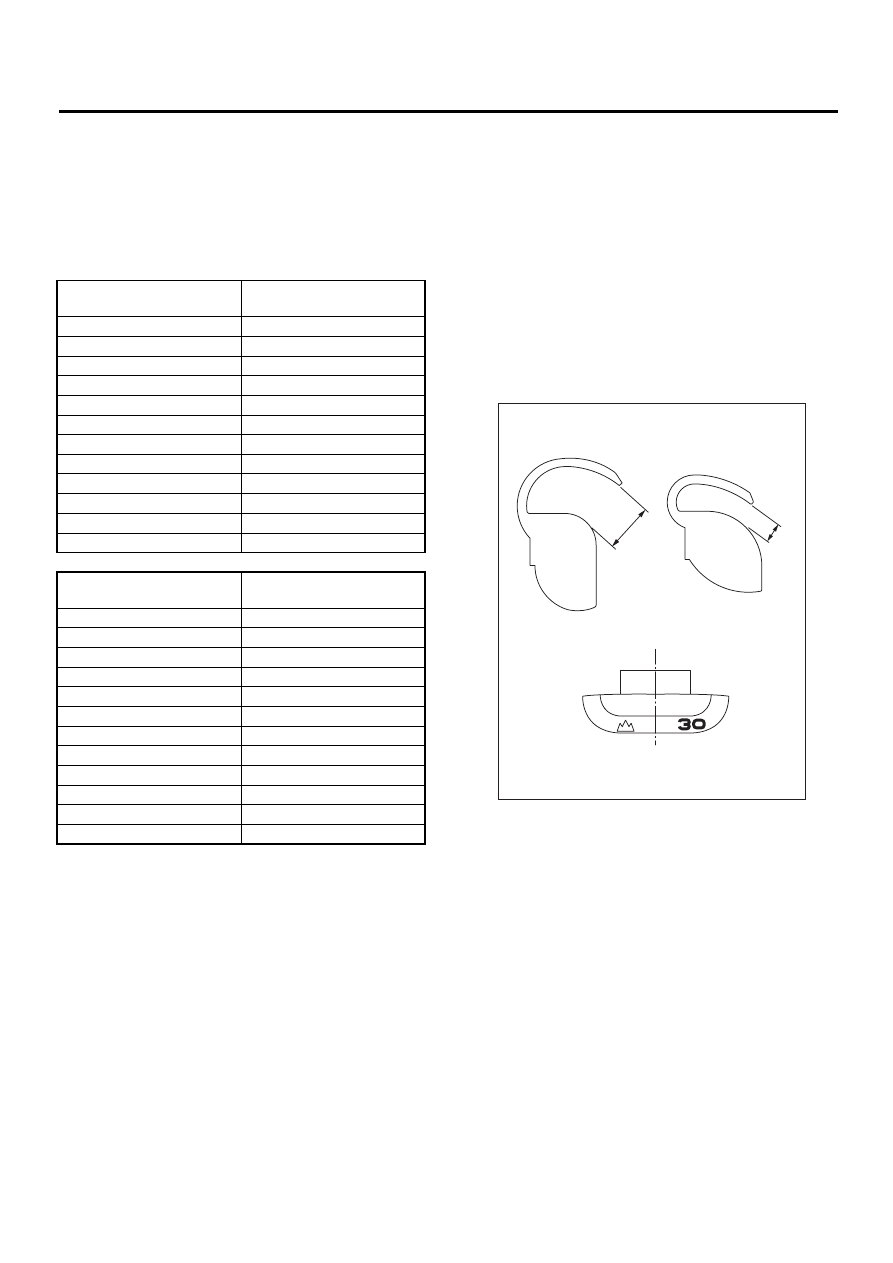
(1) Weight for aluminum wheel
(2) Weight for steel wheel
WT-00006
A
A
( 1 )
( 2 )
Нет комментариевНе стесняйтесь поделиться с нами вашим ценным мнением.
Текст