Subaru Legacy III (2000-2003 year). Service manual — part 686
DS-22
DRIVE SHAFT SYSTEM
FRONT AXLE
9) Apply sufficient grease to oil seal lip.
Specified grease
SHELL 6459N
CAUTION:
• If specified grease is not available, remove
bearing grease and apply Auto Rex A instead.
• Do not mix different types of grease.
10) Install disc cover to housing the three bolts.
Tightening torque:
18 N·m (1.8 kgf-m, 13.0 ft-lb)
11) Attach hub to ST1 securely.
12) Clean dust or foreign particles from the pol-
ished surface of hub.
13) Using ST2, press bearing into hub by driving in-
ner race.
ST1
927080000
HUB STAND
ST2
927120000
HUB INSTALLER
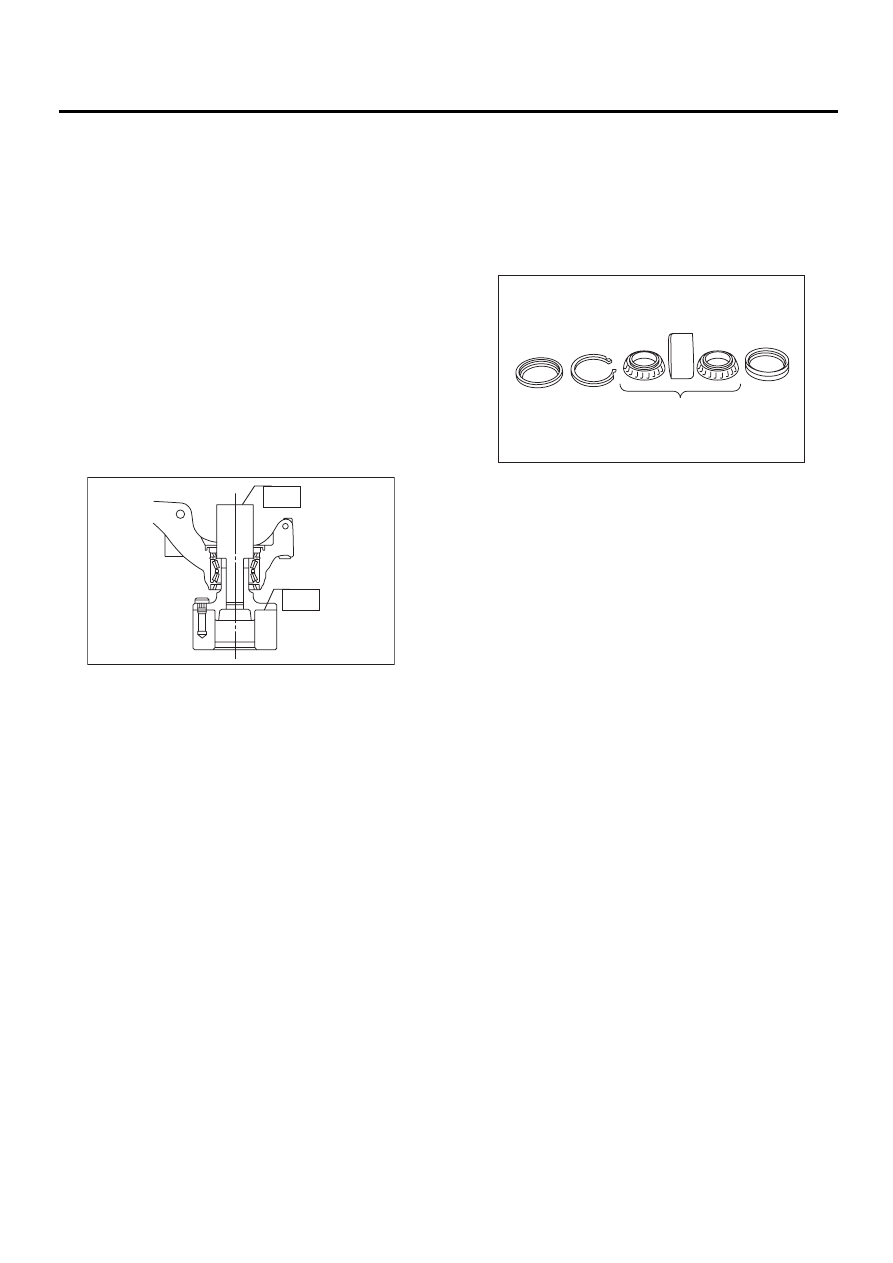
E: INSPECTION
Check the removed parts for wear and damage. If
defective, replace with new ones.
CAUTION:
• If bearing is faulty, replace it as the bearing
set.
• Be sure to replace oil seal at every overhaul.
DS-00060
ST1
ST2
(A) Replace as a set.
DS-00146
( A )
DS-23
DRIVE SHAFT SYSTEM
HUB UNIT BEARING
4. Hub Unit Bearing
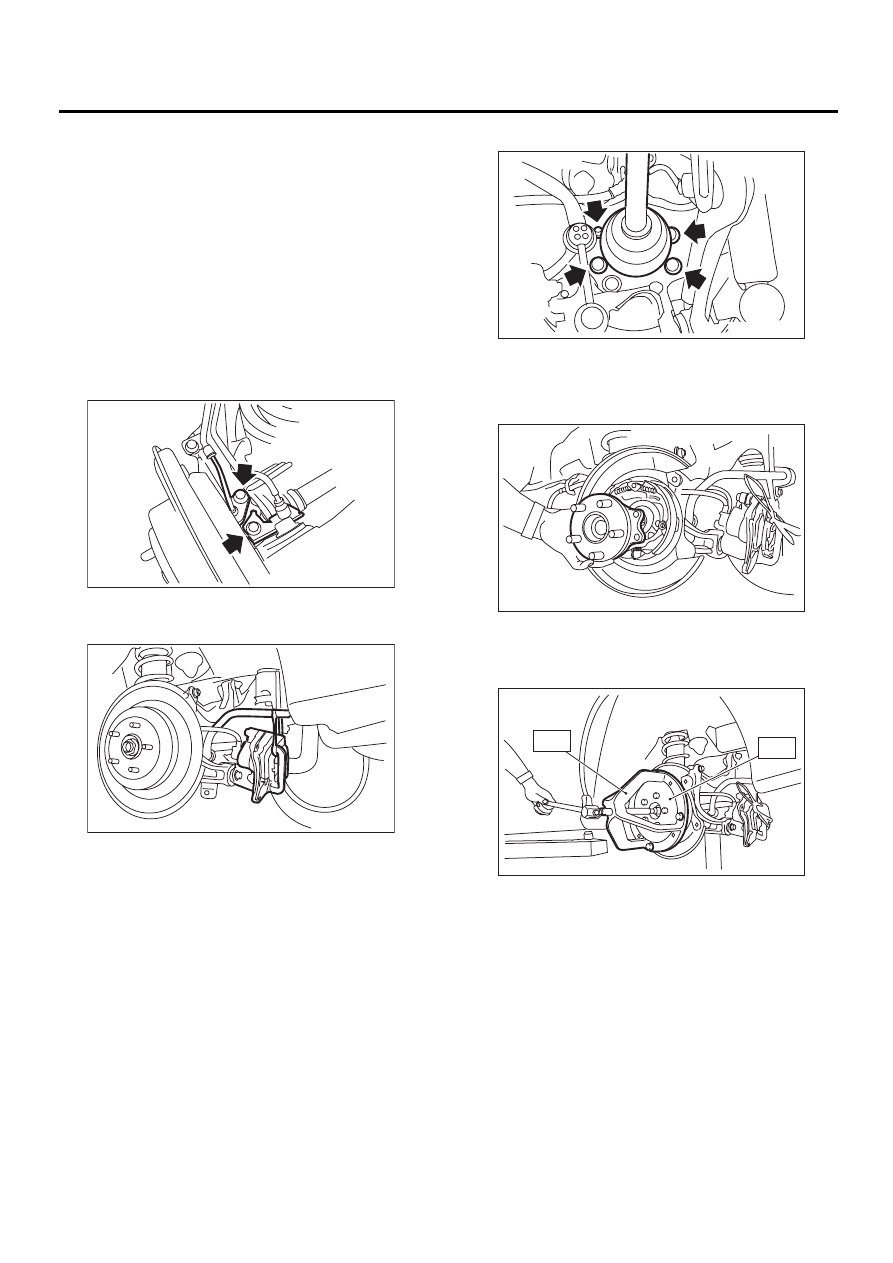
A: REMOVAL
1) Disconnect ground cable from battery.
2) Jack-up vehicle, and remove rear wheel cap and
wheels.
CAUTION:
Be sure to loosen and retighten axle nut after
removing wheel from vehicle. Failure to follow
this rule may damage wheel bearings.
3) Unlock axle nut.
4) Remove axle nut using a socket wrench.
5) Return parking brake lever.
6) Remove ABS sensor.
7) Remove brake caliper from back plate and sus-
pend it from stabilizer using a piece of wire.
8) Remove disc rotor from hub.
NOTE:
• Before removing disc rotor, mark the matching
surface of hub and disc rotor so as not to be con-
fused when installing.
• If disc rotor seizes up within hub, drive it out by
installing an 8 mm bolt into disc rotor bolt hole.
9) Remove four bolts from rear arm.
10) Remove hub unit bearing.
CAUTION:
Be careful not to damage tone wheel.
If it is hard to remove, use STs.
ST1
926470000
AXLE SHAFT PULLER
ST2
927140000
PLATE
DS-00147
DS-00148
DS-00149
DS-00150
DS-00122
ST1
ST2
DS-24
DRIVE SHAFT SYSTEM
HUB UNIT BEARING
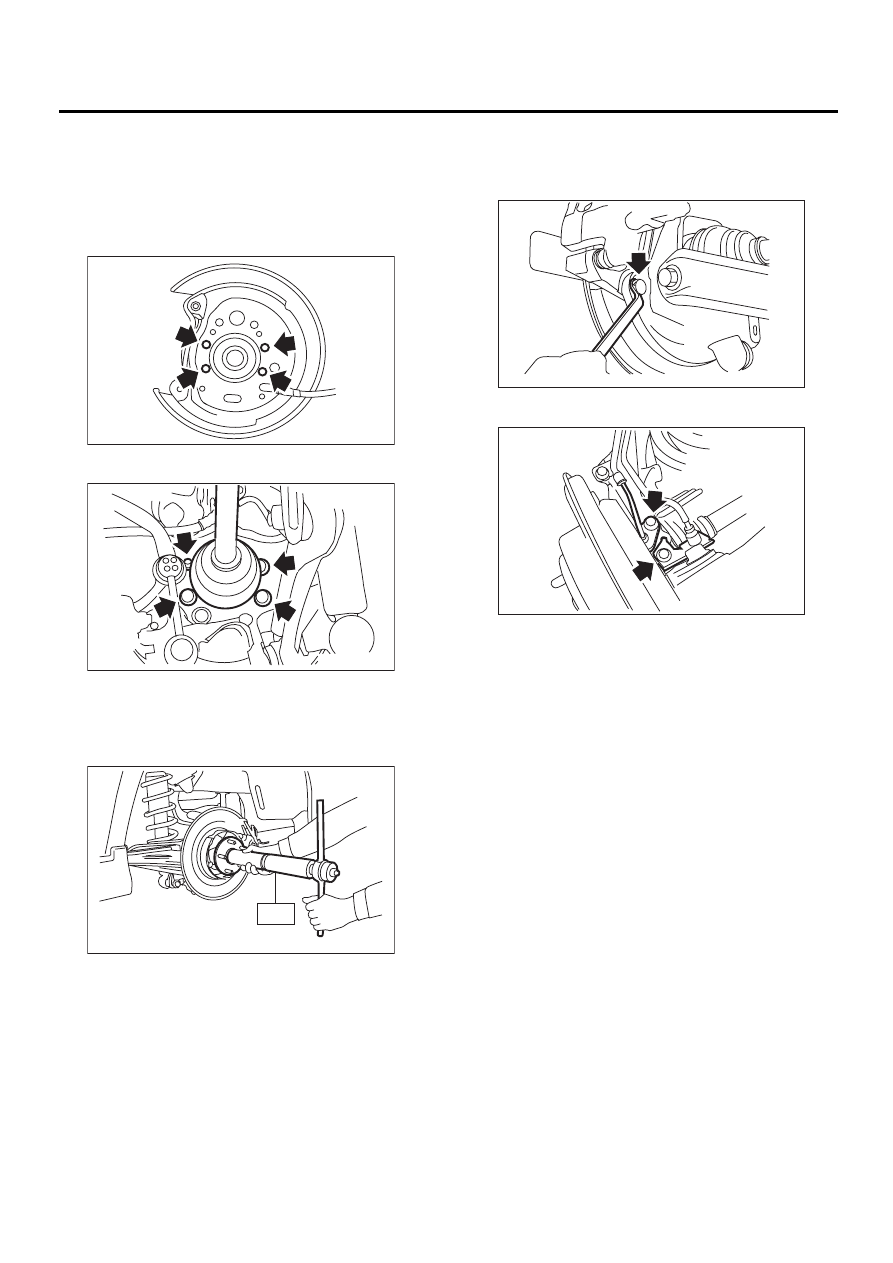
B: INSTALLATION
1) Align hub unit bearing with back plate at mount-
ing holes and install hub unit assembly and back
plate. Temporarily tighten axle nuts.
CAUTION:
Be careful not to damage tone wheel.
2) Tighten four bolts to back plate.
3) Remove axle nut.
4) Using ST1 and ST2, pull axle shaft into place.
ST1
922431000
AXLE SHAFT INSTALLER
ST2
927390000
ADAPTER
5) Temporarily tighten axle nuts.
6) Install disc rotor on hub.
7) Install disc brake caliper on back plate.
Tightening torque:
52 N·m (5.3 kgf-m, 38.3 ft-lb)
8) Install rear ABS sensor and brake cable bracket.
9) Adjust parking brake lever stroke by turning ad-
juster. <Ref. to PB-6, ADJUSTMENT, Parking
Brake Lever.>
DS-00151
DS-00149
ST
DS-00123
DS-00152
DS-00147
DS-25
DRIVE SHAFT SYSTEM
HUB UNIT BEARING
10) Move brake lever back to apply brakes. While
depressing brake pedal, tighten axle nut using a
socket wrench. Lock axle nut after tightening.
Tightening torque:
186 N·m (19 kgf-m, 137 ft-lb)
CAUTION:
• Use a new axle nut for rear use only (Olive
color).
• Always tighten axle nut before installing
wheel on vehicle. If wheel is installed and
comes in contact with ground when axle nut is
loose, wheel bearings may be damaged.
• Be sure to tighten axle nut to specified
torque. Do not overtighten it as this may dam-
age wheel bearing.
11) Install wheel and tighten wheel nuts to speci-
fied torque.
Tightening torque:
88 N·m (9 kgf-m, 65 ft-lb)
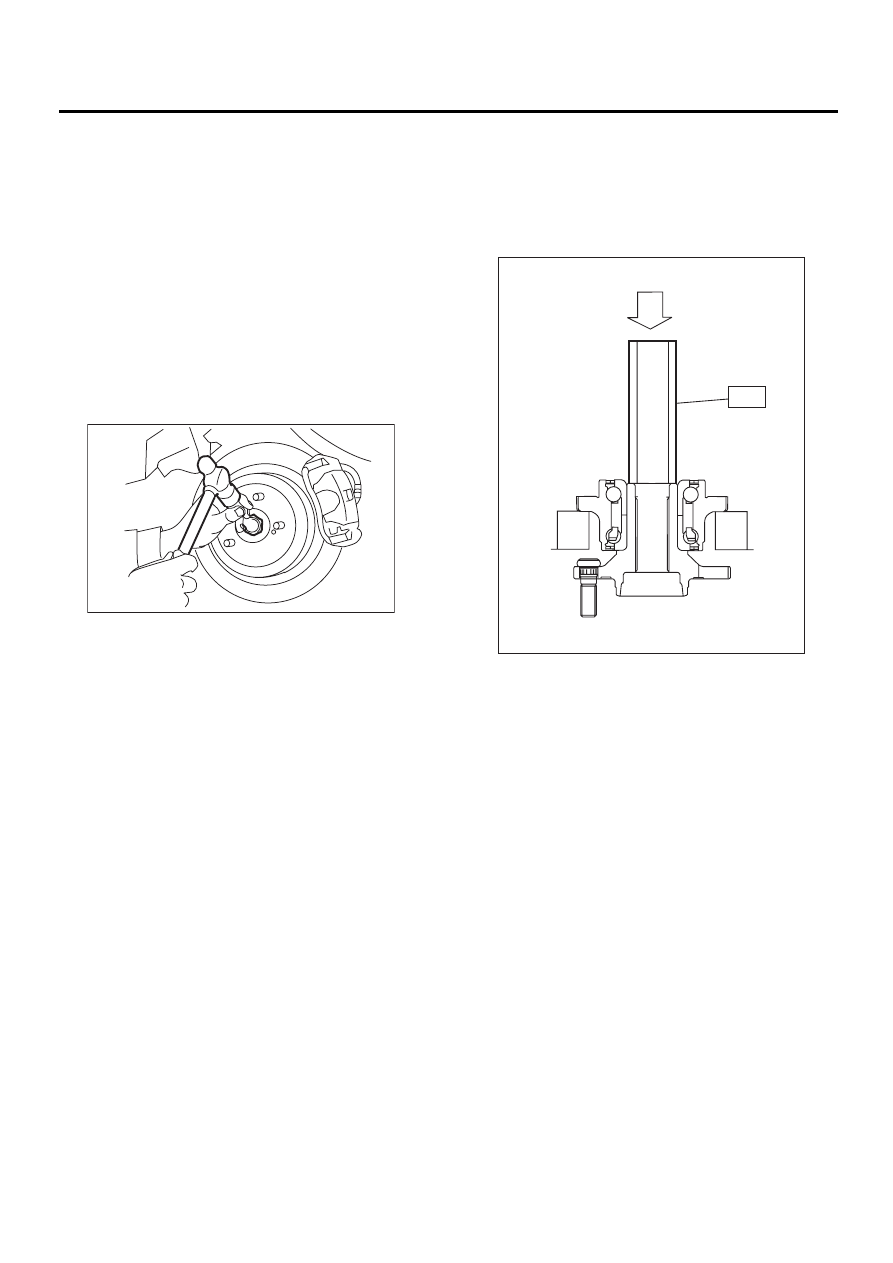
C: DISASSEMBLY
1) Using ST, remove hub unit from hub assembly.
CAUTION:
Securely set hub assembly so that it does not
lean.
ST
398507703
DUMMY COLLAR
DS-00153
DS-00154
ST
Нет комментариевНе стесняйтесь поделиться с нами вашим ценным мнением.
Текст