Infiniti G20 (P11). Manual — part 445
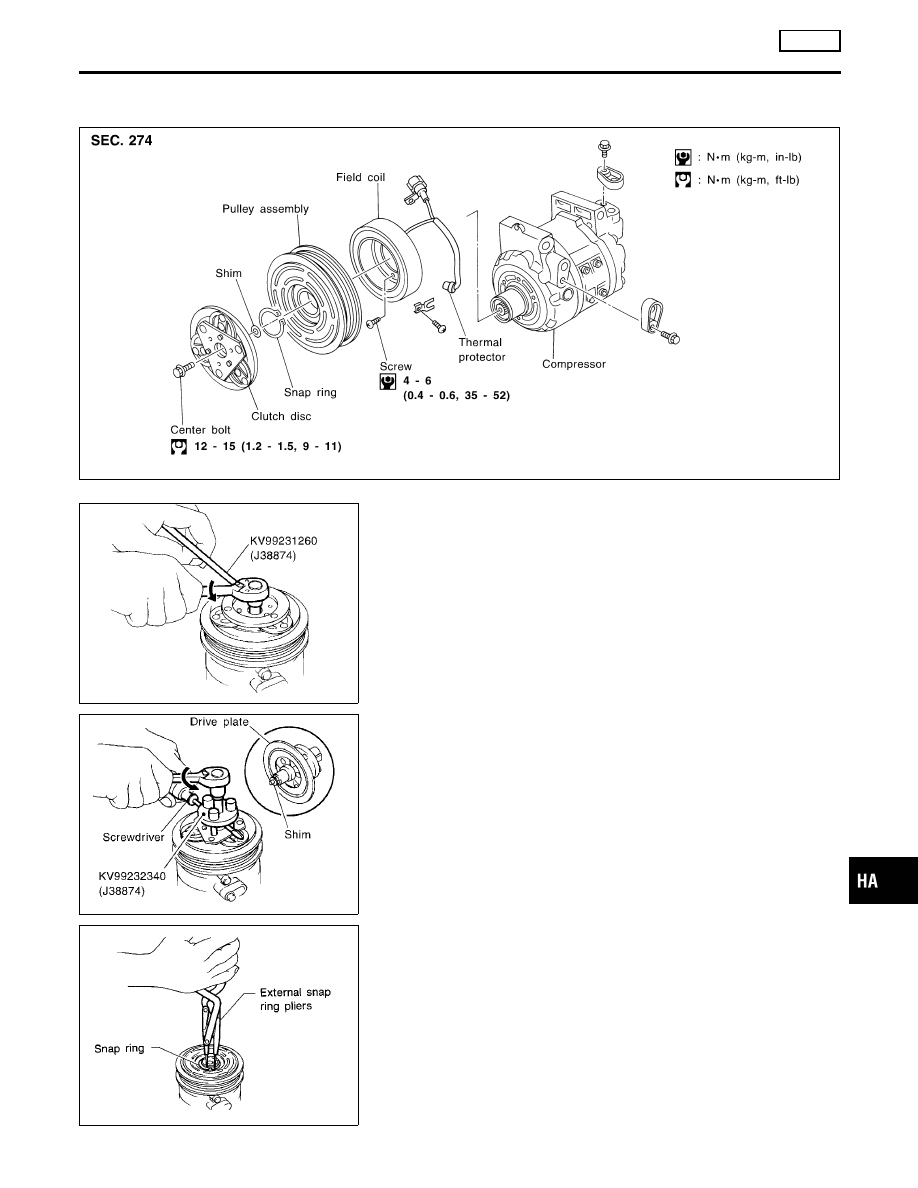
Compressor Clutch
OVERHAUL
NCHA0073
RHA668H
RHA082H
REMOVAL
NCHA0074
I
When removing center bolt, hold clutch disc with clutch disc
wrench.
RHA083H
I
Remove the drive plate using the clutch disc puller.
Insert holder’s three pins into the drive plate. Rotate the holder
clockwise to hook it onto the plate. Tighten the center bolt to
remove the drive plate.
While tightening the center bolt, insert a screwdriver between
two of the pins (as shown in the figure) to prevent rotation.
After removing the drive plate, remove the shims from either
the drive shaft or the drive plate.
RHA072C
I
Remove the snap ring using external snap ring pliers.
GI
MA
EM
LC
EC
FE
CL
MT
AT
AX
SU
BR
ST
RS
BT
SC
EL
IDX
SERVICE PROCEDURE
AUTO
Compressor Clutch
HA-111
RHA068H
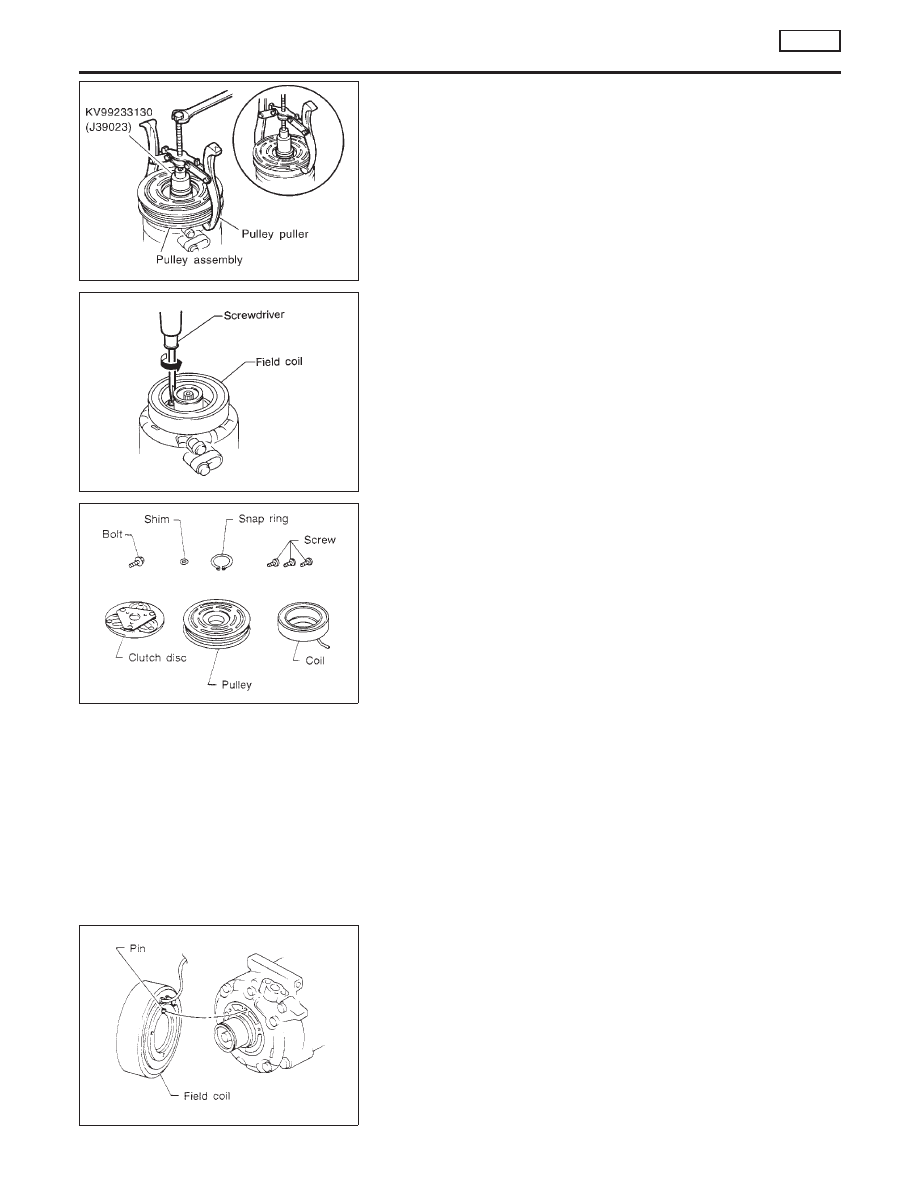
RHA074C
I
Pulley removal:
Use a commercially available pulley puller. Position the center
of the puller on the end of the drive shaft. Remove the pulley
assembly with the puller.
For pressed pulleys:
To prevent deformation of the pulley groove, the puller
claws should be hooked under (not into) the pulley
groove.
For machine latched pulleys:
Align the pulley puller groove with the pulley groove, and
then remove the pulley assembly.
I
Remove the field coil harness clip using a screwdriver.
I
Remove the three field coil fixing screws and remove the field
coil.
RHA075C
INSPECTION
NCHA0075
Clutch Disc
NCHA0075S01
If the contact surface shows signs of damage due to excessive
heat, replace clutch disc and pulley.
Pulley
NCHA0075S02
Check the appearance of the pulley assembly. If contact surface of
pulley shows signs of excessive grooving, replace clutch disc and
pulley. The contact surfaces of the pulley assembly should be
cleaned with a suitable solvent before reinstallation.
Coil
NCHA0075S03
Check coil for loose connection or cracked insulation.
RHA076C
INSTALLATION
NCHA0076
I
Install the field coil.
Be sure to align the coil pin with the hole in the compres-
sor front head.
I
Install the field coil harness clip using a screwdriver.
SERVICE PROCEDURE
AUTO
Compressor Clutch (Cont’d)
HA-112
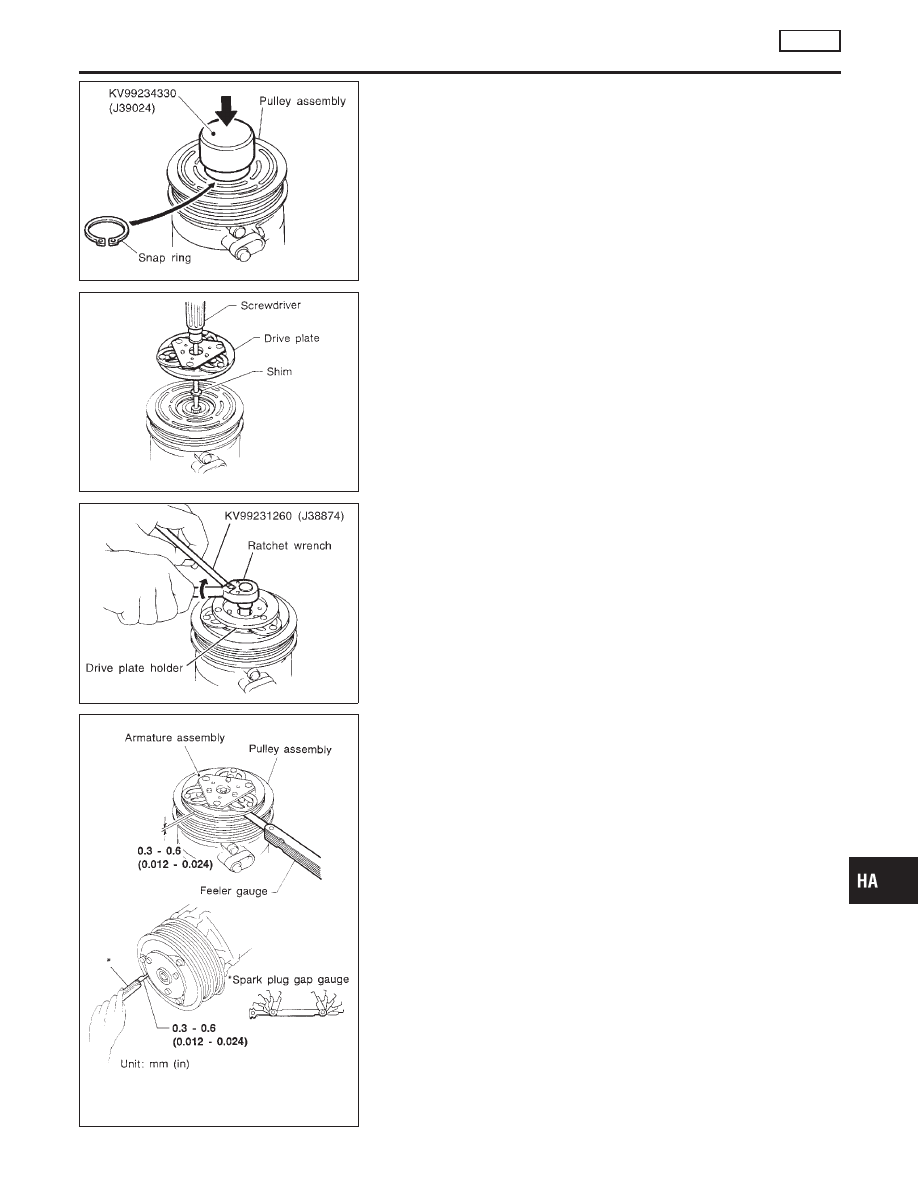
RHA069H
I
Install the pulley assembly using the installer and a hand
press, and then install the snap ring using snap ring pliers.
RHA078C
I
Install the drive plate on the drive shaft, together with the
original shim(s). Press the drive plate down by hand.
RHA070H
I
Using the holder to prevent drive plate rotation, tighten the bolt
to 12 to 15 N·m (1.2 to 1.5 kg-m, 9 to 11 ft-lb) torque.
I
After tightening the bolt, check that the pulley rotates
smoothly.
RHA080C
I
Check clearance all the way around the clutch disc.
Disc-to-pulley clearance:
0.3 - 0.6 mm (0.012 - 0.024 in)
If the specified clearance is not obtained, replace adjusting
spacer and readjust.
Break-in Operation
NCHA0076S01
When replacing compressor clutch assembly, always conduct the
break-in operation. This is done by engaging and disengaging the
clutch about thirty times. Break-in operation raises the level of
transmitted torque.
GI
MA
EM
LC
EC
FE
CL
MT
AT
AX
SU
BR
ST
RS
BT
SC
EL
IDX
SERVICE PROCEDURE
AUTO
Compressor Clutch (Cont’d)
HA-113
RHA671H
Thermal Protector
INSPECTION
NCHA0108
I
When servicing, do not allow foreign matter to enter compres-
sor.
I
Check continuity between compressor harness terminal and
field coil.
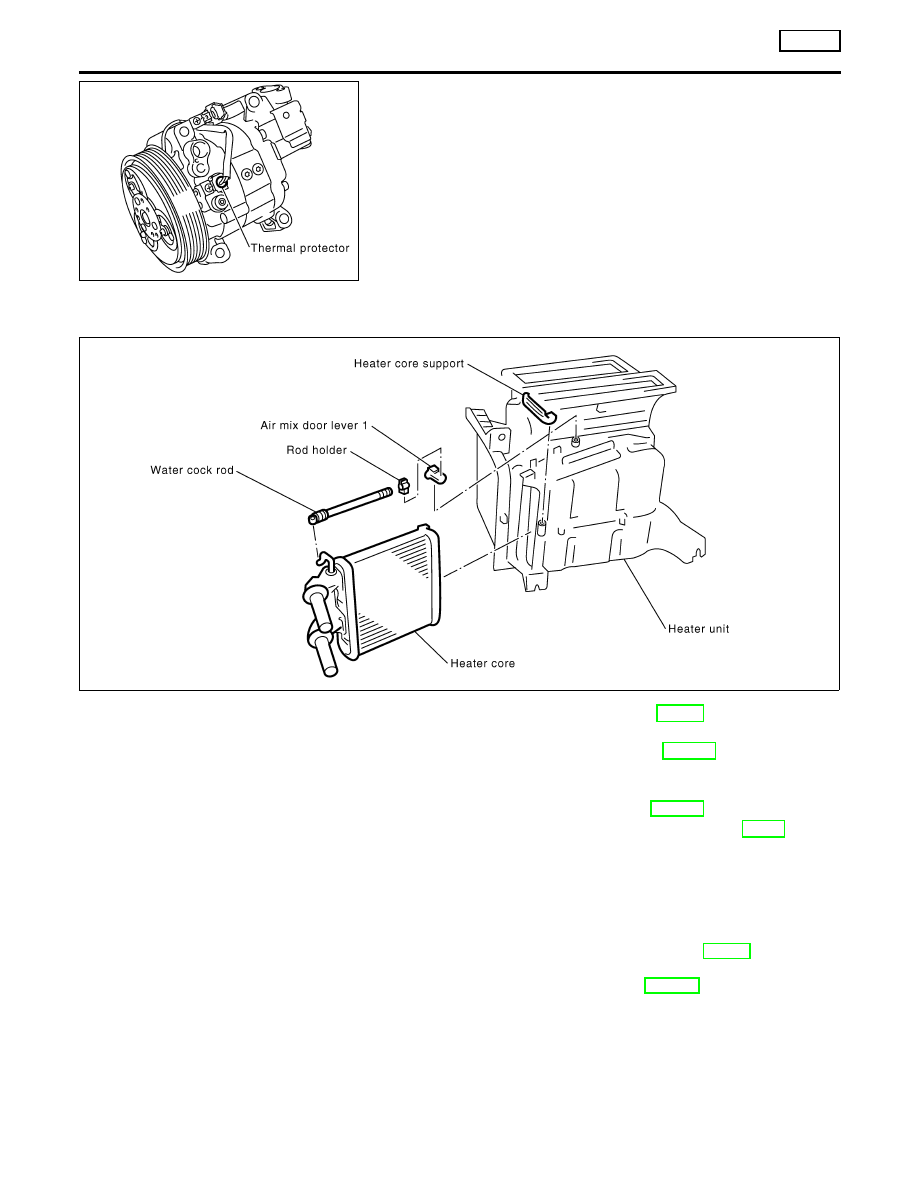
Heater Unit (Heater Core)
REMOVAL
NCHA0183
RHA528H
1.
Drain the cooling system. Refer to MA-14, “Changing Engine
Coolant”.
2.
Discharge the A/C system. Refer to HA-105.
3.
Disconnect the two heater hoses from inside the engine com-
partment.
4.
Remove the cooling unit. Refer to HA-116.
5.
Remove the steering member assembly. Refer to BT-23, “Instru-
ment Panel Assembly”.
6.
Remove the heater unit.
7.
Remove the heater core.
INSTALLATION
NCHA0184
Install in the reverse order of removal.
When filling radiator with coolant, refer to MA-14, “Changing
Engine Coolant”.
Recharge the A/C system. Refer to HA-105.
SERVICE PROCEDURE
AUTO
Thermal Protector
HA-114
Нет комментариевНе стесняйтесь поделиться с нами вашим ценным мнением.
Текст