Infiniti QX56 (JA60). Manual — part 584
HIGH-PRESSURE PIPE
HA-41
< ON-VEHICLE REPAIR >
C
D
E
F
G
H
J
K
L
M
A
B
HA
N
O
P
HIGH-PRESSURE PIPE
Removal and Installation for High-Pressure Pipe
INFOID:0000000005147660
REMOVAL
1. Remove the cowl top extension. Refer to
EXT-18, "Removal and Installation"
2. Disconnect the battery negative terminal and positive battery terminal.
3. Reposition the IPDM E/R aside.
4. Remove the front right wheel and tire assembly. Refer to
.
5. Position aside the front floor insulator.
6. Discharge the refrigerant. Refer to
HA-20, "HFC-134a (R-134a) Service Procedure"
.
7. Remove the low pressure pipe. Refer to
HA-37, "Removal and Installation for Low-Pressure Pipe"
8. Remove the high-pressure pipe.
CAUTION:
Cap or wrap the joint of the pipe with suitable material such as vinyl tape to avoid the entry of air.
INSTALLATION
Installation is in the reverse order of removal.
CAUTION:
• Replace the O-ring of the high-pressure pipe with a new one, then apply compressor oil to it when
installing it.
• After charging refrigerant, check for leaks.
Removal and Installation for Rear High- and Low-Pressure A/C and Heater Core Pipes
INFOID:0000000005147661
REMOVAL
1. Discharge the refrigerant from the A/C system. Refer to
HA-20, "HFC-134a (R-134a) Service Procedure"
2. Drain the coolant from the engine cooling system. Refer to
CO-11, "Changing Engine Coolant"
.
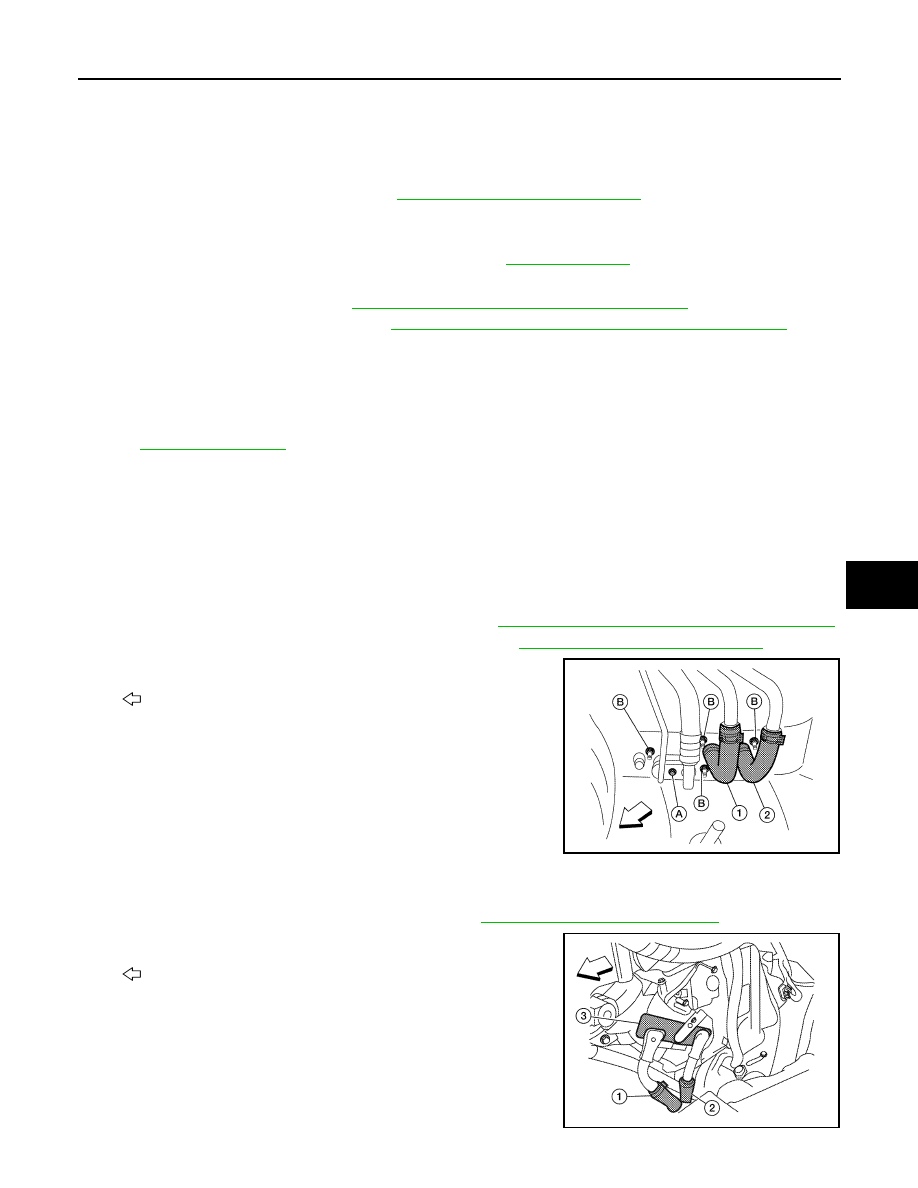
3. Disconnect the underfloor rear heater hoses (1 and 2) from the
rear heater pipes underneath the vehicle.
•
: Front
4. Remove the rear high- and low-pressure pipes bolt (A) to dis-
connect the rear high- and low-pressure pipes from the under-
floor rear high- and low-pressure pipes underneath the vehicle.
CAUTION:
Cap or wrap the joint of the pipes with suitable material
such as vinyl tape to avoid the entry of air.
5. Remove the rear high- and low-pressure pipes nuts (B).
NOTE:
The remaining steps are performed inside the rear luggage area of the vehicle.
6. Remove the luggage side finisher lower RH. Refer to
INT-19, "Removal and Installation"
.
7. Disconnect the rear heater core hoses (1 and 2) from the rear
heater core (3).
•
: Front
ALIIA0216ZZ
ALIIA0218ZZ
HA-42
< ON-VEHICLE REPAIR >
HIGH-PRESSURE PIPE
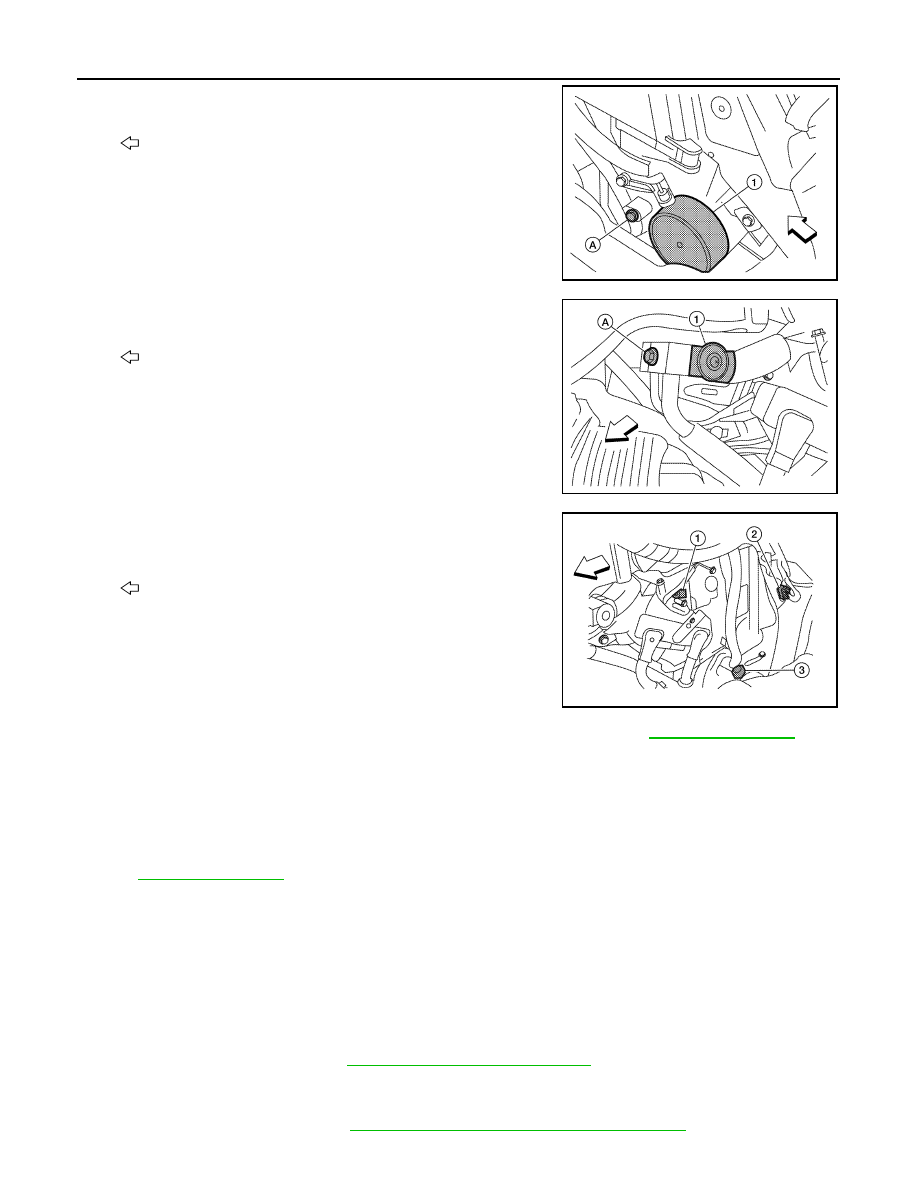
8. Remove the rear high- and low-pressure pipes bracket bolt (A)
to release the bracket.
• Rear blower motor (1)
•
: Front
9. Remove the rear high- and low-pressure pipes bolt (A) to dis-
connect the rear high- and low-pressure pipes from the rear
expansion valve (1).
•
: Front
CAUTION:
Cap or wrap the joint of the pipes with suitable material
such as vinyl tape to avoid the entry of air.
10. Disconnect the following electrical connectors:
• Rear air mix door motor (1)
• Rear variable blower control (2)
• Rear blower motor (3)
•
: Front
11. Disconnect the ducts from the rear heater and cooling unit assembly. Refer to
12. Remove the rear heater and cooling unit assembly.
CAUTION:
Cap or wrap the joint of the pipes with suitable material such as vinyl tape to avoid the entry of air.
13. Remove the rear high- and low-pressure A/C pipes.
INSTALLATION
Installation is in the reverse order of removal.
CAUTION:
• Replace the O-rings on the rear high- and low-pressure A/C pipes with a new ones, then apply com-
pressor oil to them for installation.
• After charging the refrigerant, check for leaks.
Removal and Installation for Underfloor Rear High- and Low-Pressure A/C and Heater
Core Pipes
INFOID:0000000005147662
REMOVAL
1. Drain the engine coolant. Refer to
CO-11, "Changing Engine Coolant"
.
2. Disconnect the battery negative terminal.
3. Disconnect the generator harness.
4. Discharge the refrigerant. Refer to
HA-20, "HFC-134a (R-134a) Service Procedure"
.
ALIIA0219ZZ
ALIIA0220ZZ
ALIIA0221ZZ
HIGH-PRESSURE PIPE
HA-43
< ON-VEHICLE REPAIR >
C
D
E
F
G
H
J
K
L
M
A
B
HA
N
O
P
5. Remove the front and rear bumper fascia. Refer to
EXT-13, "Removal and Installation"
(rear).
6. Reposition the front fender protector out of the way. Refer to
EXT-23, "Removal and Installation"
.
7. Disconnect the chassis harness connector.
8. Remove the spare wheel and tire.
9. Remove the tailpipe and tailpipe hanger bracket. Refer to
EX-6, "Removal and Installation"
.
10. Remove the seatbelt latch anchor. Refer to
EX-6, "Removal and Installation"
.
11. Remove the front floor heat shield.
12. Disconnect each end of the underfloor rear high- and low-pressure A/C and heater core pipes. Refer to
.
CAUTION:
Cap or wrap the joint of the pipes with suitable material such as vinyl tape to avoid the entry of air.
13. Set two suitable jacks at the RH body mount points to support the vehicle body when it is separated from
the RH side of the frame.
14. Remove the RH body mount bolts. Refer to
15. Use the vehicle hoist to lower the RH side of the frame from the RH side of the body [approximately 305
mm (12 in)] until there is sufficient clearance to remove the underfloor rear high- and low-pressure A/C
and heater core pipes from between the body and the frame.
16. Remove the underfloor rear high- and low-pressure A/C and heater core pipes from the back of the vehi-
cle.
INSTALLATION
Installation is in the reverse order of removal.
CAUTION:
• Replace the O-rings of the underfloor rear high- and low-pressure A/C and heater core pipes with
new ones, then apply compressor oil to them for installation.
• After charging refrigerant, check for leaks.
HA-44
< ON-VEHICLE REPAIR >
CONDENSER
CONDENSER
Removal and Installation for Condenser
INFOID:0000000005147663
REMOVAL
1. Discharge the refrigerant. Refer to
HA-20, "HFC-134a (R-134a) Service Procedure"
.
2. Remove the radiator. Refer to
CO-15, "Removal and Installation"
.
CAUTION:
Be careful not to damage the core surface of the condenser and the radiator.
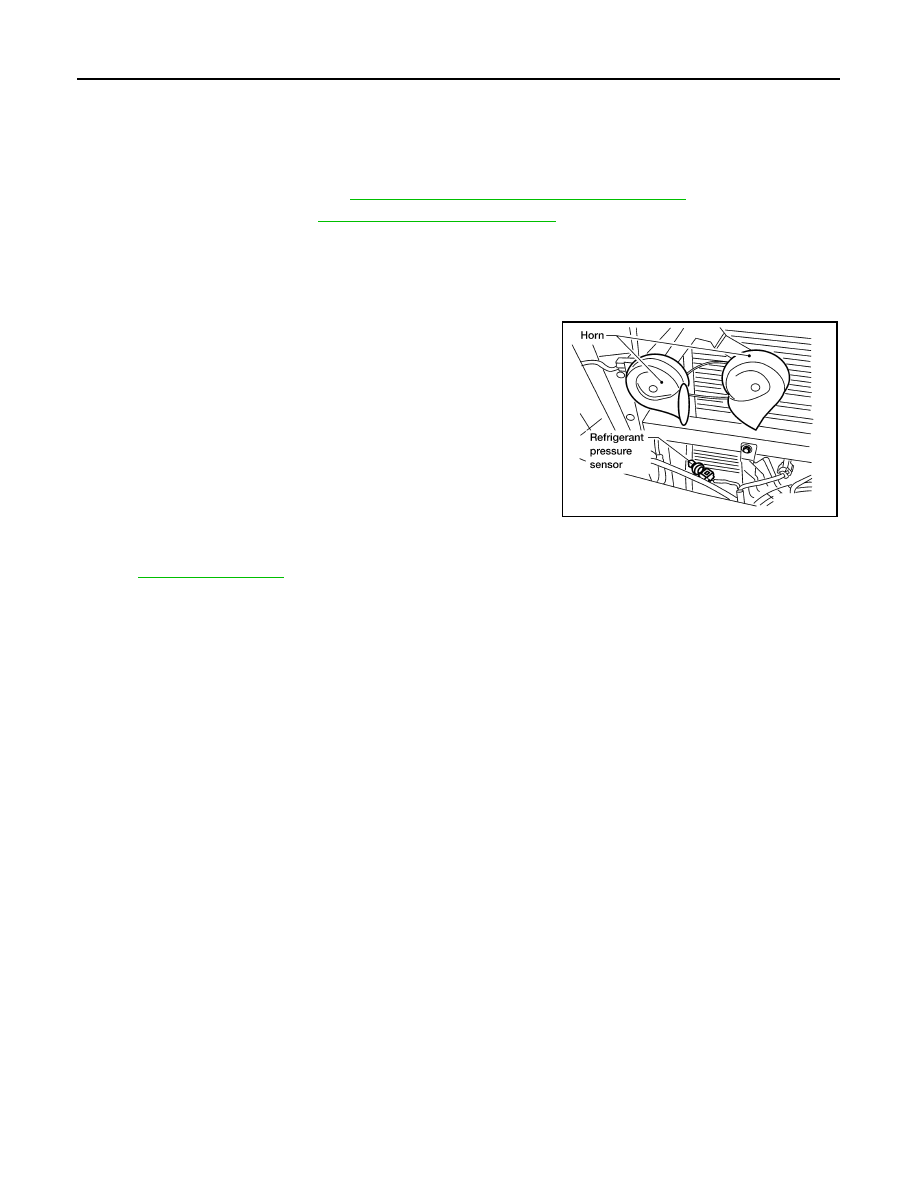
3. Disconnect the high-pressure flexible hose and the high-pressure pipe from the condenser.
CAUTION:
Cap or wrap the joint of the pipe with suitable material such as vinyl tape to avoid the entry of air.
4. Disconnect the refrigerant pressure sensor connector.
• Remove the refrigerant pressure sensor from the condenser
as necessary.
5. Lift the condenser out of the mounting grommets to remove the
condenser.
INSTALLATION
Installation is in the reverse order of removal.
CAUTION:
• Replace the O-rings of the high-pressure pipe, refrigerant pressure sensor, and high-pressure flexi-
ble hose with new ones, then apply compressor oil to them when installing them.
• After charging refrigerant, check for leaks.
• Replace the grommets as necessary.
LJIA0145E
Нет комментариевНе стесняйтесь поделиться с нами вашим ценным мнением.
Текст