Infiniti QX56 (JA60). Manual — part 318
PROPELLER SHAFT
DLN-195
< ON-VEHICLE REPAIR >
[PROPELLER SHAFT: 2S1410]
C
E
F
G
H
I
J
K
L
M
A
B
DLN
N
O
P
ON-VEHICLE REPAIR
PROPELLER SHAFT
On-Vehicle Service
INFOID:0000000005148907
APPEARANCE AND NOISE INSPECTION
• Check the propeller shaft tube surface for dents or cracks. If damaged, replace the propeller shaft assembly.
• Check the bearings for noise and damage. Repair or replace the bearings as necessary.
PROPELLER SHAFT VIBRATION
If a vibration is present at high speed, inspect the propeller shaft runout first.
1. Measure the runout of the propeller shaft tube at several points by rotating the final drive companion
flange with your hands.
2. If the runout exceeds specifications, disconnect the propeller
shaft at the final drive companion flange; then rotate the com-
panion flange 90
°, 180° and 270° and reconnect the propeller
shaft.
3. Check the runout again. If the runout still exceeds specifications,
replace the propeller shaft assembly.
4. After installation, check for vibration by driving vehicle.
Limit
Propeller shaft run out
: Refer to
SDIA1781E
DLN-196
< REMOVAL AND INSTALLATION >
[PROPELLER SHAFT: 2S1410]
PROPELLER SHAFT
REMOVAL AND INSTALLATION
PROPELLER SHAFT
Removal and Installation
INFOID:0000000005148908
REMOVAL
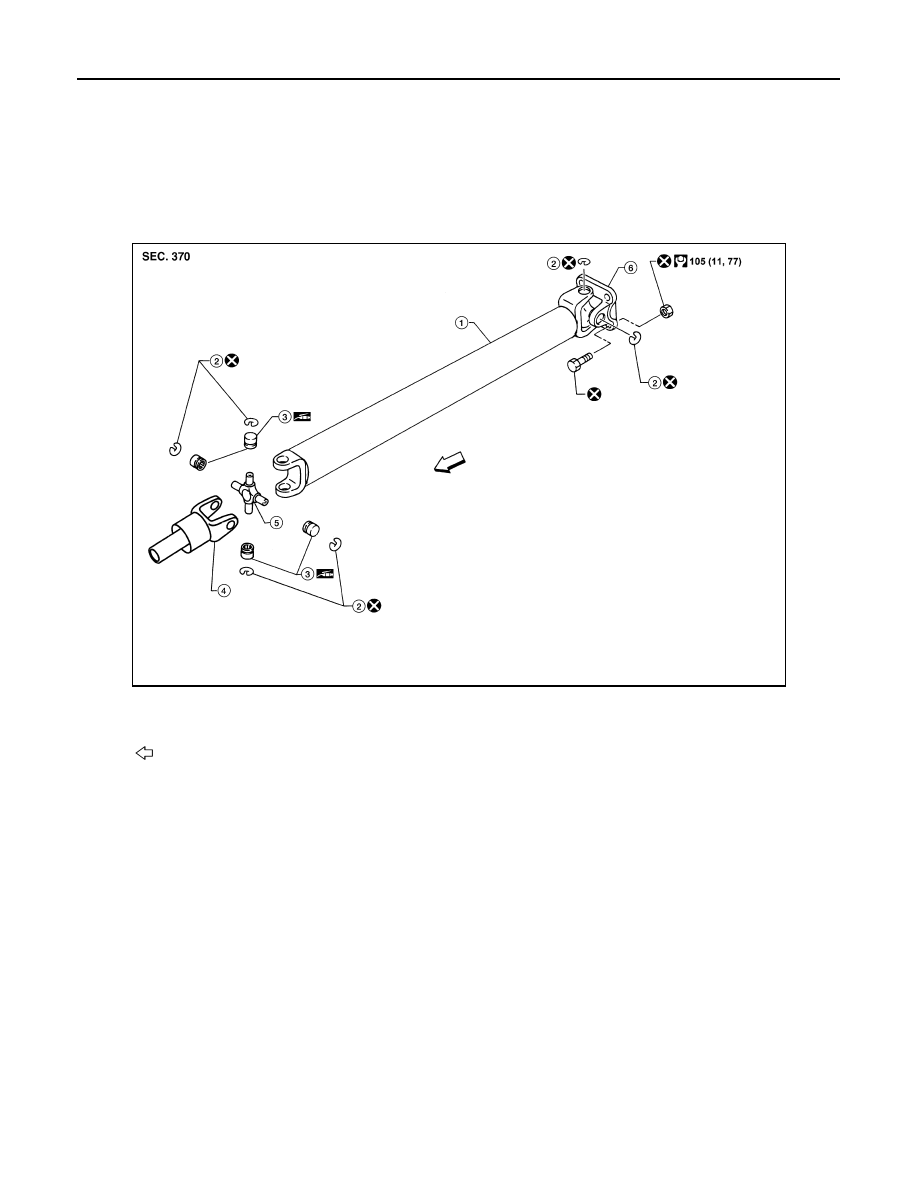
2WD
AWDIA0698GB
1.
Propeller shaft tube
2.
Snap ring
3.
Journal bearing
4.
Sleeve yoke
5.
Journal
6.
Flange yoke
Front
PROPELLER SHAFT
DLN-197
< REMOVAL AND INSTALLATION >
[PROPELLER SHAFT: 2S1410]
C
E
F
G
H
I
J
K
L
M
A
B
DLN
N
O
P
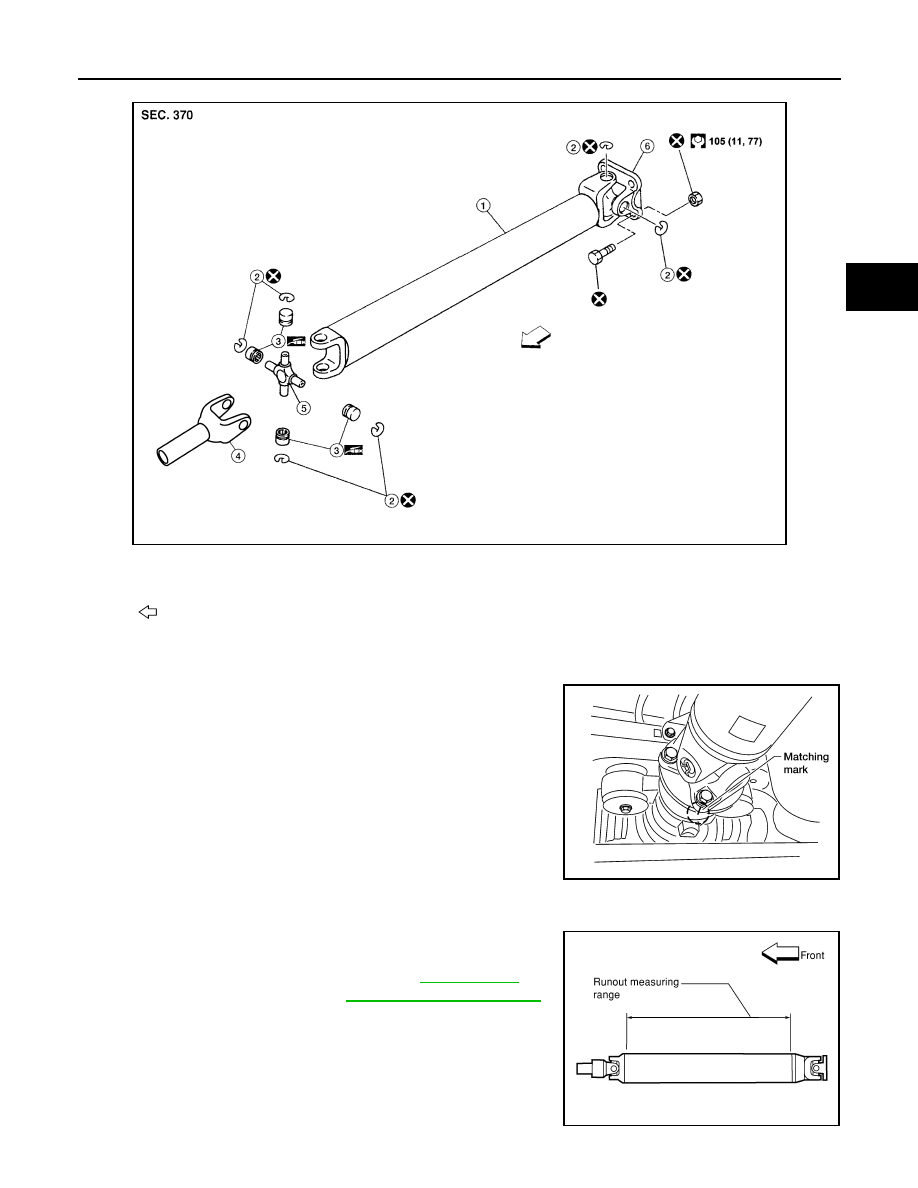
4WD
REMOVAL
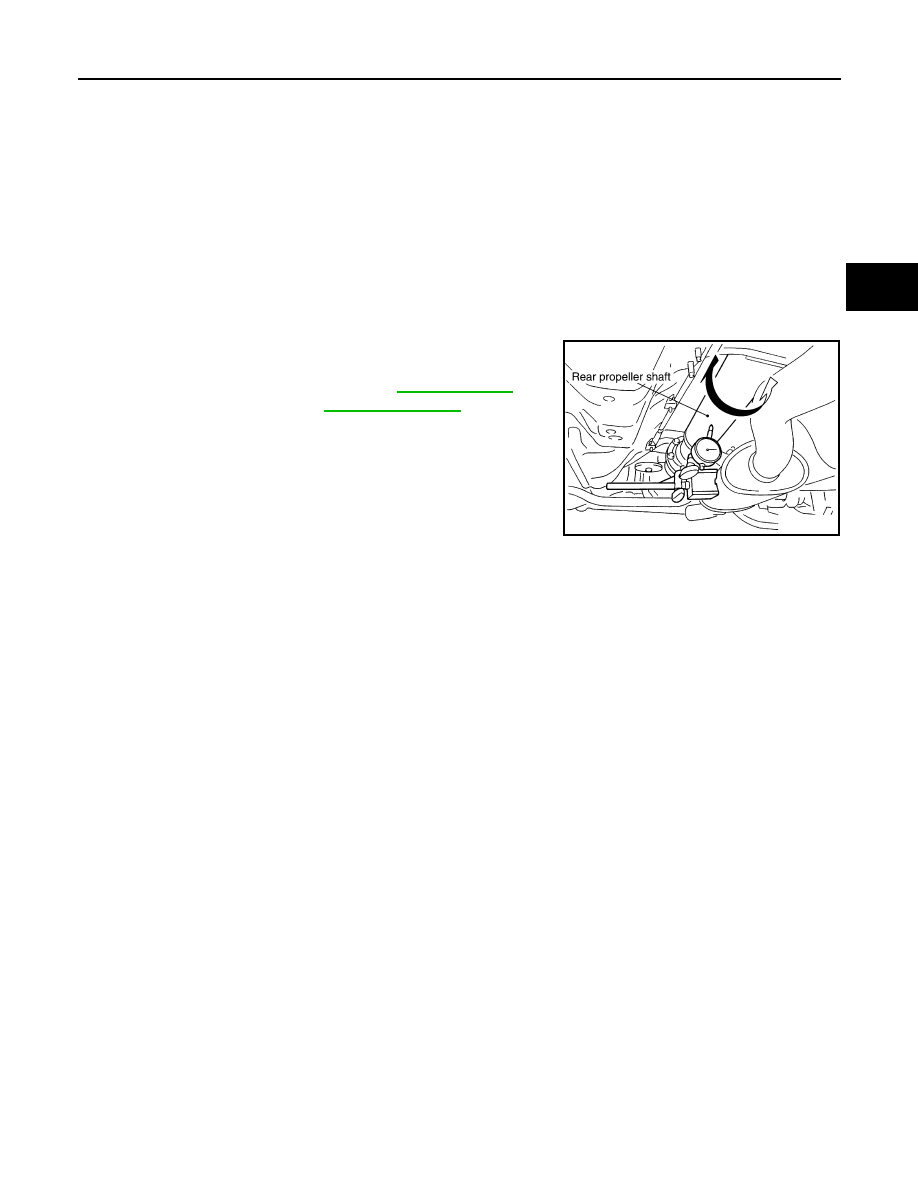
1. Move the A/T select lever to the N position and release the parking brake.
2. Put matching marks on the rear propeller shaft flange yoke and
the rear final drive companion flange as shown.
CAUTION:
For matching marks, use paint. Never damage the rear pro-
peller shaft flange yoke or the companion flange.
3. Remove the bolts, then remove the propeller shaft from the rear
final drive and A/T or transfer.
INSPECTION
• Inspect the propeller shaft runout. If runout exceeds the limit, replace the propeller shaft assembly.
AWDIA0699GB
1.
Propeller shaft tube
2.
Snap ring
3.
Journal bearing
4.
Sleeve yoke
5.
Journal
6.
Flange yoke
Front
WDIA0049E
Limit
Propeller shaft run out
: Refer to
LDIA0121E

DLN-198
< REMOVAL AND INSTALLATION >
[PROPELLER SHAFT: 2S1410]
PROPELLER SHAFT
• While holding the flange yoke on one side, check axial play of the joint as shown. If the journal axial play
exceeds the specification, repair or replace the journal parts.
• Check the propeller shaft tube for dents or cracks. If damage is
detected, replace the propeller shaft assembly.
INSTALLATION
Installation is in the reverse order of removal.
• After installation, check for vibration by driving the vehicle. Refer to
DLN-194, "NVH Troubleshooting Chart"
.
• If propeller shaft assembly of final drive assembly has been
replaced, connect them as follows:
- Face companion flange mark (A) of the final drive (1) upward. With
the mark (A) faced upward, couple the propeller shaft and the final
drive so that the matching mark (B) of the propeller shaft (2) can be
positioned as close as possible with the matching mark (C) of the
final drive companion flange.
- Tighten propeller shaft and final drive bolts and nuts of the to spec-
ification. Refer to
DLN-196, "Removal and Installation"
CAUTION:
Do not reuse the bolts and nuts. Always install new ones.
Standard
Propeller shaft journal axi-
al play
: Refer to
LDIA0117E
PDIA0892J
Нет комментариевНе стесняйтесь поделиться с нами вашим ценным мнением.
Текст