Infiniti QX56 (JA60). Manual — part 539
EXT-26
< SERVICE INFORMATION >
REAR SPOILER
REAR SPOILER
Removal and Installation
INFOID:0000000005147327
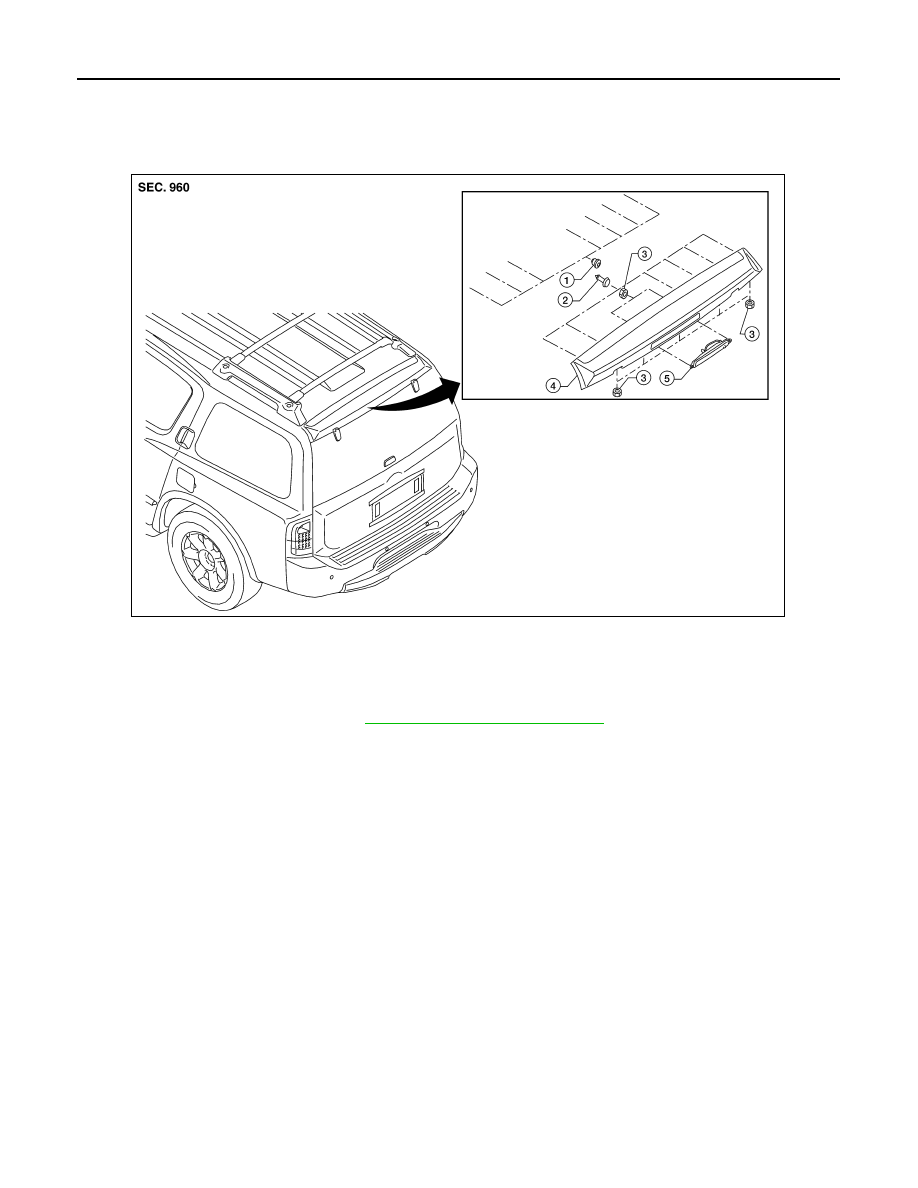
Removal
1. Remove the back door trim. Refer to
INT-21, "Removal and Installation"
.
2. Disconnect the harness to high-mount stop lamp.
3. Disconnect the washer tube.
4. Remove the nuts, release the clips and remove the rear spoiler.
• Release adhesive tape with sawing motion from mono filament line that has knots in it.
• Remove residue of adhesive tape completely from vehicle surface with strip-off wheel or equivalent.
CAUTION:
• Never apply tack-paper adhesive remover to body panel surface finished with lacquer-based
paints.
• Use care not to damage the vehicle surface during adhesive tape residue removal.
5. Remove the nuts and remove the high-mount stop lamp.
Installation
Installation is in the reverse order of removal.
NOTE:
Apply adhesion promoter only to areas of rear spoiler that tape will be applied, as required.
1.
Grommet
2.
Clip C101
3.
Nut
4.
Rear air spoiler
5.
High-mount stop lamp
WIIA0961E
ROOF RACK
EXT-27
< SERVICE INFORMATION >
C
D
E
F
G
H
I
J
L
M
A
B
EXT
N
O
P
ROOF RACK
Removal and Installation
INFOID:0000000005147328
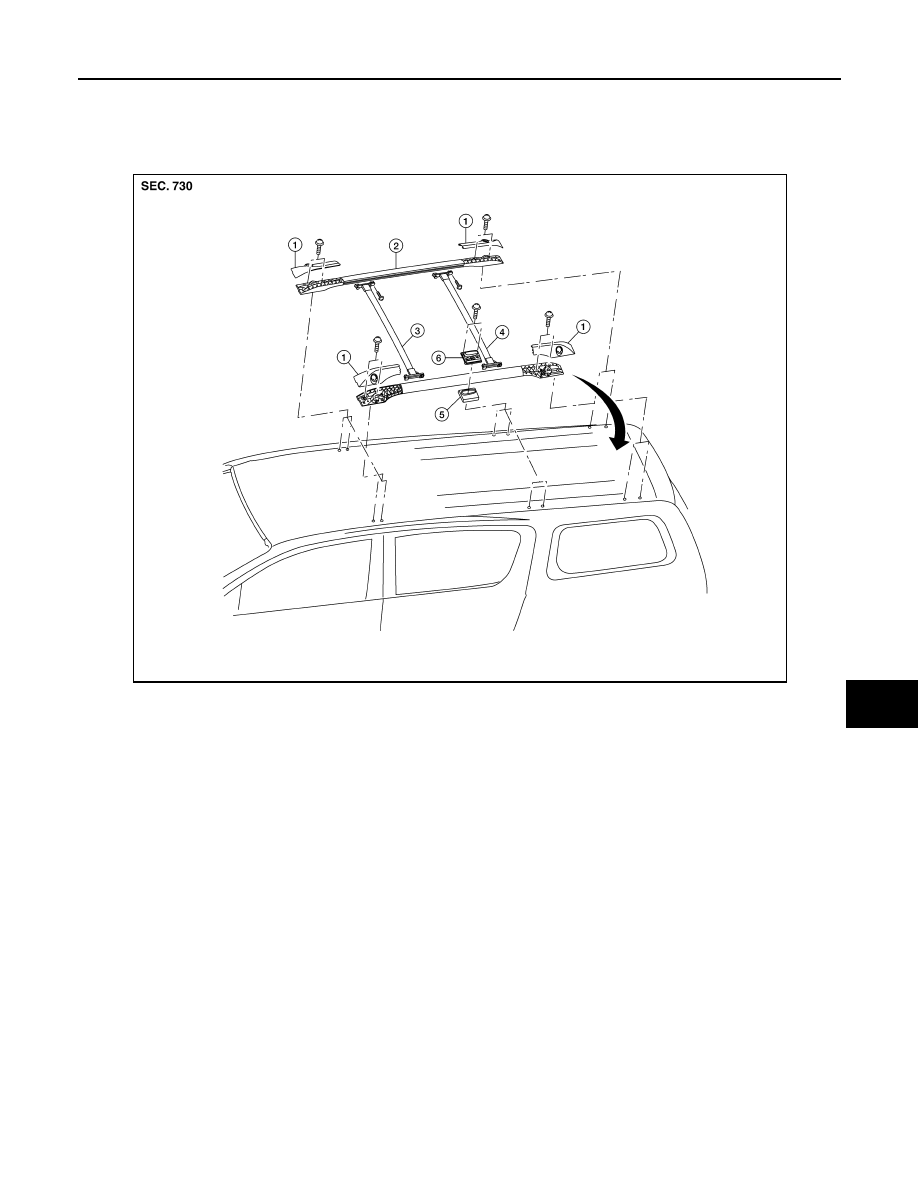
REMOVAL
1. Using a suitable tool, remove the finisher covers, then remove the roof rack bolts at the four corners and
slide roof rack back enough to release the center supports.
2. Remove the complete roof rack off the vehicle.
3. Remove the center support finisher covers, then remove the center support mount plate bolts and remove
the center support mount plates RH and LH.
4. Remove the front and rear sliding crossbar bolts, then loosen the front and rear sliding crossbar star lock
down bolts and remove the front and rear sliding crossbars.
INSTALLATION
Installation is in the reverse order of removal.
1.
Finisher covers
2.
Roof rack side rails
3.
Front sliding crossbar
4.
Rear sliding crossbar
5.
Center support finisher covers RH/LH
6.
Center support mount plates RH/LH
AWKIA0013ZZ
EXT-28
< SERVICE INFORMATION >
DOOR OUTSIDE MOLDING
DOOR OUTSIDE MOLDING
Removal and Installation
INFOID:0000000005147329
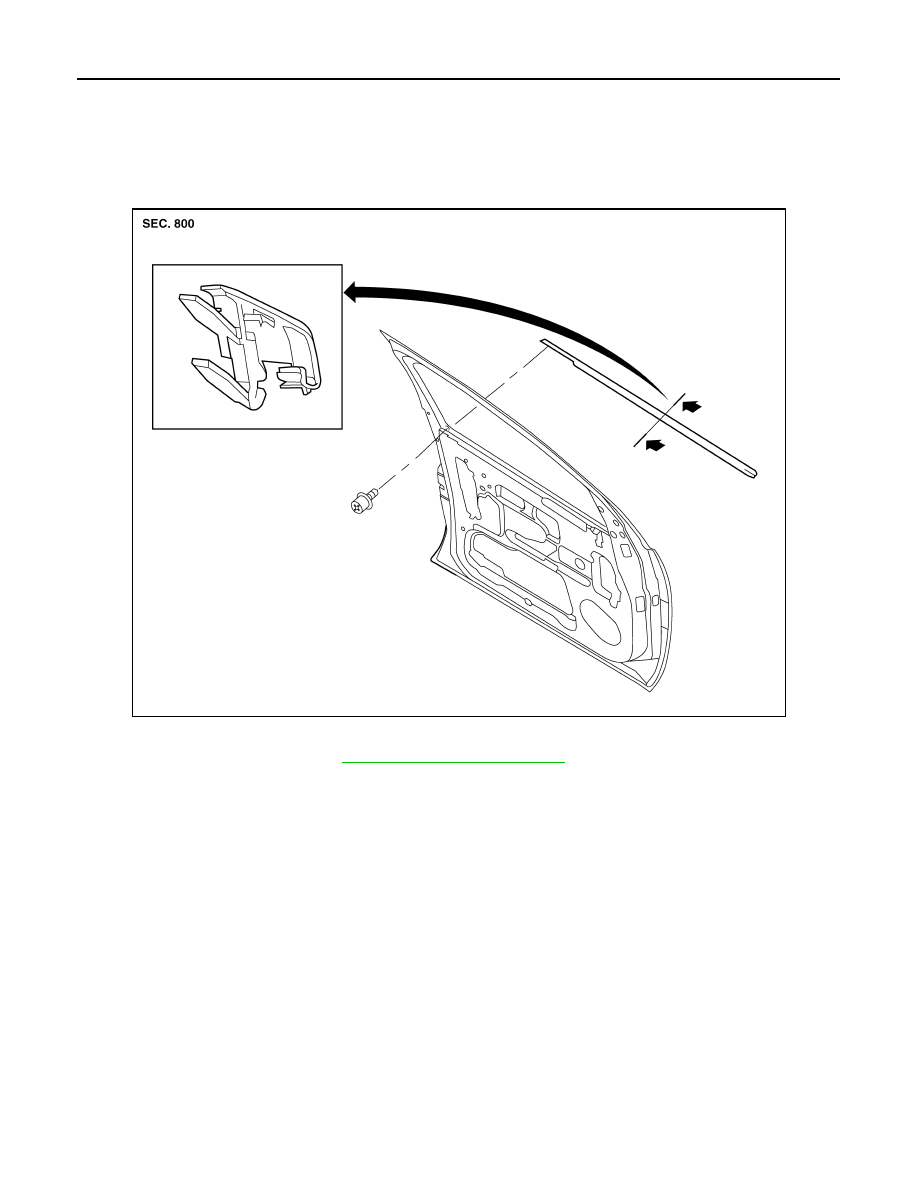
Front Door
Removal
1. Remove the door mirror. Refer to
MIR-17, "Door Mirror Assembly"
.
2. Remove the front door outside molding.
• Remove the hole cover and remove screw.
• Lift the molding from rear edge first.
• Disconnect the clips from the flange working forward.
Installation
Installation is in the reverse order of removal.
WIIA0842E
DOOR OUTSIDE MOLDING
EXT-29
< SERVICE INFORMATION >
C
D
E
F
G
H
I
J
L
M
A
B
EXT
N
O
P
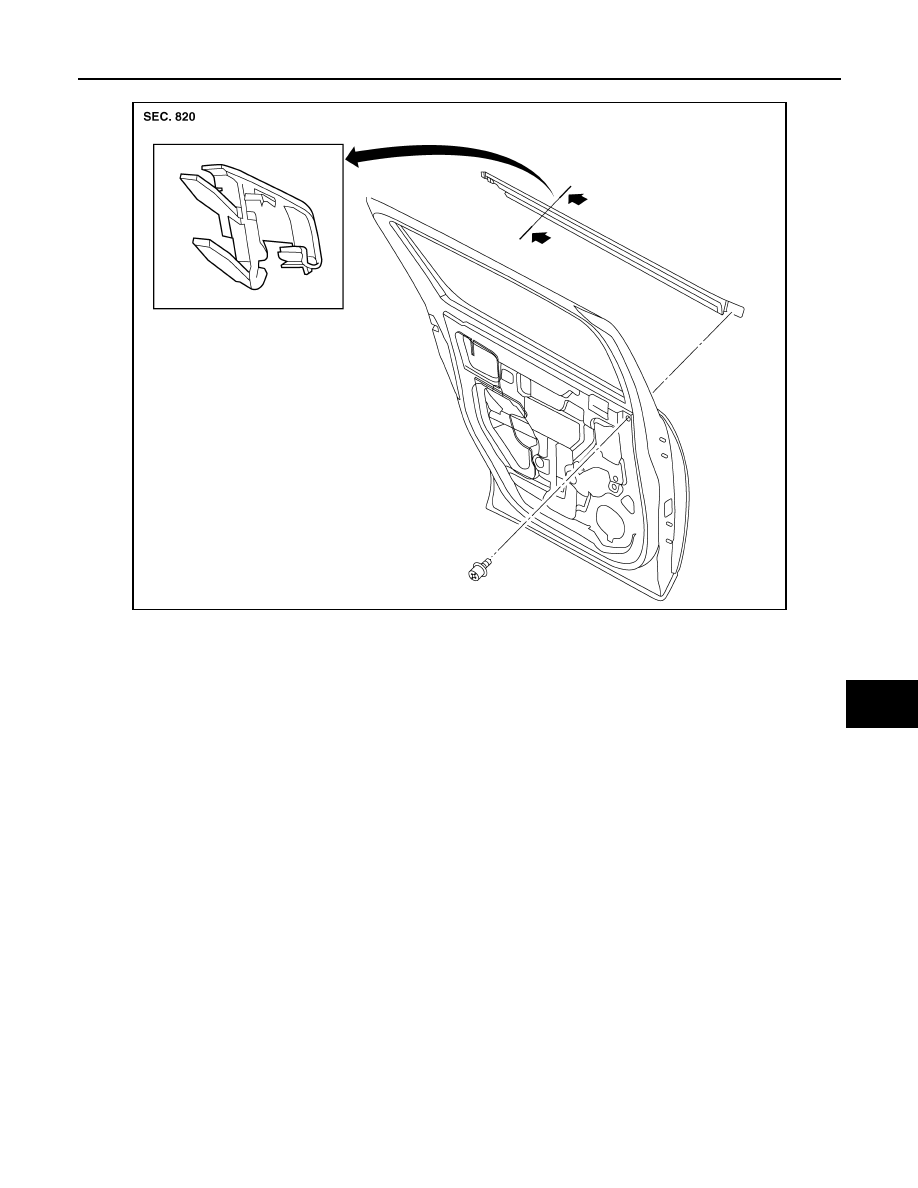
Rear Door
Removal
1. Remove the door outside molding.
• Remove the hole cover and remove screw.
• Lift the molding from front edge first.
• Disconnect the clips from the flange working rearward.
Installation
Installation is in the reverse order of removal.
LIIA2331E
Нет комментариевНе стесняйтесь поделиться с нами вашим ценным мнением.
Текст