Infiniti QX56 (JA60). Manual — part 151

ACTUATOR AND ELECTRIC UNIT (ASSEMBLY)
BRC-117
< REMOVAL AND INSTALLATION >
[VDC/TCS/ABS]
C
D
E
G
H
I
J
K
L
M
A
B
BRC
N
O
P
• Always tighten brake tubes to specification when installing.
• Never reuse drained brake fluid.
• After installation of the ABS actuator and electric unit (control unit), perform the following.
- Refill brake system with new brake fluid. Then bleed the air from the system. Refer to
.
- Adjust the steering angle sensor. Refer to
BRC-8, "ADJUSTMENT OF STEERING ANGLE SENSOR
NEUTRAL POSITION : Special Repair Requirement"
- Calibrate the decel G sensor. Refer to
BRC-9, "CALIBRATION OF DECEL G SENSOR : Special Repair
.
BRC-118
< REMOVAL AND INSTALLATION >
[VDC/TCS/ABS]
STEERING ANGLE SENSOR
STEERING ANGLE SENSOR
Removal and Installation
INFOID:0000000005148102
REMOVAL
1. Remove spiral cable. Refer to
SR-7, "Removal and Installation"
.
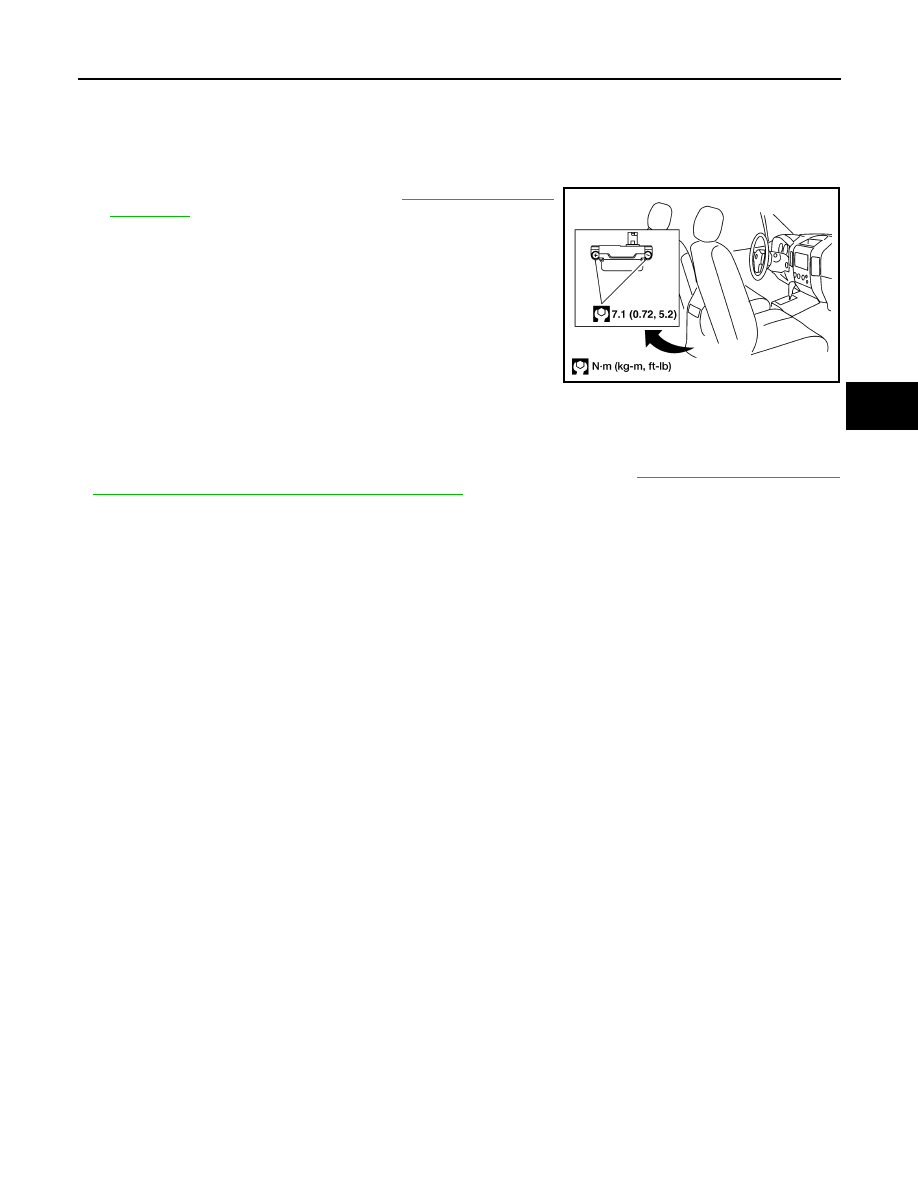
2. Remove the screws and remove the steering angle sensor.
INSTALLATION
Installation is in the reverse order of removal.
CAUTION:
After installation of spiral cable, adjust steering angle sensor. Refer to
STEERING ANGLE SENSOR NEUTRAL POSITION : Special Repair Requirement"
G SENSOR
BRC-119
< REMOVAL AND INSTALLATION >
[VDC/TCS/ABS]
C
D
E
G
H
I
J
K
L
M
A
B
BRC
N
O
P
G SENSOR
Removal and Installation
INFOID:0000000005148103
REMOVAL
1. Remove front center console. Refer to
.
2. Remove yaw rate/side/decel G sensor attaching nuts.
CAUTION:
• Do not use power tools to remove or install yaw rate/side/
decel G sensor.
• Do not drop or strike the yaw rate/side/decel G sensor.
3. Disconnect harness connector and remove the yaw rate/side/
decel G sensor.
INSTALLATION
Installation is in the reverse order of removal.
CAUTION:
• Do not drop or strike the yaw rate/side/decel G sensor.
• After installation, calibrate the yaw rate/side/decel G sensor. Refer to
DECEL G SENSOR : Special Repair Requirement"
WFIA0202E
BRM-1
BODY EXTERIOR, DOORS, ROOF & VEHICLE SECURITY
C
D
E
F
G
H
I
J
L
M
SECTION
BRM
A
B
BRM
N
O
P
CONTENTS
BODY REPAIR
PRECAUTION . . . . . . . . . . . ...
PRECAUTIONS . . . . . . . . . . . . ...
Precaution Necessary for Steering Wheel Rota-
tion After Battery Disconnect . . . . . . . . .....
Handling Precaution For Plastics . . . . . . . ..
SERVICE INFORMATION . . . . . . .
BODY REPAIR . . . . . . . . . . . . ...
Body Mounting . . . . . . . . . . . . . . ..
Body Exterior Paint Color . . . . . . . . . . .
Body Component Parts . . . . . . . . . . ....
Corrosion Protection . . . . . . . . . . . .
Body Sealing . . . . . . . . . . . . . . ...
Body Construction . . . . . . . . . . . . ...
Body Alignment . . . . . . . . . . . . . ...
Handling Precaution for Plastics . . . . . . . ..
Precaution in Repairing High Strength Steel . . ...
Foam Repair . . . . . . . . . . . . . . .
Нет комментариевНе стесняйтесь поделиться с нами вашим ценным мнением.
Текст