Infiniti QX56 (JA60). Manual — part 581
REFRIGERATION SYSTEM
HA-29
< ON-VEHICLE REPAIR >
C
D
E
F
G
H
J
K
L
M
A
B
HA
N
O
P
ON-VEHICLE REPAIR
REFRIGERATION SYSTEM
Component
INFOID:0000000005147652
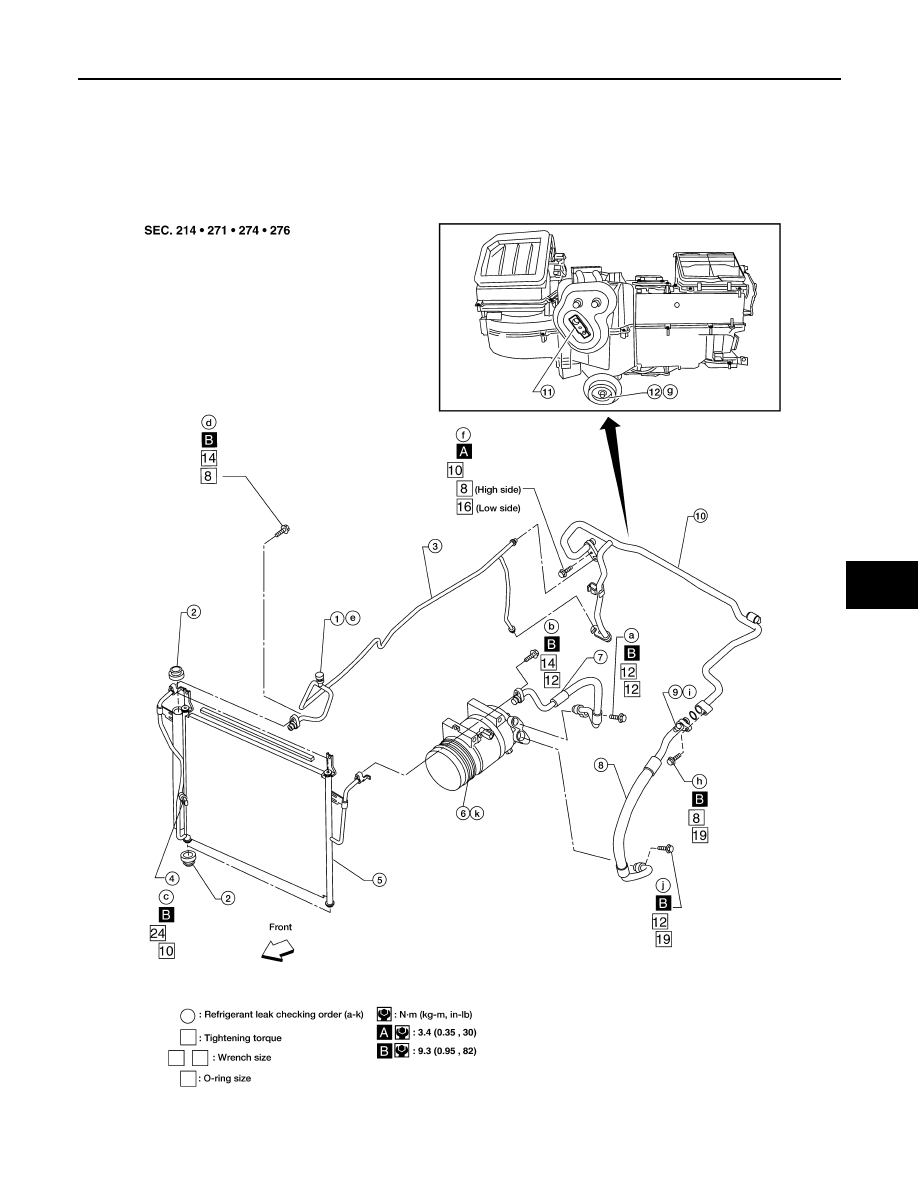
Front A/C System
WJIA1578E
HA-30
< ON-VEHICLE REPAIR >
REFRIGERATION SYSTEM
Rear A/C System
NOTE:
HA-5, "Precaution for Refrigerant Connection"
1.
High-pressure service valve
2.
Grommet
3.
High-pressure pipe
4.
Refrigerant pressure sensor
5.
Condenser
6.
Compressor shaft seal
7.
High-pressure flexible hose
8.
Low-pressure flexible hose
9.
Low-pressure service valve
10. Low-pressure pipe
11. Expansion valve (front)
12. Drain hose
AWIIA0134GB
1.
Rear heater and cooling unit assembly 2.
Rear A/C pipes
3.
Rear A/C heater core pipes
4.
Rear heater core hose
5.
Rear blower motor
6.
Underfloor rear A/C pipes
7.
Underfloor rear heater core pipes
A.
Bolt torque specification
B.
Leak checking order (l - r)
C.
Tightening torque
D.
Wrench size
E.
O-ring size
Front
NOTE: The O-ring size 8 is the high-side and the O-ring size 16 is the low-side.
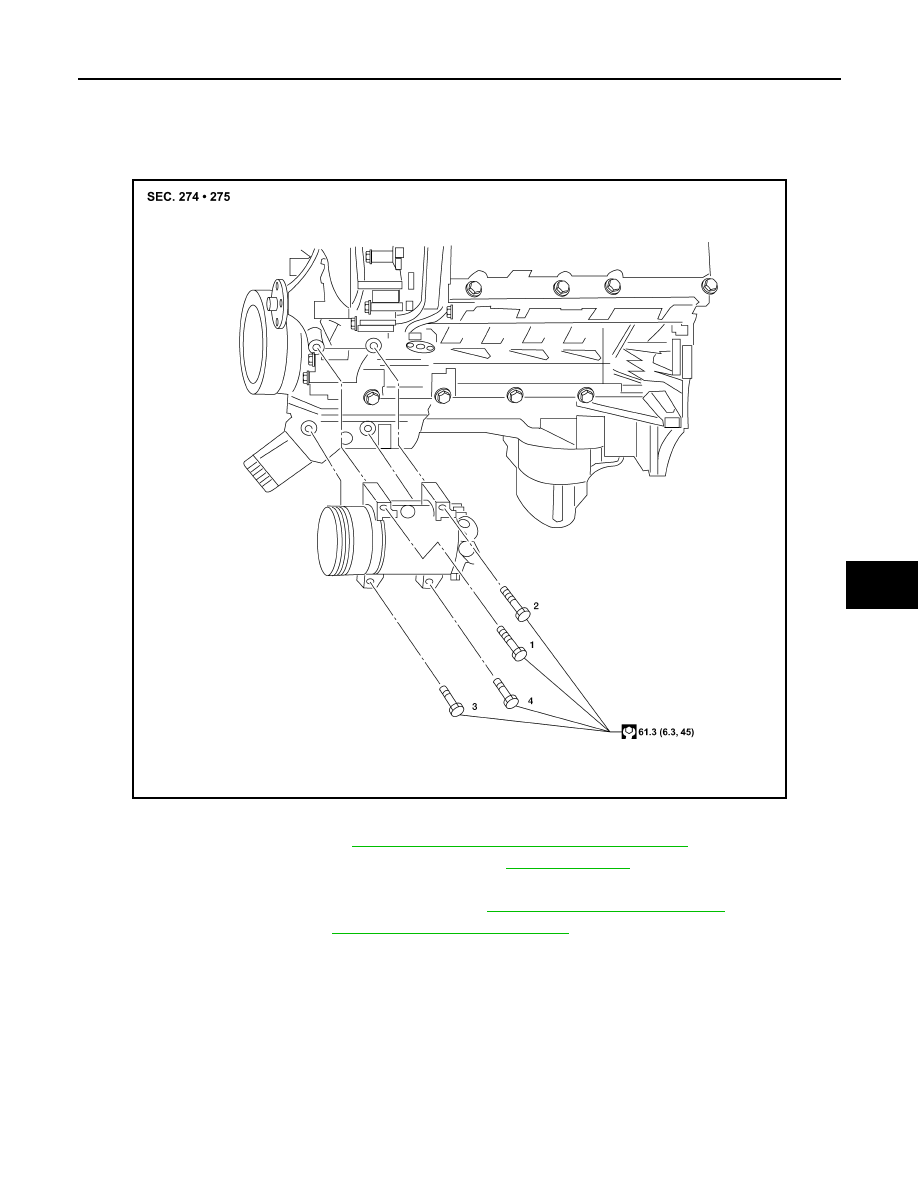
COMPRESSOR
HA-31
< ON-VEHICLE REPAIR >
C
D
E
F
G
H
J
K
L
M
A
B
HA
N
O
P
COMPRESSOR
Removal and Installation for Compressor
INFOID:0000000005147653
A/C Compressor Mounting
REMOVAL
1. Discharge the refrigerant. Refer to
HA-20, "HFC-134a (R-134a) Service Procedure"
.
2. Remove the front right wheel and tire assembly. Refer to
.
3. Remove the engine under cover and the splash shield using power tool.
4. Remove the engine air cleaner and air ducts. Refer to
EM-25, "Removal and Installation"
5. Remove the drive belt. Refer to
EM-13, "Removal and Installation"
.
6. Disconnect the compressor electrical connector.
7. Disconnect the high-pressure flexible hose and low-pressure flexible hose from the compressor.
CAUTION:
Cap or wrap the joint of the pipe with suitable material such as vinyl tape to avoid the entry of air.
8. Remove the compressor bolts and nut using power tools.
INSTALLATION
Installation is in the reverse order of removal.
CAUTION:
• Replace the O-rings of the low-pressure flexible hose and high-pressure flexible hose with new
ones, apply compressor oil to the O-rings when installing them.
AWIIA1291GB
HA-32
< ON-VEHICLE REPAIR >
COMPRESSOR
• After recharging the A/C system with refrigerant, check for leaks.
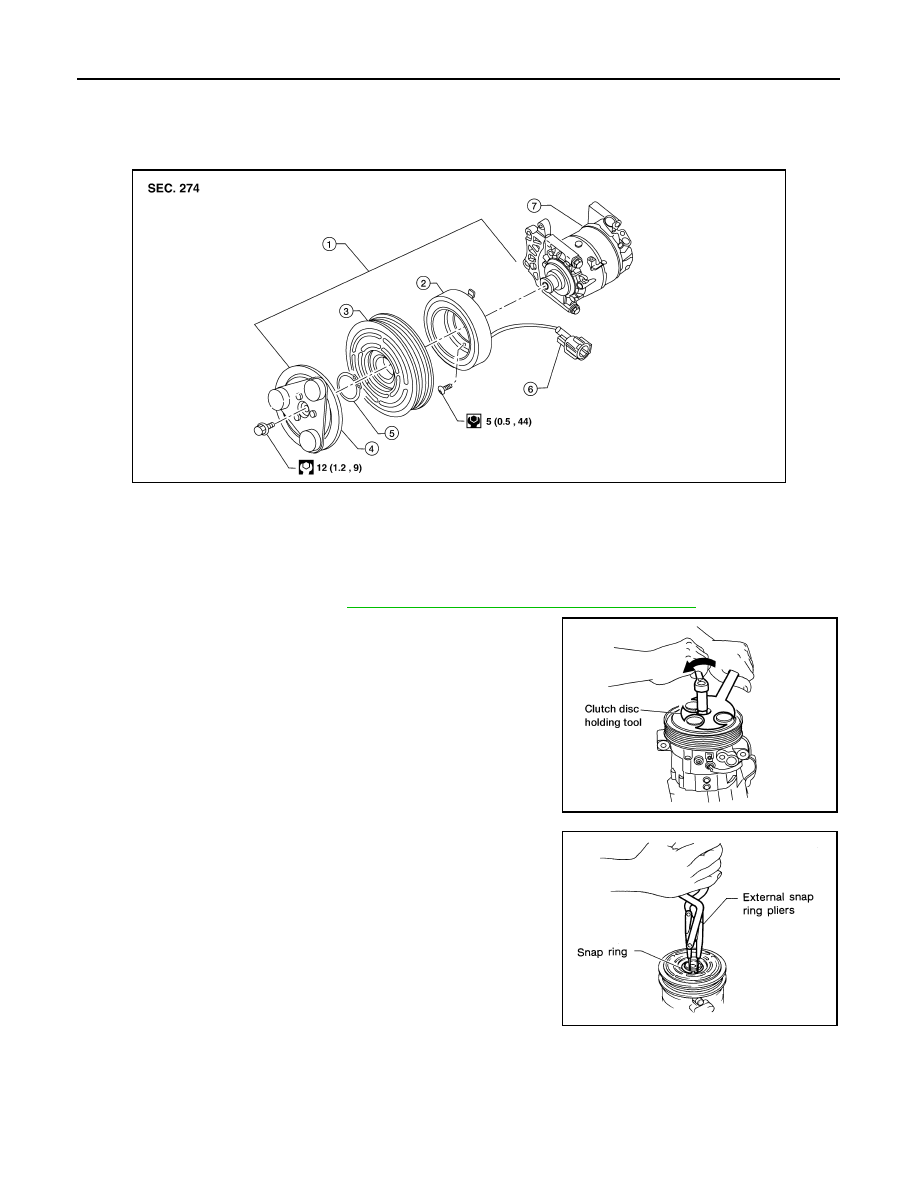
Removal and Installation for Compressor Clutch
INFOID:0000000005147654
Magnet Clutch Assembly
REMOVAL
1. Remove the compressor. Refer to
HA-31, "Removal and Installation for Compressor"
2. Remove the center bolt while holding the clutch disc stationary
using Tool as shown.
3. Remove the clutch disc and shims.
CAUTION:
Retain all of the shims for installation.
4. Remove the snap ring using a suitable tool.
AWIIA1286GB
1.
Magnet clutch assembly
2.
Magnet coil
3.
Pulley
4.
Clutch disc
5.
Snap ring
6.
Thermal protector (built in)
7.
Compressor
Tool number
: — (J-44614)
WHA228
RHA072C
Нет комментариевНе стесняйтесь поделиться с нами вашим ценным мнением.
Текст