Infiniti QX56 (JA60). Manual — part 111
BR-4
< PRECAUTION >
PRECAUTIONS
5. When the repair work is completed, return the ignition switch to the
″LOCK″ position before connecting
the battery cables. (At this time, the steering lock mechanism will engage.)
6. Perform a self-diagnosis check of all control units using CONSULT-III.
Precaution for Brake System
INFOID:0000000005147886
• Always use recommended brake fluid. Refer to
MA-13, "Fluids and Lubricants"
• Do not reuse drained brake fluid.
• Be careful not to splash brake fluid on painted areas.
• To clean or wash all parts of master cylinder, disc brake caliper and wheel cylinder, use clean brake fluid.
• Do not use mineral oils such as gasoline or kerosene. They will ruin rubber parts of the hydraulic system.
• Use flare nut wrench when removing and installing brake tube.
• Always check tightening torque when installing brake lines.
• Before working, turn ignition switch to OFF and disconnect con-
nectors for ABS actuator and electric unit (control unit) or battery
terminals.
• Burnish the brake contact surfaces after refinishing or replacing
drums or rotors, after replacing pads or linings, or if a soft pedal
occurs at very low mileage. Refer to
.
WARNING:
• Clean brake pads and shoes with a waste cloth, then wipe
with a dust collector.
SBR686C
PREPARATION
BR-5
< PREPARATION >
C
D
E
G
H
I
J
K
L
M
A
B
BR
N
O
P
PREPARATION
PREPARATION
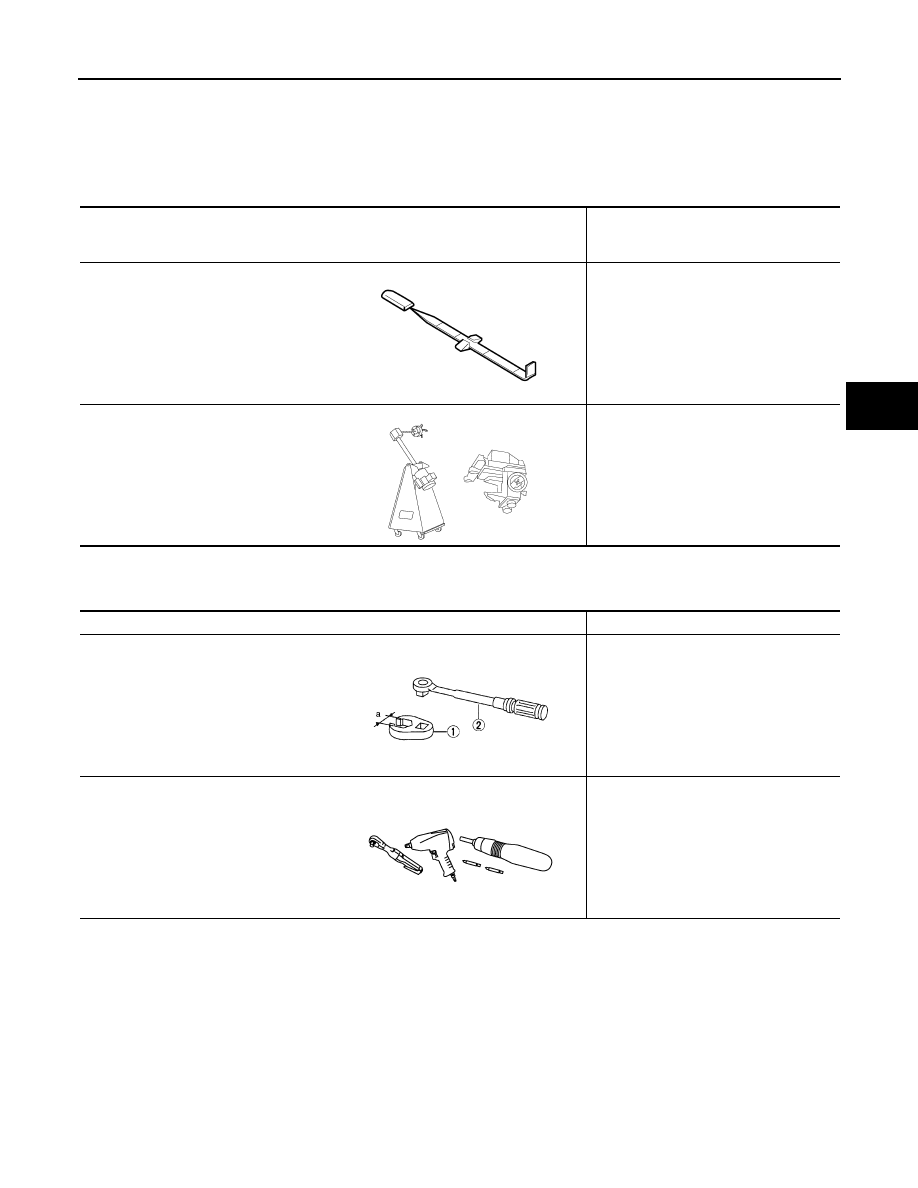
Special Service Tool
INFOID:0000000005147887
The actual shapes of Kent-Moore tools may differ from those of special service tools illustrated here.
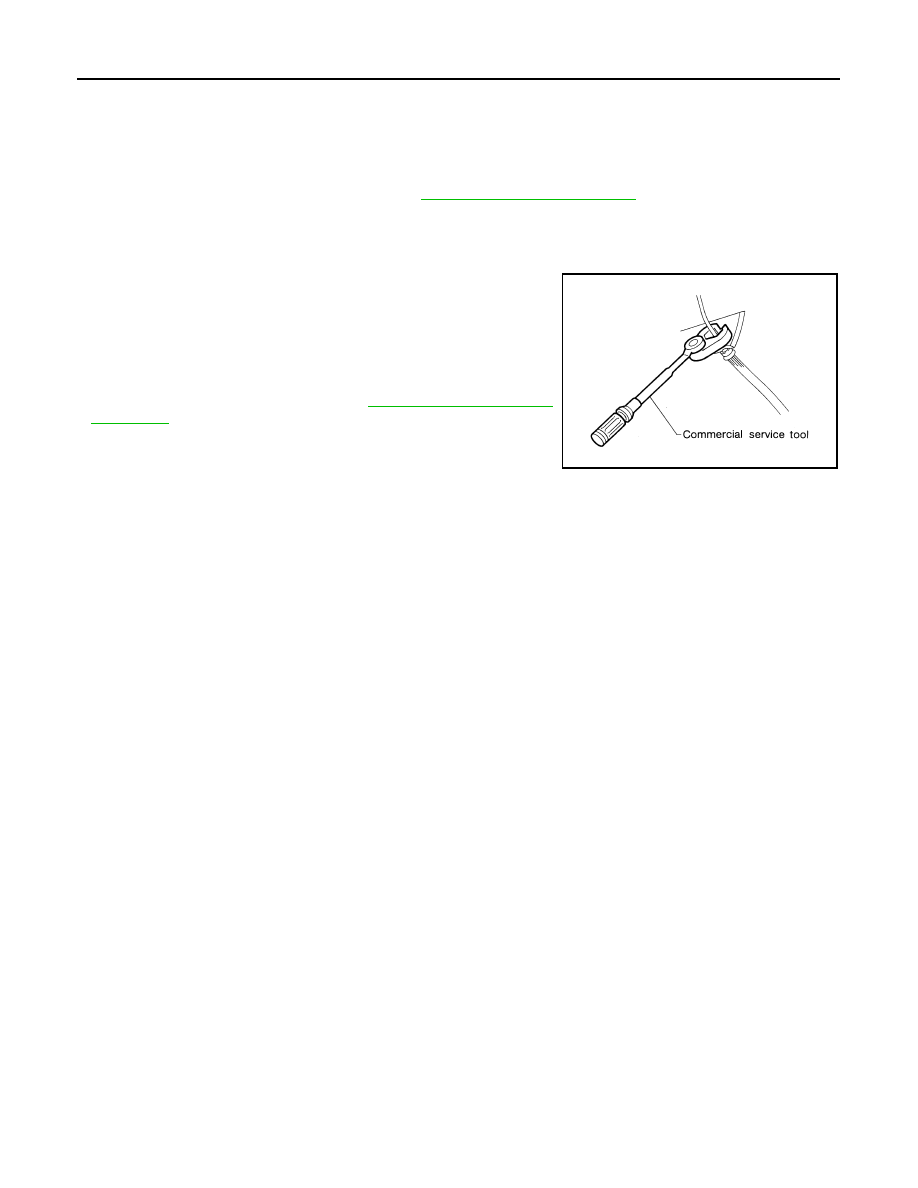
Commercial Service Tool
INFOID:0000000005147888
Tool number
(Kent-Moore No.)
Tool name
Description
—
(J-46532)
Brake and clutch pedal height measure-
ment tool
Measuring brake pedal height
38-PFM90.5
( — )
Pro-Cut PFM90 On-Car Brake Lathe
Turning rotors
LFIA0227E
ALFIA0092ZZ
Tool name
Description
1. Flare nut crowfoot
2. Torque wrench
Removing and installing each brake pip-
ing.
a: 10 mm (0.39 in) / 12 mm (0.47 in)
Power tool
Removing nuts, bolts and screws.
S-NT360
PIIB1407E
BR-6
< FUNCTION DIAGNOSIS >
NOISE, VIBRATION AND HARSHNESS (NVH) TROUBLESHOOTING
FUNCTION DIAGNOSIS
NOISE, VIBRATION AND HARSHNESS (NVH) TROUBLESHOOTING
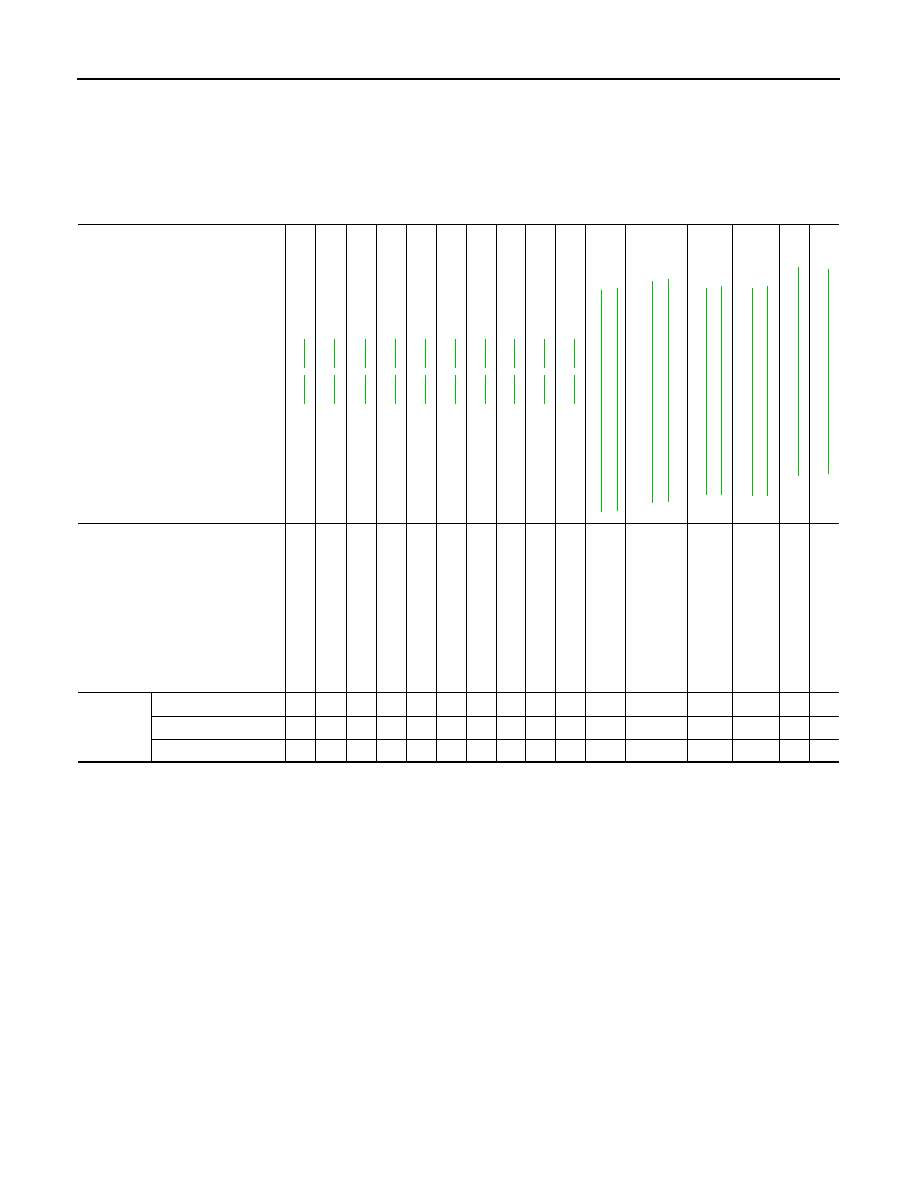
NVH Troubleshooting Chart
INFOID:0000000005147889
Use the chart below to help you find the cause of the symptom. If necessary, repair or replace these parts.
×: Applicable
Reference page
,
,
,
,
,
,
,
,
,
,
(2F1
31
0),
(2S1
41
0)
"
(FFD),
(R
F
D
)
(F
AX),
(RAX)
(F
SU),
(RSU)
"
Possible cause and
SUSPECTED PARTS
Pad
s - da
ma
ge
d
Pad
s - un
ev
en
wea
r
Shi
ms
da
ma
ge
d
Ro
to
r im
ba
la
nc
e
Ro
to
r da
ma
ge
Rot
or runout
Ro
to
r de
fo
rm
at
io
n
Ro
to
r de
fle
ct
io
n
Rot
or rust
Ro
to
r th
ickn
es
s va
riati
o
n
PROPELLER S
H
AFT
DIFF
ERENTIAL
DRIVES
H
A
FT
SUSPE
N
S
ION
TIR
E
S AND ROAD WHE
E
L
STE
E
RING
Symptom
Noise
×
×
×
×
×
×
×
×
×
Shake
×
×
×
×
×
×
Shimmy, Shudder
×
×
×
×
×
×
×
×
×
×
×
FRONT DISC BRAKE
BR-7
< BASIC INSPECTION >
C
D
E
G
H
I
J
K
L
M
A
B
BR
N
O
P
BASIC INSPECTION
FRONT DISC BRAKE
BRAKE PAD
BRAKE PAD : Front Pad Inspection
INFOID:0000000005147890
PAD WEAR
Check pad thickness from the inspection holes on cylinder body.
Check using a scale if necessary.
DISC ROTOR
DISC ROTOR : Front Rotor Inspection
INFOID:0000000005147891
VISUAL
Check surface of disc rotor for uneven wear, cracks, and serious damage. Replace as necessary.
RUNOUT
1. Attach disc rotor to wheel hub using wheel nuts (at two or more
positions).
2. Inspect runout using a dial gauge placed at 10 mm (0.39 in)
inside the disc edge.
NOTE:
Before measuring, make sure that wheel bearing axial end play
is within the specification. Refer to
.
3. When runout exceeds limit value, displace mounting positions of disc rotor by one hole. And then find a
position of the minimum value for runout.
4. If runout is outside the specified value after performing the above operation, turn disc rotor using Tool.
THICKNESS
Standard thickness
: Refer to
.
Repair limit thickness
: Refer to
.
WFIA0522E
Runout limit
: Refer to
.
(with it attached to the vehicle)
Tool number
: 38-PFM90.5 ( — )
BRA0580D
Нет комментариевНе стесняйтесь поделиться с нами вашим ценным мнением.
Текст