Infiniti EX35. Manual — part 842
DOOR PARTING SEAL
EXT-47
< ON-VEHICLE REPAIR >
C
D
E
F
G
H
I
J
L
M
A
B
EXT
N
O
P
3.
Remove front door parting seal.
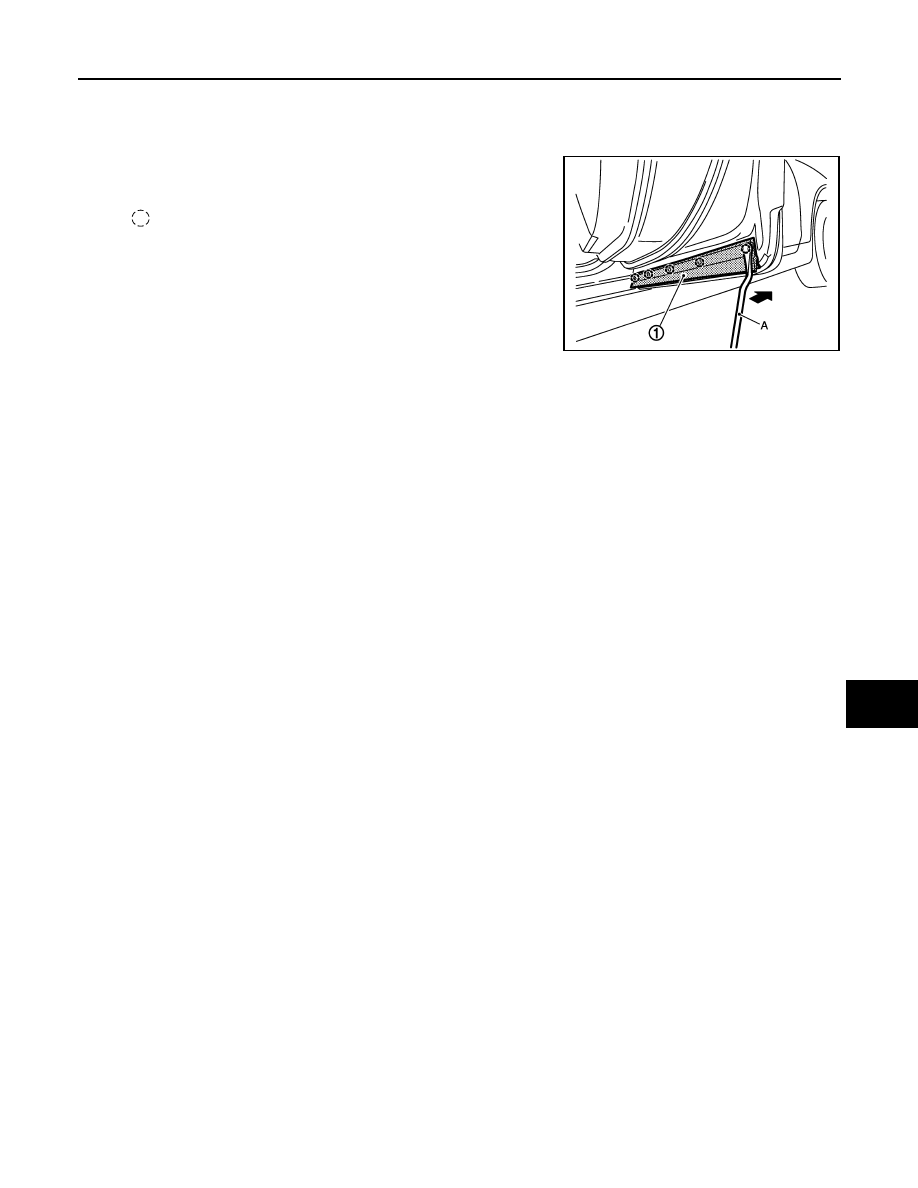
REAR DOOR PARTING SEAL (LOWER)
1.
Fully open rear door.
2.
Using a remover tool (A), disengage the clips from the rear door
parting seal (1).
CAUTION:
• Disengage the clips slowly and carefully.
• Do not pull the rear door parting seal strongly.
REAR DOOR PARTING SEAL (FRONT)
1.
Fully open front door.
2.
Pull back rear door parting seal (front).
CAUTION:
Do not bend the rear door parting seal strongly.
INSTALLATION
Install in the reverse order of removal.
CAUTION:
• When installing door parting seal, check that blind clips are securely fitted in panel holes on body,
and then press them in.
• When installing, check visually the fillet molding and the clips, then replace them with new parts if
they have been damaged.
• Replace double-faced adhesive tape on back of rear door parting seal (front) with a new tape if rear
door parting seal (front) is reused.
• Remove double-faced adhesive tape remaining on body and back of rear door parting seal (front)
using double-faced adhesive tape remover when removing rear door parting seal (front).
• Do not wash the vehicle with in 24 hours after installing so as to keep adhesive.
: Clip
JMKIA2212ZZ
EXT-48
< ON-VEHICLE REPAIR >
BACK DOOR FINISHER
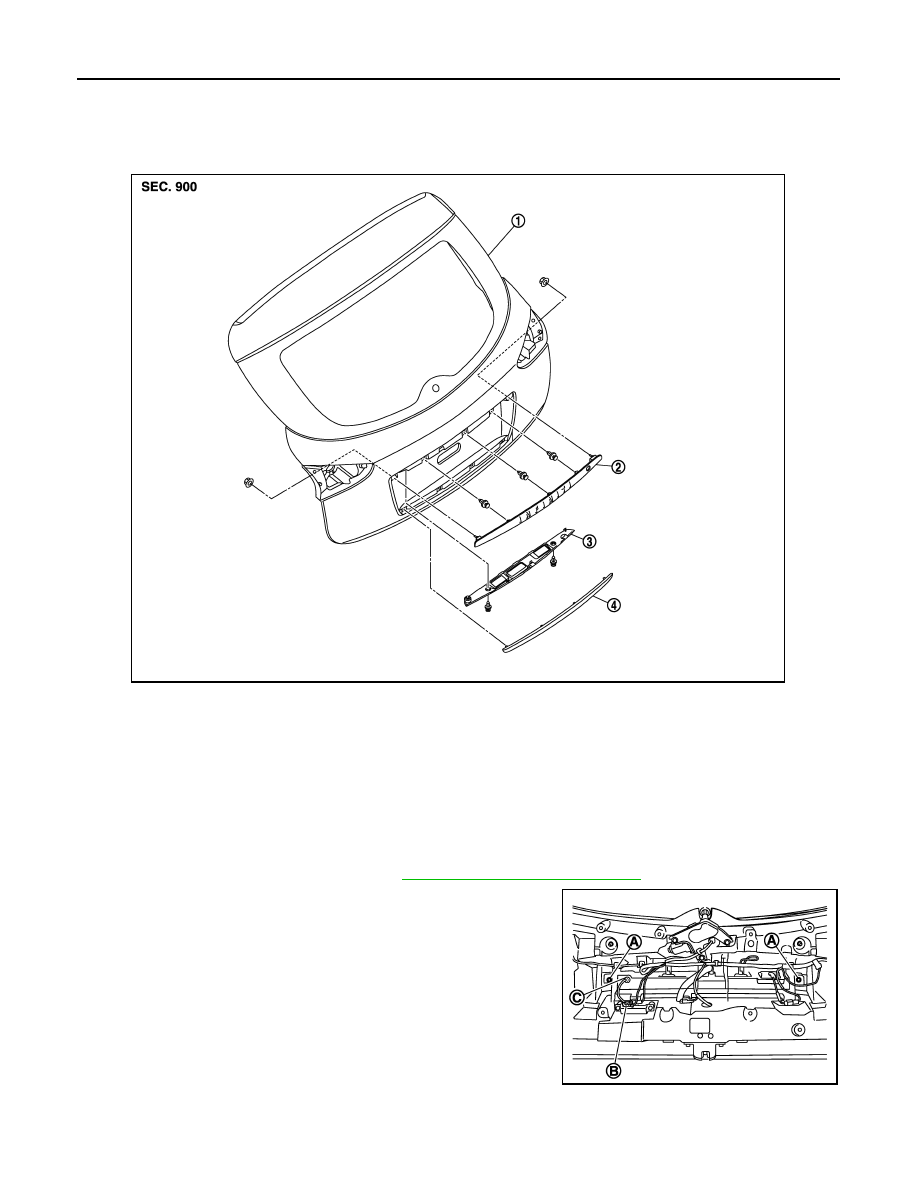
BACK DOOR FINISHER
Exploded View
INFOID:0000000003671440
Removal and Installation
INFOID:0000000003719185
REMOVAL
BACK DOOR FINISHER
1.
Fully open back door.
2.
Remove back door finisher inner. Refer to
INT-38, "Removal and Installation"
3.
Remove back door finisher (upper) fixing nuts (A).
4.
Disconnect back door request switch harness connector (B).
5.
Pull harness grommet (C) outwards from back door to release it.
1.
Back door assembly
2.
Back door finisher (upper)
3.
Door handle cover
4.
Back door finisher (lower)
JMKIA2216ZZ
JMKIA2217ZZ
BACK DOOR FINISHER
EXT-49
< ON-VEHICLE REPAIR >
C
D
E
F
G
H
I
J
L
M
A
B
EXT
N
O
P
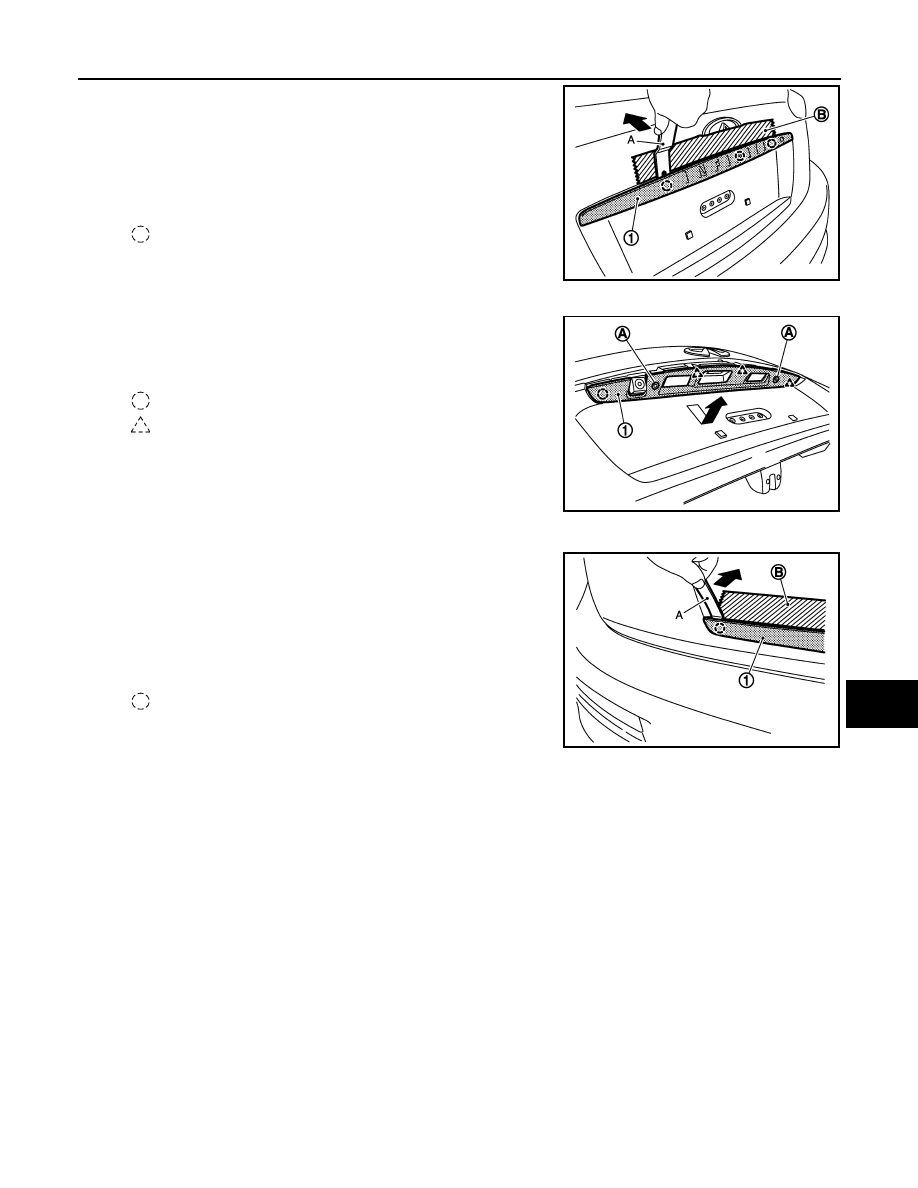
6.
Remove back door finisher (upper) (1) fixing clips with remover
tool (A).
CAUTION:
• Apply a protective tape (B) on the body to protect the
painted surface from damage.
• Disengage the clips slowly and carefully.
• Do not pull the back door finisher (upper) strongly.
7.
Pull back door finisher (upper) to remove it.
8.
Remove door handle cover (1) fixing clips (A).
9.
Remove door handle fixing pawls, and then pull toward the
arrow direction.
BACK DOOR CENTER FINISHER
1.
Remove back door finisher (lower) (1) fixing clips with remover
tool (A).
CAUTION:
• Apply a protective tape (B) on the body to protect the
painted surface from damage.
• Disengage the clips slowly and carefully.
• Do not pull the back door finisher (lower) strongly.
2.
Pull back door finisher (lower) to remove it.
INSTALLATION
Install in the reverse order of removal.
: Clip
JMKIA2218ZZ
: Clip
: Pawl
JMKIA2219ZZ
: Clip
JMKIA2220ZZ
FAX-1
TRANSMISSION & DRIVELINE
C
E
F
G
H
I
J
K
L
M
SECTION
FAX
A
B
FAX
N
O
P
CONTENTS
FRONT AXLE
2WD
SYMPTOM DIAGNOSIS . . . . . . . ...
NOISE, VIBRATION AND HARSHNESS
(NVH) TROUBLESHOOTING . . . . . . . .
NVH Troubleshooting Chart . . . . . . . . . ..
PREPARATION . . . . . . . . . . .
PREPARATION . . . . . . . . . . . . ...
Commercial Service Tool . . . . . . . . . . ..
ON-VEHICLE MAINTENANCE . . . . . .
FRONT WHEEL HUB AND KNUCKLE . . . ..
Inspection . . . . . . . . . . . . . . . . ..
ON-VEHICLE REPAIR . . . . . . . . ..
FRONT WHEEL HUB AND KNUCKLE . . . ..
Exploded View . . . . . . . . . . . . . . ..
Removal and Installation . . . . . . . . . . ...
Inspection . . . . . . . . . . . . . . . . ..
SERVICE DATA AND SPECIFICATIONS
(SDS) . . . . . . . . . . . . . . . .
SERVICE DATA AND SPECIFICATIONS
(SDS) . . . . . . . . . . . . . . . . ...
Wheel Bearing . . . . . . . . . . . . . . ...
AWD
SYMPTOM DIAGNOSIS . . . . . . . ...
NOISE, VIBRATION AND HARSHNESS
(NVH) TROUBLESHOOTING . . . . . . . .
NVH Troubleshooting Chart . . . . . . . . . ..
PRECAUTION . . . . . . . . . . . ..
PRECAUTIONS . . . . . . . . . . . . ..
Precaution Necessary for Steering Wheel Rota-
tion after Battery Disconnect . . . . . . . . ...
Precautions for Drive Shaft . . . . . . . . . ..
PREPARATION . . . . . . . . . . ...
PREPARATION . . . . . . . . . . . . .
Special Service Tool . . . . . . . . . . . .
Commercial Service Tool . . . . . . . . . .
ON-VEHICLE MAINTENANCE . . . . .
FRONT WHEEL HUB AND KNUCKLE . . .
Inspection . . . . . . . . . . . . . . . .
FRONT DRIVE SHAFT . . . . . . . . . .
Inspection . . . . . . . . . . . . . . . .
ON-VEHICLE REPAIR . . . . . . . . .
FRONT WHEEL HUB AND KNUCKLE . . .
Exploded View . . . . . . . . . . . . . . .
Removal and Installation . . . . . . . . . . .
Inspection . . . . . . . . . . . . . . . .
FRONT DRIVE SHAFT BOOT . . . . . . ..
Exploded View . . . . . . . . . . . . . . .
WHEEL SIDE . . . . . . . . . . . . . . . .
WHEEL SIDE : Removal and Installation . . . .
FINAL DRIVE SIDE . . . . . . . . . . . . .
FINAL DRIVE SIDE : Removal and Installation . ...
Inspection . . . . . . . . . . . . . . . .
FRONT DRIVE SHAFT . . . . . . . . . .
Exploded View . . . . . . . . . . . . . . .
LEFT SIDE . . . . . . . . . . . . . . . . .
Нет комментариевНе стесняйтесь поделиться с нами вашим ценным мнением.
Текст