Infiniti I35 (A33). Manual — part 160

POWER SEAT
NHBT0018S01
SBT877-A
GI
MA
EM
LC
EC
FE
AT
AX
SU
BR
ST
RS
HA
SC
EL
IDX
FRONT SEAT
Removal and Installation (Cont’d)
BT-51
HEATED SEAT
NHBT0018S03
I
When handling seat, be extremely careful not to scratch heating unit.
I
To replace heating unit, seat trim and pad should be separated.
I
Do not use any organic solvent, such as thinner, benzene, alcohol, gasoline, etc. to clean trims.
★
For Wiring Diagram, refer to EL-252, “HEATED SEAT” for details.
SBT887
Active Head Restraint
NHBT0032
The active head restraint system is designed so that the headrest
instantaneously moves towards the front upper direction by utiliz-
ing the force at the seatback during a rear-end collision.
As a result, the occupant’s head is protected from being
overextended, reducing the chance for neck injury as much as
possible.
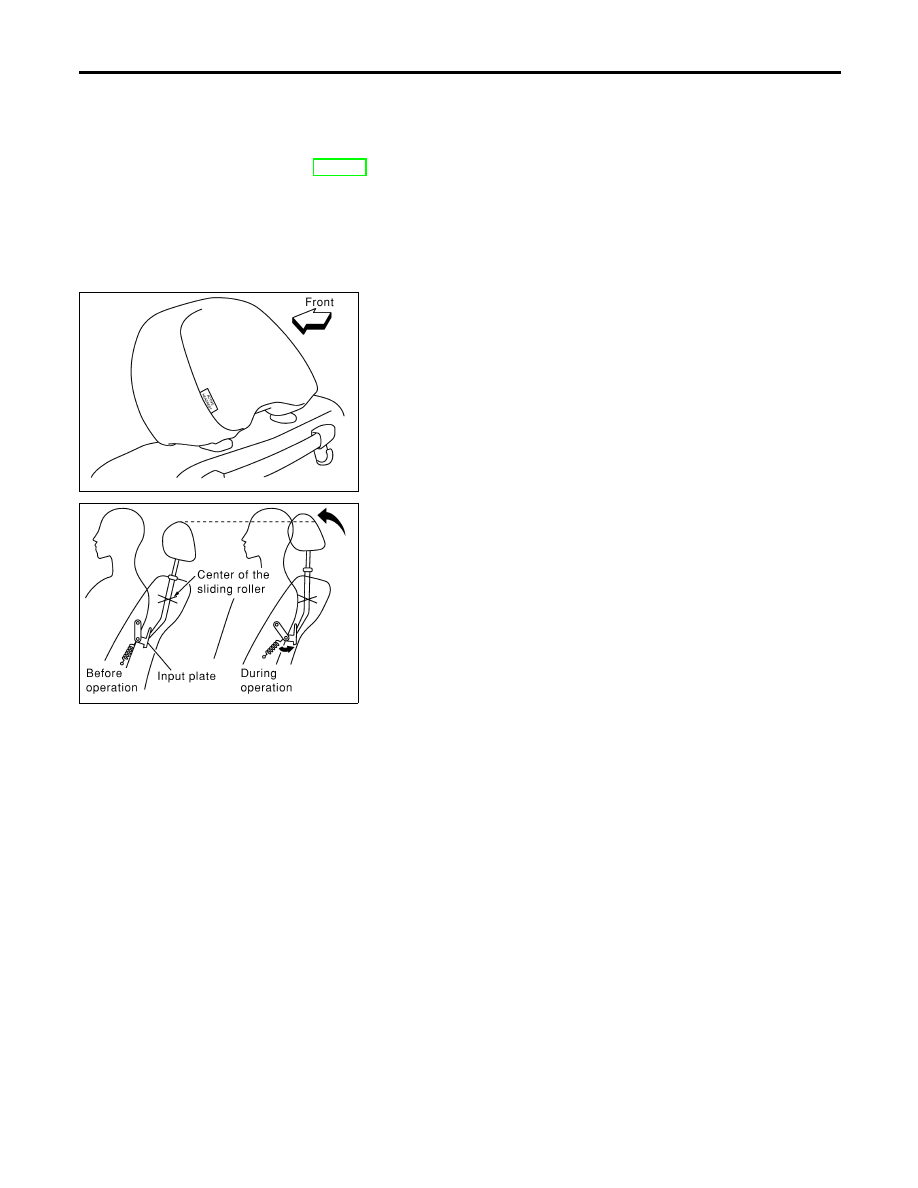
Seat with active head restraint have the labels shown in figures at
left.
SBT888
OPERATION OUTLINE
NHBT0032S01
When the seatback receives a sharp backward force during a rear-
end collision, the input plate moves with the link rotating center as
a pivot. The headrest will then move towards the front upper direc-
tion with the center of the sliding roller as a pivot.
As the backward force on the seat back is eliminated, spring ten-
sion returns the headrest to its original position.
FRONT SEAT
Removal and Installation (Cont’d)
BT-52
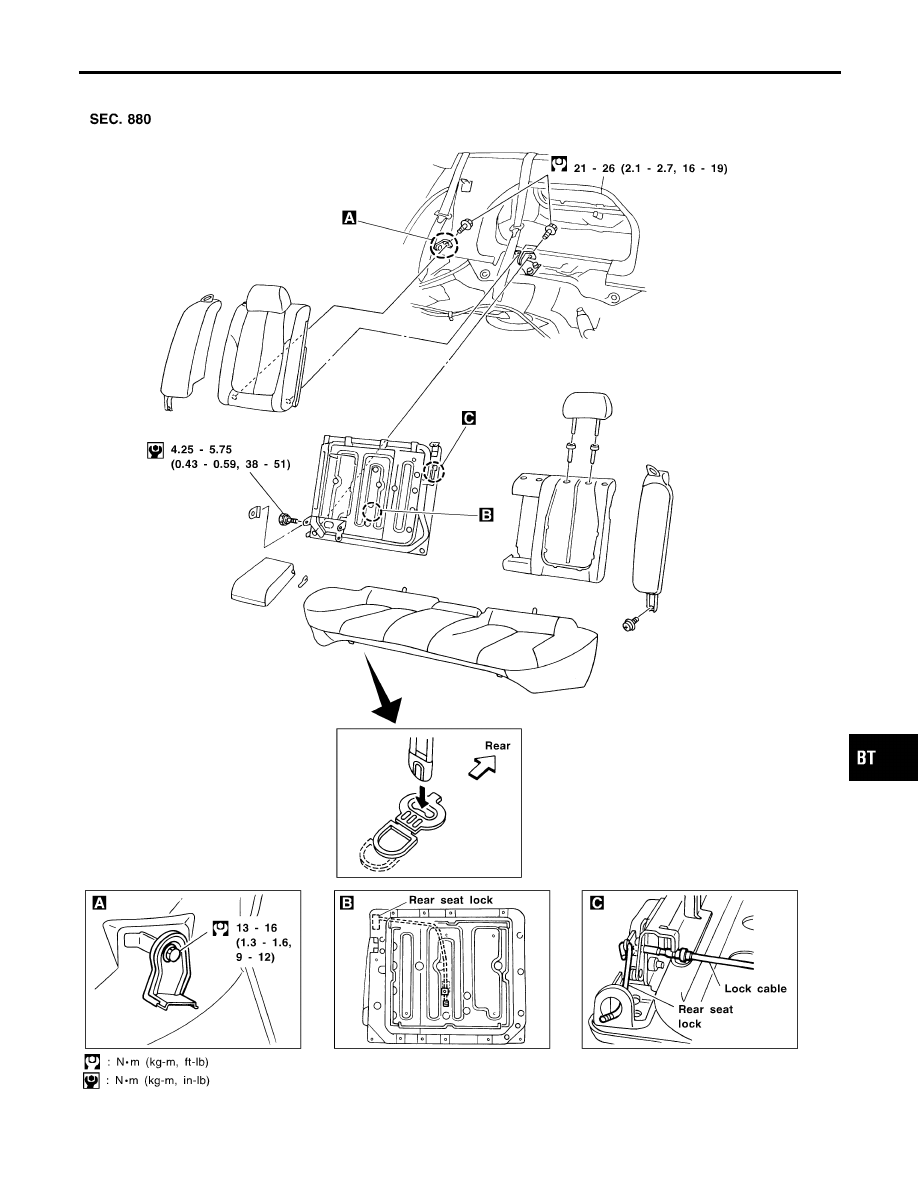
Removal and Installation
NHBT0019
SBT079A
GI
MA
EM
LC
EC
FE
AT
AX
SU
BR
ST
RS
HA
SC
EL
IDX
REAR SEAT
Removal and Installation
BT-53
Adjustment
NHBT0020
Install motor & limit SW assembly and sunroof rail assembly in the following sequence:
1. Arrange equal lengths of link and wire assemblies on both sides of sunroof opening.
2. Connect sunroof connector to sunroof switch and positive (+) power supply.
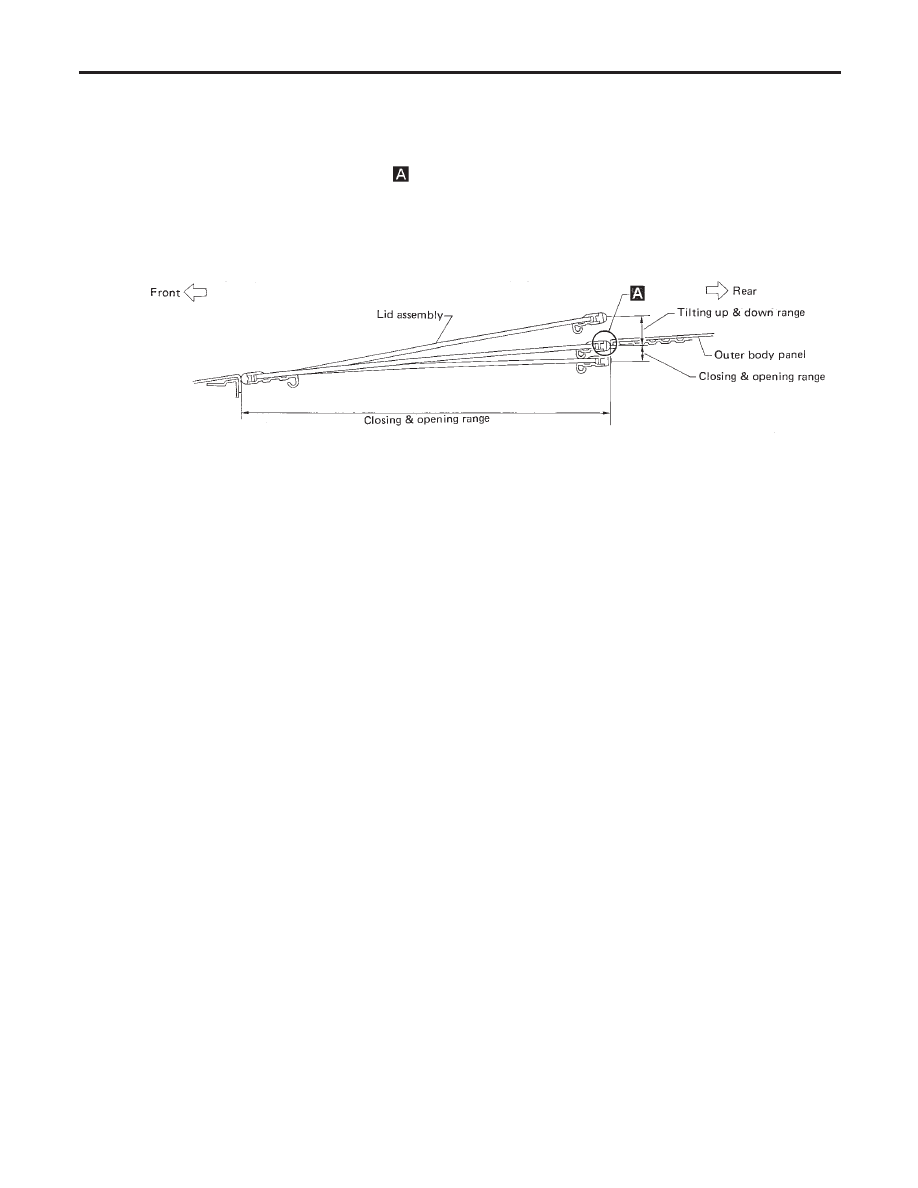
3. Set lid assembly to fully closed position
by operating OPEN switch and TILT switch. After the lid has
closed all the way, keep pushing the TILT switch toward tilt DOWN for more than 1 second.
4. Fit outer side of lid assembly to the surface of roof on body outer panel.
5. Press TILT-UP switch to check lid assembly for normal tilting.
6. Check sunroof lid assembly for normal operations (tilt-up, tilt-down, open, and close).
SBF920F
Removal
NHBT0021
I
After any adjustment, check sunroof operation and lid align-
ment.
I
Handle finisher plate and glass lid with care so not to cause
damage.
I
It is desirable for easy installation to mark each point before
removal.
CAUTION:
I
Always work with a helper.
I
Before removal, fully close the glass lid assembly, then
after removal, do not move motor assembly.
SUNROOF
Adjustment
BT-54
Нет комментариевНе стесняйтесь поделиться с нами вашим ценным мнением.
Текст