Infiniti I35 (A33). Manual — part 74
NHAT0124
SAT008D
1.
Drain ATF through drain plug.
2.
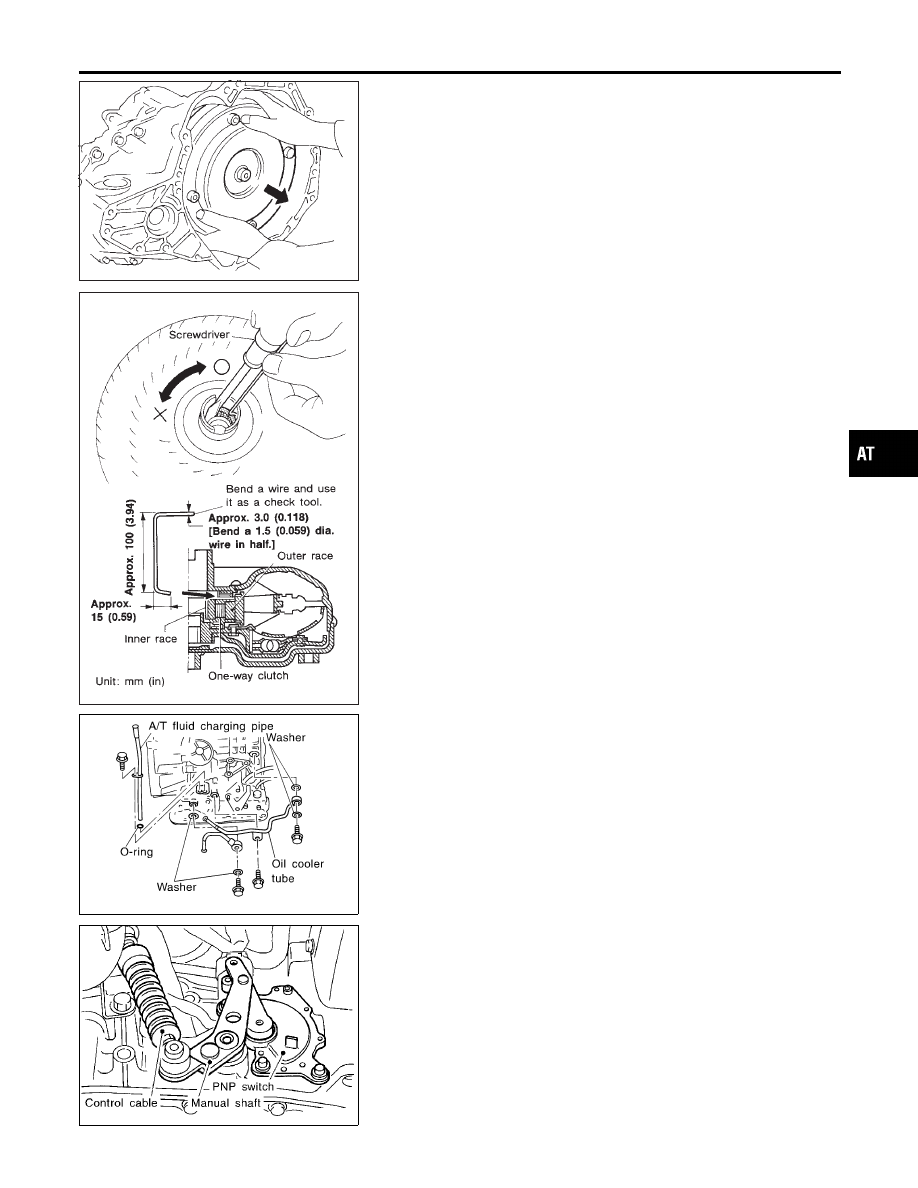
Remove torque converter.
SAT009D
3.
Check torque converter one-way clutch using check tool as
shown at left.
a.
Insert check tool into the groove of bearing support built into
one-way clutch outer race.
b.
When fixing bearing support with check tool, rotate one-way
clutch spline using screwdriver.
c.
Check that inner race rotates clockwise only. If not, replace
torque converter assembly.
SAT768J
4.
Remove A/T fluid charging pipe and fluid cooler tube.
SAT023JA
5.
Set manual shaft to position P.
6.
Remove park/neutral position (PNP) switch.
GI
MA
EM
LC
EC
FE
AX
SU
BR
ST
RS
BT
HA
SC
EL
IDX
DISASSEMBLY
AT-293
SAT003F
7.
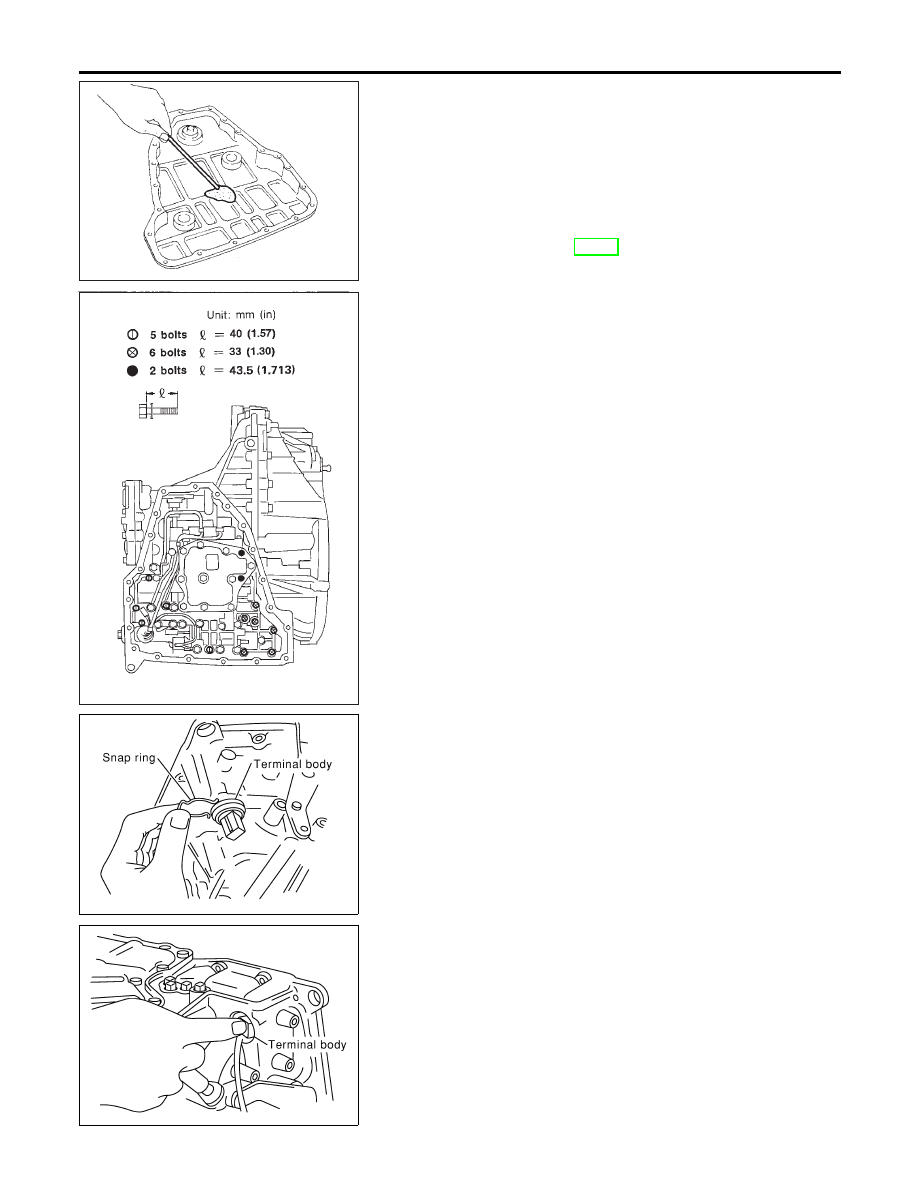
Remove oil pan and oil pan gasket.
I
Do not reuse oil pan bolts.
8.
Check foreign materials in oil pan to help determine causes of
malfunction. If the fluid is very dark, smells burned, or contains
foreign particles, the frictional material (clutches, band) may
need replacement. A tacky film that will not wipe clean indi-
cates varnish build up. Varnish can cause valves, servo, and
clutches to stick and can inhibit pump pressure.
I
If frictional material is detected, replace radiator after
repair of A/T. Refer to LC-20, “Radiator”.
SAT004F
9.
Remove control valve assembly according to the following pro-
cedures.
a.
Remove control valve assembly mounting bolts I, X and
I
.
SCIA0800E
b.
Remove snap ring from terminal body.
SCIA0801E
c.
Push terminal body into transmission case and draw out sole-
noid harness.
DISASSEMBLY
AT-294
SAT005F
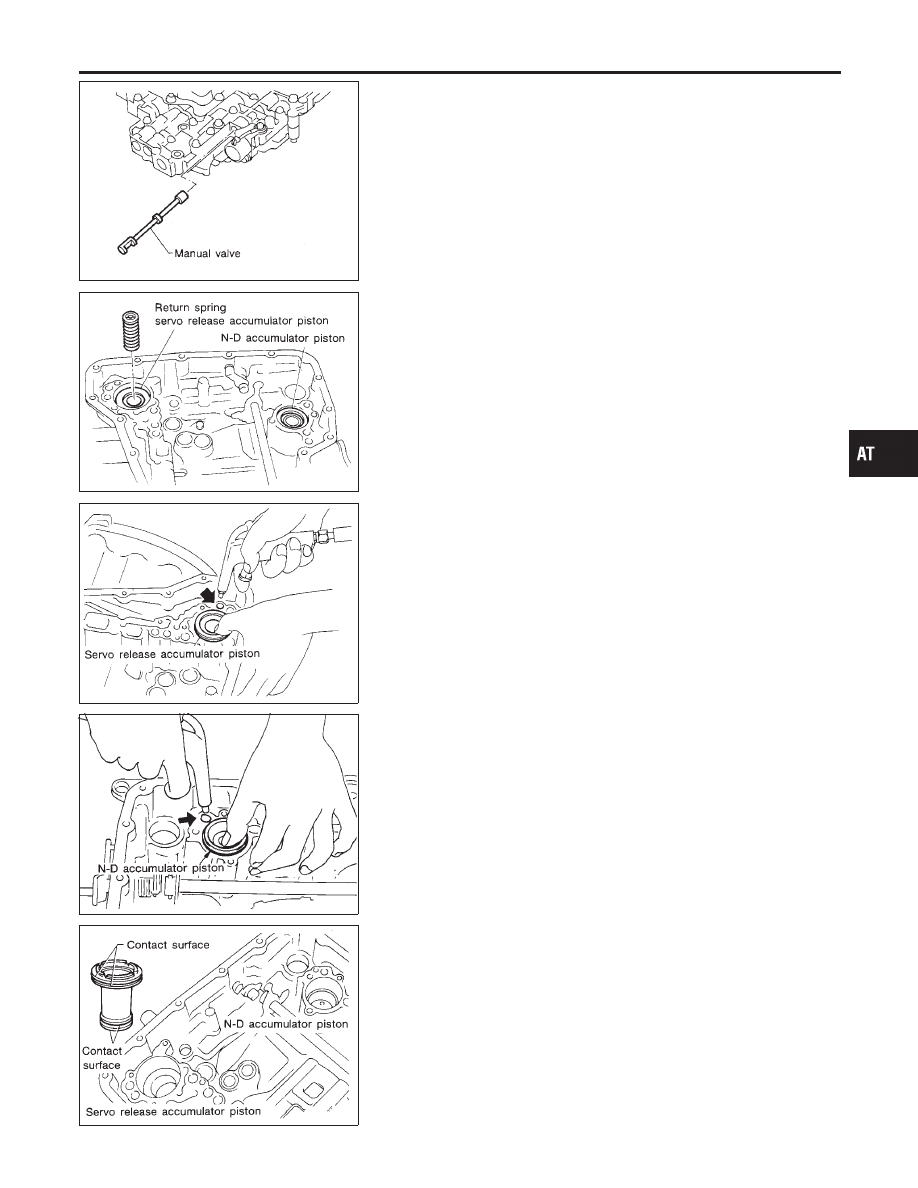
10. Remove manual valve from control valve assembly.
SAT018DA
11. Remove return spring from servo release accumulator piston.
SAT019DA
12. Remove servo release accumulator piston with compressed
air.
13. Remove O-rings from servo release accumulator piston.
SAT020D
14. Remove N-D accumulator piston and return spring with com-
pressed air.
15. Remove O-rings from N-D accumulator piston.
SAT023DA
16. Check accumulator pistons and contact surface of transmis-
sion case for damage.
17. Check accumulator return springs for damage and free length.
GI
MA
EM
LC
EC
FE
AX
SU
BR
ST
RS
BT
HA
SC
EL
IDX
DISASSEMBLY
AT-295
SAT006F
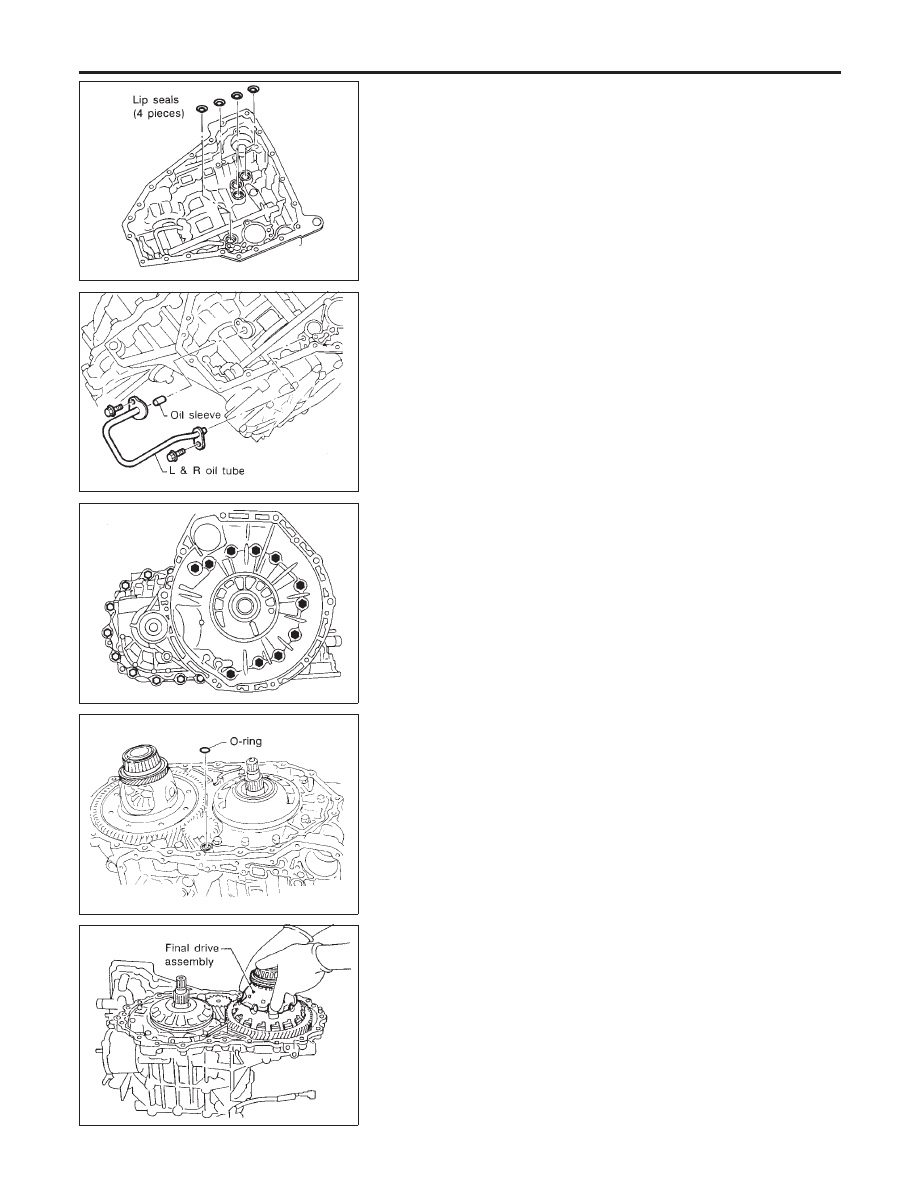
18. Remove lip seals.
SAT862HA
19. Remove L & R oil tube and oil sleeve.
SAT008F
20. Remove converter housing according to the following proce-
dures.
a.
Remove converter housing mounting bolts.
b.
Remove converter housing by tapping it lightly.
SAT235F
c.
Remove O-ring from differential oil port.
SAT228F
21. Remove final drive assembly from transmission case.
DISASSEMBLY
AT-296
Нет комментариевНе стесняйтесь поделиться с нами вашим ценным мнением.
Текст