Infiniti G37 Coupe. Manual — part 1349

PARKING COMPONENTS
TM-249
< ON-VEHICLE REPAIR >
[5AT: RE5R05A]
C
E
F
G
H
I
J
K
L
M
A
B
TM
N
O
P
3.
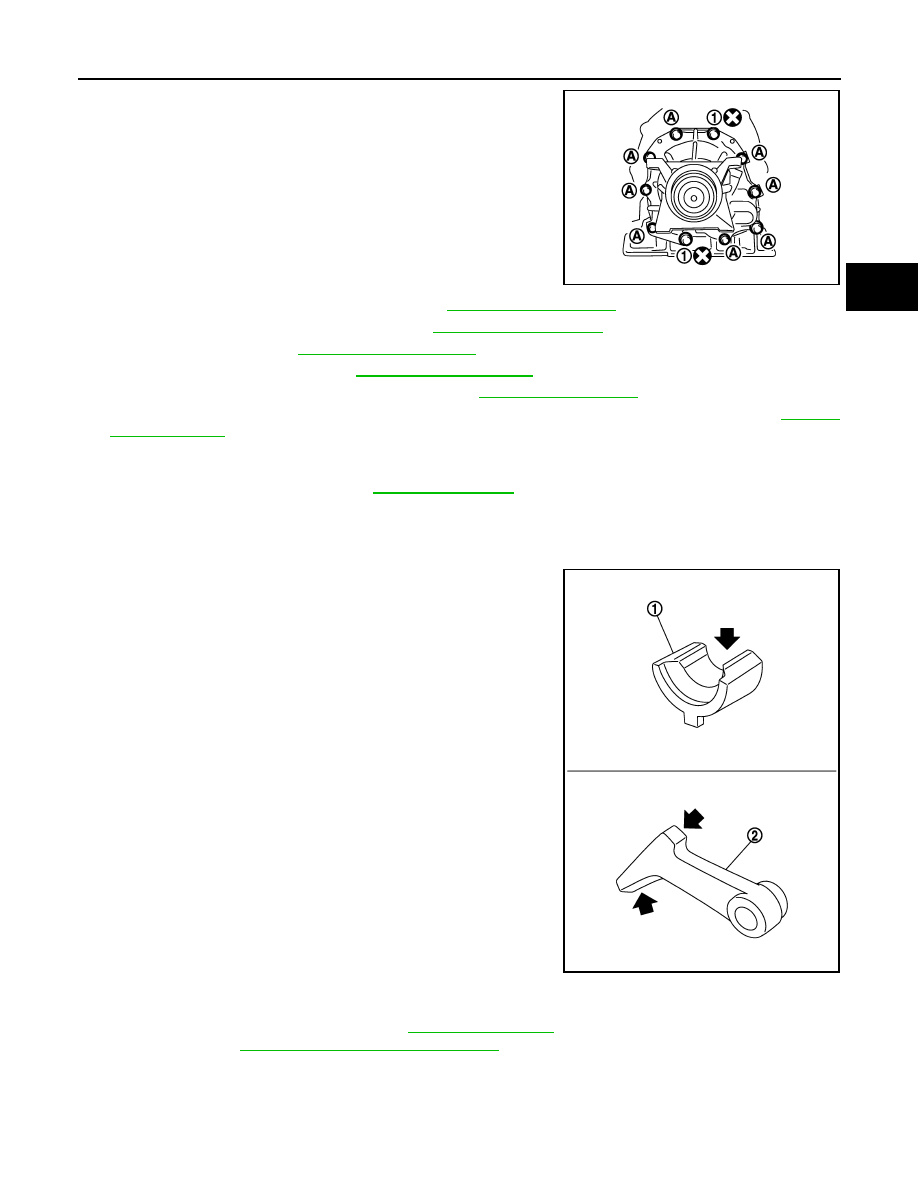
Install parking pawl (with return spring) (1) and pawl shaft (2) to
rear extension.
4.
Install parking actuator support (1) to rear extension.
5.
Install bearing (1) to rear extension.
CAUTION:
Check the direction of needle bearing. Refer to
"Location of Adjusting Shims, Needle Bearings, Thrust
Washers and Snap Rings"
.
6.
Install seal rings (1) to output shaft.
7.
Install parking gear (1) to output shaft (2).
JPDIA0032ZZ
JPDIA0031ZZ
SCIA6179J
JPDIA0030ZZ
JPDIA0029ZZ

TM-250
< ON-VEHICLE REPAIR >
[5AT: RE5R05A]
PARKING COMPONENTS
8.
Install output shaft (1) in transmission case.
9.
Install bearing race (1) to output shaft (2).
10. Apply recommended sealant (Genuine Anaerobic Liquid Gasket
GI-15, "Recommended Chemical Prod-
.) to rear extension assembly as shown in the
figure.
CAUTION:
Completely remove all moisture, oil and old sealant, etc.
from the transmission case and rear extension assembly
mounting surfaces.
11. Install rear extension assembly (with needle bearing) to trans-
mission case.
CAUTION:
Insert the tip of parking rod between the parking pawl and
the parking actuator support when assembling the rear
extension assembly.
JPDIA0028ZZ
JPDIA0057ZZ
A
: Start and finish point shall be in
the center of two bolts.
B
: 3 – 5 mm (0.12 – 0.20 in)
Sealant
width (C)
: 1.0 – 2.0 mm (0.04 – 0.08 in)
Sealant
height (C)
: 0.4 – 1.0 mm (0.016 – 0.04 in)
JPDIA0036ZZ
SCIA3431E
PARKING COMPONENTS
TM-251
< ON-VEHICLE REPAIR >
[5AT: RE5R05A]
C
E
F
G
H
I
J
K
L
M
A
B
TM
N
O
P
12. Tighten rear extension assembly bolts to the specified torque.
13. Install engine mounting insulator (rear). Refer to
.
14. Install rear engine mounting member. Refer to
.
15. Install control rod. Refer to
16. Install rear propeller shaft. Refer to
.
17. Install exhaust front tube and center muffler. Refer to
18. Install drain plug to oil pan. Tighten a necessary drain plug with specified torque. Refer to
CAUTION:
Do not reuse drain plug gasket.
19. Pour ATF into A/T assembly. Refer to
.
Inspection
INFOID:0000000001672268
INSPECTION AFTER REMOVAL
If the contact surface on parking actuator support (1), parking pawl
(2) and etc. has excessive wear, abrasion, bend, or any other dam-
age, replace the components.
INSPECTION AFTER INSTALLATION
Check the following item after completing installation.
• A/T fluid leakage and A/T fluid level. Refer to
• A/T position. Refer to
TM-226, "Inspection and Adjustment"
.
1
: Self-sealing bolt
A
: Bolt
JPDIA0026ZZ
JPDIA0034ZZ
TM-252
< ON-VEHICLE REPAIR >
[5AT: RE5R05A]
REAR OIL SEAL
REAR OIL SEAL
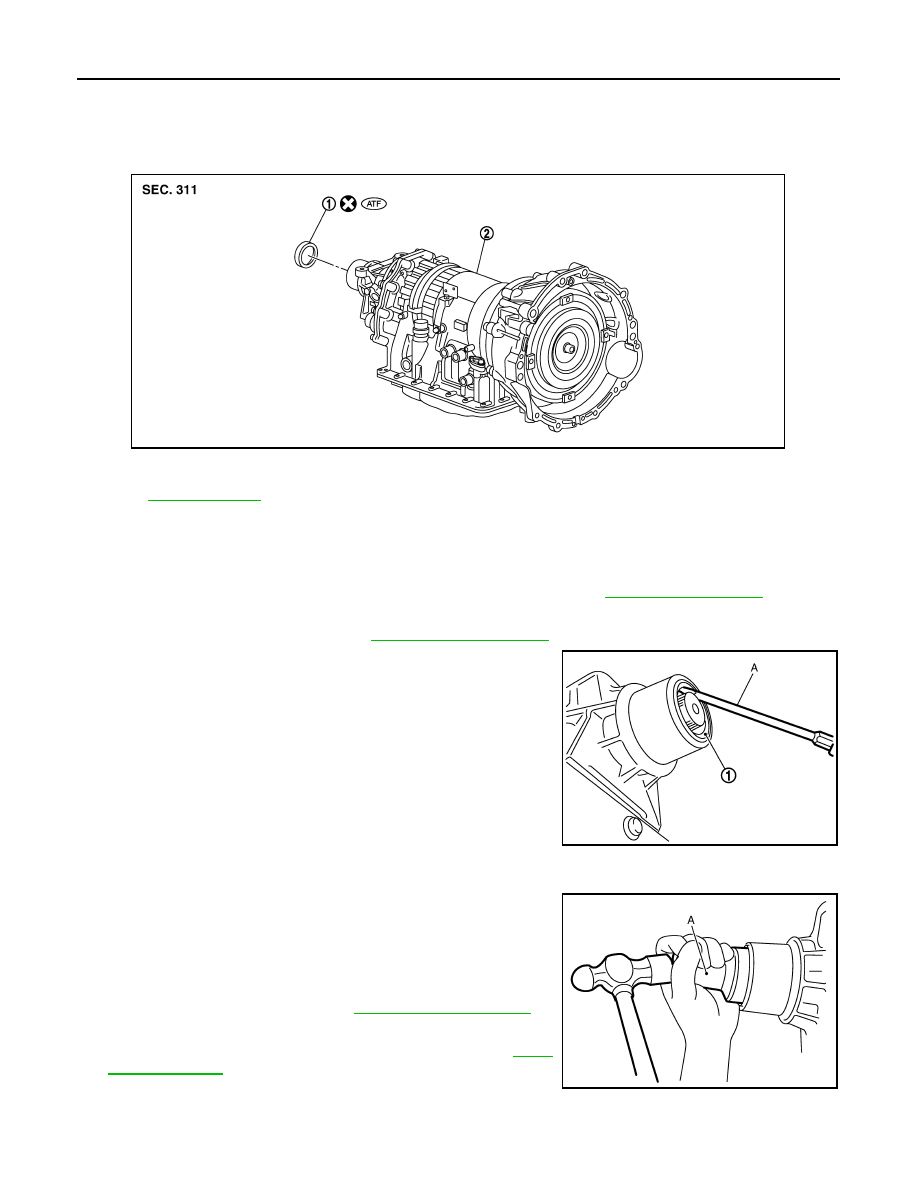
Exploded View
INFOID:0000000001672269
Removal and Installation
INFOID:0000000001672270
REMOVAL
1.
Remove exhaust front tube and center muffler with power tool. Refer to
.
2.
Remove heat insulator.
3.
Remove rear propeller shaft. Refer to
4.
Remove rear oil seal (1) using a flat-bladed screwdriver (A).
CAUTION:
Be careful not to scratch rear extension assembly.
INSTALLATION
1.
As shown in the figure, use the drift [SST: ST33400001 (J-
26082)] (A) to drive rear oil seal into rear extension assembly
until it is flush.
CAUTION:
• Do not reuse rear oil seal.
• Apply ATF to rear oil seal.
2.
Install rear propeller shaft. Refer to
.
3.
Install heat insulator.
4.
Install exhaust front tube and center muffler. Refer to
1.
Rear oil seal
2.
A/T
Refer to
for symbols in the figure.
JSDIA0176ZZ
JPDIA0037ZZ
JPDIA0039ZZ
Нет комментариевНе стесняйтесь поделиться с нами вашим ценным мнением.
Текст