Infiniti Q45 (FY33). Manual — part 17
SAT769B
2. CHECK AT IDLE
SAT770B
SAT768B
SAT796A
SAT771B
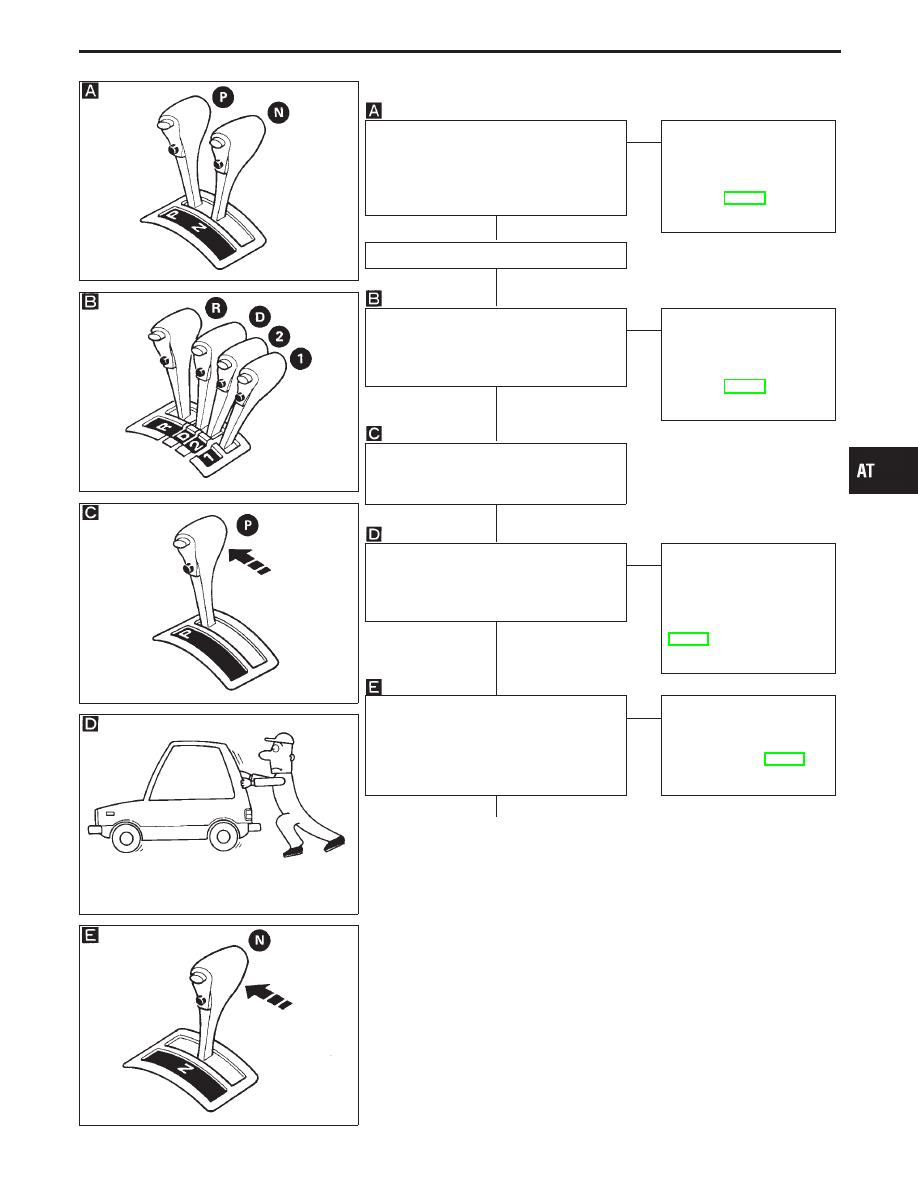
1. Park vehicle on flat surface.
2. Move selector lever to “P” position.
3. Turn ignition switch to “OFF” position.
4. Turn ignition switch to “START” position.
5. Is engine started?
Yes
E
No
Mark the box on the DIAG-
NOSTIC WORKSHEET.
Go to “2. Engine Cannot Be
Started In “P” and “N”
Position”, AT-163.
Continue ROAD TEST.
Turn ignition switch to “ACC” position.
1. Move selector lever to “D”, “1”, “2” or “R”
position.
2. Turn ignition switch to “START” position.
3. Is engine started?
No
E
Yes
Mark the box on the DIAG-
NOSTIC WORKSHEET.
Go to “2. Engine Cannot Be
Started In “P” and “N”
Position”, AT-163.
Continue ROAD TEST.
1. Move selector lever to “P” position.
2. Turn ignition switch to “OFF” position.
3. Release parking brake.
1. Push vehicle forward or backward.
2. Does vehicle move when it is pushed
forward or backward?
3. Apply parking brake.
No
E
Yes
Mark the box on the DIAG-
NOSTIC WORKSHEET.
Go to “3. In “P” Position,
Vehicle Moves Forward Or
Backward When Pushed”,
AT-163.
Continue ROAD TEST.
1. Start engine.
2. Move selector lever to “N” position.
3. Release parking brake.
4. Does vehicle move forward or back-
ward?
No
E
Yes
Mark the box on the DIAG-
NOSTIC WORKSHEET.
Go to “4. In “N” Position,
Vehicle Moves”, AT-164.
Continue ROAD TEST.
q
A
(Go to next page.)
GI
MA
EM
LC
EC
FE
PD
FA
RA
BR
ST
RS
BT
HA
EL
IDX
TROUBLE DIAGNOSIS — Basic Inspection
Road Test (Cont’d)
H
H
H
H
H
H
AT-65
SAT797A
SAT772B
SAT799A
SAT773B
q
A
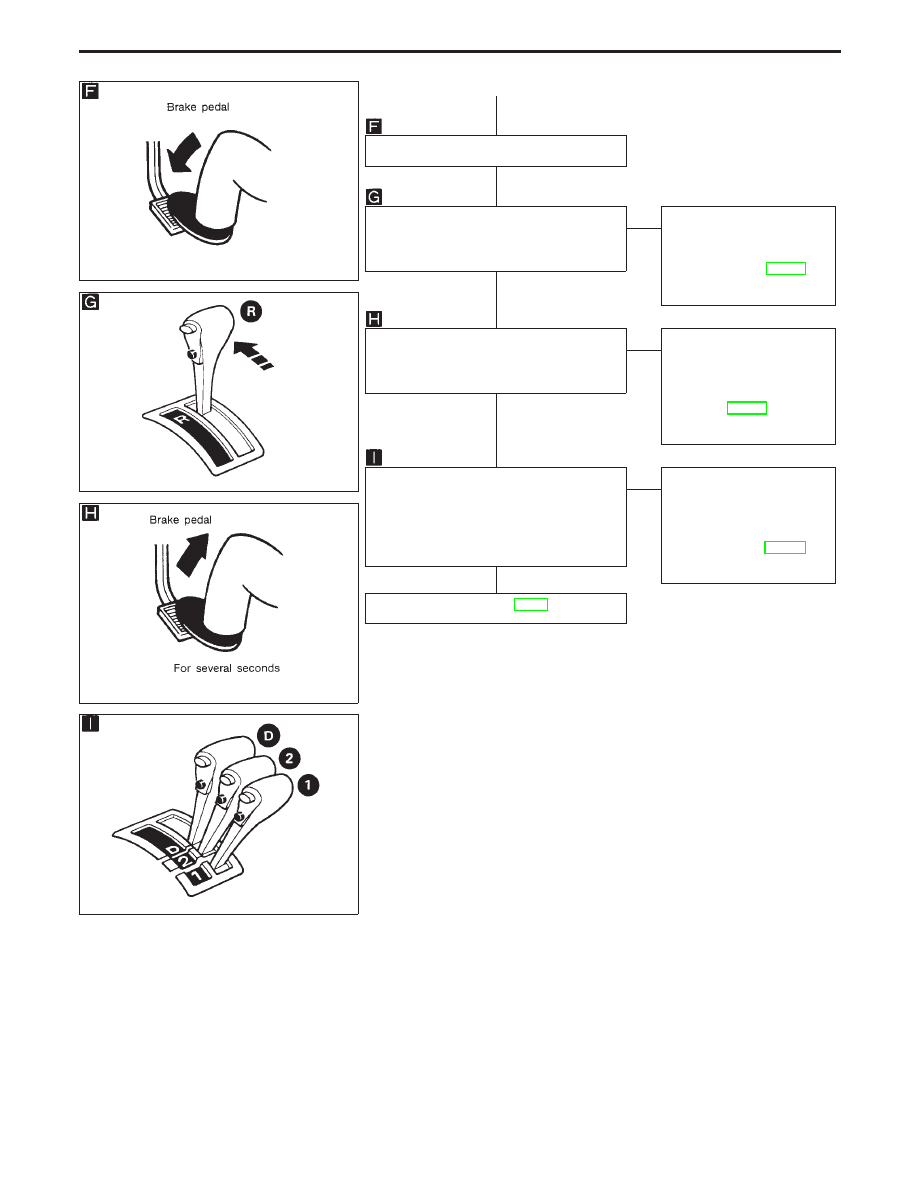
Apply foot brake.
1. Move selector lever to “R” position.
2. Is there large shock when changing
from “N” to “R” position?
No
E
Yes
Mark the box on the DIAG-
NOSTIC WORKSHEET.
Go to “5. Large Shock “N”
,
“R” Position”, AT-165.
Continue ROAD TEST.
1. Release foot brake for several seconds.
2. Does vehicle creep backward when foot
brake is released?
Yes
E
No
Mark the box on the DIAG-
NOSTIC WORKSHEET.
Go to “6. Vehicle Does Not
Creep Backward In “R”
Position”, AT-166.
Continue ROAD TEST.
1. Move selector lever to “D”, “2” and “1”
positions and check if vehicle creeps
forward.
2. Does vehicle creep forward in all three
positions?
Yes
E
No
Mark the box on the DIAG-
NOSTIC WORKSHEET.
Go to “7. Vehicle Does Not
Creep Forward In “D”, “2”
Or “1” Position”, AT-167.
Continue ROAD TEST.
Go to 3. CRUISE TEST, AT-67.
TROUBLE DIAGNOSIS — Basic Inspection
Road Test (Cont’d)
H
H
H
H
H
AT-66
SAT601J
3. CRUISE TEST
I
Check all items listed in Parts 1 through 3.
With CONSULT-II
I
Using CONSULT-II, conduct a cruise test and record the result.
I
Print the result and ensure that shifts and lock-ups take place
as per Shift Schedule.
SEF046TA
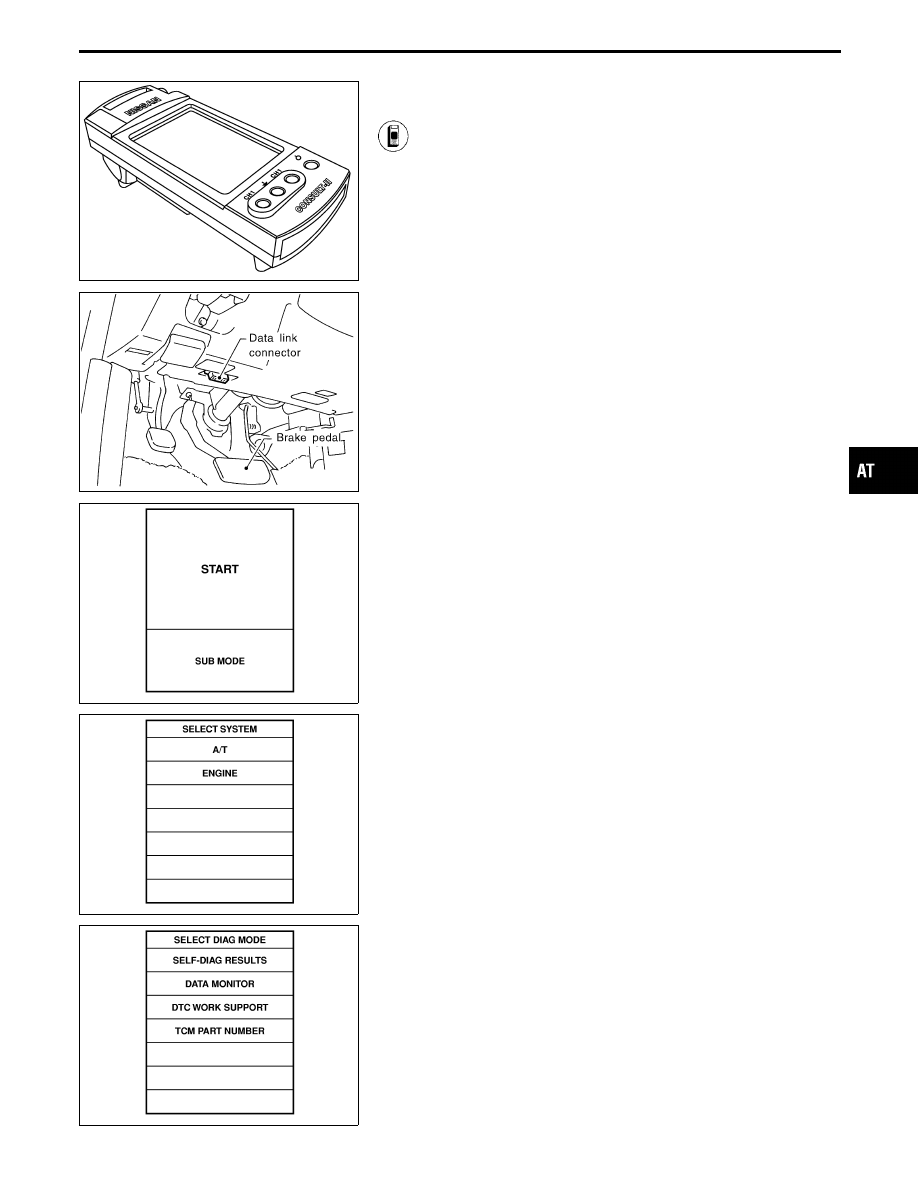
CONSULT-II setting procedure
1.
Turn ignition switch “OFF”.
2.
Connect CONSULT-II to Data link connector which is located
behind the cover.
SAT586J
3.
Turn ignition switch “ON”.
4.
Touch “START”.
SAT014K
5.
Touch “A/T”.
SAT971J
6.
Touch “DATA MONITOR”.
GI
MA
EM
LC
EC
FE
PD
FA
RA
BR
ST
RS
BT
HA
EL
IDX
TROUBLE DIAGNOSIS — Basic Inspection
Road Test (Cont’d)
AT-67
SAT175K
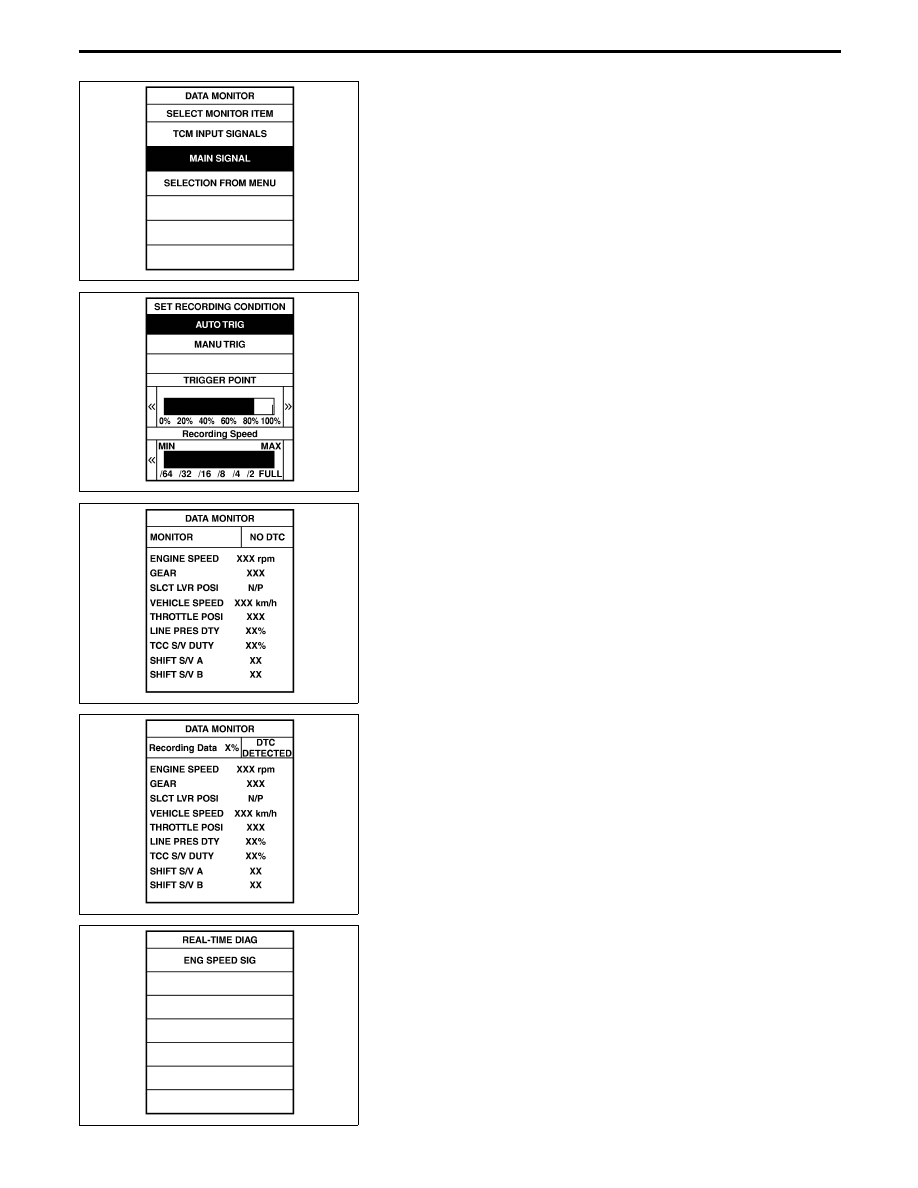
7.
Touch “MAIN SIGNALS” or “ECU INPUT SIGNALS”.
8.
See “Numerical Display“, “Barchart Display” or “Line Graph
Display”.
SAT973J
9.
Touch “SETTING” to set recording condition (“AUTO TRIG” or
“MANU TRIG”) and touch “BACK”.
10. Touch “Start”.
SAT134K
11. When performing cruise test, touch “RECORD”.
SAT135K
12. After finishing cruise test part 1, touch “STOP”.
SAT987J
13. Touch “STORE” and touch “BACK”.
TROUBLE DIAGNOSIS — Basic Inspection
Road Test (Cont’d)
AT-68
Нет комментариевНе стесняйтесь поделиться с нами вашим ценным мнением.
Текст