Infiniti M35/M45 Y50. Manual — part 749
DOOR SASH MOLDING
EI-27
C
D
E
F
G
H
J
K
L
M
A
B
EI
DOOR SASH MOLDING
PFP:80282
Removal and Installation
NIS0024P
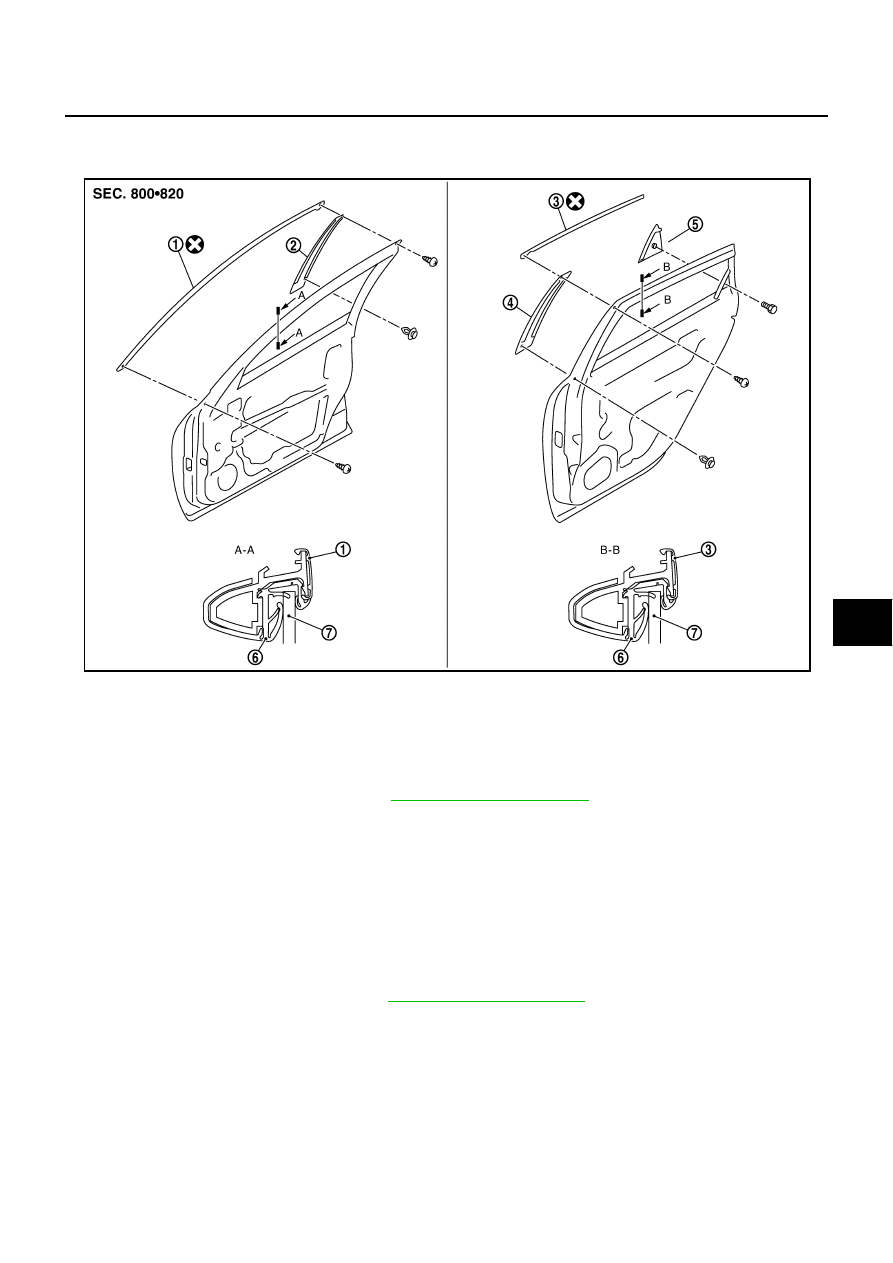
FRONT DOOR SASH MOLDING
Removal
1.
Remove front door weather-strip. Refer to
2.
Release roof portion of glass run.
3.
Remove screw of front door sash molding.
4.
Remove door sash molding connection between door panel and molding from glass run side and remove
molding.
Installation
Install in the reverse order of removal.
REAR DOOR SUSH MOLDING
Removal
1.
Remove rear door weather-strip. Refer to
.
2.
Release roof portion of glass run.
3.
Remove screw of rear door sash molding.
4.
Remove door sash molding connection between door panel and molding from glass run side and remove
molding (front).
Installation
Install in the reverse order of removal.
1.
Front door sash molding
2.
Front door sash outer cover
3.
Rear door sash molding
4.
Rear door sash outer cover
5.
Rear door corner cover
6.
Door glass run
7.
Door glass
PIIB5694E
EI-28
DOOR SASH MOLDING
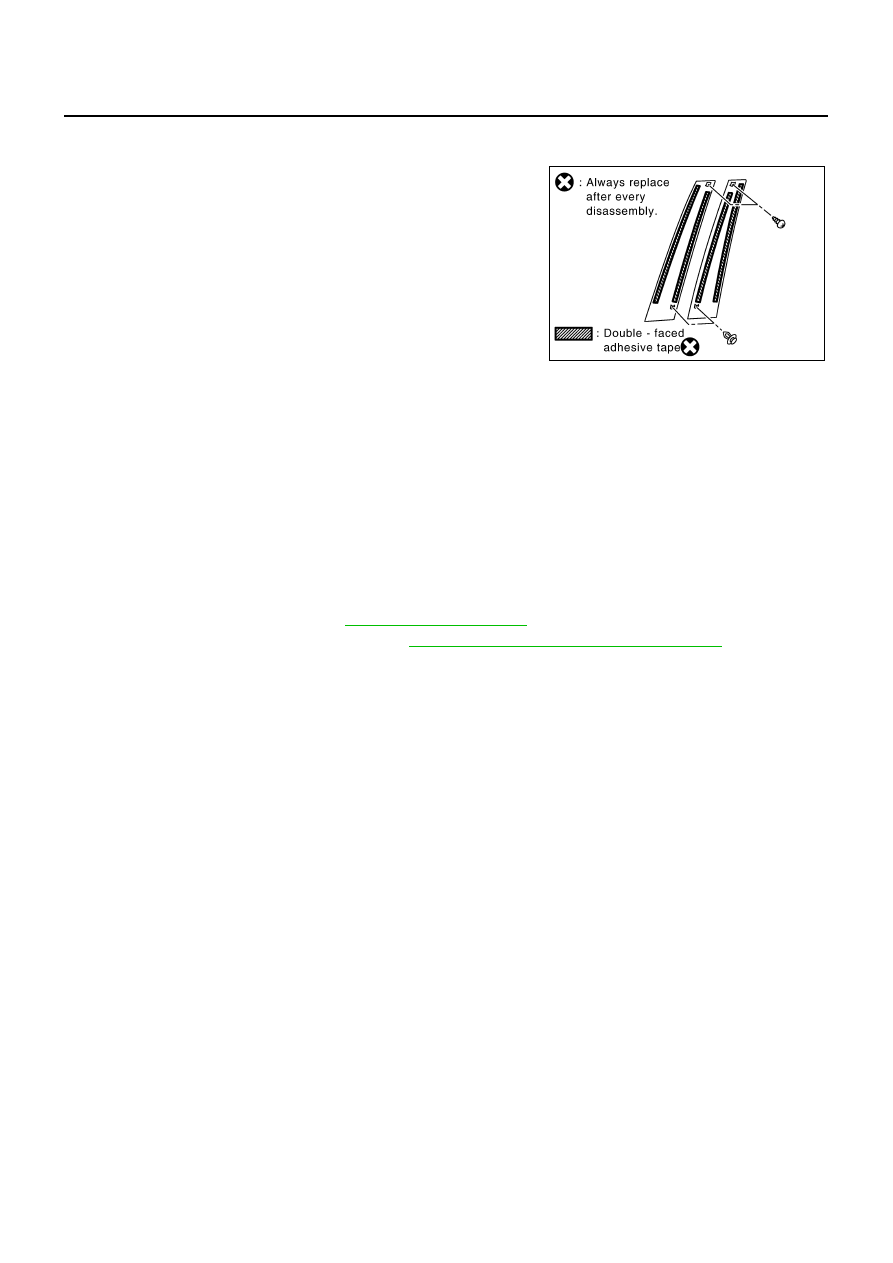
DOOR SASH OUTER COVER
Removal
1.
Remove front door weather-strip, rear door weather-strip. Refer
to
2.
Remove double-faced adhesive tape with (wide) plastic spatula
and remove door sash outer cover.
Installation
Install in the reverse order of removal.
NOTE:
If door sash outer cover is reused, remove double-faced adhesive tape from molding and body sides, clean
the applied area, and then install the parts shown in the figure into the body after applying new double-sided
tape to it.
CAUTION:
●
Do not let air between contact surfaces when installing.
●
To secure contact, do not wash vehicle within 24 hours after installation.
REAR DOOR CORNER COVER
Removal
1.
Remove rear door finisher. Refer to
2.
Remove rear door sash cover inner. Refer to
EI-36, "REAR DOOR SASH COVER INNER"
3.
Remove bolts of rear door corner cover and remove rear door corner cover.
Installation
Install in the reverse order of removal.
PIIB4515E
DOOR OUTSIDE MOLDING
EI-29
C
D
E
F
G
H
J
K
L
M
A
B
EI
DOOR OUTSIDE MOLDING
PFP:82820
Removal and Installation
NIS0024Q
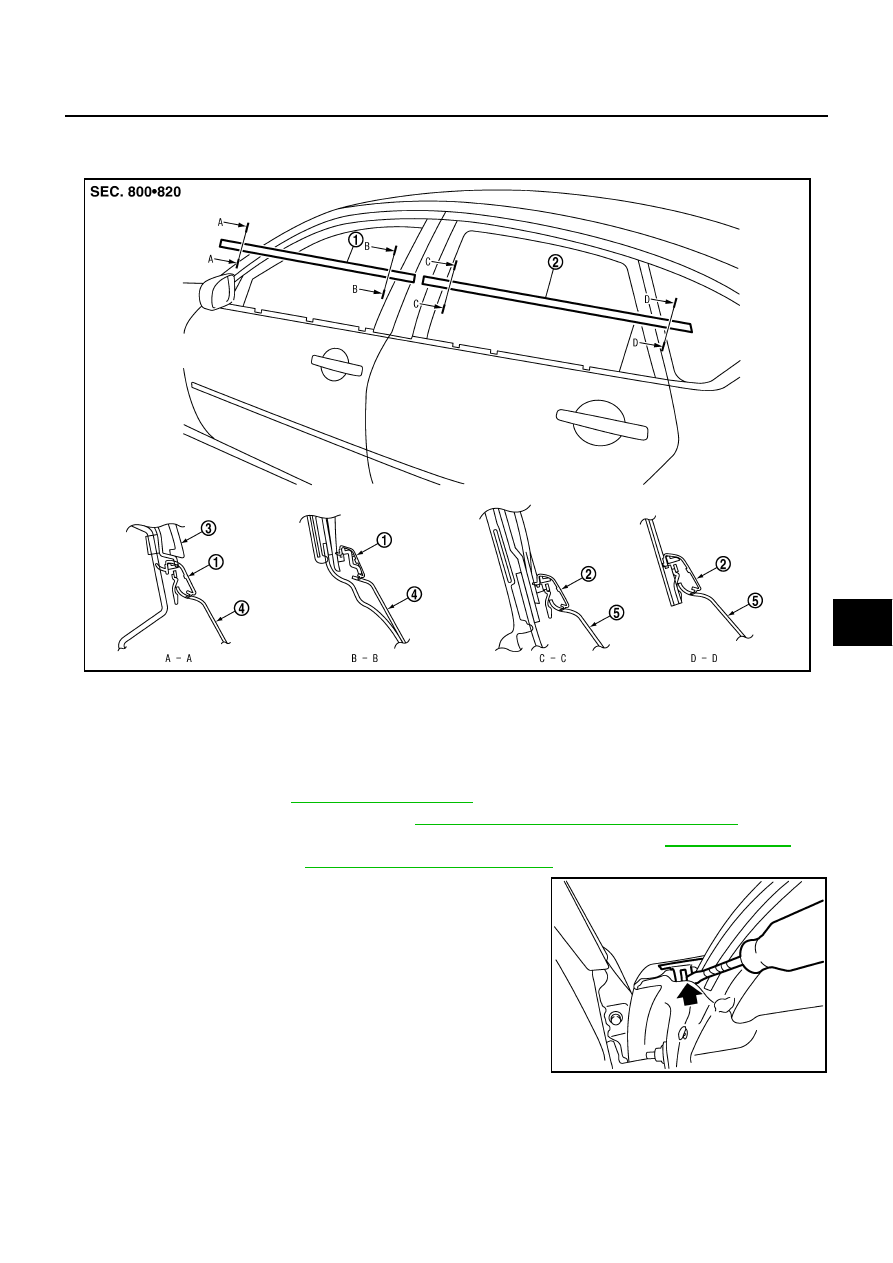
FRONT DOOR OUTSIDE MOLDING
Removal
1.
Fully open door window.
2.
Remove door trim. Refer to
.
3.
Remove front door sash cover inner. Refer to
EI-36, "FRONT DOOR SASH COVER INNER"
.
4.
Disconnect harness connector for tweeter (only for models with tweeter). Refer to
5.
Remove door mirror. Refer to
GW-118, "Removal and Installation"
6.
Disengage pawls by inserting a screwdriver to front and rear of
pawl inter grated with cap.
7.
Remove door outside molding while pulling up molding using plastic spatula after disengaging.
1.
Door outside molding (front)
2.
Door outside molding (rear)
3.
Door mirror
4.
Front door outer
5.
Rear door outer
PIIB2754J
PIIB4192J
EI-30
DOOR OUTSIDE MOLDING
CAUTION:
●
Be careful not to apply excessive force when removing because it is easy to deform parts.
●
After removal, visually inspect molding, and if it is deformed, replace it with new molding.
Installation
Install in the reverse order of removal.
NOTE:
Molding rear end is flush with door sash rear end when installing.
REAR DOOR OUTSIDE MOLDING
Removal
1.
Fully open door window.
2.
Remove door trim. Refer to
.
3.
Remove rear door sash cover inner. Refer to
EI-36, "REAR DOOR SASH COVER INNER"
4.
Disengage pawls by inserting a screwdriver to front and rear of pawl integrated with cap.
5.
Remove door outside molding while pulling up molding using plastic spatula after disengaging.
CAUTION:
●
Be careful not to apply excessive force when removing because it is easy to deform parts.
●
After removal, visually inspect molding, and if it is deformed, replace it with new molding.
Installation
Install in the reverse order of removal.
NOTE:
Molding rear end is flush with door sash rear end when installing.
Нет комментариевНе стесняйтесь поделиться с нами вашим ценным мнением.
Текст