Lincoln Corsair (2022 year). Manual in english — page 33
Switching the Ventilated Seats On and
Off
E268558
Touch the button to cycle through
the various ventilated seat settings.
Accessing Rear Climate Controls
E270447
Touch the button to access
additional controls for the rear
climate system.
Rear Climate Control Lock Indicator
E265289
Touch the button.
When on, you can only operate the
rear passenger settings through
the front controls.
Switching Rear Auto Mode On and Off
Touch the button to switch on rear
automatic operation, then set the
temperature.
Switching the Rear Climate Controlled
Seats On and Off
E265282
Touch the button to cycle through
the various climate controlled seat
settings.
Switching the Rear Heated Seats On
and Off
Touch the button to cycle through
the various heat settings.
Switching the Rear Ventilated Seats
On and Off
E268558
Touch the button to cycle through
the various ventilated seat settings.
PHONE
WARNING: Driving while distracted
can result in loss of vehicle control, crash
and injury. We strongly recommend that
you use extreme caution when using any
device that may take your focus off the
road. Your primary responsibility is the safe
operation of your vehicle. We recommend
against the use of any hand-held device
while driving and encourage the use of
voice-operated systems when possible.
Make sure you are aware of all applicable
local laws that may affect the use of
electronic devices while driving.
Check the compatibility of your device on
the regional website.
Pairing Your Cell Phone for the First
Time
Go to the settings menu on your device and
switch Bluetooth® on.
Select the phone option on the
feature bar.
536
SYNC™ 3
-------------------------------------------------------------------------------------------------------------------------------------------------------------
1. Select Add Phone.
Note: A prompt alerts you to search for your
vehicle on your cell phone.
2. Select your vehicle on your cell phone.
Note: A number appears on your cell phone
and on the touchscreen.
3. Confirm that the number on your cell
phone matches the number on the
touchscreen.
Note: The touchscreen indicates that you
have successfully paired your cell phone.
4. Download the phonebook from your cell
phone when you are prompted.
Note: If you pair more than one cell phone,
use the phone settings to specify the primary
phone. You can change this setting at any
time.
Using Your Cell Phone
(If Equipped)
Recent Call List
Display and select an entry from a list of
previous calls.
Contacts
Display a smart search form to look up your
contacts. Use the List button to alphabetically
sort your contacts.
Change Phone
Display the list of paired or connected
devices that you can select.
Phone Settings
Change ring tones, alerts or pair another
phone.
Do Not Disturb
Reject incoming calls and switch ring tones
and alerts off.
Phone Keypad
Directly dial a number.
Mute
Mute the microphone when in a call.
Phone Voice Assistant
Say a command to use the Google or Siri
voice assistant available on your connected
phone to access supported features.
Text Messaging
Setting Text Message Notification
iOS
1. Go to the settings menu on your cell
phone.
2. Select Bluetooth®.
3. Select the information icon to the right of
your vehicle.
4. Switch text message notification on.
Android
1. Go to the settings menu on your cell
phone.
2. Select Bluetooth®.
3. Select the profiles option.
4. Select the phone profile.
5. Switch text message notification on.
537
SYNC™ 3
-------------------------------------------------------------------------------------------------------------------------------------------------------------

Using Text Messaging
Description
Menu Item
Hear the text message.
Hear It
View the text message.
View
Call the sender.
Call
Reply to the text message with a standard text message.
Reply
Apple CarPlay
(If Equipped)
1. Connect your device to a USB port.
2. Follow the instructions on the
touchscreen.
Note: Certain features of the system are not
available when you are using Apple CarPlay.
Switching Apple CarPlay Off
Select the settings option on the
feature bar.
1. Select Apple CarPlay Preferences.
2. Switch Apple CarPlay off.
Android Auto
(If Equipped)
1. Connect your device to a USB port.
2. Follow the instructions on the
touchscreen.
Note: You might need to enable Android
Auto from the settings menu.
Note: Certain features of the system are not
available when you are using Android Auto.
Switching Android Auto Off
Select the settings option on the
feature bar.
1. Select Android Auto.
2. Switch Android Auto off.
NAVIGATION
(IF EQUIPPED)
Note: For more information, refer to our
website.
Select the navigation option on the
feature bar.
538
SYNC™ 3
-------------------------------------------------------------------------------------------------------------------------------------------------------------

E297846
Map view menu.
A
Zoom out.
B
Zoom in.
C
Route guidance menu.
D
Destination entry menu.
E
539
SYNC™ 3
-------------------------------------------------------------------------------------------------------------------------------------------------------------

Setting a Destination
Destination Entry Menu
Description
Item
Enter a destination address.
Search
Display and select from a list of previous destinations.
Previous Destinations
Set your saved home address as your destination
Home
Set your saved place of work as your destination.
Work
Display and select from a list of favorite destinations.
Favorites
540
SYNC™ 3
-------------------------------------------------------------------------------------------------------------------------------------------------------------
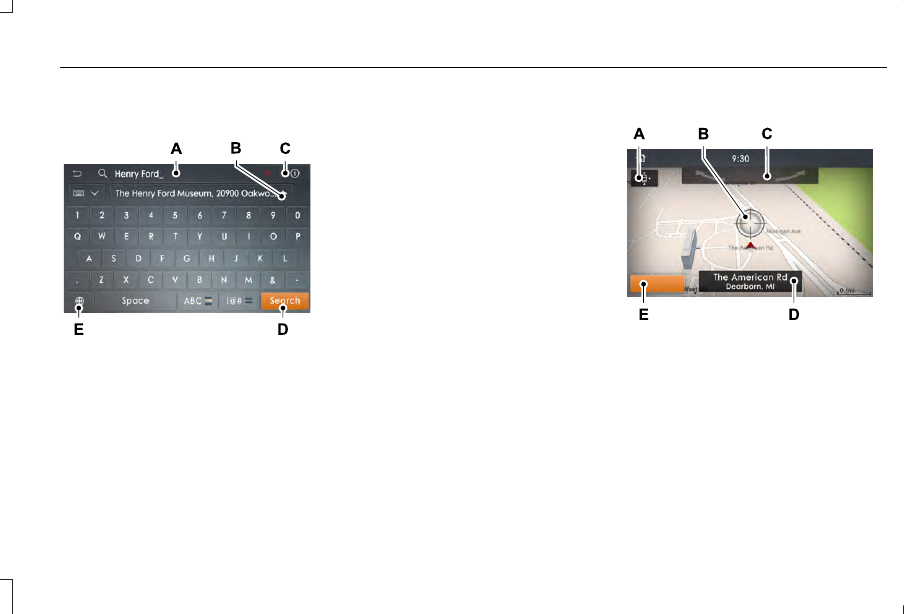
Setting a Destination Using the Text Entry
Screen
E297857
Text entry field.
A
Automatic suggestions based on
the text you enter.
B
Information icon.
C
Search.
D
Keyboard settings.
E
Note: Select one of the suggestions to
copy the detail to the text entry field.
You can search by entering all or part of
the destination, such as the Address, POI
Category or Name, Intersection, City,
Latitude/Longitude, etc. Tips: If you do not
specify a location, the system will use the
current vehicle location. You can specify a
location by address, city, state or zip code.
For additional search support, please visit:
owner.lincoln.com.
Note: Press the button in the top right-hand
corner of the main map to display estimated
time of arrival, remaining travel time or
distance to destination.
Setting a Destination Using the Map Screen
E297858
Re-center the map.
A
Selected location.
B
3D map rotation. Swipe left or right.
C
Destination name.
D
Start route guidance.
E
Select the location on the map.
Select Start to begin route guidance.
541
SYNC™ 3
-------------------------------------------------------------------------------------------------------------------------------------------------------------
Changing the Format of the Map
Display the map in one of the following
formats:
•
A two-dimensional map with the direction
you are traveling toward the top of the
screen.
•
A two-dimensional map with north toward
the top of the screen.
•
A three-dimensional map with the
direction you are traveling toward the
front.
Zoom
Display more or less detail on the map.
Note: You can use pinch gestures to zoom
in and out. Place two fingers on the screen
and move them apart to zoom in. Place two
fingers on the screen and bring them
together to zoom out.
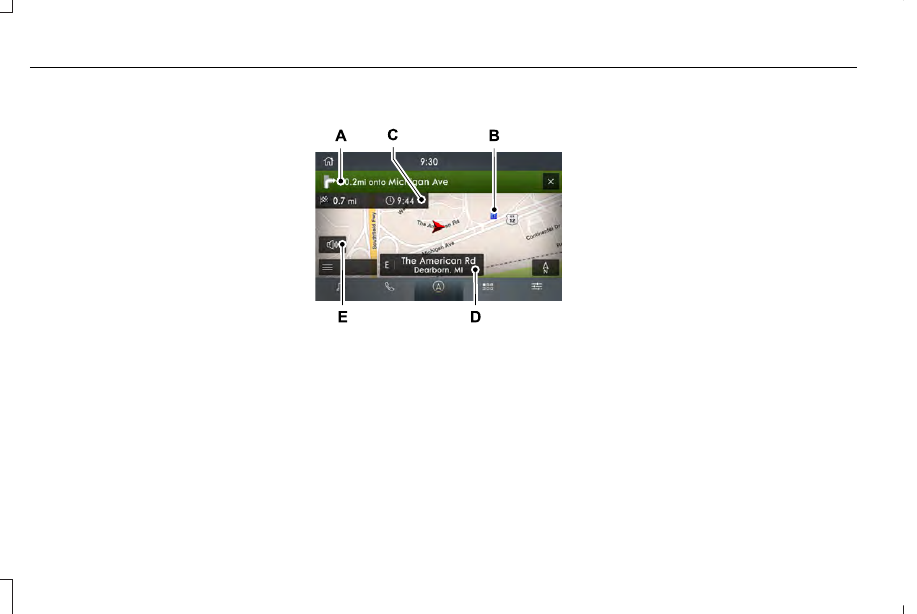
Route Guidance
E297859
Turn indicator. Select to hear the
last voice prompt.
A
Point of interest.
B
Estimated time of arrival, distance
to destination or time to
destination.
C
Current road.
D
Mute guidance prompts.
E
Note: To change guidance prompt volume,
turn the volume control when a guidance
prompt plays.
542
SYNC™ 3
-------------------------------------------------------------------------------------------------------------------------------------------------------------

Route Guidance Menu
Description
Menu Item
Adjust your map preferences for when route guidance is active.
Screen View
View a full screen map when route guidance is active.
Full Map
View highway exit information for your current route.
Highway Exit Info
View the turn list for your current route. Select a road to avoid it.
Turn List
You can find the SiriusXM Traffic and Travel Link information by pressing this button. This information
requires an active subscription to SiriusXM Traffic and Travel Link. When a route is not active, a list
of nearby traffic incidents displays. When a route is active, you can choose to display a list of traffic
nearby or on the route.
Traffic List
Adjust navigation settings. See Settings (page 555).
Navigation Settings
View information about your current location.
Where Am I?
Cancel route guidance.
Cancel Route
View the entire current route on the map.
View Route
View an alternative route compared to your current one.
Detour
Change the order or remove waypoints.
Edit Waypoints
The system determines the order of waypoints for you.
Optimize Order
Go to the next screen and start the new route.
Go
543
SYNC™ 3
-------------------------------------------------------------------------------------------------------------------------------------------------------------
Adjusting the Guidance Prompt Volume
Turn the volume control when a guidance
prompt plays to adjust the volume.
Note: If you have inadvertently adjusted the
volume to zero, press the turn indicator
button to play the last voice prompt and then
adjust the volume to the desired level.
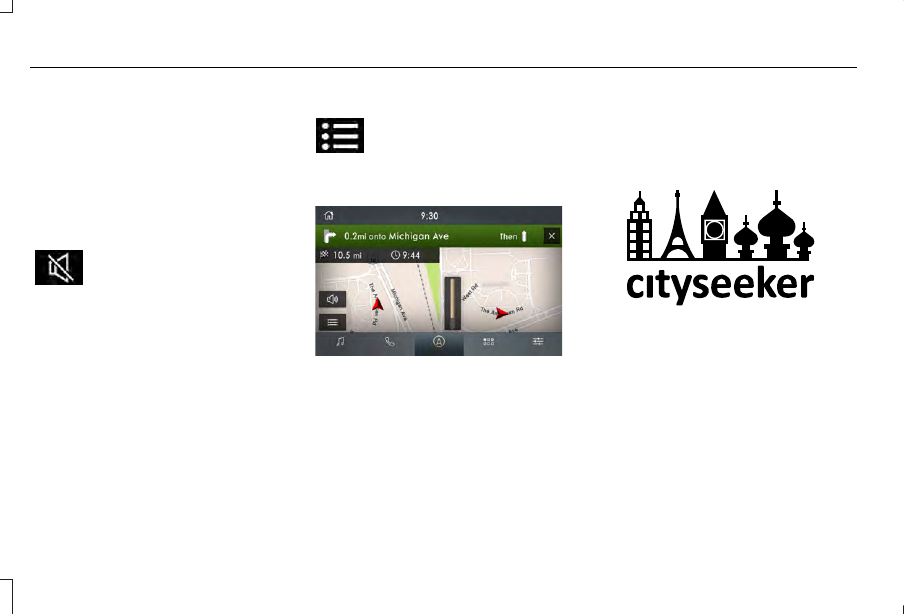
Muting Guidance Prompts
Select the mute option on the
screen to mute guidance prompts.
Note: The system mutes the next and all
future guidance prompts.
Adding Waypoints
You can add a waypoint to a navigation route
as a destination along your route. You can
add up to five waypoints.
1. Select the search option on the map.
2. Set a destination.
3. Select Add Waypoint.
4. Select Go.
Canceling Route Guidance
Select the route guidance menu
option on the active guidance
screen.
Select Cancel Route.
E297860
Note: The route guidance menu option is
always in the bottom right-hand corner of
the main map.
cityseeker
(If Equipped)
Note: cityseeker point of interest (POI)
information is limited to approximately 1,110
cities (1,049 in the United States, 36 in
Canada and 15 in Mexico).
E225487
cityseeker, when available, is a service that
provides more information about certain
points of interest such as restaurants, hotels
and attractions.
When you have selected a point of interest,
the location and information appear, such as
address, phone number and a star rating.
Press More Information to see a photo, a
review, a list of services and facilities, the
average room or meal price and the web
address. This screen displays the point of
interest icons.
544
SYNC™ 3
-------------------------------------------------------------------------------------------------------------------------------------------------------------
For restaurants, cityseeker can provide
information such as star rating, average cost,
review, handicap access, hours of operation,
and website address.
For hotels, cityseeker can provide
information such as star rating, price
category, review, check-in and checkout
times, hotel service icons and website
address. Hotel service icons include:
•
Restaurant
•
Business center
•
Handicap facilities
•
Laundry
•
Refrigerator
•
24 hour room service
•
Fitness center
•
Internet access
•
Pool
•
Wi-Fi
Attractions include nearby landmarks,
amusement parks, historic buildings and
more. cityseeker can provide information
such as star rating, reviews, hour of operation
and admission price.
SiriusXM Traffic and Travel Link
(If
Equipped)
SiriusXM Traffic and Travel Link is available
on vehicles equipped with navigation and
only in select markets. You must activate and
subscribe to receive SiriusXM Traffic and
Travel Link information. It helps you locate
the best gas prices, find movie listings, get
current traffic alerts, view the weather map,
get accurate ski conditions and see current
sports scores.
The system calculates a reasonable efficient
route based on available speed limits, traffic,
and road conditions. You may know a local
short cut that is more efficient at a given time
than the route provided by SYNC 3, but you
should expect a slight difference in minutes
or miles with the SYNC 3 route.
Michelin Travel Guide
(If Equipped)
The Michelin travel guide is a service which
provides additional information about certain
places of interest, for example restaurants,
hotels and tourist sites. Points of interest that
have Michelin travel guide information
display a button to show you more
information. Push the button to see the
additional information. If you have paired
your phone with the system, you can press
the phone button to directly establish a call
with the selected point of interest.
Navigation Map Accuracy and Updates
HERE is the digital map provider for the
navigation application. If you find map data
errors, you may report them directly to HERE
by going to www.here.com. HERE evaluates
all reported map errors and responds with
the result of their investigation by e-mail.
545
SYNC™ 3
-------------------------------------------------------------------------------------------------------------------------------------------------------------

The navigation system map data may contain
inaccurate or incomplete information due to
the passage of time, changing
circumstances, sources used and the nature
of collecting comprehensive geographic
data, any of which may lead to incorrect
results. Inaccurate speed limit information,
turn restrictions and other road attributes
may affect the determined route and
associated guidance
Annual navigation map updates are available
for purchase through your dealership.
Depending on your purchase agreement,
you might be eligible for free Map update.
You can choose to download the Map data
update onto a USB, order a USB, or use Wi-Fi
to deliver automatic updates. To update your
Map data over Wi-Fi, your vehicle must be
connected to a Wi-Fi access point. Map Data
files are large, so it is highly recommended
to perform the update when free Wi-Fi is
available otherwise high data rates may
apply. For USB updates, free map update
eligibility, and other details, contact dealers
at 1-866-462-8837 in the United States and
Canada or 01-800-557-5539 in Mexico or
visit our local website for more information.
ELECTRIC VEHICLE INFORMATION
Power Flow
E304437
The Power Flow information for
your plug-in hybrid vehicle is
available through the Home screen
or under Apps.
Vehicle Operational States
Power will flow to or from the front and rear
wheels depending on operational state and
drive conditions.
•
Idling: The vehicle is running and in park
(P). The engine and, or the high voltage
battery are on.
•
Electric Driving: The vehicle is running
and in drive (D) or neutral (N). The high
voltage battery provides power to the
wheels.
•
Hybrid Driving: The vehicle is running
and in drive (D) or neutral (N). The engine
and the high voltage battery provide
power to the wheels.
•
Engine Driving: The vehicle is running
and in drive (D) or neutral (N). The engine
provides power to the wheels.
•
Regenerative Braking: The vehicle is
running in drive gear (D) and is slowing
down. The regenerative braking system
captures power and sends it back to the
high voltage battery.
•
Charging: The vehicle is plugged in and
the high voltage battery is being charged.
Engine On Due To
The following conditions help to explain why
the engine is on, and what you can do to
allow all electric operation.
•
Drive Power: The engine is on due to
accelerator pedal pressure or speed
control activation. Reduce pressure on
the accelerator pedal or switch off the
speed control to return to full electric
mode.
•
High Speed: The engine is on because
the vehicle speed exceeds the level for
full electric operation. Reduce the speed
to return to electric operation.
546
SYNC™ 3
-------------------------------------------------------------------------------------------------------------------------------------------------------------

•
Heater Setting: The engine is on because
of the heater setting. Reduce or switch
off the heater setting to return to electric
operation.
•
Neutral Gear: The engine is on because
the vehicle is in neutral (N). Shift out of
neutral gear to return to electric
operation.
•
Engine Cold: The engine is on because
it is cold. The vehicle returns to electric
operation once the engine is sufficiently
warm.
•
Battery Charging: The engine is on to
charge the high-voltage battery. The
vehicle returns to electric operation once
the battery is sufficiently charged.
•
Low Gear: The engine is on because the
vehicle is in low gear. Shift out of low
gear to return to electric operation.
•
Normal Operation: The engine is on to
optimize vehicle operation. The vehicle
returns to electric operation when
possible.
•
Low Use: The engine is on to maintain
engine oil quality. The vehicle returns to
electric operation when low engine use
mode is complete. See Plug-In Hybrid
Vehicle Operation (page 215).
•
Engine Braking Active: The engine is on
to provide increased powertrain braking.
This can occur when you turn on the
grade assist feature, when speed control
is on or when driving with your foot off
the accelerator pedal. Turning off grade
assist or speed control may allow the
vehicle to return to electric operation.
•
Battery Temperature: The engine is on
due to high or low high-voltage battery
temperature. This is a normal operating
condition. The vehicle returns to electric
operation when possible.
•
Drive Mode: The engine is on due to the
drive mode selection. Select an
appropriate drive mode for electric only
operation.
Charge Settings
E304452
The Charge Settings information
for your plug-in hybrid vehicle is
available through the Home screen
or under Vehicle Settings. To Improve your
charging experience, your vehicle has the
following convenience features.
Charge Times
Once you set up Charge Times for a specific
charging location, your vehicle prioritizes
charging based on your preferred time
settings. You can set two preferred charging
time windows for weekdays and two for
weekends. This feature allows you to take
advantage of electric utility rate plans that
offer lower pricing during certain times of
day. Contact your utility company to see what
plans are available.
Note: You can also set up and use these
features using the Lincoln Way app.
547
SYNC™ 3
-------------------------------------------------------------------------------------------------------------------------------------------------------------

Departure Times
Setting Departure Times allows you to
control charging schedules and have the
vehicle cabin heated or cooled while
plugged in, so your vehicle is ready to drive
when you are. By setting a departure time
your vehicle can use your charge time
settings to minimize your electricity costs but
still prioritize finishing charging before your
scheduled departure. A calendar view allows
you to program two departure times per day
for each day of the week.
Note: You can also set up and use these
features using the Lincoln Way app.
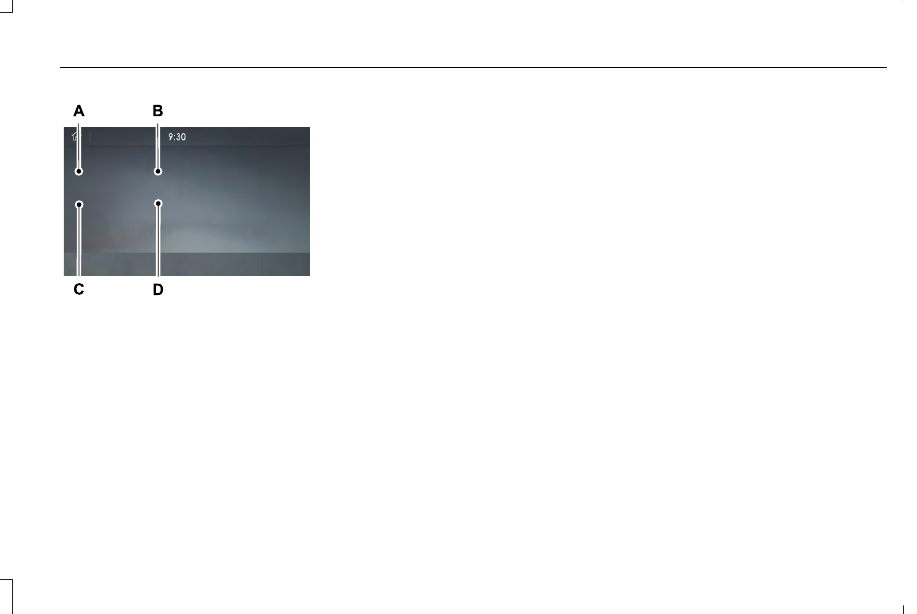
Charge Settings Screen
E304455
Charging status.
A
Charging time information.
B
High voltage battery state of
charge.
C
Plug and charging status.
D
Charging Status
Displays the present state of the charging
system. See Charging the High Voltage
Battery (page 235).
548
SYNC™ 3
-------------------------------------------------------------------------------------------------------------------------------------------------------------

Description and Action
Charging Status
Your vehicle is unplugged and starts charging when plugged in.
Will charge when plugged in.
Your vehicle is unplugged at a saved location with Charge Times is
enabled. Charging is scheduled to start at the time displayed based
on your charge time settings. You must plug in prior to the start time
shown for the vehicle to begin charging at that time.
Will wait for preferred charge time.
Your vehicle is plugged in at a saved location with Charge Times
enabled. Charging starts at the time displayed, which is based on your
Charge Times settings.
Waiting for preferred charge time.
Your vehicle is plugged in and using power to charge the high voltage
battery or run electrical systems.
Charging.
Your vehicle is finished charging.
Charged.
Your vehicle is plugged in and there is a fault within the vehicle
charging system. Unplug and plug back in. If the fault is still present,
contact your dealer.
Vehicle charge fault.
Your vehicle is plugged in and a fault is detected with the charge
station or charging cord. Check the charging cord and the charge
station or electrical supply.
Charge station fault.
549
SYNC™ 3
-------------------------------------------------------------------------------------------------------------------------------------------------------------

Description and Action
Charging Status
A charging coupler is plugged into the vehicle but there is no
connection with a charging power source.
Charge station not detected.
Your vehicle is plugged in but cannot communicate with the charging
station. Contact the station provider.
Incompatible charge station.
Your vehicle is plugged in and charging is paused at the charge
station.
Charge station paused.
Charging Time Information
Displays estimates of how long your vehicle
takes to fully charge when plugged into a
high or low power charger.
•
High power estimate: The minimum time
to a 100% charge using a high power
charger.
•
Low power estimate: The longest time to
a 100% charge using a low power
charger.
When charging, the start and estimated end
time displays. When your vehicle is not
plugged in and at a location with Charge
Times enabled, the start and end times
display based on known charging power.
Note: Charging durations and end times are
only estimates. Certain conditions may result
in longer charging times. See Charging the
High Voltage Battery (page 235).
High Voltage Battery State of Charge
Displays the remaining charge percentage
with 100% representing the total amount of
energy you can get from an external charge.
Plug and Charging Status
Displays the plug and charging status icons.
E304458
Not plugged in.
E304459
Plugged in and not currently
charging.
E304460
Plugged in and charging.
E304461
Plugged in and waiting to charge
based on charge time settings.
Charge Preferences
Touch the button to access Charge Time and
Departure Time settings. Additional
information and settings are displayed on
the charge settings screen once Charge
Time or Departure Times are set up.
550
SYNC™ 3
-------------------------------------------------------------------------------------------------------------------------------------------------------------
E304454
Charge Times on and off switch.
A
Charge Times location name and
charging time information.
B
Departure Times on and off switch.
C
Next departure time and cabin
temperature.
D
Charge Times On and Off Switch
This switch is visible when your vehicle is at
a saved Charge Times location. Use the
switch to turn your charge time settings on
and off for this location.
Charge Times Location Name and Charging
Time Information
The location name displays when your
vehicle is at a saved Charge Times location.
The charging start time is displayed along
with the charging end time and associated
charge level.
Departure Times On and Off Switch
This switch is visible when you have at least
one departure time set. Use this switch to
turn all departure times on and off. Switching
departure times off does not delete your
settings.
Next Departure Times and Cabin
Temperature
Displays the next departure time and
associated cabin temperature setting.
Charge Time Settings
Follow these steps to set a preferred charge
time for a charging location.
1. Select Charge Preferences on the
Charge Settings screen.
2. Select Charge Time Setup on the Edit
Charge Preferences screen.
3. Select Add New Location on the Charge
Times screen. You can also edit settings
for previously saved locations from this
screen.
4. Select an address from the Recent
Charge Locations screen.
5. On the Confirm Location for Charge
Times screen, you can edit the location
name and set a max charge level as
desired. Once you have your desired
location name and max charge level,
select Continue to Schedule.
Note: Charging will stop when your vehicle
reaches the max charge level.
6. Select WEEKDAY or WEEKEND on the
Preferred Charge Times screen.
551
SYNC™ 3
-------------------------------------------------------------------------------------------------------------------------------------------------------------
Нет комментариевНе стесняйтесь поделиться с нами вашим ценным мнением.
Текст