Mitsubishi Eclipse / Eclipse Spyder (2000-2002). Service and repair manual — part 649
CONVERTIBLE TOP
TSB Revision
BODY
42-143
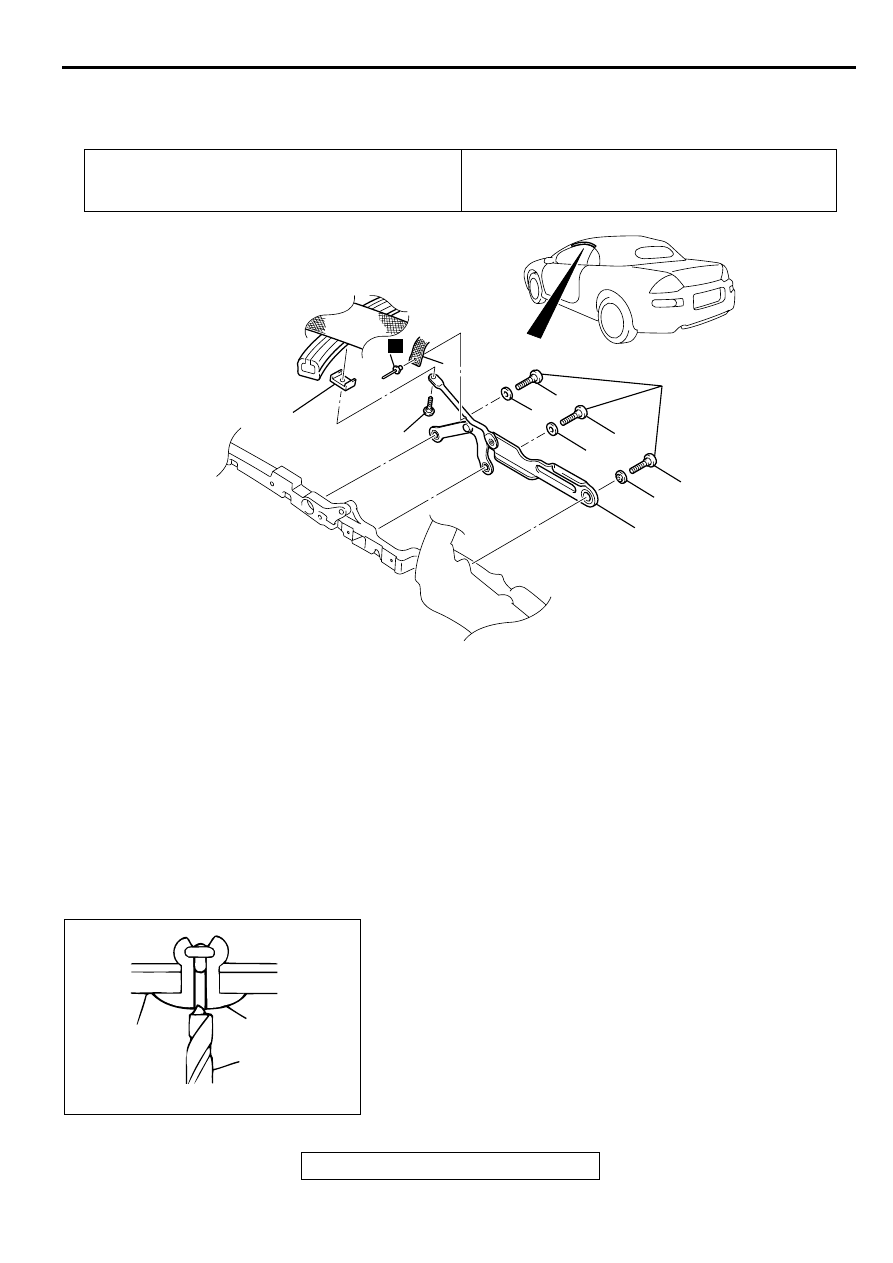
TOPSTACK CONTROL LINK ASSEMBLY
REMOVAL AND INSTALLATION
M1426207800023
REMOVAL SERVICE POINT
<<A>> RIVET REMOVAL
Use a drill [
φ
4.0
−
4.5 mm (
φ
0.16
−
0.18 inch)] to break the rivet
by drilling a hole, and remove the rivet.
Pre-removal Operation
•
Completely open the convertible top.
•
Completely down the quarter window glass.
Post-installation Operation
•
Convertible top fit Adjustment (Refer to
AC004133 AB
6
5
1
2
29 ± 3 N·m
22 ± 2 ft-lb
8
7
9
4
3
10
11
N
REMOVAL STEPS
•
TOPSTACK CENTER RAIL WEATH-
ERSTRIP HOLDER (REFER TO
1. TOP COVER SIDE STRAP
<<A>> >>A<<
2. RIVET
3. SCREW
4. NO.2 BOW BUSHING
5. BOLT
6. WASHER
7. BOLT
8. WASHER
9. BOLT
10. WASHER
11. TOPSTACK CONTROL LINK
REMOVAL STEPS (Continued)
AC004134
TOPSTACK
CONTROL LINK
ASSEMBLY
AB
RIVET
DRILL
CONVERTIBLE TOP
TSB Revision
BODY
42-144
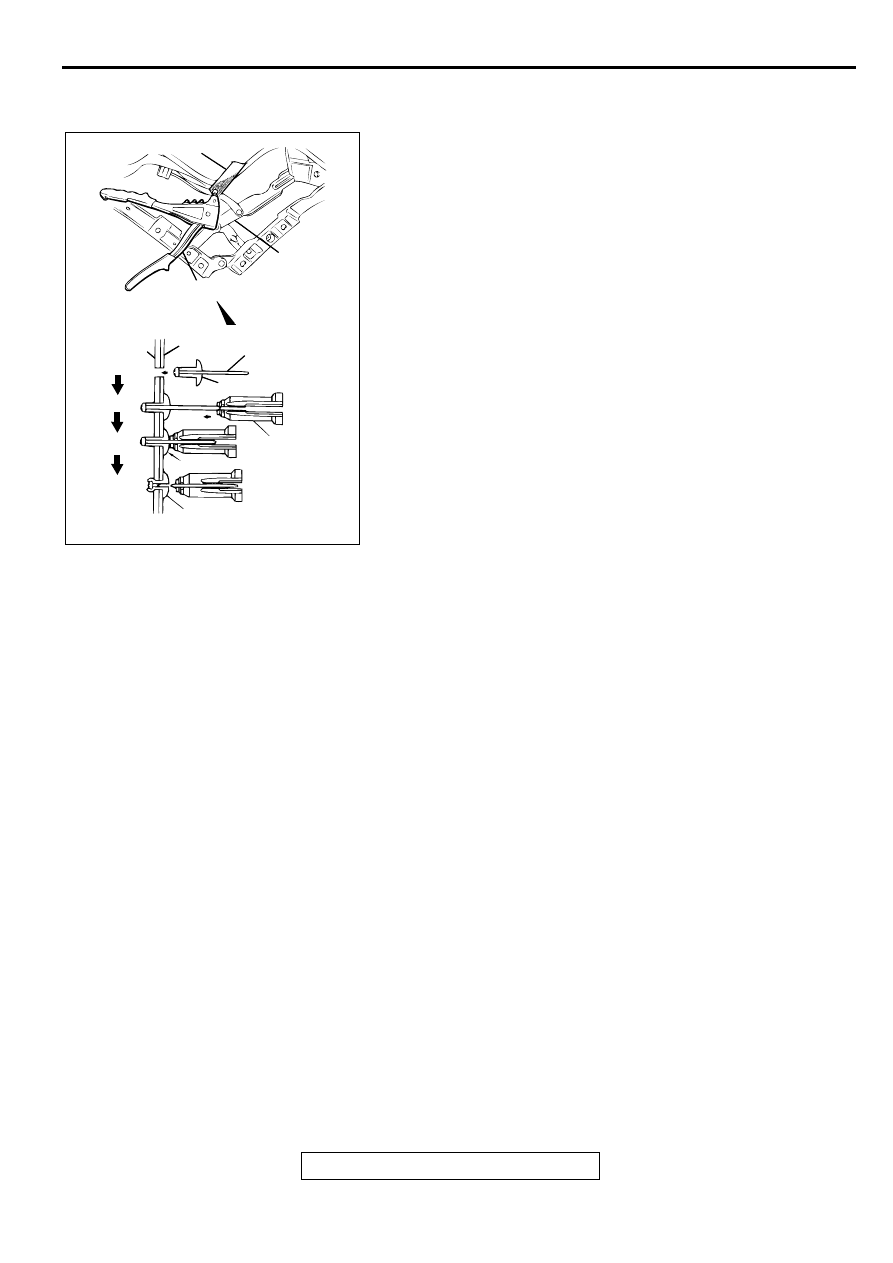
INSTALLATION SERVICE POINT
>>A<< RIVET INSTALLATION
1. Insert the rivet [
φ
4.8 mm (
φ
0.19 inch)] into the top cover side
strap and control link.
2. Insert "A" of the rivet into the rivet tool.
3. Pressing the flange surface of the rivet, move the handle of
the rivet tool.
4. The thinnest point of "A" is cut and the rivet is held in the
position.
AC004135
TOPCOVER SIDE STRAP
AB
CONTROL
LINK
RIVET TOOL
CONTROL
LINK
TOP COVER SIDE STRAP
A
RIVET
RIVET TOOL
FLANGE SURFACE
RIVET
CONVERTIBLE TOP
TSB Revision
BODY
42-145
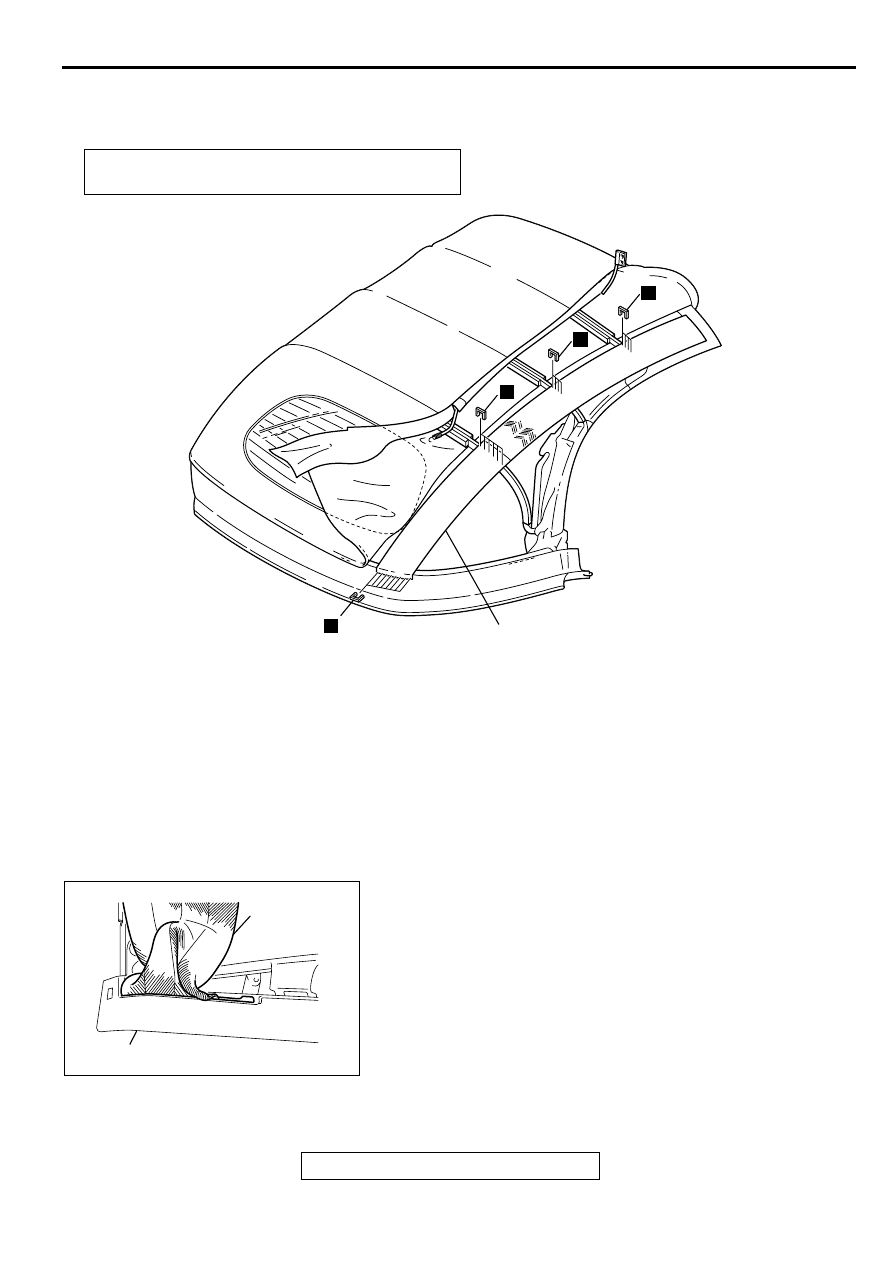
TOPSTACK SIDE STAY PADS
REMOVAL AND INSTALLATION
M1426205400029
REMOVAL SERVAICE POINT
<<A>> TOPSTACK SIDE STAY PAD ASSEMBLY REMOVAL
1. Move the No.1 bow side topstack side stay pad to the outer
side of the vehicle.
Post-installation Operation
•
Convertible Top Fit Adjustment (Refer to
AC004136
N
N
N
N
1
AB
REMOVAL STEPS
•
DEFOGGER HARNESS
CONNECTOR (REFER TO
•
TOP COVER ASSEMBLY (REFER
TO
<<A>> >>A<<
1. TOPSTACK SIDE STAY PAD
ASSEMBLY
REMOVAL STEPS (Continued)
AC004137AB
TOPSTACK
SIDE STAY
PAD
NO.1BOW

CONVERTIBLE TOP
TSB Revision
BODY
42-146
2. Guide the (folded) end of the topstack side stay pad out of
the wider slit of the No.1 bow.
3. Pull out the folded end of the topstack side stay, and
disconnect the topstack side stay pad from the No.1 bow.
4. Disconnect the topstack side stay pad from the No.2. No.3
No.4, and No.5 bows.
INSTALLATION SERVICE POINT
>>A<< TOPSTACK SIDE STAY PAD ASSEMBLY
INSTALLATION
1. Face the folded end of the topstack side stay pad
downward, and then position it to the No.1 bow side.
2. Connect the topstack side stay pad to the No.5, No.4, No.3,
No.2 bows.
3. Insert the folded end of the topstack side stay pad through
the wider part of the No.1 bow slit as shown.
4. Working from inside the vehicle, pull out the folded end of
the topstack side stay pad, and then install the topstack side
stay pad to the No.1 bow.
AC004138 AB
TOPSTACK
SIDE STAY
PAD
NO.1BOW
AC004139 AB
TOPSTACK
SIDE STAY
PAD
NO.1BOW
AC004140 AB
TOPSTACK
SIDE STAY
PAD
NO.1BOW SLIT
AC004138 AB
TOPSTACK
SIDE STAY
PAD
NO.1BOW
Нет комментариевНе стесняйтесь поделиться с нами вашим ценным мнением.
Текст