Mitsubishi Eclipse / Eclipse Spyder (2000-2002). Service and repair manual — part 522
TRANSAXLE
TSB Revision
AUTOMATIC TRANSAXLE OVERHAUL
23B-19
DISASSEMBLY
CAUTION
•
Because the automatic transaxle is manufactured from
high-precision parts, care must be taken not to scratch
or damage these parts during disassembly and
assembly.
•
The working area should be covered with a rubber mat
to keep it clean at all times.
•
Do not wear any cloth gloves and do not use any shop
towels during disassembly. Use only nylon cloth, paper
towels or any other lint-free material.
•
Parts which have been disassembled should all be
cleaned. Metal parts can be cleaned with normal
detergent, but they should be dried completely using
compressed air.
•
Clutch discs, plastic thrust plates and rubber parts
should be cleaned with automatic transmission fluid
(ATF).
•
If the transaxle body has been damaged, disassemble
and clean the cooler system.
1. Remove the torque converter.
2. Remove each bracket.
3. Remove the dipstick.
4. Remove the eye bolt gauge, gaskets and the oil cooler feed
tube.
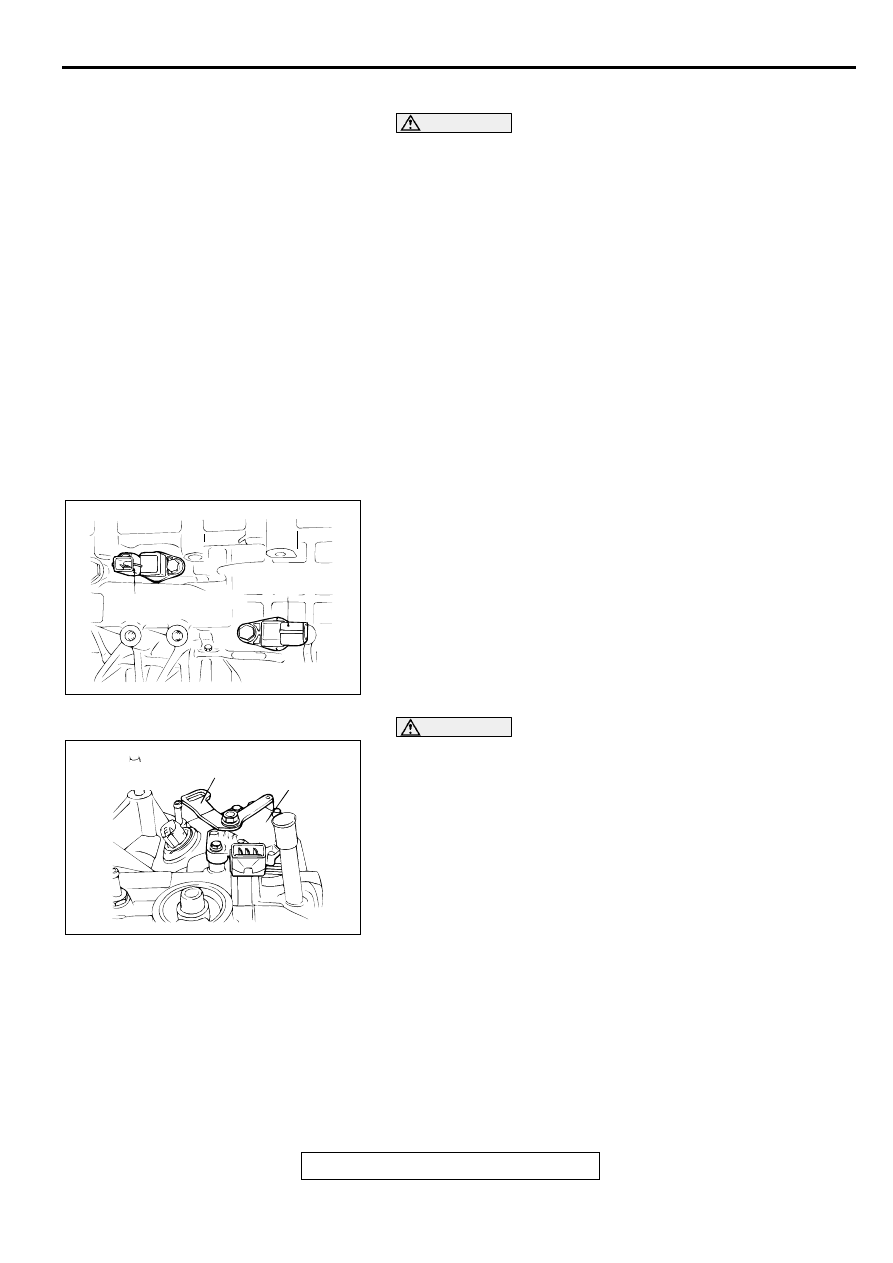
5. Remove the input shaft speed sensor and output shaft
speed sensor.
CAUTION
The manual control lever tightening nut must be removed
before removing the valve body. If the valve body is
removed before the nut, the park/neutral position switch
will be damaged.
6. Loosen the manual control lever tightening nut, and then
remove the manual control lever, and the park/neutral
position switch.
AKX01087AB
OUTPUT SHAFT
SPEED SENSOR
INPUT SHAFT SPEED
SENSOR
AKX01100AB
PARK/NEUTRAL
POSITION
SWITCH
MANUAL CONTROL
LEVER
TRANSAXLE
TSB Revision
AUTOMATIC TRANSAXLE OVERHAUL
23B-20
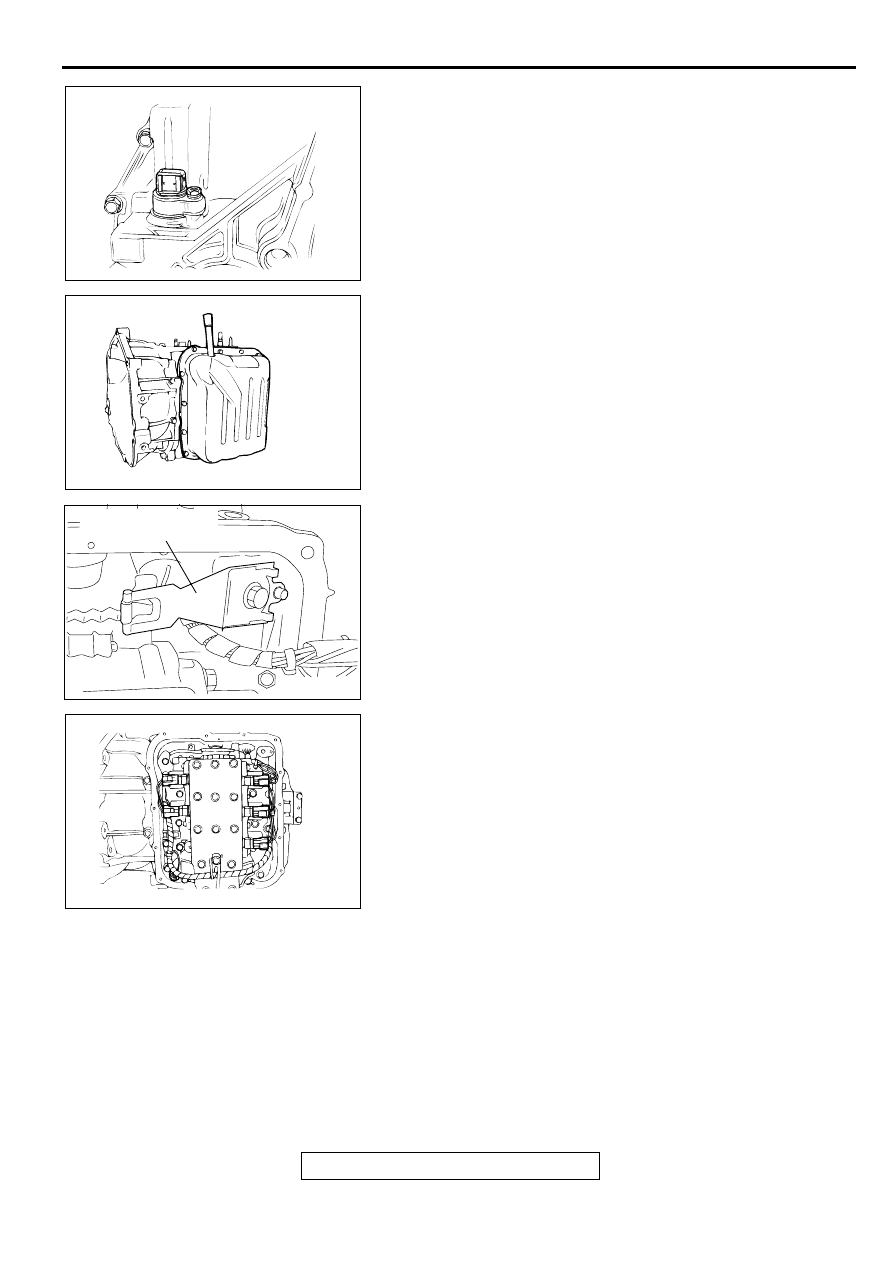
7. Remove the speedometer gear.
8. Remove the valve body cover.
9. Remove the manual control shaft detente.
10.Disconnect the harness connectors from the solenoid
valves and the fluid temperature sensor of the valve body.
AKX01101
AKX01003
AKX01103AB
MANUAL CONTROL
SHAFT DETENT
AKX01004
TRANSAXLE
TSB Revision
AUTOMATIC TRANSAXLE OVERHAUL
23B-21
CAUTION
Make sure that the manual control lever and the park/
neutral position switch are removed. See step 8.
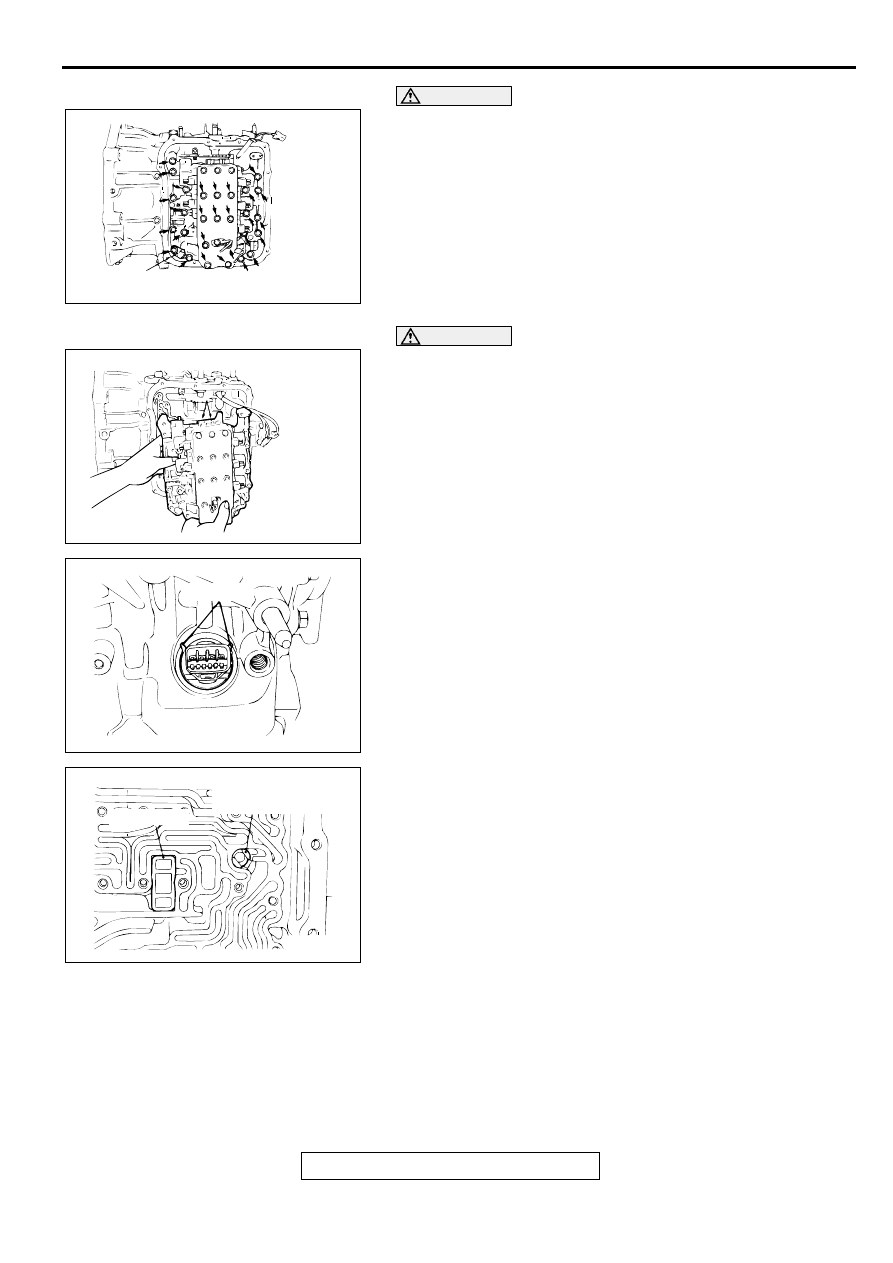
11.Remove the valve body mounting bolts (28 pieces).
12.Remove the fluid temperature sensor.
CAUTION
Do not lose the two steel balls.
13.Remove the valve body, gasket and the two steel balls.
14.Remove the snap ring from the connector and then push the
connector into the transaxle case and remove the solenoid
valve harness.
15.Remove the strainer and the second brake retainer oil seal.
AKX00960
FLUID TEMPERATURE SENSOR
AB
AKX01005
AKX00961AB
SNAP RING
AKX01007AB
SECOND BRAKE
RETAINER OIL SEAL
STRAINER
TRANSAXLE
TSB Revision
AUTOMATIC TRANSAXLE OVERHAUL
23B-22
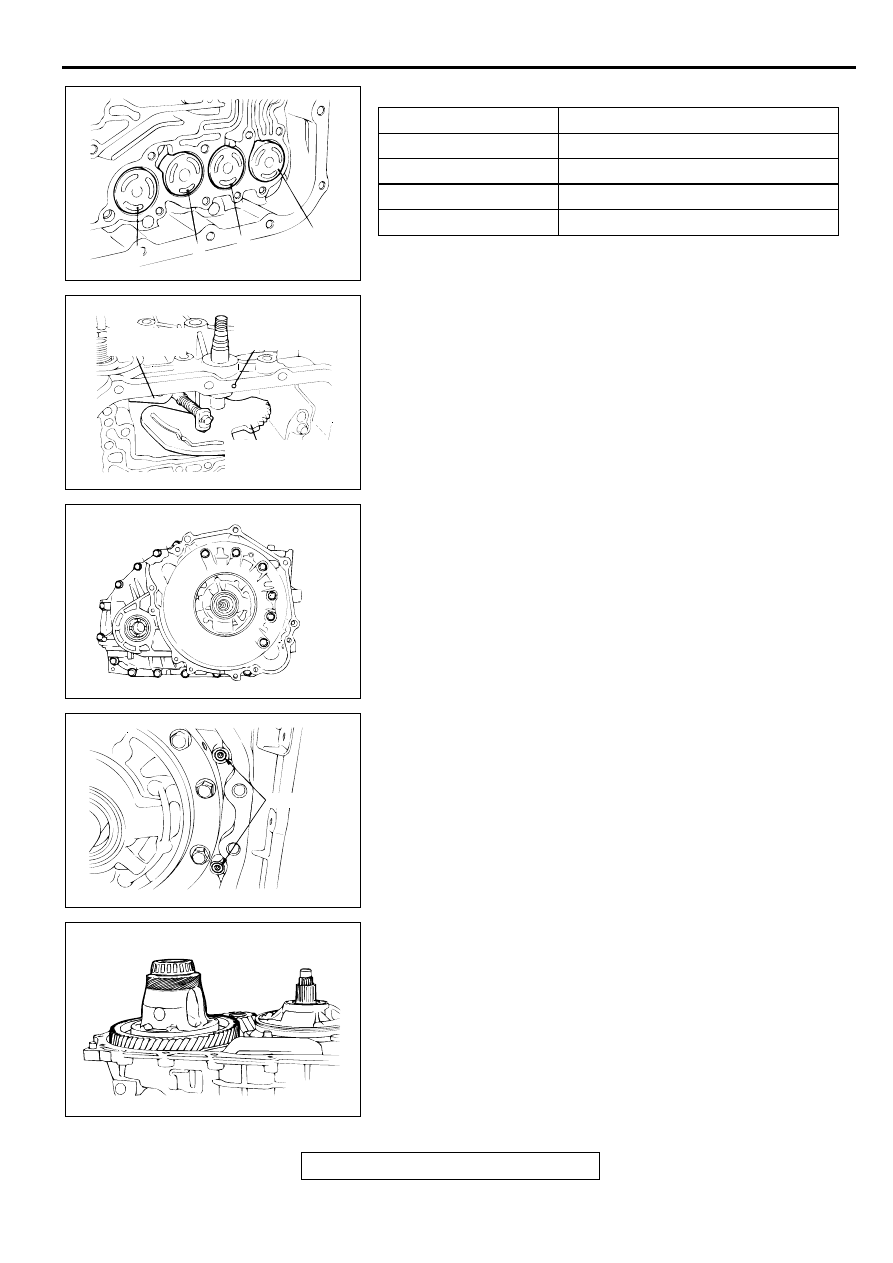
16.Remove each accumulator piston and spring.
17.Remove the manual control lever shaft roller.
18.Remove the manual control lever shaft and the parking pawl
rod.
19.Remove the torque converter housing mounting bolts (18
pieces), and then remove the torque converter housing.
20.Remove the differential bearing outer race and spacer from
the torque converter housing.
21.Remove the O-rings (two pieces).
22.Remove the differential.
23.Remove the differential bearing outer race from the
transaxle case.
NUMBER
NAME
1
For low-reverse brake
2
For underdrive clutch
3
For second brake
4
For overdrive clutch
AKX01008
4
3
2
AB
1
AKX00962AB
MANUAL
CONTROL LEVER
SHAFT ROLLER
PARKING
PAWL ROD
MANUAL CONTROL
LEVER SHAFT
AKX01104
AKX01024AB
O-RINGS
AKX01025
Нет комментариевНе стесняйтесь поделиться с нами вашим ценным мнением.
Текст