Acura RL (1996-2004 year). Manual — part 354
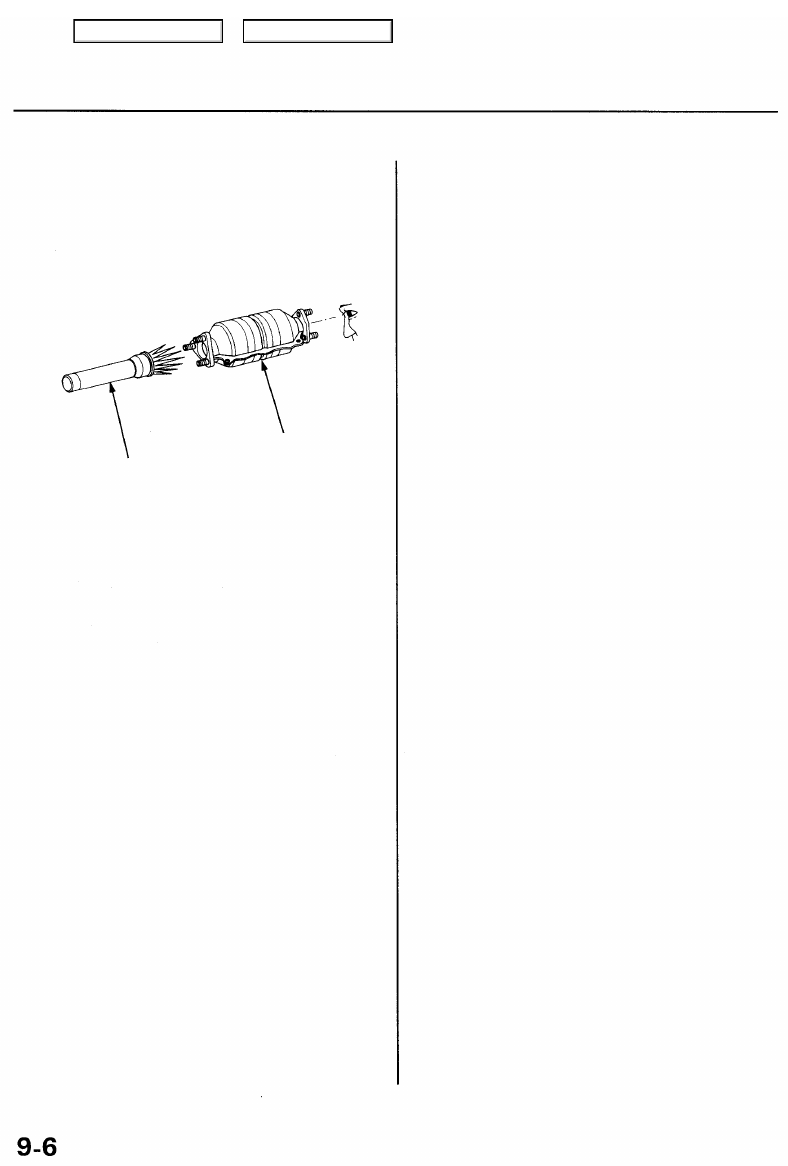
TWC
Inspection
Using a flashlight, make a visual check for plugging,
melting or cracking of the catalyst.
TWC
FLASHLIGHT
Main Menu
Table of Contents
HO2S
Replacement
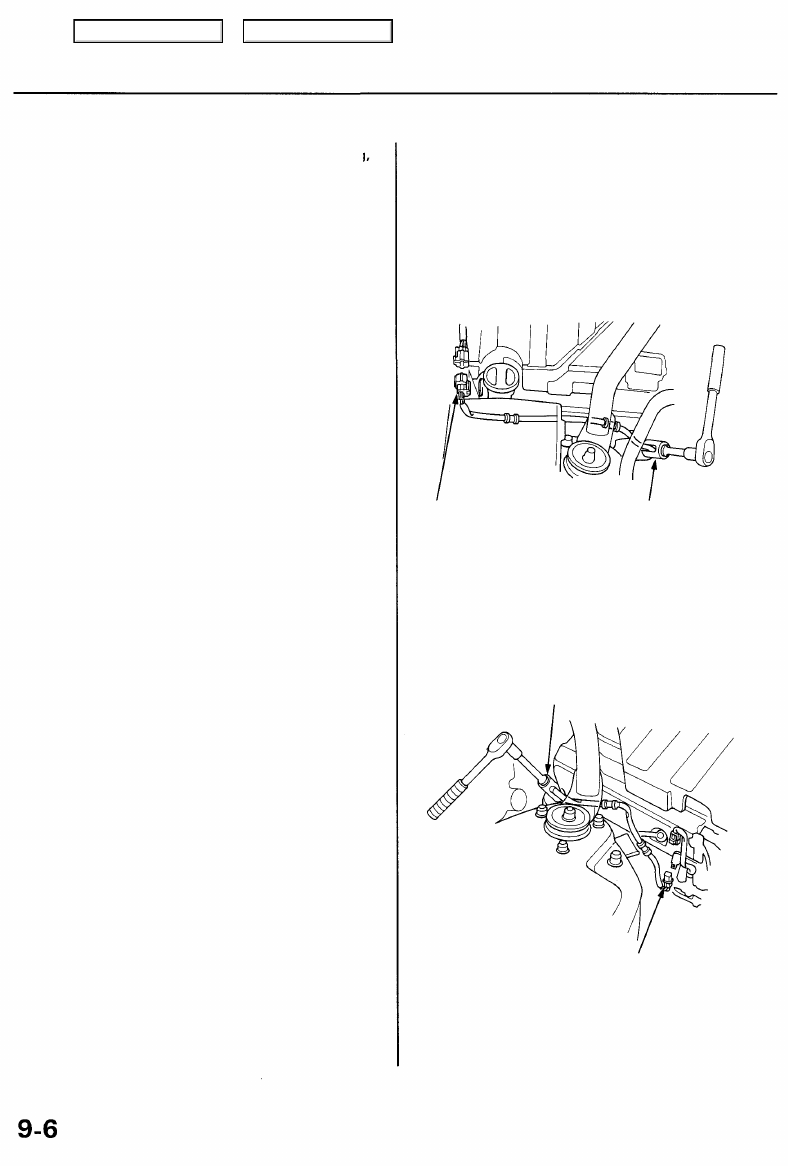
Primary HO2S:
1. Disconnect the left and/or right primary HO2S con-
nector, then remove the left and/or right primary
H02S.
LEFT:
LEFT PRIMARY
HO2S CONNECTOR
O
2
SENSOR SOCKET
WRENCH
44 N-m (4.5 kgf-m,
33 Ibf-ft)
RIGHT:
O
2
SENSOR SOCKET
WRENCH
44 N-m (4.5 kgf-m, 33 Ibf-ft)
RIGHT PRIMARY
H02S CONNECTOR
2. Install the left and/or right primary HO2S in reverse
order of removal.
T
Main Menu
Table of Contents
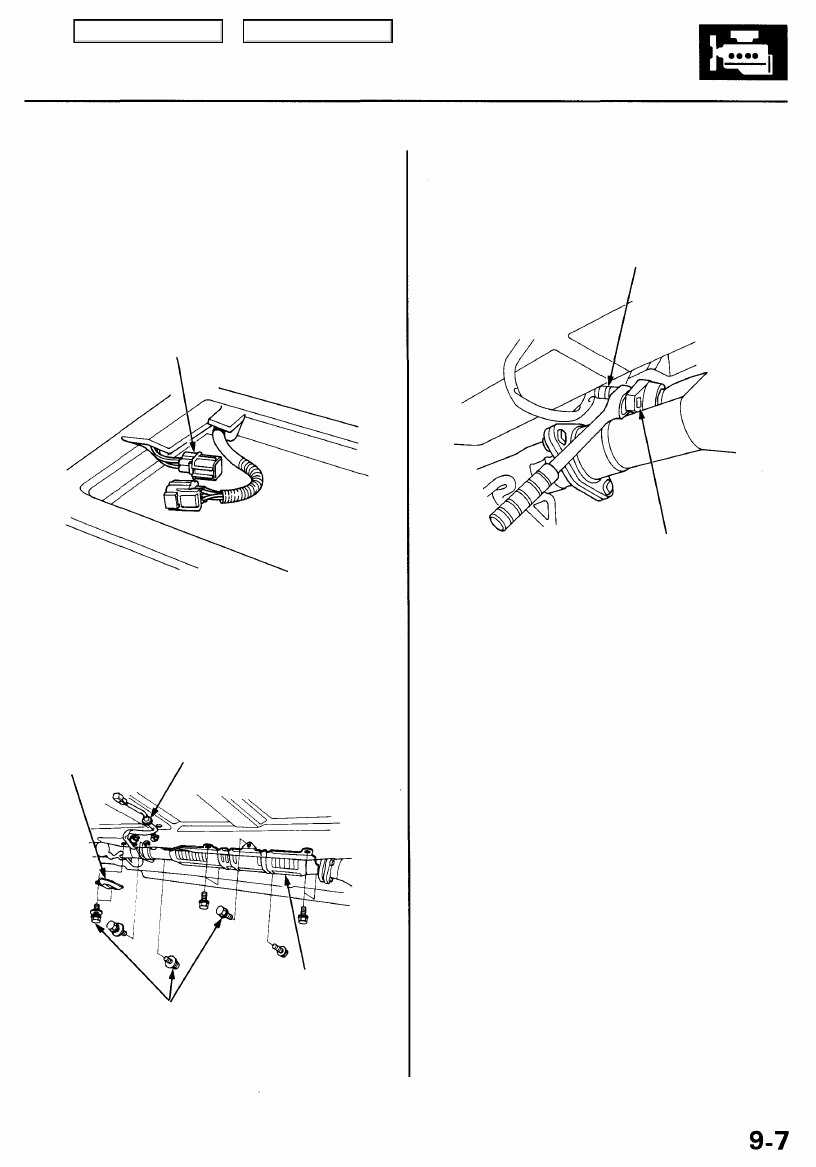
Secondary HO2S:
1. Move the front passenger's seat forward.
Pull the carpet back to expose the secondary HO2S
connector.
2. Disconnect the secondary HO2S connector.
SECONDARY
HO2S CONNECTOR
3. Remove the wire harness cover, then remove the
grommet.
WIRE HARNESS GROMMET
COVER
HEAT
SHIELD
6 x 1.0 mm
9.8 N-m (1.0 kgf-m, 7.2 Ibf-ft)
4. Remove the heat shields.
5. Remove the secondary HO2S.
SECONDARY HO2S
44 N-m (4.5 kgf-m, 33 Ibf-ft)
O
2
SENSOR WRENCH
(Commercially available)
6. Install the secondary HO2S in reverse order of
removal.
Main Menu
Table of Contents
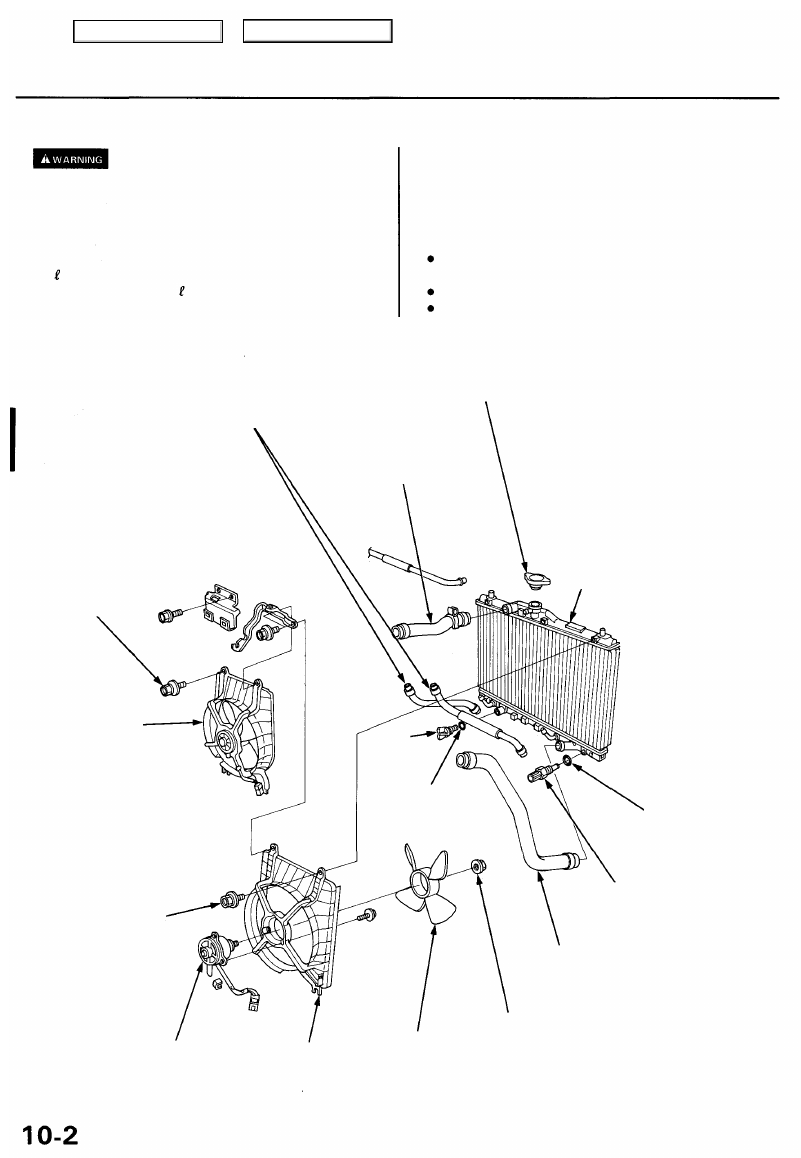
Radiator
Illustrated Index
System is under high pressure when the
engine is hot. To avoid danger of releasing scalding
coolant, remove the cap only when the engine is cool.
Total Cooling System Capacity (Including heater and
reservoir)
8.6 (9.1 US qt, 7.6 Imp qt)
Reservoir capacity: 0.65 (0.69 US qt, 0.57 Imp qt)
CAUTION: When pouring engine coolant, be sure to
shut the relay box lid and not to spill coolant on the elec-
trical parts or the painted portion. If any coolant spills,
rinse it off immediately.
NOTE:
Check all cooling system hoses for damage, leaks or
deterioration and replace if necessary.
Check all hose clamps and retighten if necessary.
Use new O-rings when reassembling.
AUTOMATIC TRANSMISSION
FLUID (ATF) COOLER HOSES
Refer to
when
installing.
RADIATOR CAP
Pressure testing, page
6 x 1.0 mm
9 N-m (0.9 kgf-m,
7 Ibf-ft)
RADIATOR
Engine coolant
Refilling and bleeding, page
Inspect soldered joints and
seams for leaks.
Blow out dirt from between
core fins with compressed air.
If insects, etc., are clogging
radiator, wash them off with
low-pressure water.
CONDENSER
FAN SHROUD
6 x 1.0 mm
7 N-m (0.7 kgf-m,
5 Ibf-ft)
O-RING
Replace.
RADIATOR FAN
CONTROL SENSOR
27 N-m (2.8 kgf-m,
20 Ibf-ft)
FAN MOTOR
RADIATOR FAN
SHROUD
RADIATOR
FAN
LOWER RADIATOR
HOSE
SELF-LOCKING NUT
5.4 N-m (0.55 kgf-m, 3.3 Ibf-ft)
O-RING
Replace.
DRAIN
PLUG
UPPER RADIATOR
HOSE
Main Menu
Table of Contents
Нет комментариевНе стесняйтесь поделиться с нами вашим ценным мнением.
Текст