Acura RL (1996-2004 year). Manual — part 299
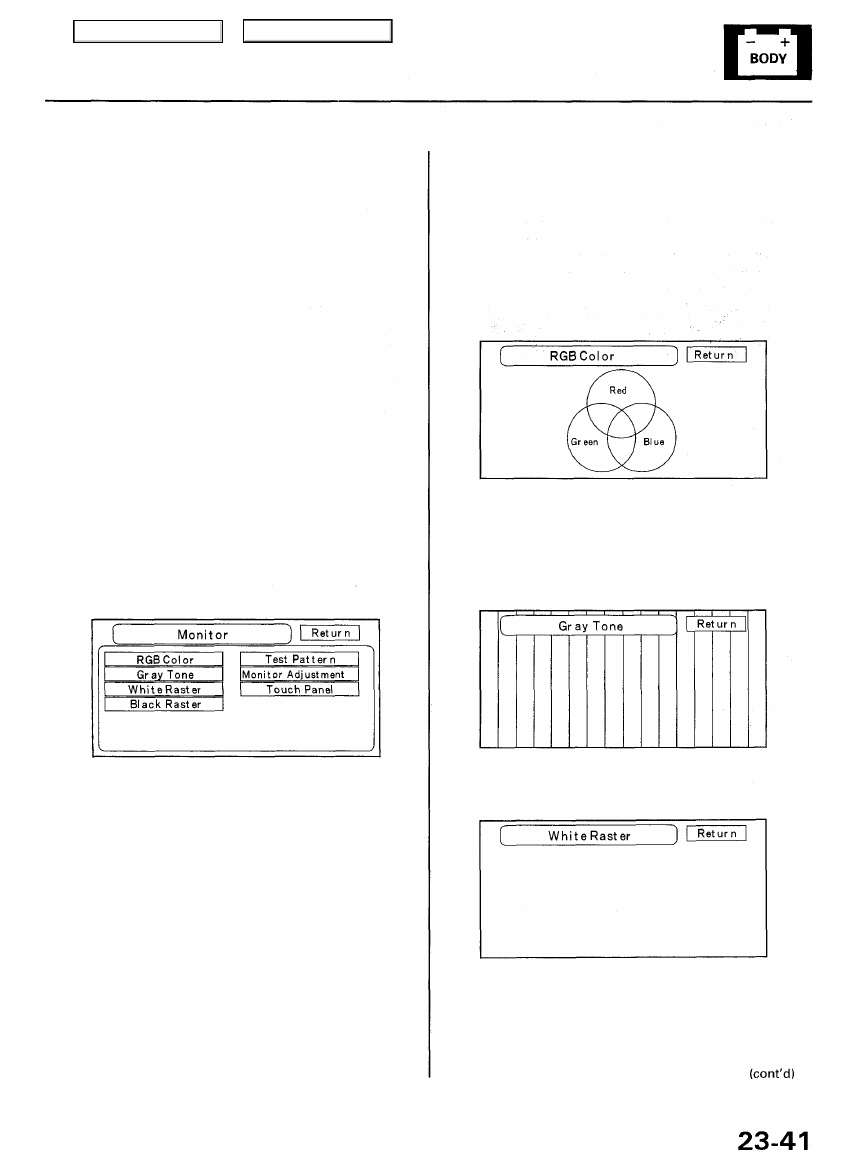
Monitor Check
Overview of display unit
• The display unit communicates with the navigation
unit over its own GA-Net bus. Information is sent to
the navigation unit whenever the user activates the
touch screen, or hard buttons. Information sent by
the navigation unit to the display unit includes com-
mands to control the LCD back light.
• The navigation unit also sends navigation informa-
tion to the screen using the Red, Green, Blue, and
Composite Video signals.
• The display unit is protected by the security system
by daisy-chaining the security signal through it, and
then passing the signal to the audio unit.
• The illumination input from the gauge brightness
control provides back lighting for the hard buttons
surrounding the screen.
• The display unit also communicates with the climate
control module to set the A/C mode, and fan speed.
These screens allow troubleshooting of the display unit.
Touch the menu item you want to troubleshoot, and fol-
low the diagnostic instructions.
RGB Color
This screen verifies that the display unit is receiving the
video (R, G, B and Composite sync) signals properly.
The three primary colors should all be shown without
distortion. The combination of all three should produce
a central white section. If any of the colors are missing,
troubleshoot for the color signal (see page
). If the
picture has lines in it or scrolls horizontally, or vertically,
troubleshoot for a Composite sync problem (see page
).
Gray Tone
This screen diagnoses problems with contrast. You
should be able to see the changes from bar to bar
across the scale. It is normal for the 2 bars on either side
to appear the same.
White Raster
The entire display must be shown in white.
Main Menu
Table of Contents
Navigation System
System Diagnosis Mode (cont'd)
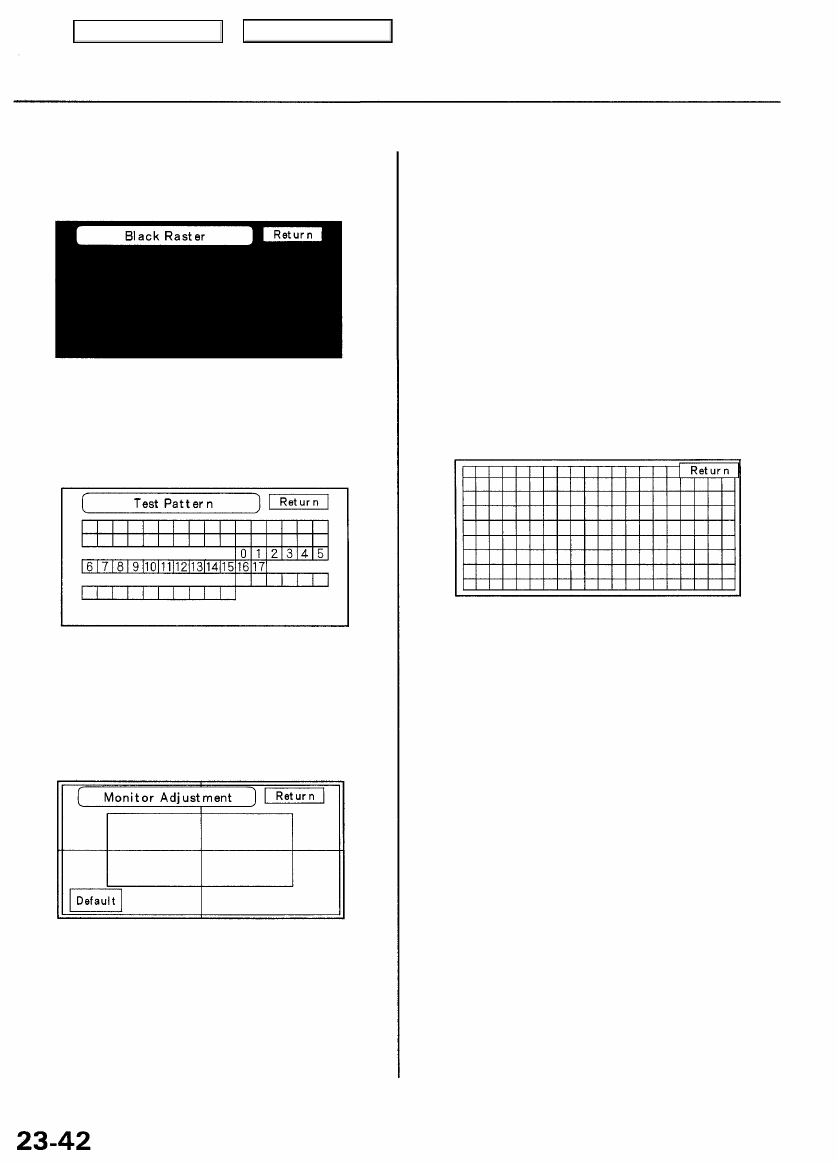
Black Raster
The entire display must be shown in black.
Test Pattern
The chart below; shows the colors being used for the
map and menu screens. This is for factory use only. To
check the color signal use the "RGB Color" diagnostic
found under the Monitor Check menu item.
Monitor Adjustment
This allows the navigation display to be centered. Use
the joystick to move the picture up/down or left/right. It
is unlikely that you will ever need to adjust the monitor
position. The "Default" button will reset the display
position to factory specifications.
Touch Panel
The panel touch sensing system consists of 9 horizontal
and 20 vertical infrared beams. Touching the screen
blocks both a horizontal and a vertical beam. Every pos-
sible touch position is shown on this diagnostic screen.
Touching one of these areas should cause its color to
reverse, and sound a "beep". If any areas of the screen
either don't respond, or respond at some other location
when touched, then replace the display unit. The
"Display" diagnostic listed in Unit Check provides an
additional method to determine if one of the infrared
sources or detectors is bad.
NOTE: Direct sunlight can affect this test by falsely trig-
gering the infrared detectors, so perform this diagnostic
inside or in a shaded area.
Main Menu
Table of Contents
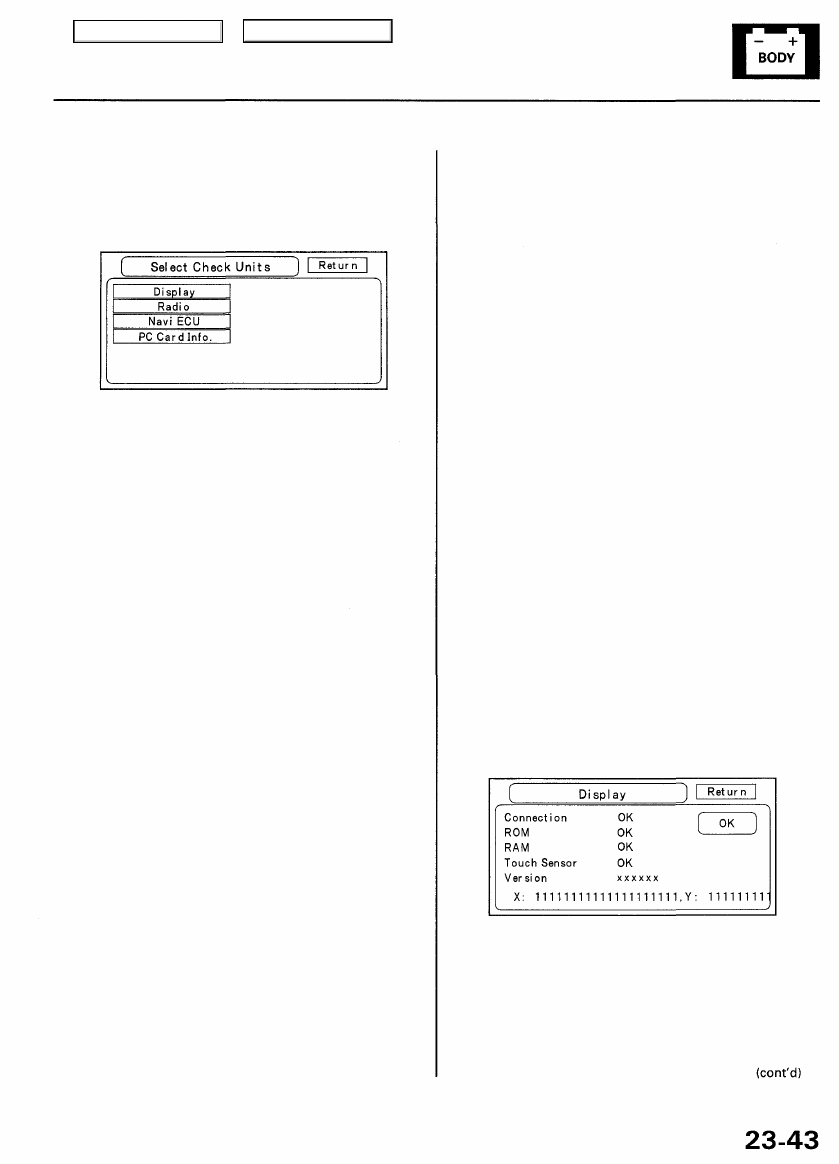
Unit Check
Touch the item you want to check and the check starts.
Display
This diagnostic performs additional checks on the com-
munication bus between the control unit and the dis-
play. In addition, the internal electronics and touch
screen functionality are confirmed.
• When the connection is NG, first check for loose ter-
minals at the navigation unit and the display unit
connections. Next check for an open or short in the
communication line between the navigation unit and
the display unit. If the line is found to have an open
or short, replace the affected shielded harness.
• If the ROM or RAM is NG, replace the display unit.
• If the touch sensor is NG, then check for zeros in the
"X", or "Y" values below.
• The version represents the software version in the
display.
• The "1" following the X, indicate the 20 working ver-
tical infrared beams/receptors (from left to right).
The "Is" following the Y, indicate the 9 working hori-
zontal beams (from top to bottom). If any one of the
"1s" is a zero, this indicates that these is a problem
with one of the beams or receptors. Check all around
the inside rim of the navigation screen for dirt or any-
thing that may be blocking a beam. If nothing is
found, replace the display unit. See the display unit
diagram in the "System Description" showing the
infrared beam layout. Individual touch positions can
be verified by running the "Touch Panel" diagnostic
under the Monitor Check menu choice.
NOTE: When selecting this diagnostic from "Unit
Check," quickly remove your fingers from the touch-
screen to avoid a false detection of the infrared sen-
sors.
Main Menu
Table of Contents
Navigation System
System Diagnosis Mode (cont'd)
Navi ECU
This screen diagnoses the navigation unit. When this
diagnostic is initiated, there is a delay of up to a minute
while it runs.
• "ROM (Application)", and "ROM (Loader)" are for
factory use.
• If "V-RAM" or "D-RAM" is NG, then replace the navi-
gation unit.
• If "GPS" indicates "NG (ANT)", then check the entire
GPS Antenna wire from the navigation unit to the
antenna. If the wire is crushed or damaged, try a
known good antenna. If this diagnostic reads OK,
then order a new GPS antenna. If the diagnostic still
reads NG (ANT), then replace the navigation unit.
• "DVD ROM" represents the database version on the
DVD. This information can also be found is Setup
Screen 4 by touching "information".
• "Serial No." should be the same as the serial number
found on the underside of the navigation unit. This
number is needed to obtain the security code from
the Interactive Network (IN) system.
• The "Mem Clr" button is for factory use and should
not be used unless instructed by the factory.
Touching this button will erase the customer's set-
tings, personal information, GPS orbital data, and
anything else stored in memory.
PC Card info.
Normally there is no PC Card in the PC slot, and the
screen should say, "PC Card is not inserted" as below:
If the factory instructs you to insert a card, then this
screen displays the Manufacturer, and Product Name as
shown in the following screen.
NOTE: Do not try to end this diagnostic by pressing "OK"
or "Mem Clr" before it finishes, otherwise the system
will reboot.
Main Menu
Table of Contents
Нет комментариевНе стесняйтесь поделиться с нами вашим ценным мнением.
Текст