Acura RL (1996-2004 year). Manual — part 591
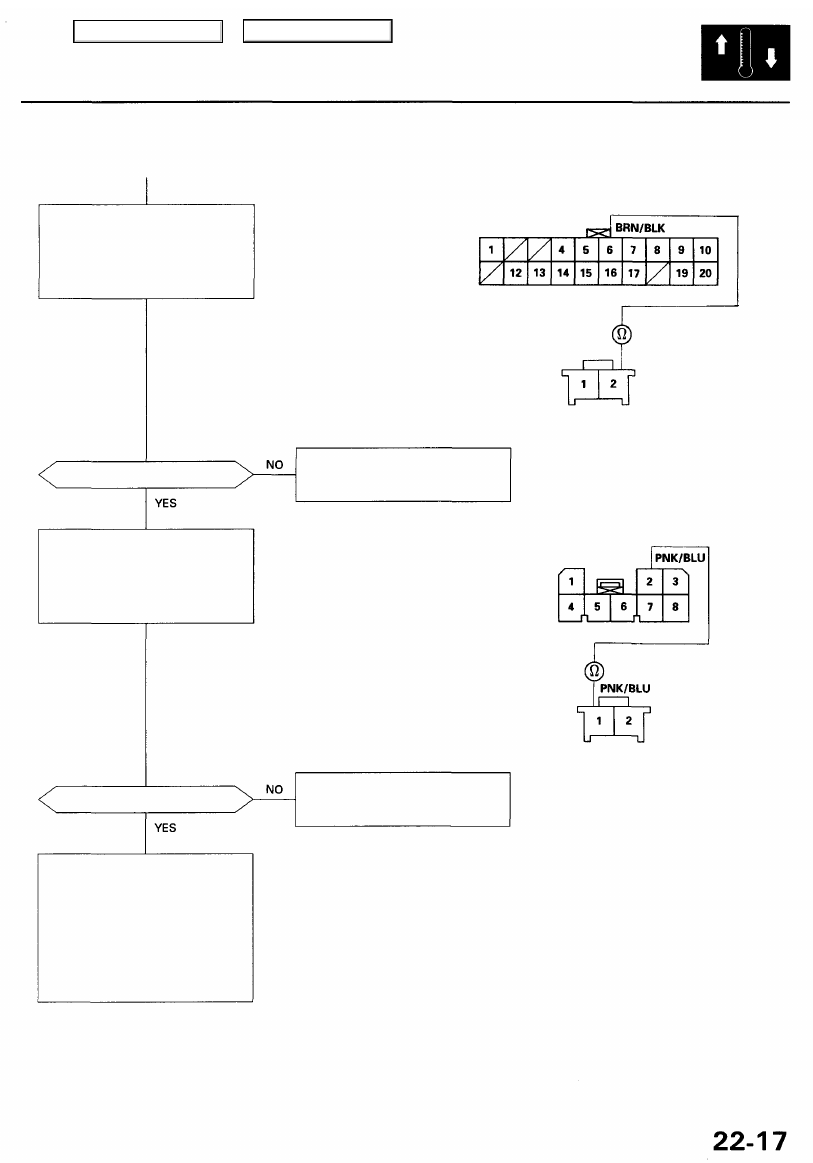
Check for an open in the wire:
Check for continuity between the
No. 6 terminal of the climate con-
trol unit 20P connector and the
No. 2 terminal of the in-car tem-
perature sensor 2P connector.
Is there continuity?
Check for an open in the wire:
Check for continuity between the
No. 2 terminal of the climate con-
trol unit 8P connector and the
No. 1 terminal of the in-car tem-
perature sensor 2P connector.
Is there continuity?
Check for loose wires or poor
connections at the climate con-
trol unit 8P and 20P connectors
and at the in-car temperature
sensor 2P connector. If the con-
nections are good, substitute a
known-good climate control unit,
and recheck. If the symptom/indi-
cation goes away, replace the
original climate control unit.
CLIMATE CONTROL UNIT 20P CONNECTOR
Wire side of female terminals
BRN/BLK
IN-CAR TEMPERATURE SENSOR 2P CONNECTOR
Wire side of female terminals
Repair open in the wire between
the climate control unit and the
in-car temperature sensor.
CLIMATE CONTROL UNIT 8P CONNECTOR
Wire side of female terminals
Repair open in the wire between
the climate control unit and the
in-car temperature sensor.
Main Menu
Table of Contents
Troubleshooting
Outside Air Temperature Sensor
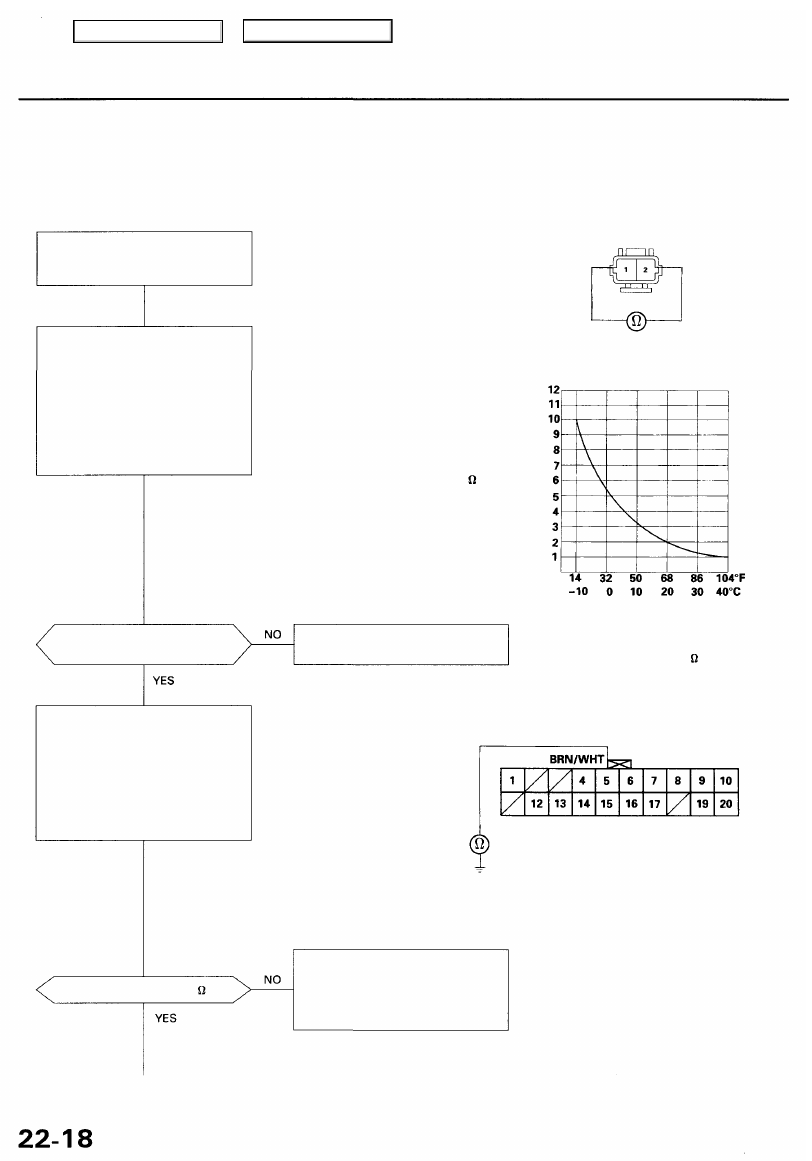
Self-diagnosis indicator light B comes on: A problem in the outside air temperature sensor circuit.
The outside air temperature sensor is a temperature dependent resistor (thermistor). The resistance of the thermistor
decreases as the temperature outside the car increases.
OUTSIDE AIR TEMPERATURE SENSOR
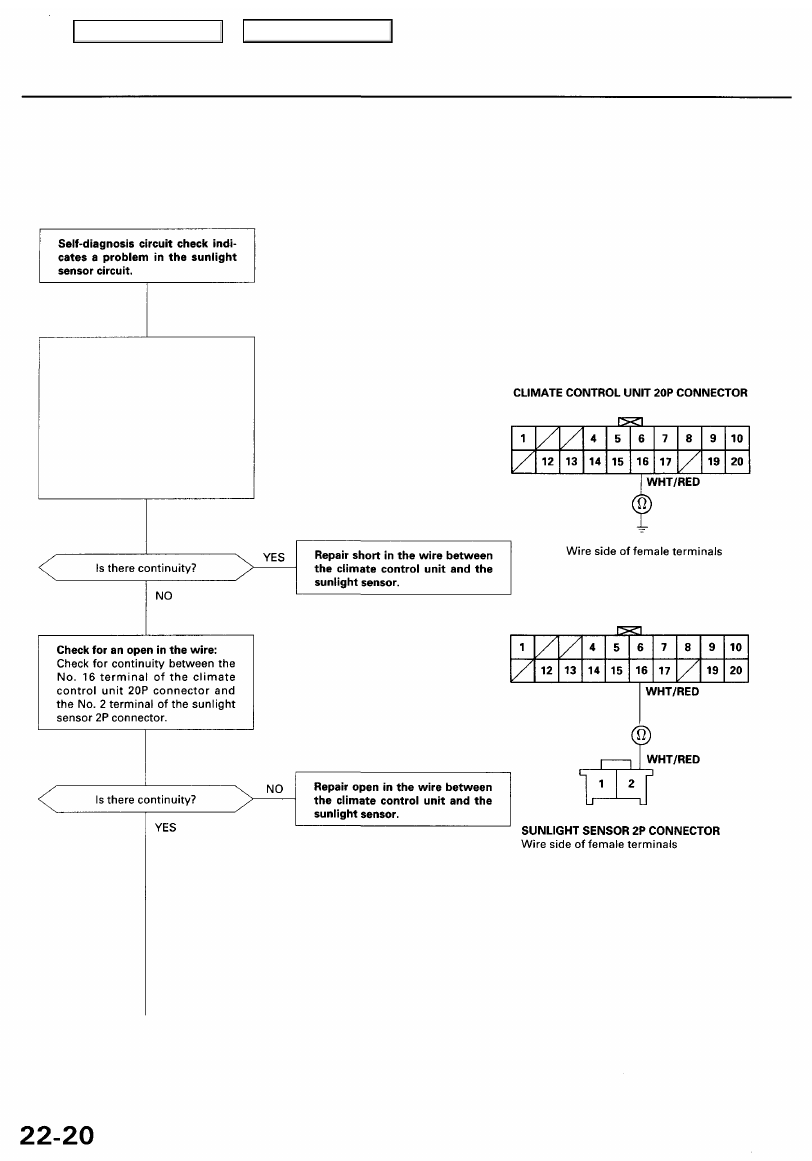
Self-diagnosis circuit check indi-
cates a problem in the outside
air temperature sensor circuit.
Check the outside air tempera-
ture sensor:
1. Remove the outside air tem-
perature sensor (see page
), and disconnect the
2P connector.
2. Measure the resistance
between the No. 1 and No. 2
terminals of the outside air
temperature sensor.
* Is the resistance within the spec-
ifications shown on the graph.
Check for a short in the wire:
1. Remove the climate control
), and dis-
connect the 8P and 20P con-
nectors.
2. Measure the resistance
between the No. 5 terminal of
the 20P connector and body
ground.
Is there more than 10 k ?
Terminal side of male terminals
RESISTANCE
k
* Dip the sensor in ice water, and mea-
sure resistance. Then pour hot water
on the sensor, and check for change in
resistance.
Replace the outside air tempera-
ture sensor.
CAUTION: The sensor uses a thermistor which
can be damaged if high current is applied during
testing. Therefore, use a circuit tester with an
output of 1 mA or less at the 20 k range.
CLIMATE CONTROL UNIT 20P CONNECTOR
Wire side of female terminals
Repair short in the wire between
the climate control unit, the out-
side air temperature sensor and
the gauge assembly, or check the
gauge assembly (see
).
Main Menu
Table of Contents
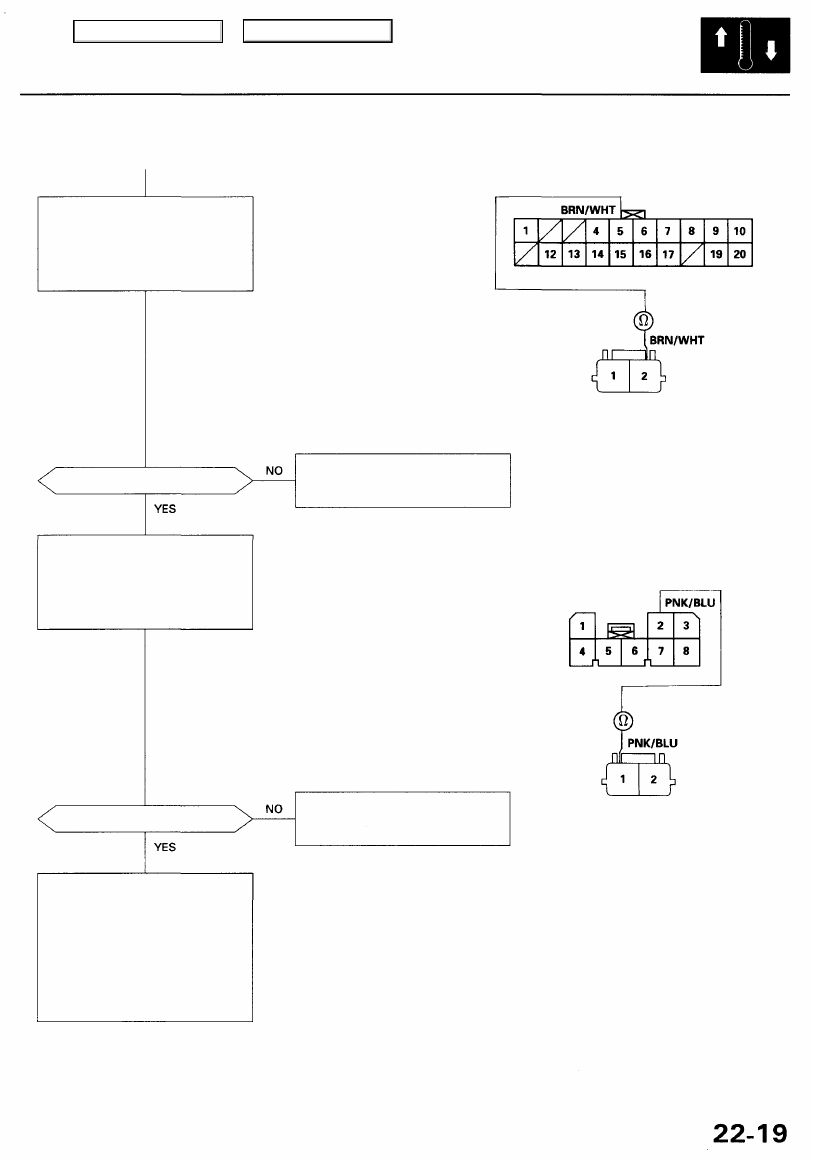
CLIMATE CONTROL UNIT 20P CONNECTOR
Wire side of female terminals
Check for an open in the wire:
Check for continuity between the
No. 5 terminal of the climate con-
trol unit 20P connector and the
No. 2 terminal of the outside air
temperature sensor 2P connector.
OUTSIDE AIR TEMPERATURE SENSOR
2P CONNECTOR
Wire side of female terminals
Is there continuity?
Repair open in the wire between
the climate control unit and the
outside air temperature sensor.
Check for an open in the wire:
Check for continuity between the
No. 2 terminal of the climate con-
trol unit 8P connector and the No.
1 terminal of the outside air tem-
perature sensor 2P connector.
CLIMATE CONTROL UNIT 8P CONNECTOR
Wire side of female terminals
Is there continuity?
Repair open in the wire between
the climate control unit and the
outside air temperature sensor.
Check for loose wires or poor
connections at the climate control
unit 8P and 20P connectors and at
the outside air temperature sen-
sor 2P connector. If the connec-
tions are good, substitute a
known-good climate control unit,
and recheck. If the symptom/indi-
cation goes away, replace the
original climate control unit.
Main Menu
Table of Contents
Troubleshooting
Sunlight Sensor
Self-diagnosis indicator light C comes on: A problem in the sunlight sensor circuit.
The sunlight sensor is a light sensitive, variable resistance diode. The resistance of the diode increases as the intensity of
the light increases.
Check for a short in the wire:
1. Remove the climate control
), and dis-
connect the 8P and 20P con-
nectors.
2. Remove the sunlight sensor
), and discon-
nect the 2P connector.
3. Check for continuity between
the No. 16 terminal of the 20P
connector and body ground.
To page
Main Menu
Table of Contents
Нет комментариевНе стесняйтесь поделиться с нами вашим ценным мнением.
Текст