Acura RL (1996-2004 year). Manual — part 357
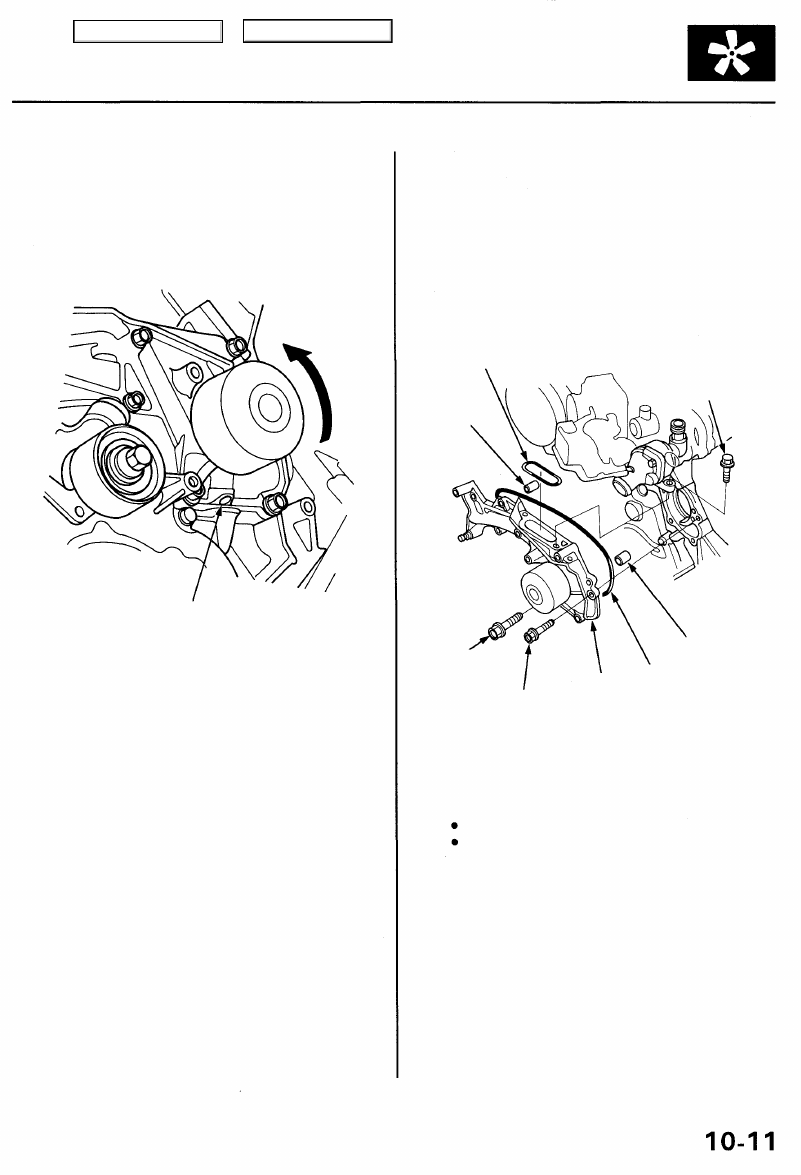
Inspection
1. Remove the timing belt (see page
).
2. Turn the water pump pulley counterclockwise.
Check that it turns freely.
BLEED HOLE
3. Check for signs of seal leakage.
NOTE: A small amount of "weeping" from the bleed
hole is normal.
Replacement
1. Remove the timing belt (see page
).
2. Remove the left camshaft pulley and back cover
).
3. Remove the water pump.
NOTE: Inspect and clean the O-ring groove and
mating surface with the cylinder block.
O-RING
Replace.
8 x 1.25 mm
22 N-m (2.2 kgf-m,
16 Ibf-ft)
DOWEL
PIN
DOWEL PIN
8 x 1.25 mm
22 N-m (2.2 kgf-m,
16 Ibf-ft)
6 x 1.0 mm
12 N-m (1.2 kgf-m,
8.7 Ibf-ft)
4. Install the water pump in the reverse order of removal.
NOTE:
Keep the O-ring in position when installing.
Clean up the spilled engine coolant.
WATER
PUMP
O-RING
Replace.
Main Menu
Table of Contents
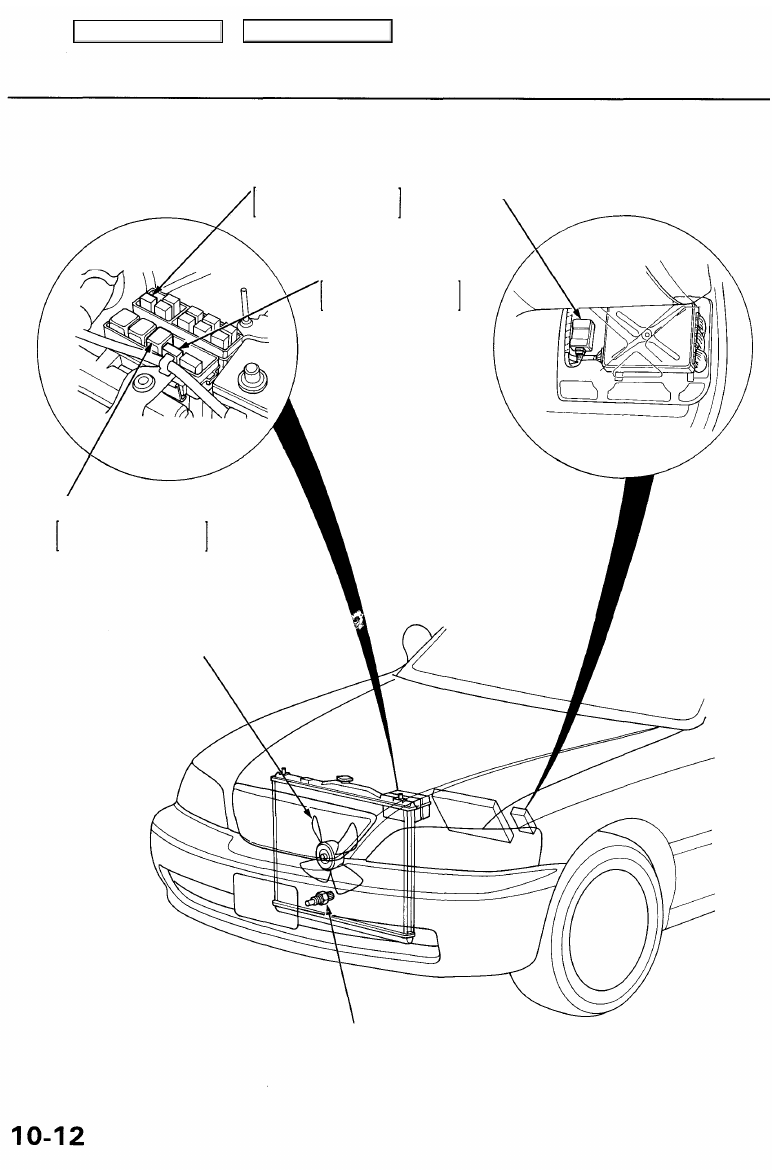
Fan Controls
Component Location Index
RADIATOR FAN RELAY
Wire colors: BLK/YEL, YEL,
LT GRN/BLK and BLU
FAN CONTROL
MODULE
CONDENSER FAN RELAY
Wire colors: BLK/YEL,
WHT, BLU and BLU/ORN
RADIATOR FAN
MAIN RELAY
Wire colors: BLK/YEL, RED,
LT GRN/BLK, BLK and BLU
RADIATOR FAN
RADIATOR FAN
CONTROL SENSOR
Testing, page
Main Menu
Table of Contents
Fan Controls
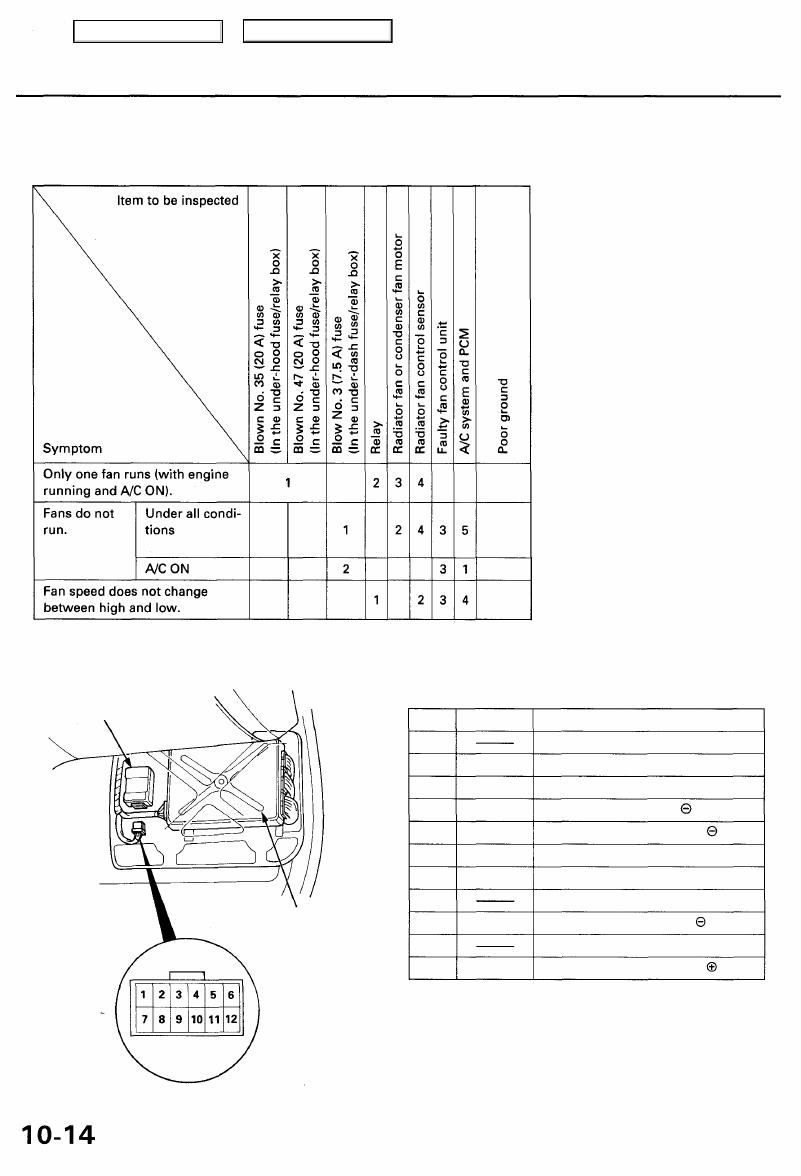
Troubleshooting
NOTE: The numbers in the table show the troubleshooting sequence.
G301
G302
G301
G302
G402
G402
Fan Control Module Terminals
FAN CONTROL
MODULE
Terminal Wire
Connects to
1
2
3
4
5
6
7
8
9
10
11
12
GRN/RED
BLK
RED/WHT
LT GRN/BLK
GRN/BLK
BLK/YEL
PNK
BLU/ORN
BLU/GRN
A/C pressure switch
Not used
Ground
A/C pressure switch
Radiator fan relay (Coil )
Radiator fan control sensor
IG2 (Main power supply)
PCM
Not used
Condenser fan relay (Coil )
Not used
Radiator fan control sensor
PCM
Main Menu
Table of Contents
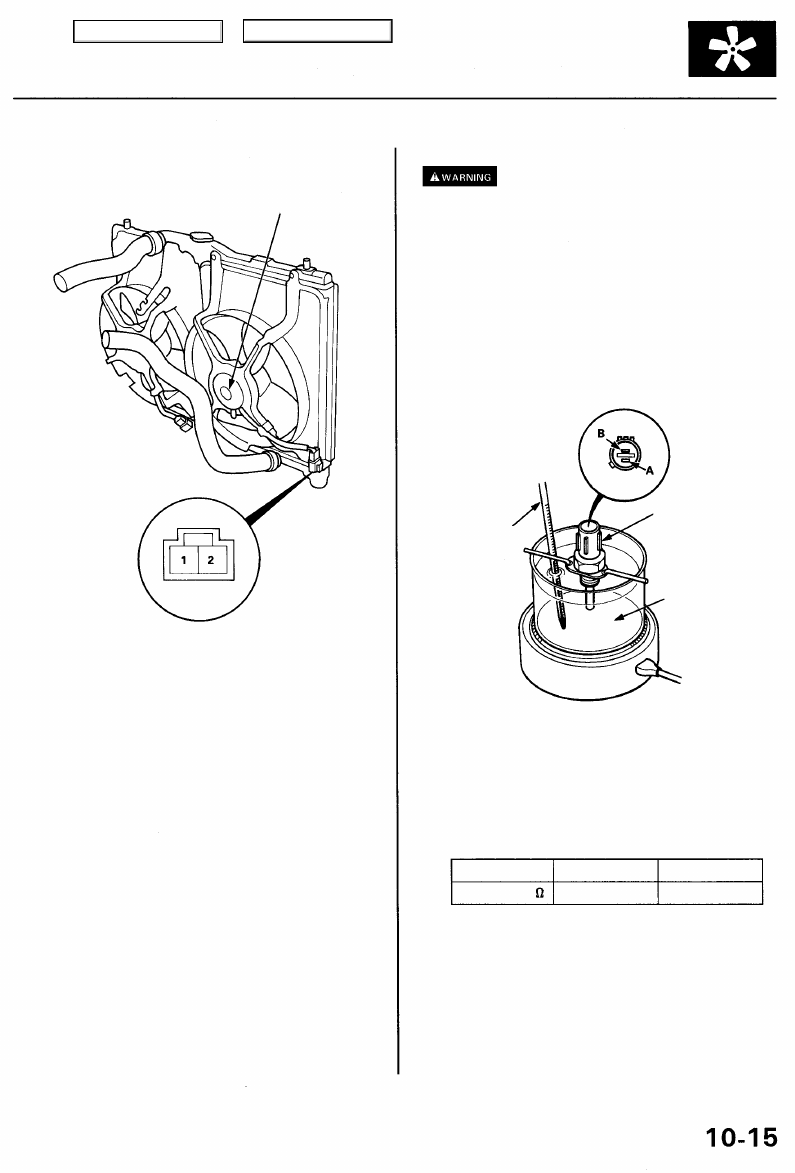
Fan Motor Testing
1. Disconnect the 2P connector.
RADIATOR FAN MOTOR
TERMINAL SIDE OF
MALE TERMINALS
2. Test the motor by connecting battery power to the
No. 2 terminal and ground to the No. 1 terminal.
3. If the motor fails to run or does not run smoothly,
replace it.
Radiator Fan Control Sensor
Testing
Removing the radiator fan control sensor
while the engine is hot can cause the coolant to spray
out, seriously scalding you. Always let the engine and
radiator cool down before removing the radiator fan
control sensor.
NOTE: Bleed air from the cooling system after installing
the radiator fan control sensor (see page
).
1. Remove the radiator fan control sensor from the
).
2. Suspend the radiator fan control sensor in a con-
tainer of water as shown.
THERMOMETER
RADIATOR FAN
CONTROL SENSOR
WATER
3. Heat the water, and check the temperature with a
thermometer.
CAUTION: Do not let the thermometer touch the
bottom of the hot container.
4. Measure the resistance between the A and B termi-
nals according to the table.
Temperature
Resistance (K )
183°F (84°C)
1.047-1.254
194°F (90°C)
0.872-1.024
5. If you don't get the above readings, replace the
radiator fan control sensor.
NOTE: Clean the sensor after testing.
Main Menu
Table of Contents
Нет комментариевНе стесняйтесь поделиться с нами вашим ценным мнением.
Текст