Acura RL (1996-2004 year). Manual — part 677
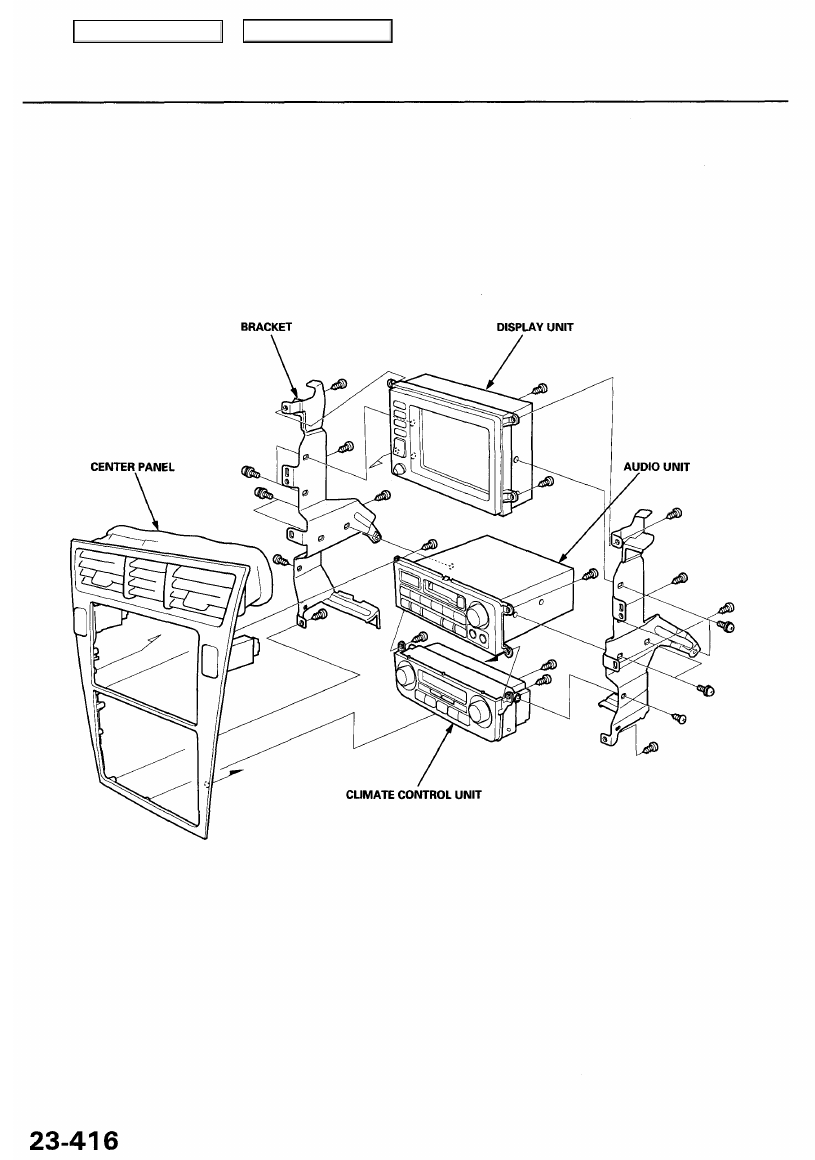
Display Unit
Removal/Installation (cont'd)
'00 - 01 Models
1. Remove the center panel, display unit, audio unit, climate control unit and bracket as an assembly (see
).
2. Remove the display unit from the bracket.
3. Install in the reverse order of removal.
Main Menu
Table of Contents
Clock Display Size and Location Adjustment
'00 - 01 models only
1. Turn the ignition switch ON (II).
2. When the disclaimer is shown on the navigation display unit, touch "OK."
3. When the "Enter destination by:" screen is shown, touch "Setup."
4. When the "Setup Screen" is shown, touch Display "Off."
5. Touch the numbers of the clock to change the clock size and location.
• If the clock is small and in the lower right hand comer of the screen, it will increase in size and move to the center of
the screen.
• If the clock is large and in the center of the screen, it will decrease in size and move to the lower right hand corner of
the screen.
6. Push the MENU button to return to the "Enter destination by:" screen.
The clock display settings will be saved.
Main Menu
Table of Contents
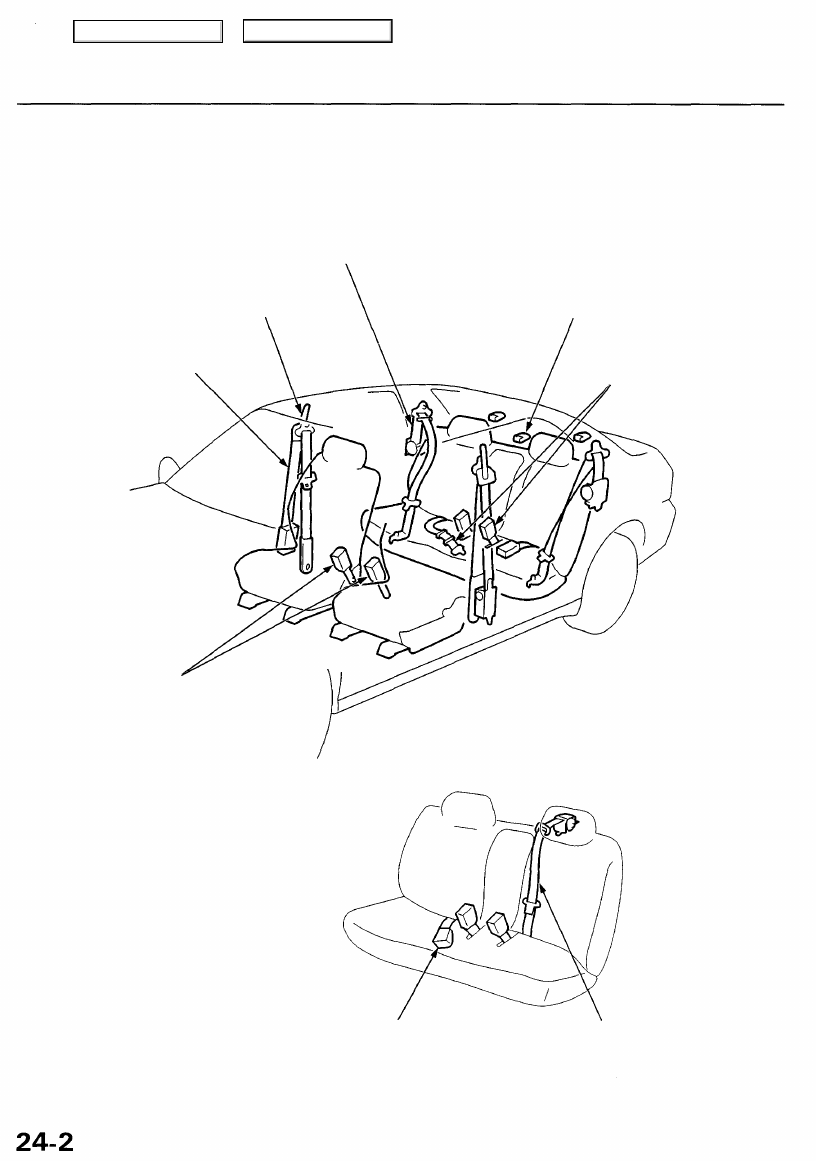
Seat Belts
Component Location Index
SRS components are located in the parts areas marked with an asterisk (*). Review the SRS component locations, precau-
tions, and procedures in this (
) before performing repairs or service.
REAR SEAT BELT
Removal/Installation, page
Inspection, page
SHOULDER
ANCHOR ADJUSTER
(see page
*FRONT SEAT BELT
CHILD SEAT TETHER ANCHOR
Installation — '96 - 99 Models, page
Removal/Installation — '00 - 01 Models, page
REAR SEAT BELT BUCKLE/
CENTER BELT TONGUE
(see page
FRONT SEAT
BELT BUCKLES
(see page
REAR CENTER SEAT BELT BUCKLE ('98 - 01 models) REAR CENTER SEAT BELT ('98 - 01 models)
(see page
) (see page
Main Menu
Table of Contents
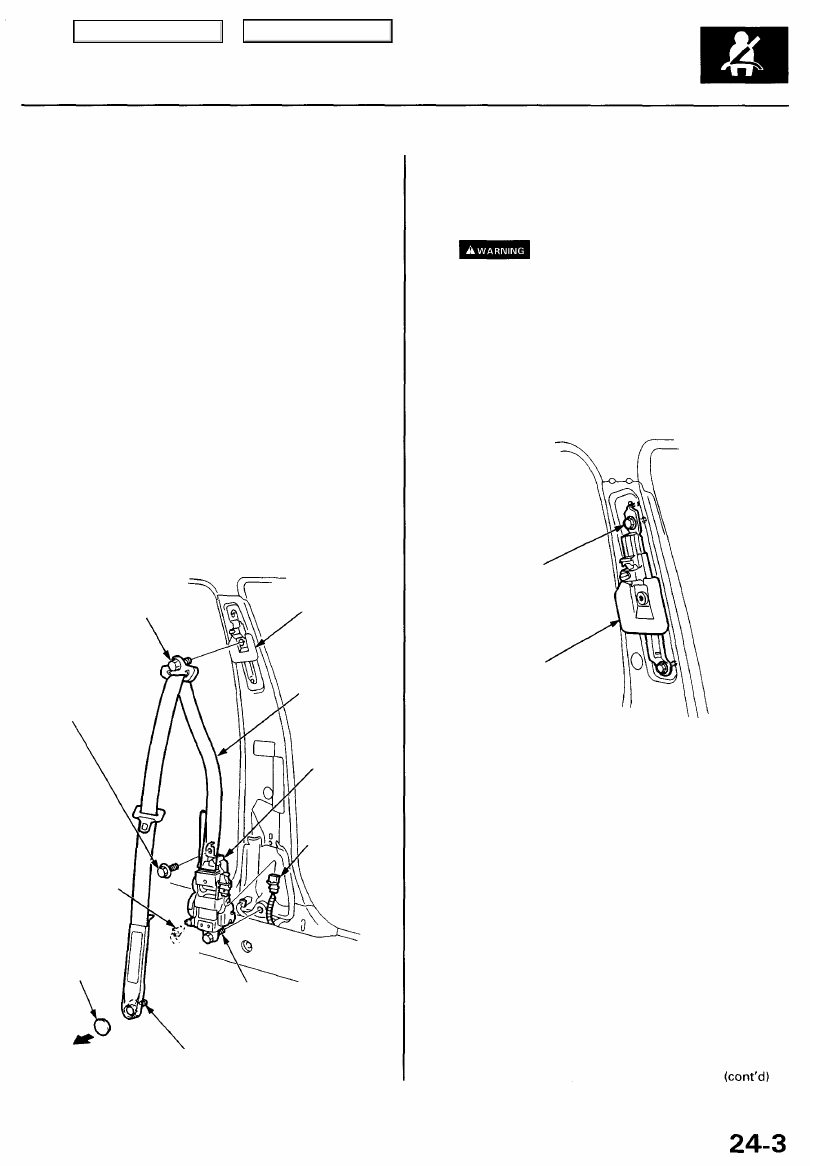
Front Seat Belt
Removal/Installation
SRS components are located in this area. Review the SRS
component locations, precautions, and procedures in this
(
) before performing repairs or service.
CAUTION: Check the front seat belts for damage, and
replace then if necessary. Be careful not to damage them
during removal and installation.
Front seat belt:
1. Make sure you have the anti-theft code for the
radio, then write down the frequencies for the pre-
set buttons.
2. Disconnect the negative battery cable, and wait at
least 3 minutes before beginning work.
3. Slide the front seat forward fully.
4. Remove:
• Front and rear side trim (see
• Front and rear door trim (see
5. Remove the lower anchor cap, then remove the lower
anchor bolt.
SHOULDER
ANCHOR
ADJUSTER
UPPER ANCHOR BOLT
7/16-20 UNF
32 N-m (3.3 kgf-m,
24 Ibf-ft)
RETRACTOR
MOUNTING BOLT
6 x 1.0 mm
9.8 N-m (1.0 kgf-m,
7.2 Ibf-ft)
SEAT BELT
TENSION
REDUCER
CONNECTOR
LOWER
ANCHOR
CAP
FRONT SEAT
BELT
RETRACTOR
SEAT BELT
TENSIONER
CONNECTOR
RETRACTOR BOLT
7/16-20 UNF
32 N-m (3.3 kgf-m,
24 Ibf-ft)
LOWER ANCHOR BOLT
7/16-20 UNF
32 N-m (3.3 kgf-m, 24 Ibf-ft)
6. Remove the center pillar trim (see
).
7. Disconnect the seat belt tension reducer connector
and seat belt tensioner connector.
To avoid accidental deployment and
possible injury, always disconnect the seat belt ten-
sioner connector before removing the retractor (see
page
8. Remove the upper anchor bolt and retractor bolt,
remove the retractor mounting bolt, then remove
the front seat belt and retractor.
9. Remove the shoulder anchor adjuster.
10 x 1.25 mm
31 N-m (3.2 kgf-m,
23 Ibf-ft)
SHOULDER
ANCHOR
ADJUSTER
10. Installation is the reverse of the removal procedure.
NOTE:
• Check that the retractor locking mechanism func-
• Make sure you assemble the washers and collars
on the upper and lower anchor bolts as shown.
• Before installing the anchor bolts, make sure there
are no twists or kinks in the front seat belt.
• Make sure the seat belt tension reducer connec-
tor and seat belt tensioner connector are connec-
ted securely.
• Enter the anti-theft code for the radio, then enter
the customer's radio station presets.
Main Menu
Table of Contents
Нет комментариевНе стесняйтесь поделиться с нами вашим ценным мнением.
Текст