Acura RL (1996-2004 year). Manual — part 284
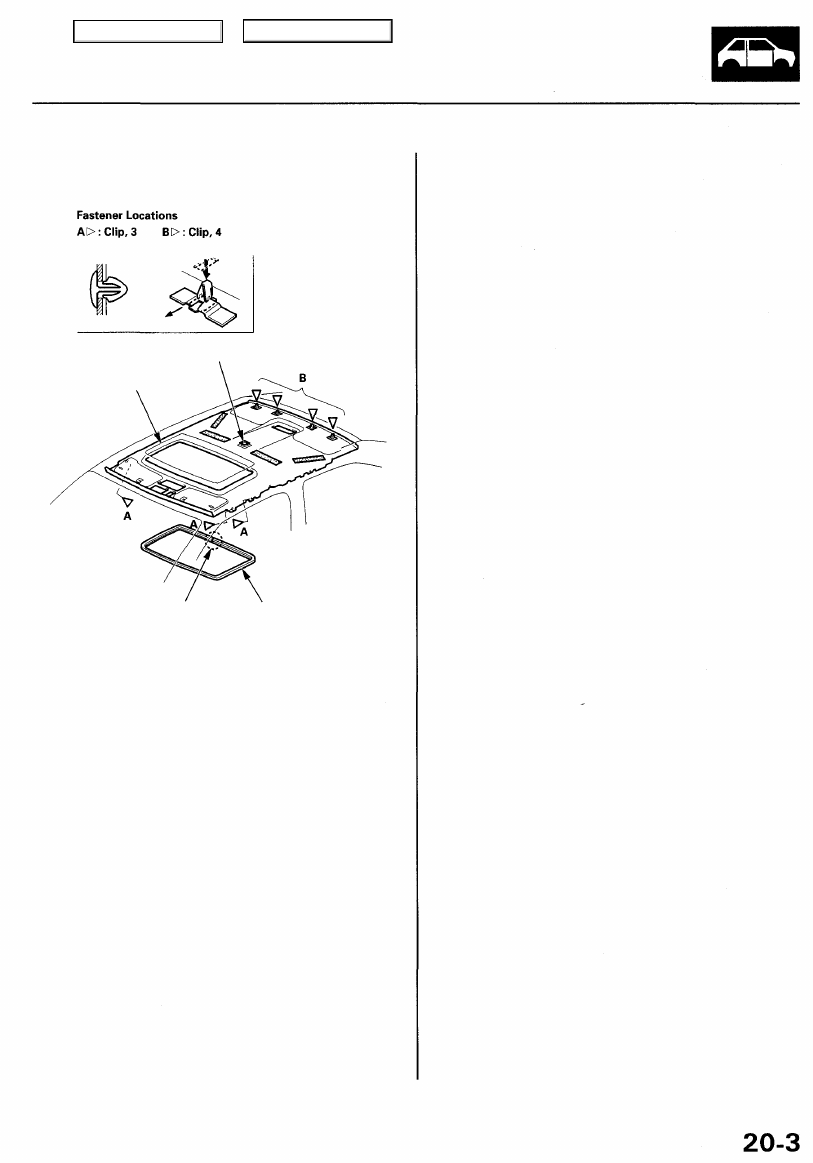
6. Remove the clips and roof trim, detach the rear
clips, then remove the headliner.
FASTENER
HEADLINER
JOINT
ROOF
TRIM
7. Remove the headliner through the passenger's door
opening.
8. Installation is the reverse of the removal procedure,
and note these items:
• When inserting the headliner through the door
opening, be careful not to fold or bend it. Also, be
careful not to scratch the body.
• Check that both sides of the headliner are
securely attached to the trim.
• When installing the roof trim, install the joint
toward the rear.
• Make sure each connector is plugged in properly.
Main Menu
Table of Contents
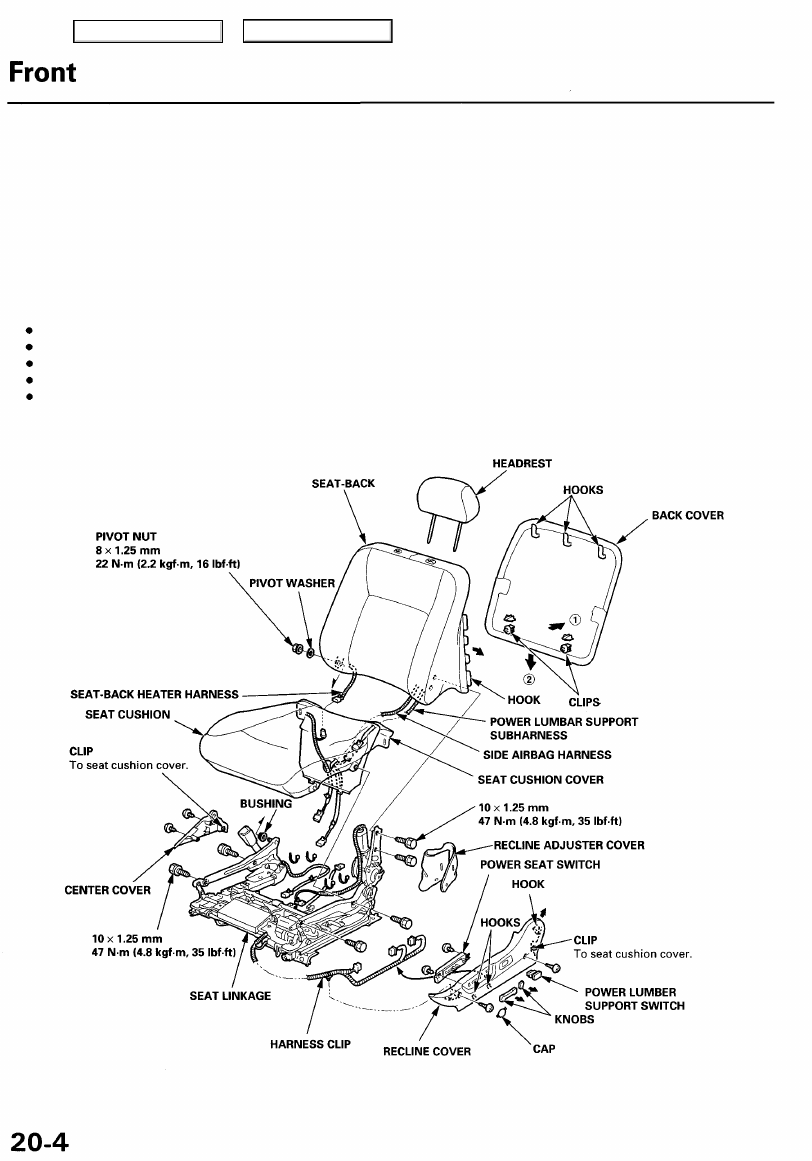
Seat
Disassembly
SRS components are located in this area. Review the SRS component locations, precautions, and procedures in the SRS
section before performing repairs or service. Refer to the '99 - 01 Acura 3.5 RL Service Manual, P/N 61SZ305.
CAUTION:
• Put on gloves to protect your hands.
• When prying with a flat-tip screwdriver, wrap it with protective tape to prevent damage.
8-way power adjustable (with power lumbar support and seat heater):
NOTE:
Take care not to tear the seams or damage the seat covers.
for the seat harness wiring locations. Route the seat wire harness correctly.
Make sure the bushing and pivot washer are installed correctly.
Apply multipurpose grease to the moving portion of the seat track.
To prevent wrinkles in the seat-back cover, stretch the material evenly over the pad.
Main Menu
Table of Contents
Power Lumbar Support Replacement
SRS components are located in this area. Review the
SRS component locations and precautions and proce-
dures in the SRS section before performing repair or
service. Refer to the '99 - 01 Acura 3.5 RL Service
Manual, P/N 61SZ305.
CAUTION:
• Put on gloves to protect your hands.
• When prying with a flat-tip screwdriver, wrap it with
protective tape to prevent damage.
NOTE:
• Take care not to bend the cable.
• Take care not to tear the seams or damage the seat
covers.
Remove the back cover (see page
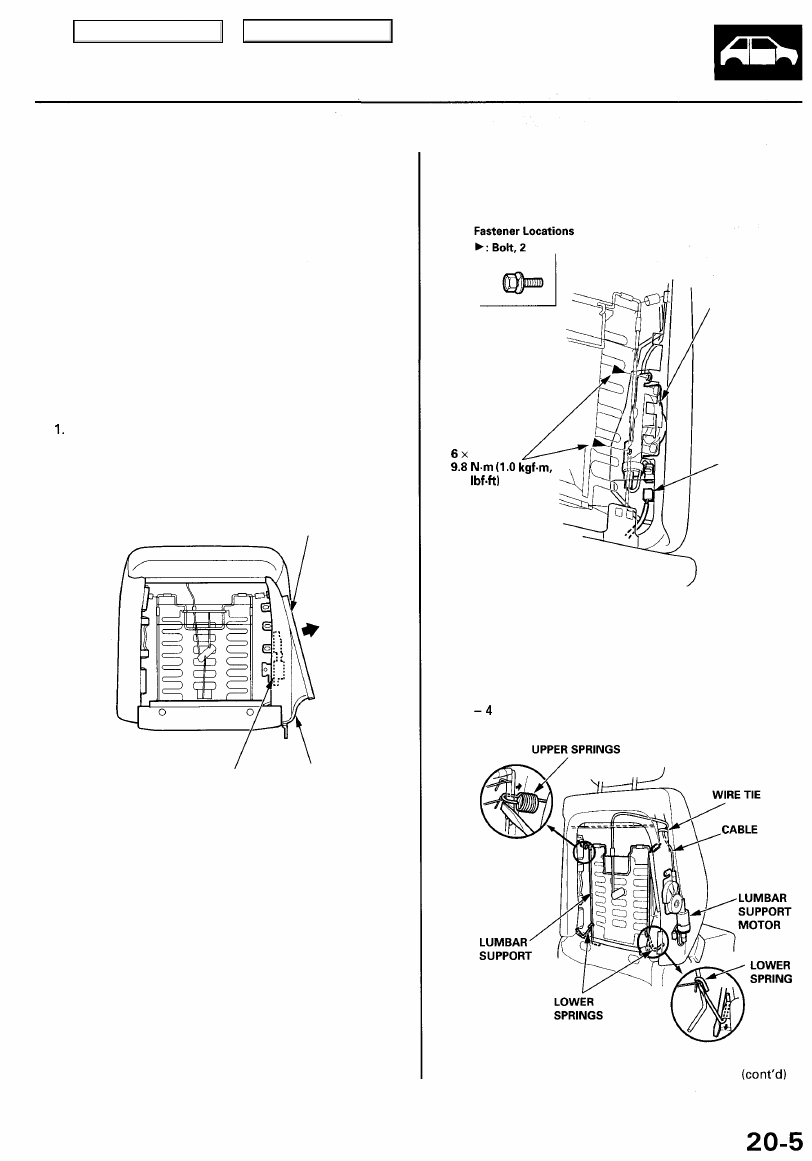
2. Release the hook strip on the right inside of the
seat-back.
HOOK STRIP
LUMBAR SUPPORT
MOTOR
SEAT-BACK COVER
3. Disconnect the lumbar support motor connector,
and remove the bolts securing the lumbar support
motor.
LUMBAR SUPPORT
MOTOR
1.0 mm
7.2
LUMBAR SUPPORT
MOTOR
CONNECTOR
4. Remove the lumbar support, cable, and motor as an
assembly.
- 1 Pull back the edge of the seat-back cover and
pad as needed.
-2 Release the wire tie.
- 3 Release both lower springs.
Release the lumbar support from both upper
springs.
Main Menu
Table of Contents
Front Seat
Power Lumbar Support Replacement
(cont'd)
5. Install the lumbar support in the reverse order of
removal, and note these items:
• Replace the wire ties as news ones.
• To prevent wrinkles when installing a seat-back
cover, make sure the material is stretched evenly
over the pad before securing the hook strip.
• Replace the back panel clips as new ones.
20-6
Main Menu
Table of Contents
Нет комментариевНе стесняйтесь поделиться с нами вашим ценным мнением.
Текст