Acura RL (1996-2004 year). Manual — part 443
1. Remove the mainshaft and countershaft speed sen-
sors from the transmission housing.
2. Remove the 16 bolts securing the transmission
housing with the transmission hanger, harness
clamp bracket, and speed sensor connector bracket.
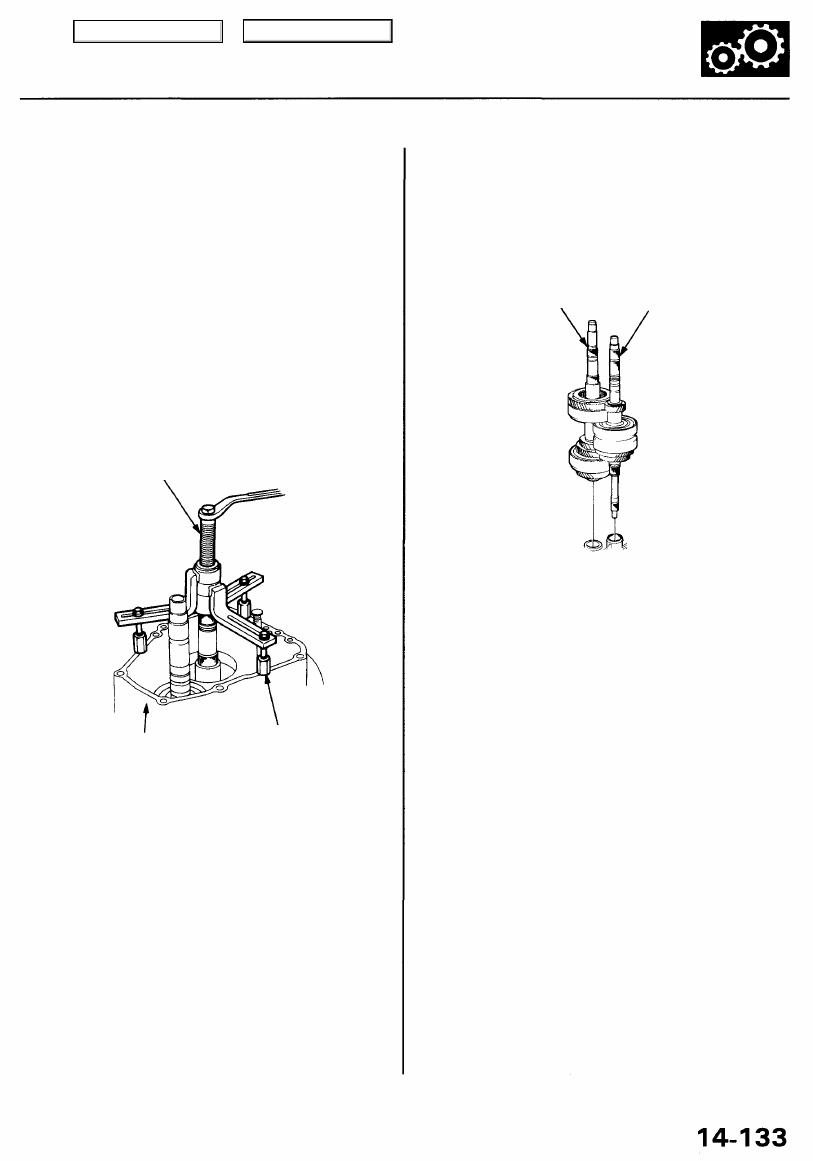
3. Install the special tools on the transmission hous-
ing, then remove the housing as shown.
CAUTION: Make sure you remove the mainshaft and
countershaft speed sensors before removing the
transmission housing from the torque converter
housing.
HOUSING PULLER
TRANSMISSION
HOUSING
HOUSING PULLER
EXTENSION BOLTS
(3 Required)
4. Remove the mainshaft sub-assembly and counter-
shaft sub-assembly together.
NOTE: Remove the shafts carefully to avoid dam-
aging the regulator valve body.
COUNTERSHAFT
SUB-ASSEMBLY
MAINSHAFT
SUB-ASSEMBLY
5. Remove the secondary driven gear shaft assembly.
Main Menu
Table of Contents
Torque Converter Housing/Valve Body
Removal
NOTE:
• Clean all parts thoroughly in solvent or carburetor cleaner, and dry with compressed air.
• Blow out all passages.
• When removing the valve body from the torque converter housing, replace the O-ring.
Main Menu
Table of Contents
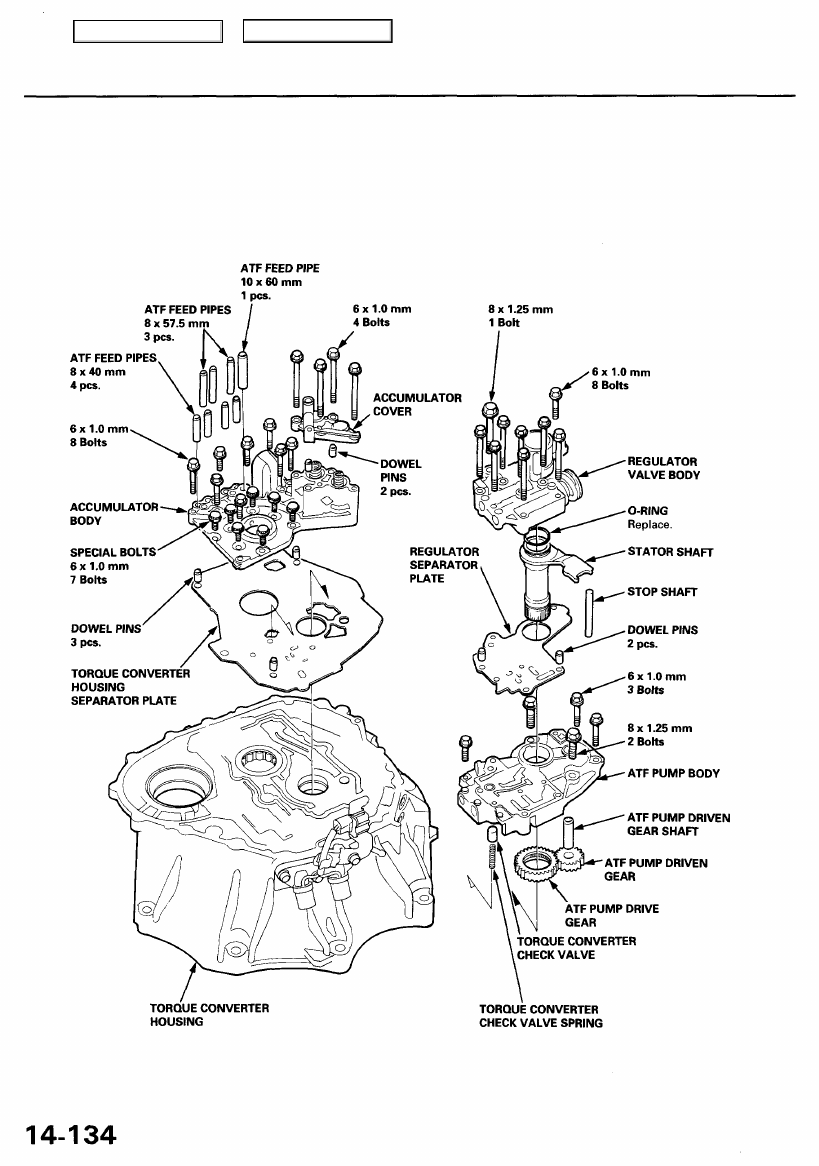
1. Remove the eight 6 mm bolts and one 8 mm bolt
securing the regulator valve body, then remove the
regulator valve body.
2. Remove the Stator shaft, stop shaft, and regulator
separator plate.
3. Remove the three 6 mm bolts and two 8 mm bolts
securing the ATP pump body, then remove the ATP
pump body.
4. Remove the ATP pump driven gear shaft, ATP pump
gears, torque converter check valve, and spring.
5. Remove the four bolts securing the accumulator
cover, then remove the accumulator cover.
NOTE: The accumulator cover is spring loaded. To
prevent stripping the threads in the torque converter
housing, press down on the accumulator cover
while unscrewing the bolts in a crisscross pattern.
6. Remove the eight ATP feed pipes from the accumu-
lator body.
7. Remove the eight 6 mm bolts and seven 6 mm spe-
cial bolts securing the accumulator body, then
remove the accumulator body.
8. Remove the torque converter housing separator
plate with three dowel pins.
Main Menu
Table of Contents
Valve Body
Repair
NOTE: This repair is only necessary if one or more of
the valves in a valve body do not slide smoothly in their
bores. You may use this procedure to free the valves in
the valve bodies.
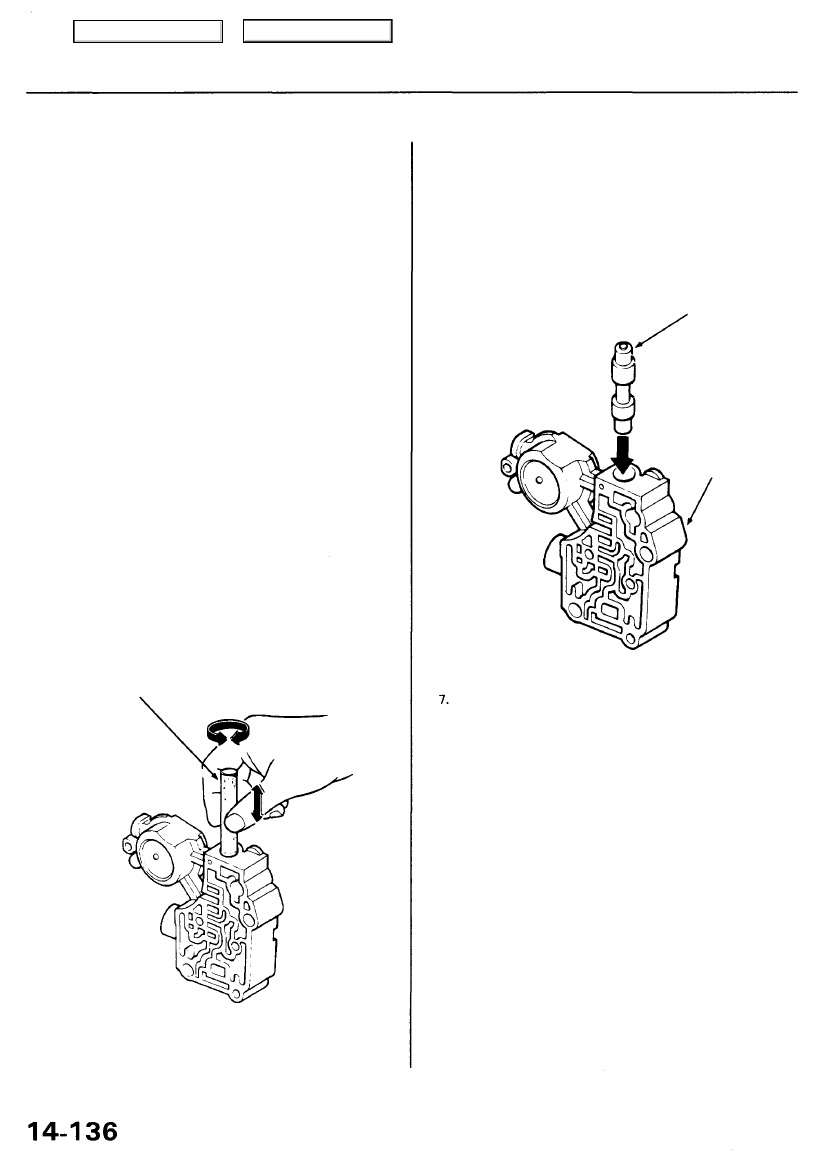
1. Soak a sheet of #600 abrasive paper in ATP for
about 30 minutes.
2. Carefully tap the valve body so the sticking valve
drops out of its bore.
CAUTION: It may be necessary to use a small screw-
driver to pry the valve free. Be careful not to scratch
the bore with the screwdriver.
3. Inspect the valve for any scuff marks. Use the ATF-
soaked #600 paper to polish off any burrs that are
on the valve, then wash the valve in solvent and dry
it with compressed air.
4. Roll up half a sheet of ATF-soaked #600 paper and
insert it in the valve bore of the sticking valve.
Twist the paper slightly, so that it unrolls and fits
the bore tightly, then polish the bore by twisting the
paper as you push it in and out.
CAUTION: The valve body is aluminum and doesn't
require much polishing to remove any burrs.
ATF-soaked
#600 abrasive
paper
5. Remove the #600 paper. Thoroughly wash the entire
valve body in solvent, then dry it with compressed
air.
6. Coat the valve with ATP, then drop it into its bore. It
should drop to the bottom of the bore under its own
weight. If not, repeat step 4, then retest. If the valve
still sticks, replace the valve body.
VALVE
VALVE
BODY
Remove the valve, and thoroughly clean it and the
valve body with solvent. Dry all parts with com-
pressed air, then reassemble using ATP as a lubricant.
Main Menu
Table of Contents
Нет комментариевНе стесняйтесь поделиться с нами вашим ценным мнением.
Текст