Acura RL (1996-2004 year). Manual — part 315
GASKET
Replace.
EXHAUST
PIPE A
SELF-LOCKING NUT
10 x 1.25 mm
54 N-m (5.5 kgf-m,
40 Ibf-ft)
Replace.
10 x 1.25 mm
38 N-m (3.9 kgf-m,
28 Ibf-ft)
SELF-LOCKING NUT
10 x 1.25 mm
54 N-m (5.5 kgf-m,
40 Ibf-ft)
Replace.
TRANSMISSION STOP
COLLAR
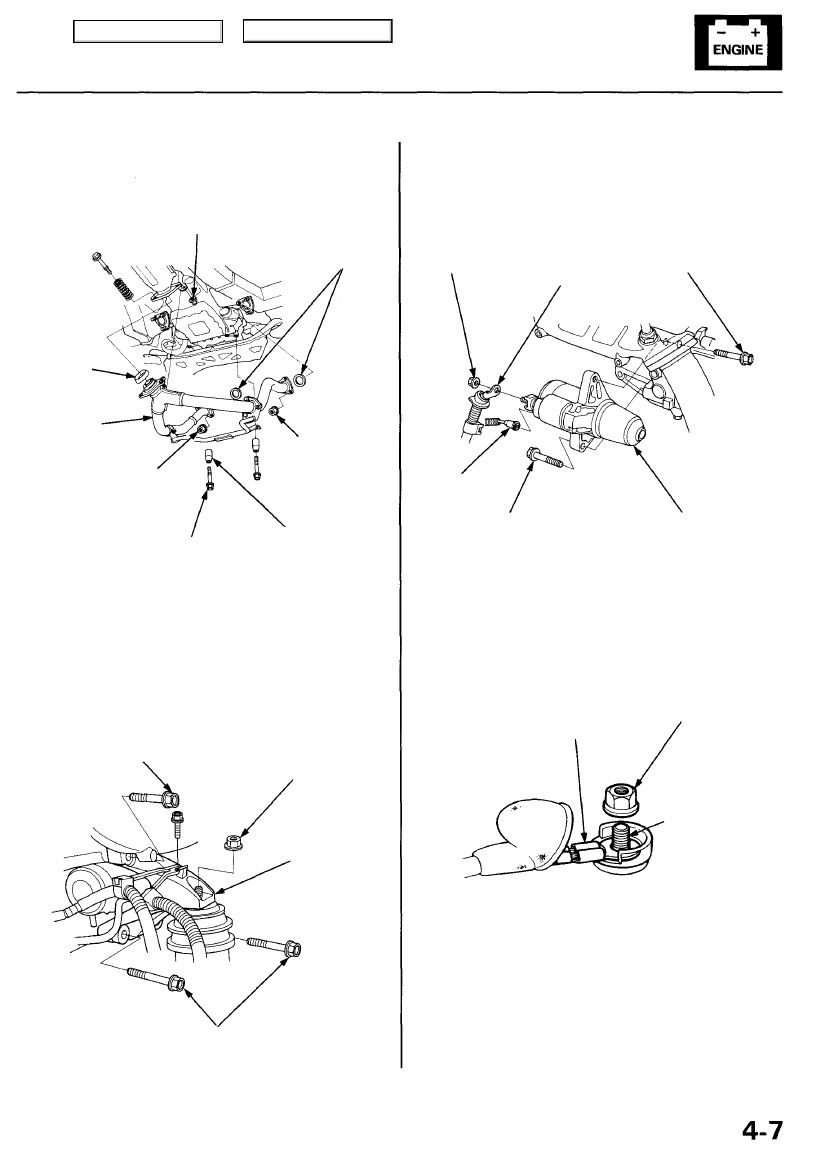
10. Remove the front mount mounting bolts (see
).
11. Attach the chain hoist to the engine (see
).
12. Remove the left engine mount bracket.
12 x 1.25 mm
54 N-m (5.5 kgf-m,
40 Ibf-ft)
12 x 1.25 mm
64 N-m (6.5 kgf-m,
47 Ibf-ft)
LEFT ENGINE
MOUNT BRACKET
12 x 1.25 mm
54 N-m (5.5 kgf-m, 40 Ibf-ft)
13. Disconnect the starter cable and BLK/WHT wire, then
remove the starter.
8 x 1.25 mm
8.8 N-m (0.9 kgf-m,
6.5 Ibf-ft)
10 x 1.25 mm
STARTER 44 N-m (4.5 kgf-m, 33 Ibf-ft)
CABLE
BLK/WHT
WIRE
10 x 1.25 mm
44 N-m (4.5 kgf-m, 33 Ibf-ft)
STARTER
14. Install in the reverse order of removal.
NOTE: When installing the starter cable, make sure
that the crimped side of the ring terminal is facing
out.
Crimped side of ring
terminal
NUT
TERMINAL
15. Enter the anti-theft code for the radio, then enter the
customer's radio station presets.
9. Remove the transmission stop collar, then remove
the exhaust pipe A.
GASKETS
Replace.
SELF-LOCKING NUT
8 x 1.25 mm
22 N-m (2.2 kgf-m, 16 Ibf-ft)
Replace.
Main Menu
Table of Contents
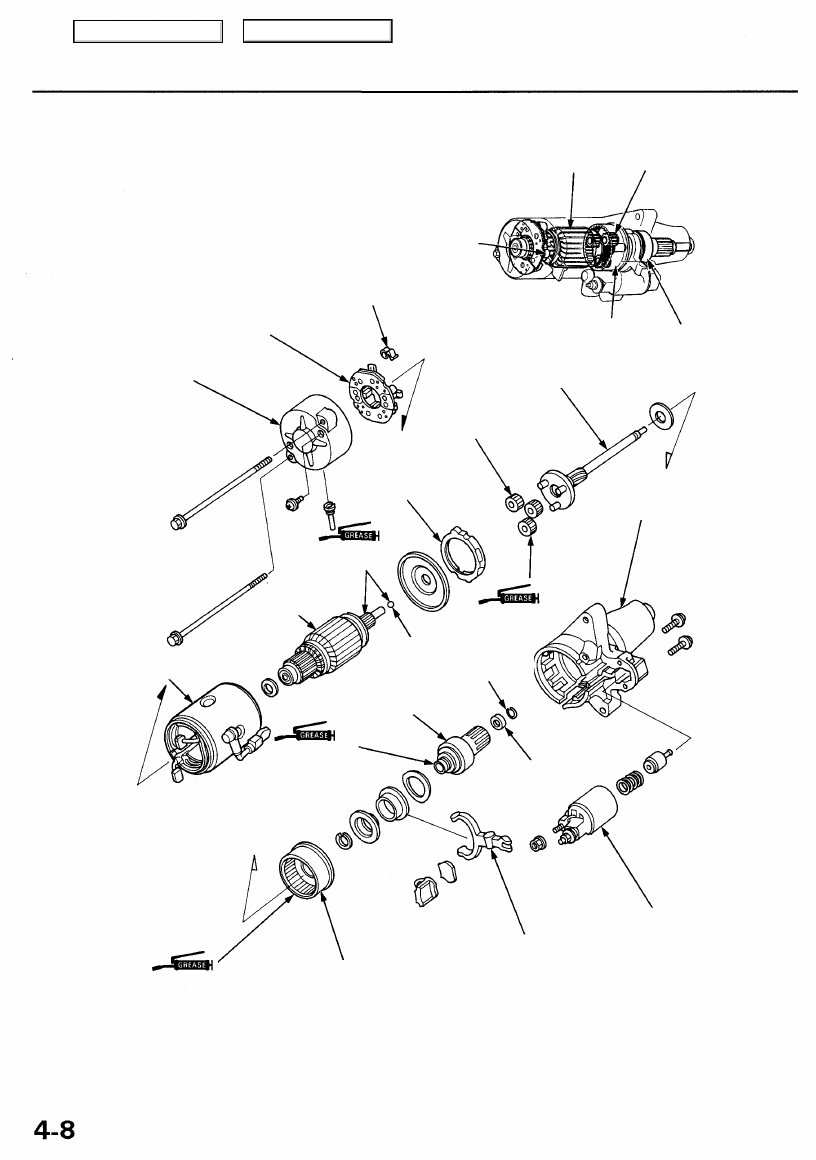
Starting System
Starter Overhaul
CAUTION: Disconnect the battery cable before remov-
).
NOTE: The PCM memory setting is needed after recon-
).
BRUSH HOLDER
BRUSH SPRING
BRUSH HOLDER
Test, page
END COVER
RING
GEAR
MOLYBDENUM
DISULFIDE
OVERRUNNING
CLUTCH ASSEMBLY
GEAR SHAFT
PLANETARY GEAR
Inspection, page
PLATE
MOLYBDENUM
DISULFIDE
ARMATURE
Inspection and
Test, page
MOLYBDENUM
DISULFIDE
OVERRUNNING
CLUTCH ASSEMBLY
SOLENOID
LEVER
RING GEAR
PINION STOP
SPRING CLIP
Replace
MOLYBDENUM
DISULFIDE
GEAR HOUSING
PLANETARY GEAR
ARMATURE
STEEL BALL
Main Menu
Table of Contents
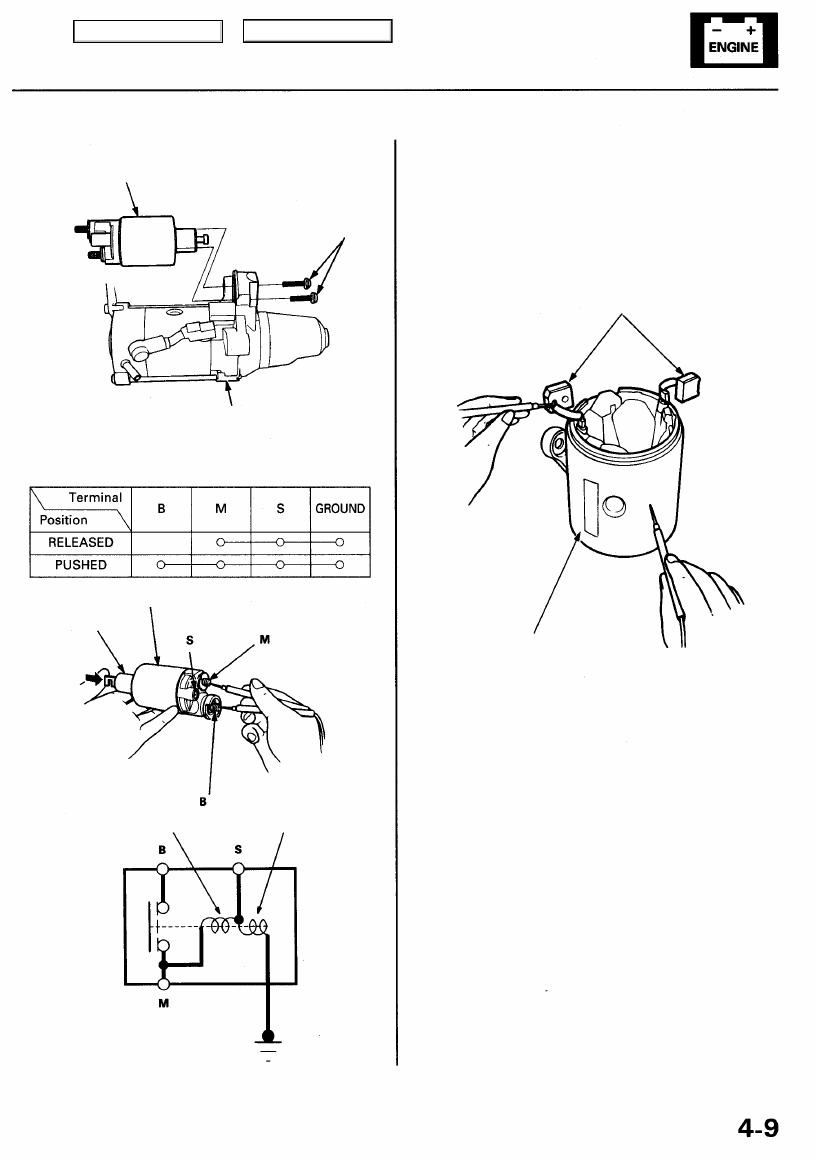
Starter Solenoid Test
1. Remove the starter solenoid from the gear housing.
SOLENOID
SCREWS
GEAR HOUSING
2. Check for continuity between the terminals in each
solenoid plunger position according to the table.
PLUNGER
SOLENOID HOUSING (GROUND)
Starter Field Winding Test
1. Check for continuity between the brushes. If there's
no continuity, replace the armature housing.
2. Check for continuity between each brush and the
armature housing (ground).
If continuity exists, replace the armature housing.
BRUSHES
ARMATURE HOUSING (GROUND)
GROUND
PULL-IN COIL
HOLD-IN COIL
Main Menu
Table of Contents
Starting System
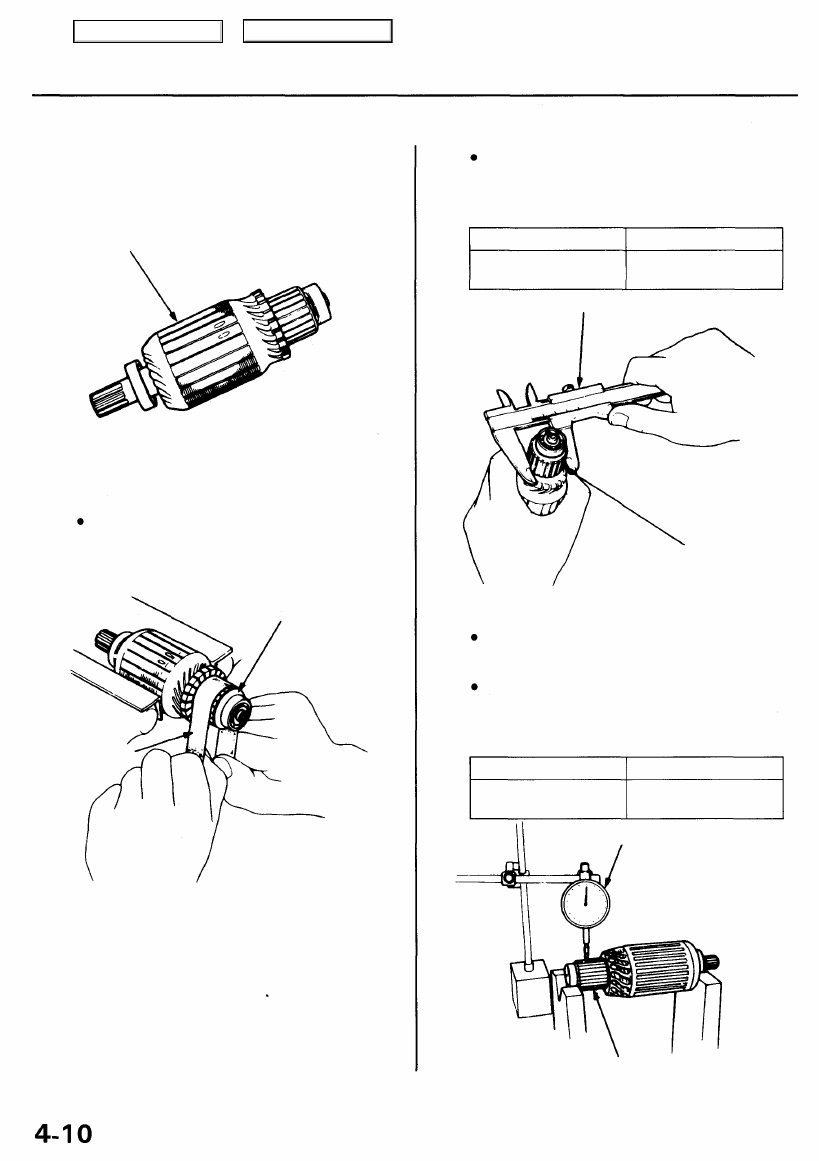
Armature Inspection and Test
1.
Inspect the armature for wear or damage due to con-
tact with the permanent magnet. If there is wear or
damage, replace the armature.
Inspect for damage
2. Check commutator surface and diameter.
If the surface is dirty or burnt, resurface with emery
cloth or a lathe within the following specifications,
or recondition with #500 or #600 sandpaper.
COMMUTATOR
SANDPAPER
If commutator diameter is below the service limit,
replace the armature.
Commutator Diameter
Standard (NEW)
31.9-32.1 mm
(1.256 -1.264 in)
Service Limit
31.5 mm
(1.240 in)
VERNIER CALIPER
COMMUTATOR
3. Measure the commutator runout.
If the commutator runout is within the service
limit, check the commutator for carbon dust or
brass chips between the segments.
If the commutator runout is not within the ser-
vice limit, replace the armature.
Commutator Runout
Standard (NEW)
0-0.05 mm
(0-0.002 in)
Service Limit
0.1 mm
(0.004 in)
DIAL INDICATOR
COMMUTATOR
Main Menu
Table of Contents
Нет комментариевНе стесняйтесь поделиться с нами вашим ценным мнением.
Текст