Acura RL (1996-2004 year). Manual — part 9
11. Finish the welds.
Use a hammer and dolly to even out the front wheel-
house and front side frame flanges for a close fit with
the surface of the front bulkhead.
).
13. Attach the front fender.
14. Lower the body.
NOTE: Tighten the wheel nuts to the specified torque.
Torque: 108 N-m (11.0 kgf-m, 79.6 Ibf-ft)
15. Apply the paint.
See Paint Repair section.
• Ventilate when spraying paint. Most paint
contains substances that are harmful if inhaled
or swallowed. Read the paint label before
opening the paint container.
• Avoid contact with skin. Wear an approved
respirator, gloves, eye protection and appropriate
clothing when painting.
• Paint is flammable. Store it in a safe place, and
keep it away from sparks, flames or cigarettes.
16. Install the related parts.
17. Inspect, check, and make adjustments.
• Adjust the headlight aim.
• Check that the electrical components light up and
operate properly.
• Replenish radiator coolant and inspect for leaks.
Main Menu
Table of Contents
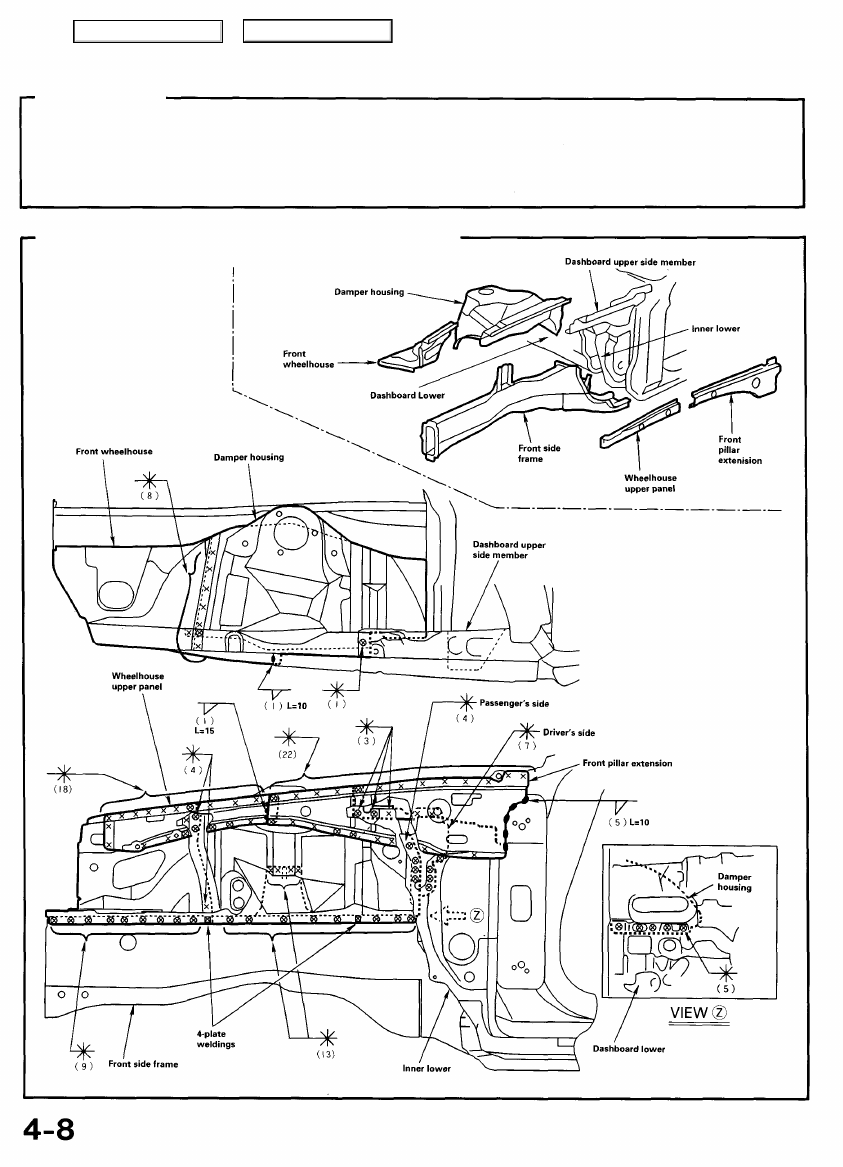
Front Wheelhouse/Damper Housing
Description
The front wheelhouse component is constructed as a unit with the front damper housing. Therefore, replacement of the
component affects the front wheel alignment. When assembling it, either use a positioning jig or follow dimensions on the
frame repair chart for positioning. Weld carefully.
Mass Production Body Welding Diagram
Main Menu
Table of Contents
Replacement
1. Remove the related parts.
• Parts to be removed when removing the front bulk-
head
• Parts on passenger side of lower dashboard which
are especially flammable
• Electrical accessories in engine compartment and
wire harnesses.
NOTE: See the 96 Acura 3.5RL Service Manual, for
removal and installation of the engine, front suspension
and brakes.
2. Pull out and straighten the damaged area to approxi-
mately the original shape.
• Attach the car to the frame straightener by tighten-
ing the underbody clamps at the horizontal pinch
weld points.
NOTE: Refer to the 96 Acura 3.5RL Service Manual for
safety stand location points.
• Before cutting off the damaged sections, pull them
out so that they are restored to the original shape.
• Do not pull out more than necessary.
• Pull out and straighten the damaged area of the
lower dashboard, front pillar, and other parts.
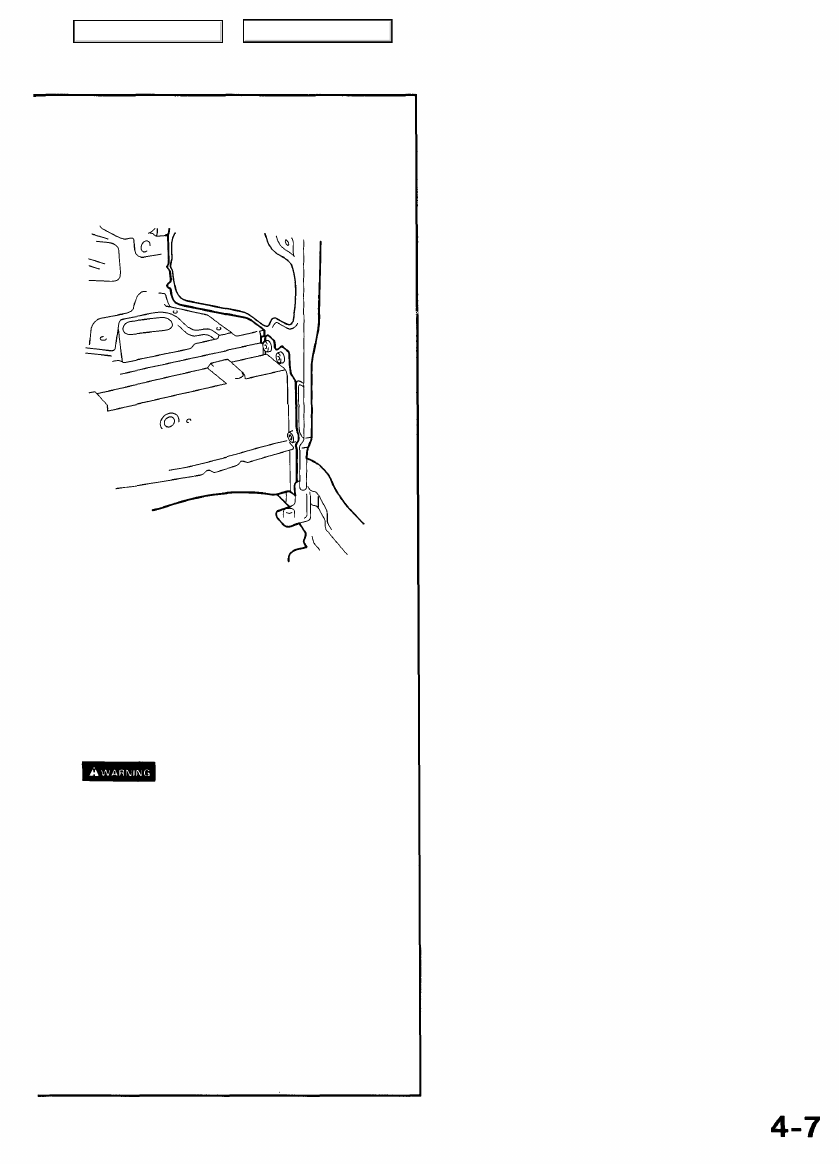
• After pulling, check the damper housing position
using the body dimensional drawings (see
and positioning jig (see page
).
NOTE: Check the condition of the door and hinges.
• Center punch around the spot weld imprints on the
front side frame and damper housing.
• Drill holes in the center punched areas using a spot
cutter.
• Using a chisel, pry off the welded flange.
3. Peel off the undercoat.
Heat the undercoat at the weld areas of the wheelhouse
and front side frame with a gas torch, and peel off the
undercoat with a metal spatula.
4. Cut and pry off the front wheelhouse and damper
housing.
-1 When replacing the front wheelhouse only.
• Remove the wheelhouse upper panel.
• Remove the MIG weld flange with a disc sander.
To prevent eye injury, wear goggles or
safety glasses whenever sanding, cutting or grinding.
NOTE: Remove the wheelhouse upper panel carefully so
they can be reused.
Main Menu
Table of Contents
Front Wheelhouse/Damper Housing
Replacement (cont'd)
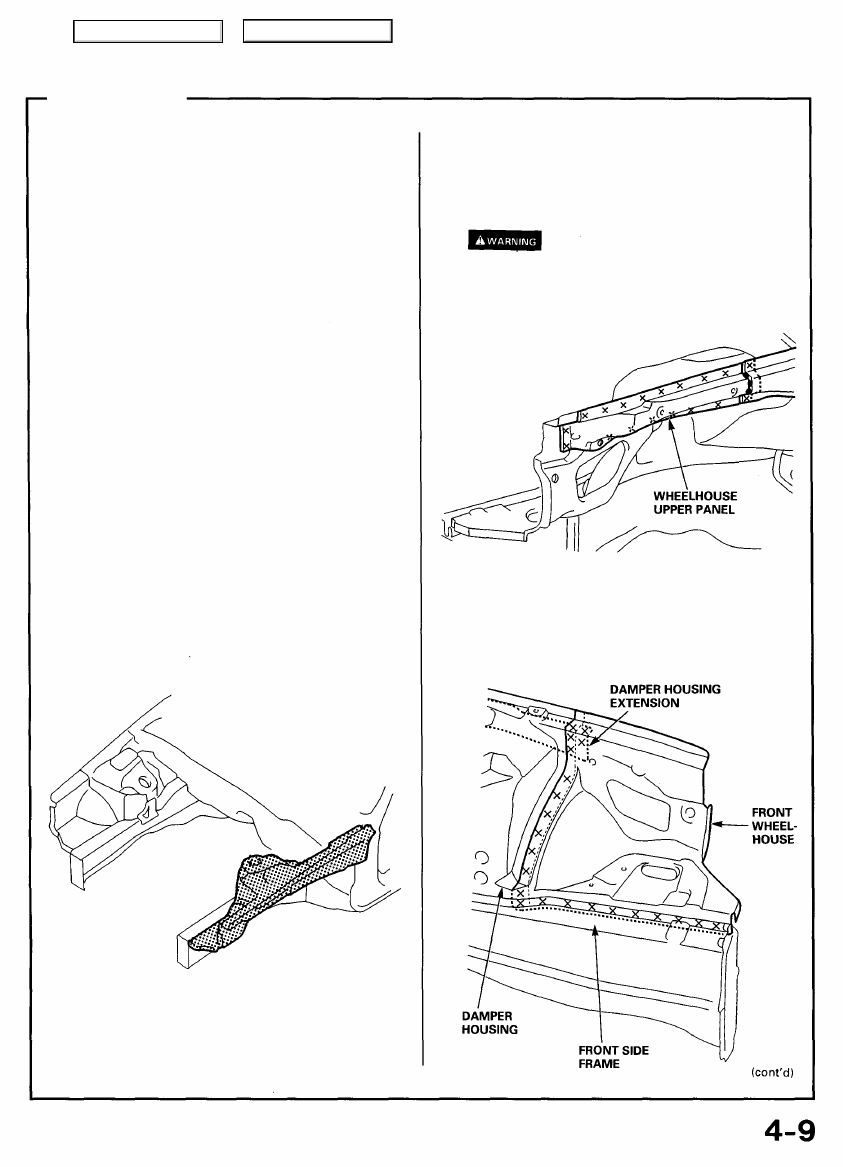
- 2 Replace the damper housing with the front
wheelhouse.
• Remove the front pillar extension.
• Remove the MIG weld flange with a disc sander.
To prevent eye injury, wear goggles or
safety glasses whenever sanding, cutting or grinding.
• Using a chisel, pry off the welded flange form the
front pillar and damper housing.
NOTE: Remove the front pillar extension carefully so they
can be reused.
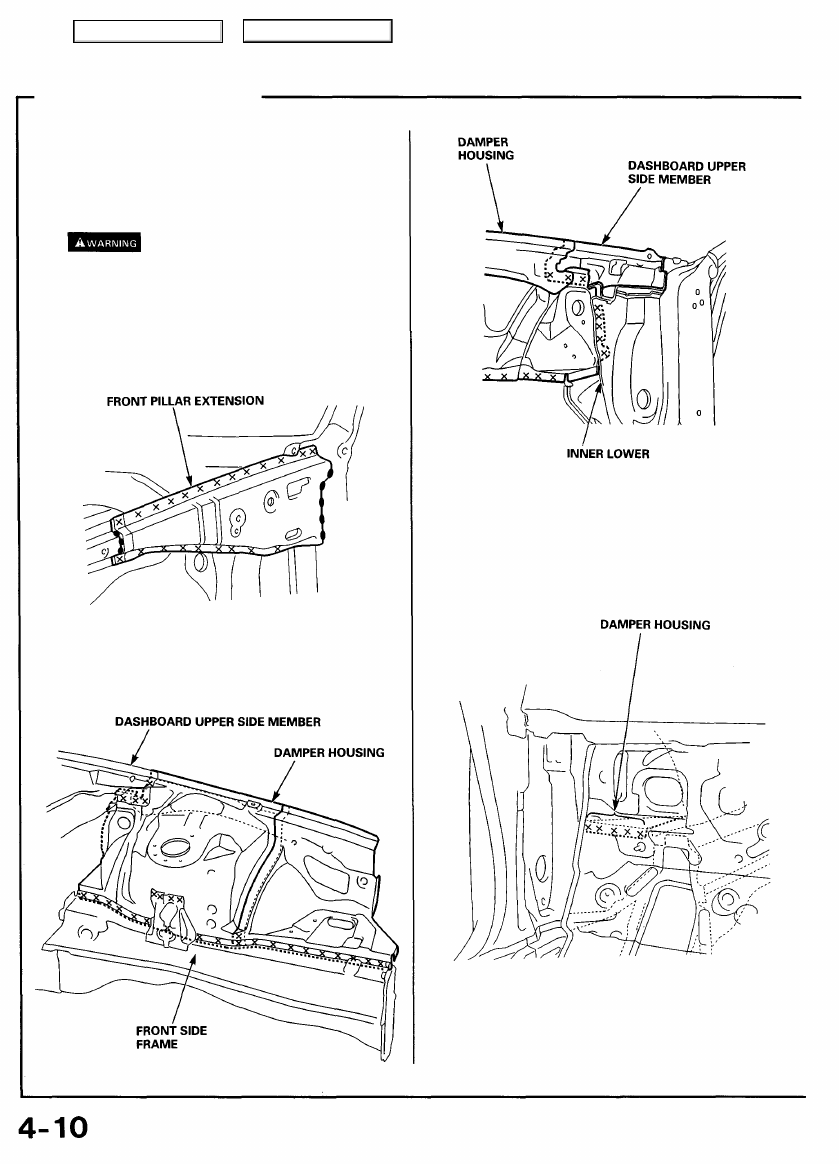
• From the passenger compartment side, drill holes in
the spot welded area with a 5 mm (0.2 in).
NOTE: Drill holes completely through the parts since the
replacement damper housing will be welded by MIG
welding.
• Using a spot cutter, drill holes in the spot welded area
on the front side frame and dashboard upper side
member.
Main Menu
Table of Contents
Нет комментариевНе стесняйтесь поделиться с нами вашим ценным мнением.
Текст