Acura RL (1996-2004 year). Manual — part 18
8. Mold the related parts.
• Remove the burrs from the spot weld or MIG weld
using a sander.
To prevent eye injury, wear goggles
or safety glasses whenever sanding, cutting or
grinding.
• Fill any holes made in the spot welded areas of the
flange by MIG or gas welding.
To prevent eye injury and burns
when welding, wear an approved welding helmet,
gloves and safety shoes.
9. Keep the body level.
Jack-up the body at the front and back. Place safety
stands at the four designated places of the side sill.
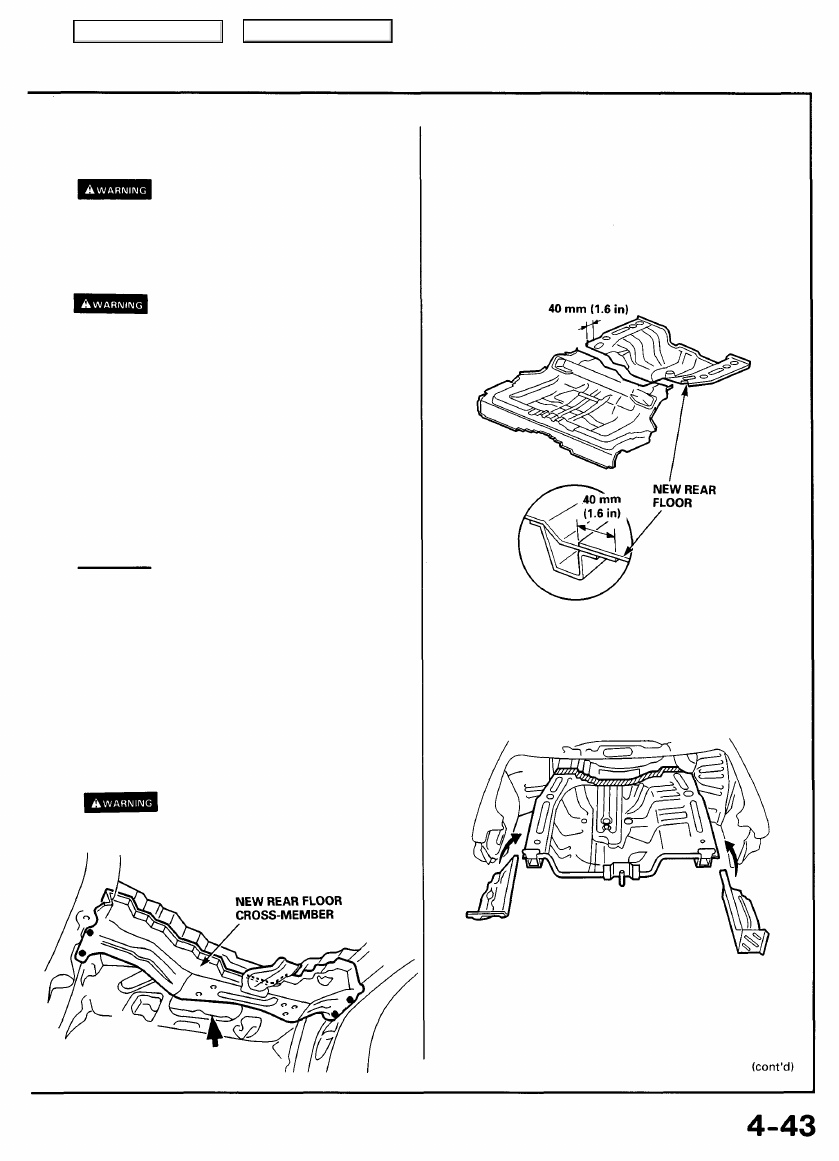
10. Check the position of the rear frames using the body
) and the position-
ing jig.
11. Set the new rear floor cross-member.
• Sand off undercoat from both sides of the areas to
be welded to expose the steel plate.
To prevent eye injury, wear goggles
or safety glasses whenever sanding, cutting or
grinding.
• Set the new rear floor cross-member in the original
position properly and place a jack under the rear floor
cross-member for support.
• Refer to the set position body dimensional drawings
) for proper positioning of the rear floor
cross-member.
• Temporarily weld the mating surfaces with the rear
frame.
To prevent eye injury and burns
when welding, wear an approved welding helmet,
gloves and safety shoes.
14. Remove the new rear floor and floor pockets.
13. Clamp the new rear floor and floor pockets, and recheck
the position of the rear frames and rear floor cross-
member.
• Check the fuel tank strap positions.
12. Cut the new rear floor to align it with the body.
NOTE: Cut the new part so it overlaps the body side floor
by approximately 40 mm (1.6 in).
• Remove the undercoat from both sides of the areas
to be welded with a sander to expose the steel plate.
Main Menu
Table of Contents

Rear Floor/Rear Floor Cross-member
Replacement (cont'd)
15. Main weld the new rear floor cross-member.
To prevent eye injury and burns
when welding, wear an approved welding helmet,
gloves and safety shoes.
• MIG/plug weld the rear floor cross member from the
trunk compartment.
• Temporarily weld the mating surfaces with the rear
floor and floor pockets.
To prevent eye injury and burns
when welding, wear an approved welding helmet,
gloves and safety shoes.
• Check the rear panel position.
18. Perform the main welding.
To prevent eye injury and burns
when welding, wear an approved welding helmet,
gloves and safety shoes.
Spot welding:
Make 20% to 30% more spot welds than there were
holes drilled.
MIG welding:
• Drill the holes for welding the repair part.
• Check the rear frame position and weld the repair part
to the rear frames.
16. Finish the welding area.
• Roughly grind the welds in the trunk compartment
with a disc grinder. Be sure to leave the finishing
allowance this time.
NOTE: Take care not to grind excessively.
17. Set the new rear floor and floor pockets.
NOTE: Apply the spot sealer to the welding surface when
spot welding.
Main Menu
Table of Contents
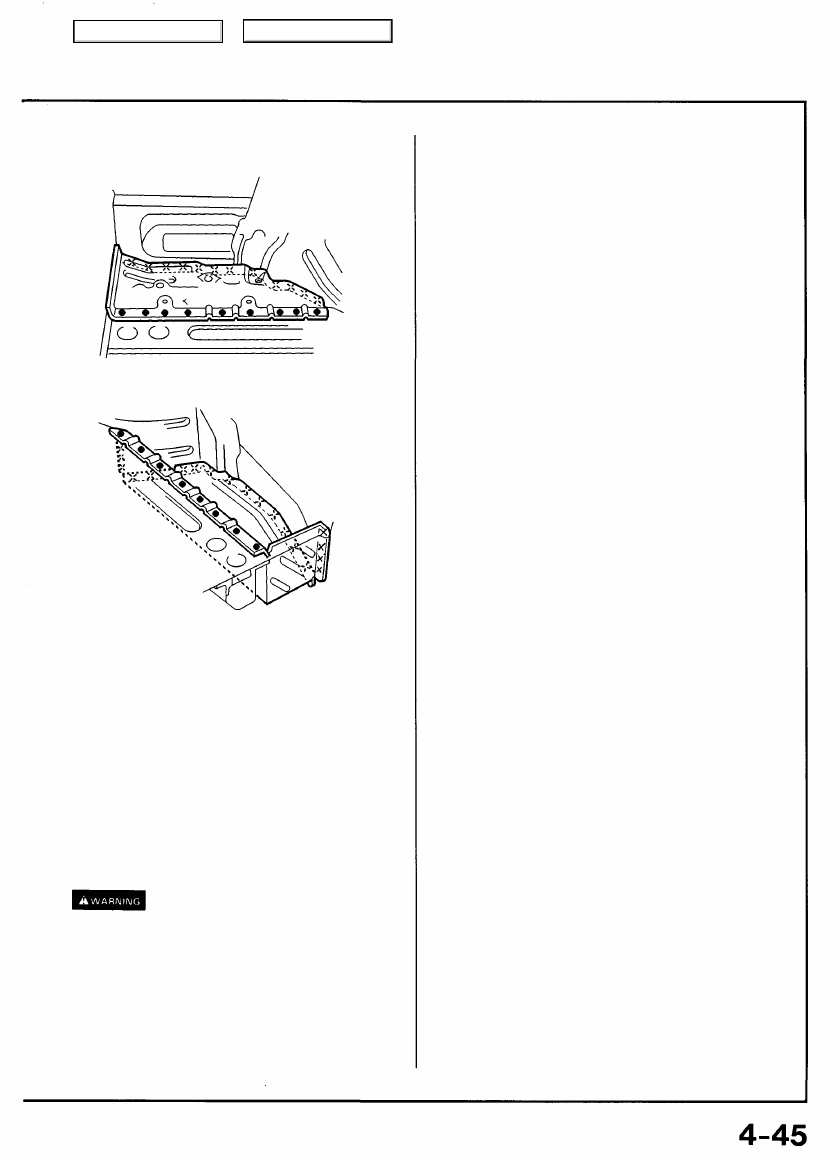
• Weld the new floor pockets.
22. Apply the undercoat.
Apply anti-rust agent to the inside of the rear floor cross-
member, jack-up stiffener and jointed areas of the rear
).
23. Weld the rear panel and install the related parts.
Install in the reverse order in which they were removed.
24. Inspect and clean.
• Measure the rear wheel alignment.
• Clean the inside of the trunk compartment.
• Weld the rear panel (see page
).
19. Finish the welded area.
Even out the welded area with a hammer and dolly, and
fit the flange surfaces closely together.
20. Apply the sealer.
Apply sealer at the overlapped area of the rear floor, and
the welded surfaces of the rear wheelhouse and rear end
inner panel. Seal gaps completely (see
).
21. Apply the paint.
See Paint Repair section.
• Ventilate when spraying paint. Most paint
contains substances that are harmful if inhaled
or swallowed. Read the paint label before
opening the paint container.
• Avoid contact with skin. Wear an approved
respirator, gloves, eye protection and appropriate
clothing when painting.
• Paint is flammable. Store it in a safe place, and
keep it away from sparks, flames or cigarettes.
Main Menu
Table of Contents

Honeycomb Floors
Description
NOTE: What is known as "honeycomb" construction is employed for the front floor. Properly designed and applied, it plays an
important role in maintaining the structural rigidity of that section of the car's floor. The honeycomb floor is installed with an epoxy
resin adhesive. Care must be exercised when installing a new honeycomb floor as seepage of water into the honeycomb
construction will adversely affect its performance.
Replacement
3. Flattening of melt-sheet.
• Heat the surface of the melt-sheet with a torch or heat
gun until it becomes soft and pliable.
• Finish the surface smooth and flat with a steel spat-
ula.
NOTE: In order to take full advantage of the honeycomb
floor, its face must contact the base fully.
CAUTION: Be careful not to burn the fittings inside
the passenger compartment when heating.
1. Remove the related parts.
• Front and rear seats.
• Carpet, others
2. Removal of honeycomb floors.
• Scrape off the dust sealer all the way around the
floor.
• Separate the floor from the body by using a pair of
pliers.
Main Menu
Table of Contents
Нет комментариевНе стесняйтесь поделиться с нами вашим ценным мнением.
Текст