Acura TL (1995-1998) body repair. Manual — part 25
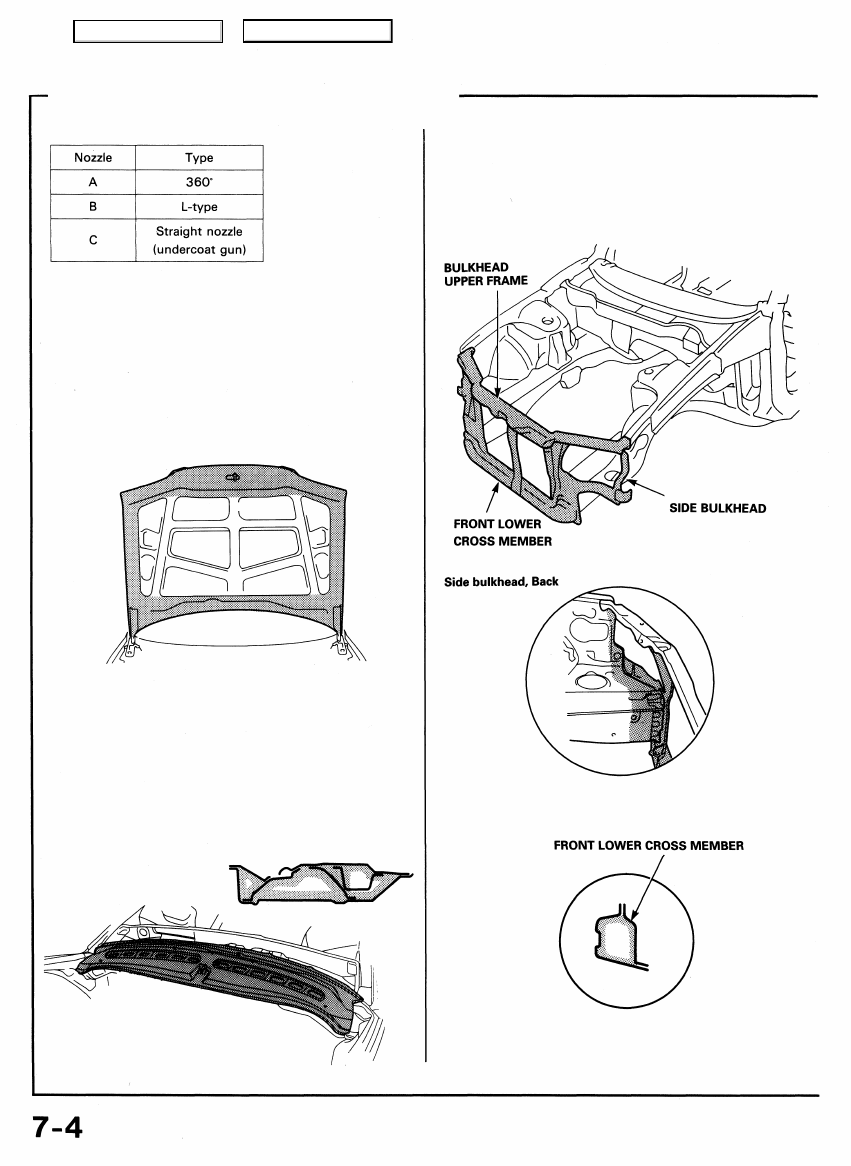
Areas to be Covered by Anti-rust Agents
Rust-preventive Treatments
Rust-preventive Treatments:
Hood, Underside
• Coat the entire panel and seams all the way around.
• Spray sufficient anti-rust agent to the front area and
each corner.
• Apply rust-preventive agent or grease to the hood
hinges.
• Also coat the bulkhead upper frame and hood frame with
anti-rust agent.
Nozzles used: A and B
Front Bulkhead Area
• With the hood opened, coat the joints of the bulkhead,
wheelhouse and side frame and around the back of the
headlight assembly.
Nozzle used: B
• Coat the inside of the front lower cross member.
Nozzles used: A and B
Dashboard Upper/Windshield Lower
• Coat the windshield lower and dashboard upper water
drain with anti-rust agent at front, right and left.
• Spray anti-rust agent completely over the rear of the
dashboard upper (windshield side).
NOTE: To insert the nozzle in the dashboard upper, remove
the air scoop grille for easier, more thorough spraying.
Nozzles used: A and B
Main Menu
Table of Contents
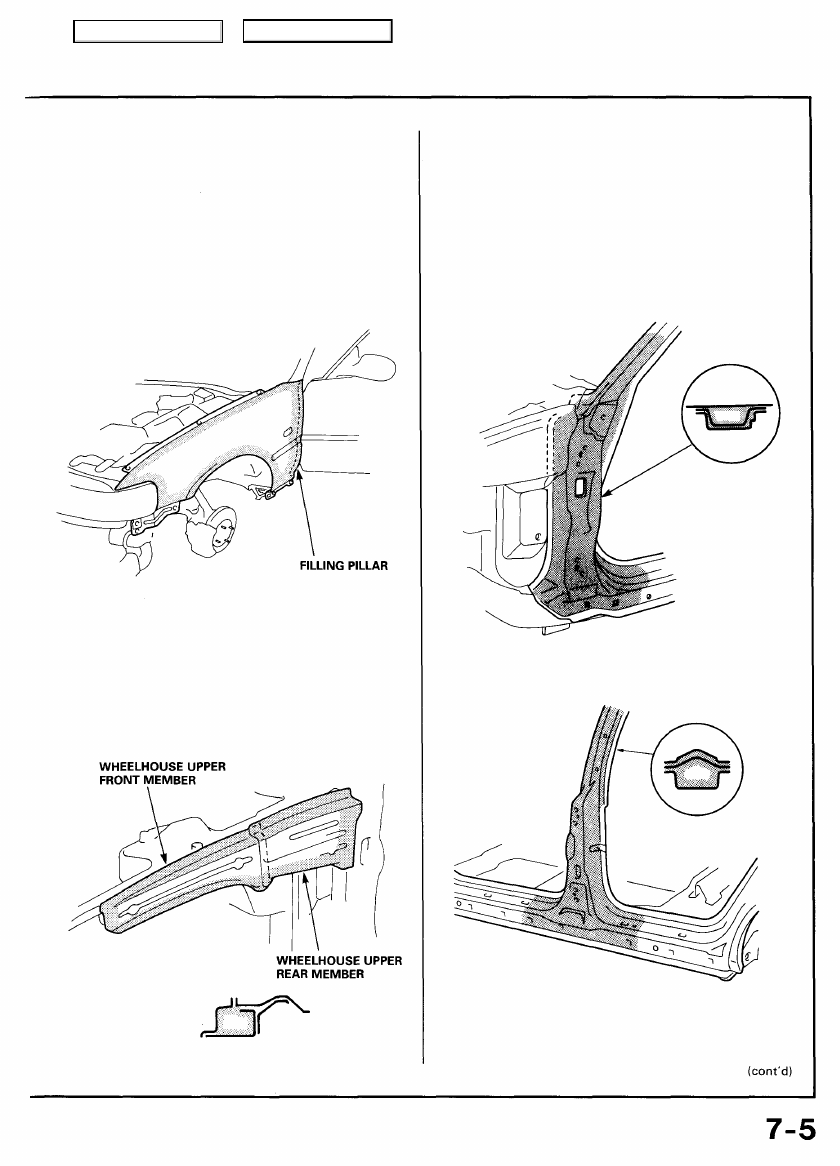
Front Fender, Underside
Apply anti-rust agent to the end of the fender, wheelhouse,
and side sill installation.
NOTE:
• Apply a coat of agent to the front door side, wheel arch
end.
• If the fender is to be removed, care take to avoid damaging
the paint finish. Apply agent to the entire surface of the
back of the fender.
• Apply agent to the front fender filling pillar.
Nozzles used: B and C
Outside Panel (Front Pillar and Center Pillar), Inside
• Remove the door harness grommet and insert the nozzle
facing down.
NOTE: Make sure that the nozzle is not interfering with the
door hinge bracket. Spray thoroughly.
• Coat the door checker bracket.
Nozzles used: A and B
Front Pillar
Wheelhouse Upper Member, Inside
• Remove the front fender.
• Remove the air scoop grille in the dashboard upper and
coat the inside of the wheelhouse upper member with
anti-rust agent.
Nozzles used: A and B
Center Pillar
Main Menu
Table of Contents
<Rear>
<Front>
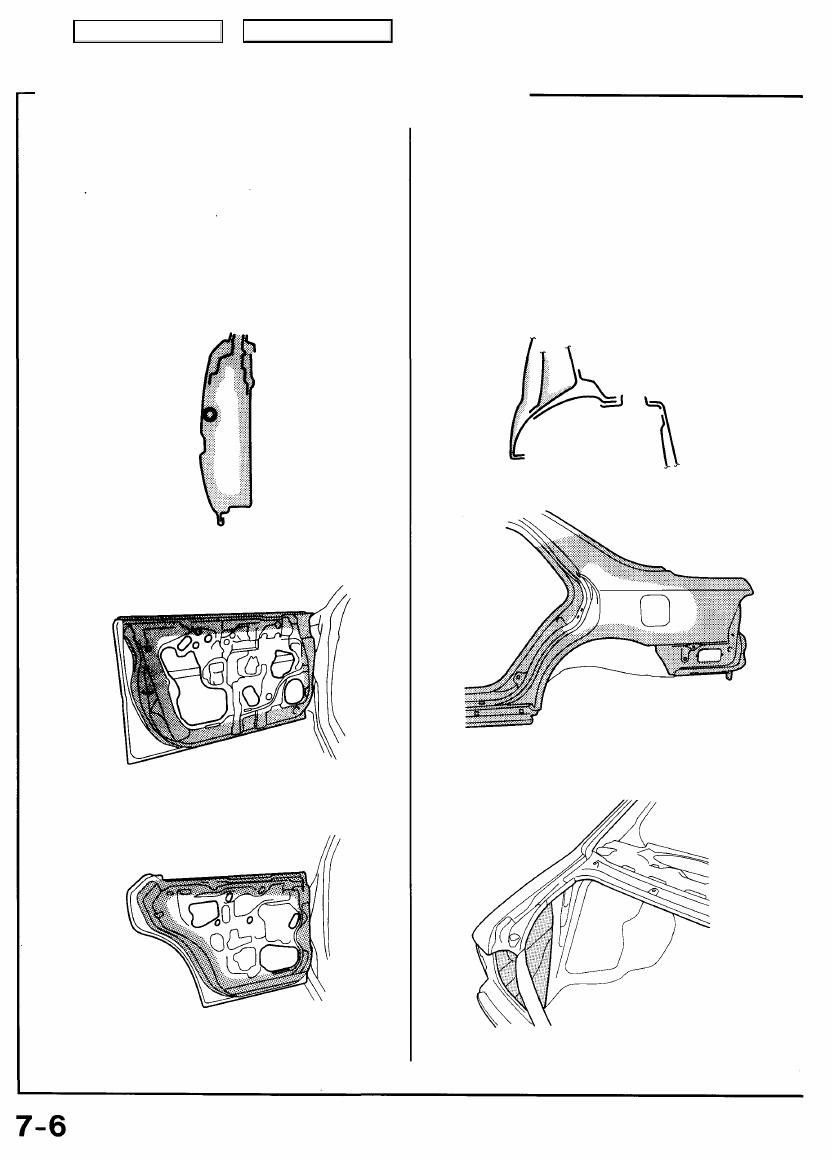
Doors, Inside
• Apply agent to the joint between the door stiffener and
door skin through the water drain hole at the bottom of
the door.
• If necessary, remove the door side molding and weather-
strip, then spray the agent through the hole.
NOTE: When a suction type spray gun is used, remove the
door trim panel.
Nozzles used: A and B
Rear Side Outer Panel, Inside
• Remove the door lock striker, taillight and grommets, then
spray agent through the hole.
• To apply agent to the inside of the rear wheelhouse,
remove rear trim panel and trunk side trim panel.
NOTE: Make sure that all the surfaces are coated with anti-
rust agent since the areas to be covered are relatively
extensive.
Nozzle used: A
Areas to be Covered by Anti-rust Agents (cont'd)
Rust-preventive Treatments
Main Menu
Table of Contents
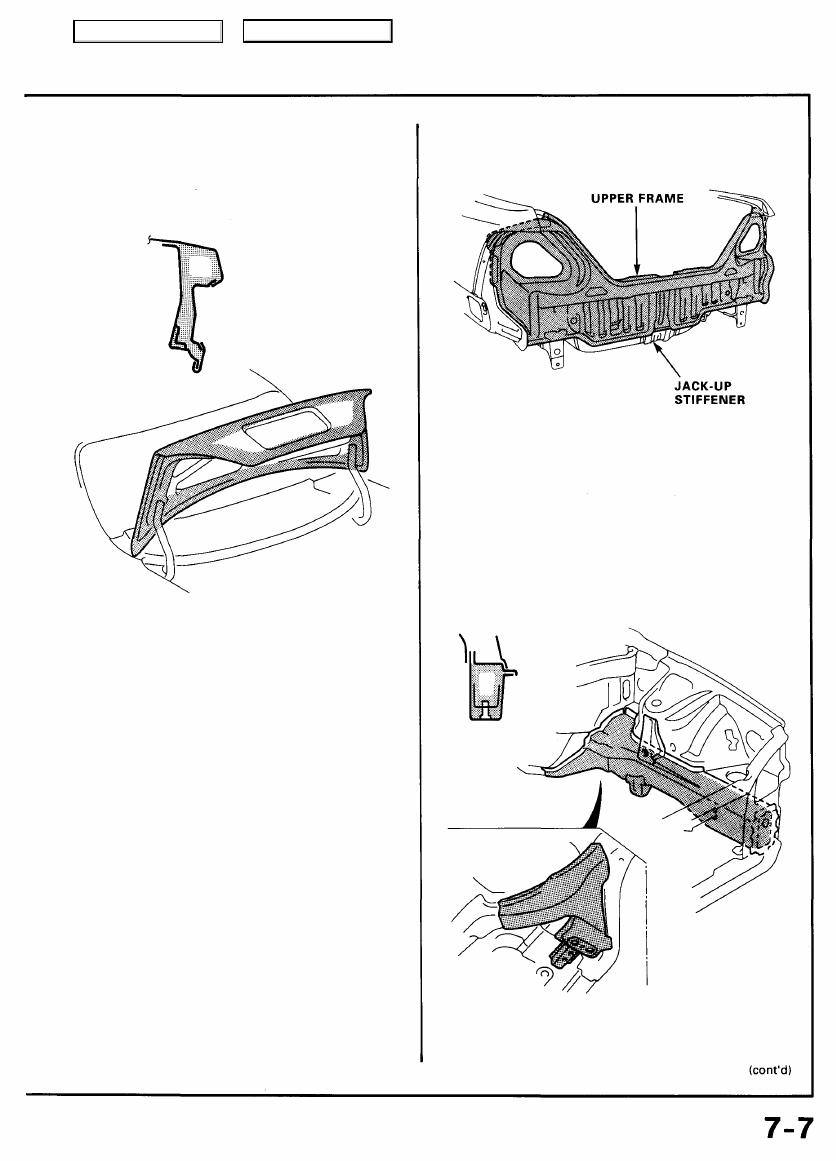
Rear Panel, Inside and Outside/Rear Floor End
• Apply the agent to the gap between the rear panel and
rear floor.
• Apply the agent to the inside of the rear panel upper and
center frame.
• Undercoat may be used on those areas of the rear panel
that are concealed from view when parts are installed.
• Apply the agent to the inside of the jack-up stiffener.
Front Side Frame, Inside
• Remove the grommets from inside the front
compartment and coat the inside of the front side
frame.
• Coat the battery mount bracket base.
Nozzles used: A and B
Nozzle used : B
Trunk Lid Inside
• Coat the trunk lid skin, and frame seams all the way around.
• On the trunk lid, apply the agent to the inside of the
reinforcement frame.
Nozzles used: A and B
Main Menu
Table of Contents
Нет комментариевНе стесняйтесь поделиться с нами вашим ценным мнением.
Текст