Acura TL (1995-1998) body repair. Manual — part 32
Materials and Tools (cont'd)
Polypropylene (PP) Resin Parts
-2.Hardening starts immediately after mixing.
Practical hardness will be obtained within 60 min-
utes. The surface will be tacky within 5 minutes and
nearly hardened after 15 minutes. It takes 12 hours
for the surface to harden thoroughly 68°F (20°C)
-3.Sanding can be done after:
• Ventilate when spraying paint. Most paint
contains substances that are harmful if inhaled or
swallowed. Read the paint label before opening
the paint container.
• Avoid contact with skin. Wear an approved
respirator, gloves, eye protection and appropriate
clothing when painting.
• Paint is flammable. Store it in a safe place, and
keep it away from sparks, flames or cigarettes.
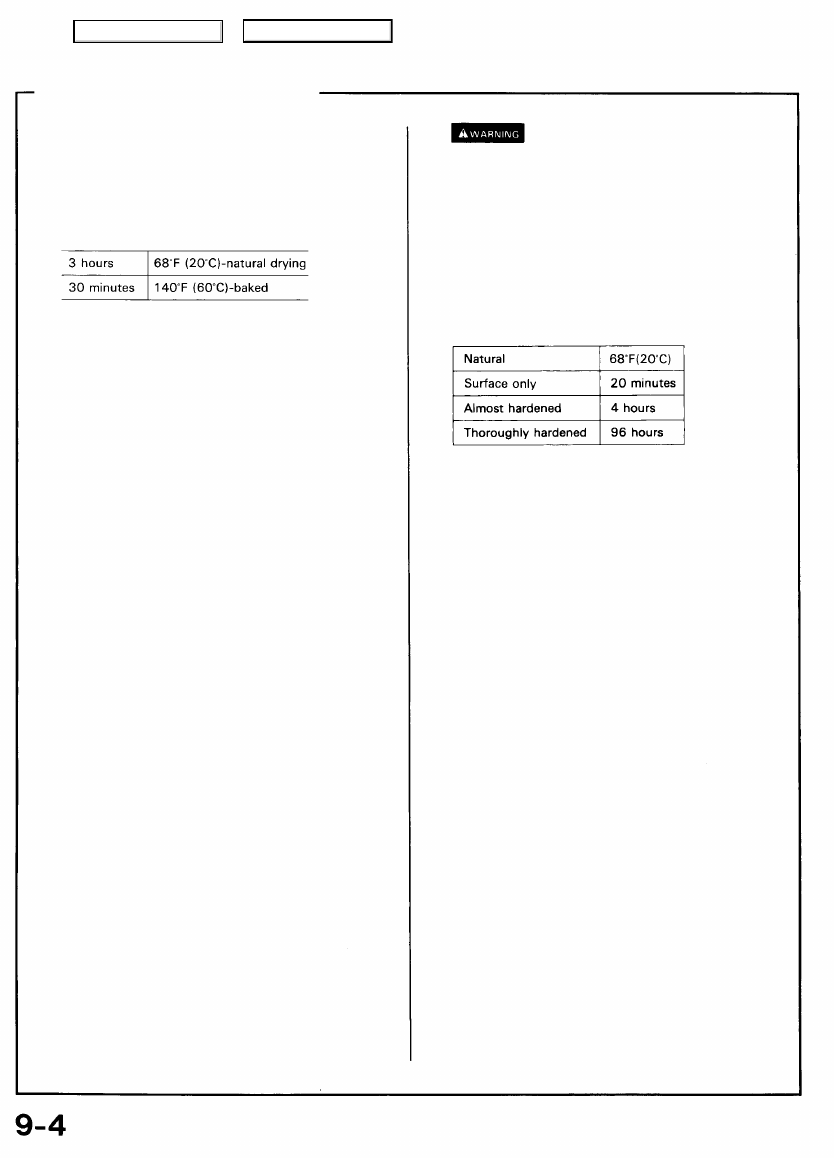
Drying time:
NOTE: The HIGH ART MAT BLACK SURFACER is a
dual liquid type. If mixed, it will harden in a matter of
hours.
3. Primer Surfacer
NOTE: Use a dual-liquid type bumper primer surfacer
(gray).
• The primer surface is used to protect the PP resin
surface and to fill cavities or flaws in the intermediate
and top coats.
• Mix 10 parts of primer surfacer and 1 part of har-
dener. Add the specific thinner (30-60%) to the
mixture of the hardener and primer to attain the
proper viscosity for spraying.
4. Intermediate and Top Paint Coats (Body color)
NOTE:
• The paints are the dual liquid type based on the color
chart.
• Measure the pigment and hardener as described so
they are in correct ratio.
• Use the acrylic urethane paint prepared according to
the mixing chart as the intermediate coat.
Mixing Ratio:
Mix 5 parts of body color pigment to 1 part of additive.
Mix 4 parts of the mixture of the pigment and additive
with 1 part of the hardener.
NOTE:
• Dilute the mixture with 40-50% of the specified
thinner (Highart Thinner).
• Be sure to mix the correct amount of the additive.
• Use a spray gun to apply the paint. Do not use a
brush.
Main Menu
Table of Contents
Refinishing Processes
Main Menu
Table of Contents
Repair Procedures
Polypropylene (PP) Resin Parts
Main Menu
Table of Contents
Refinishing Procedures
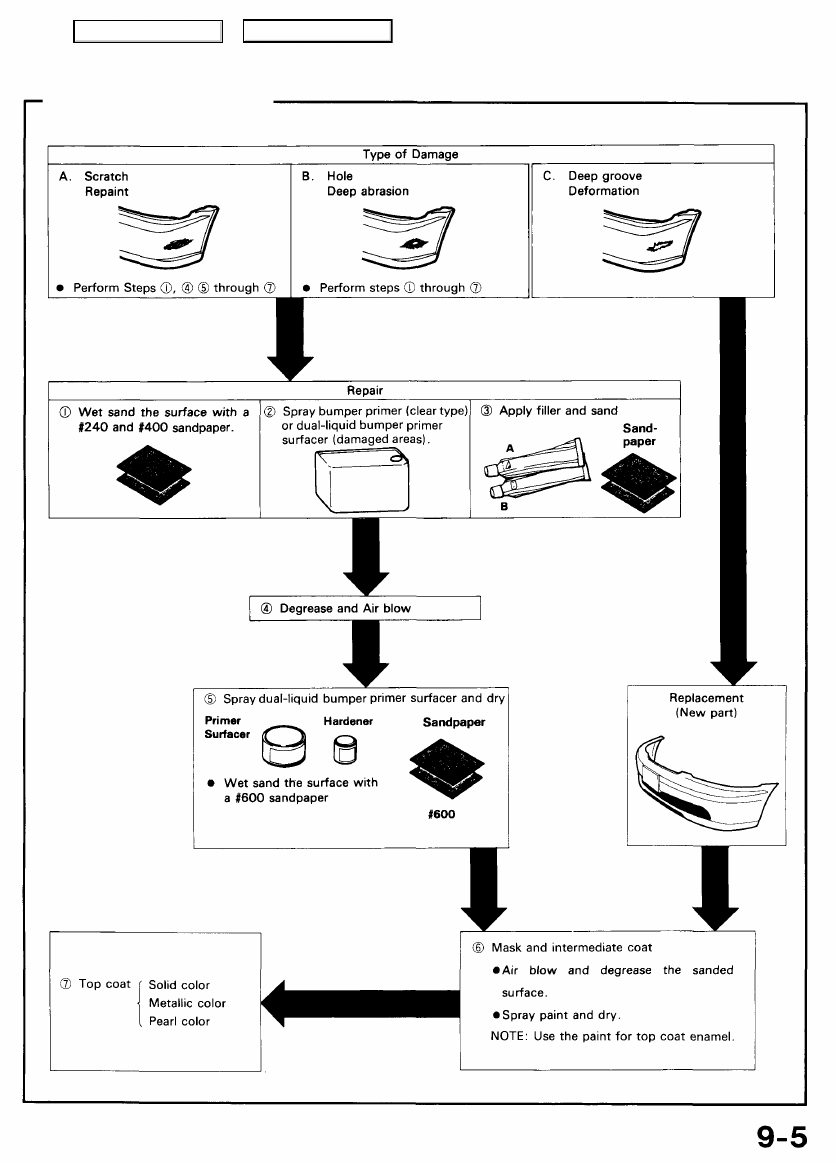
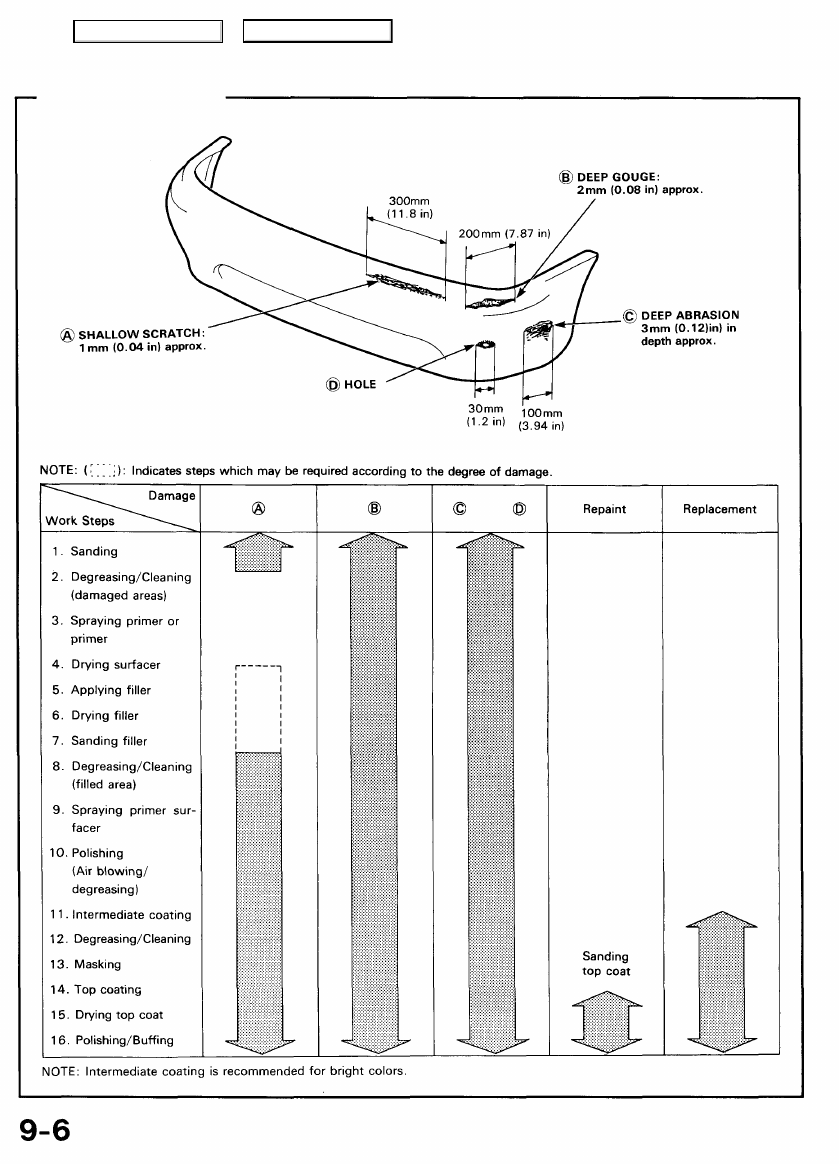
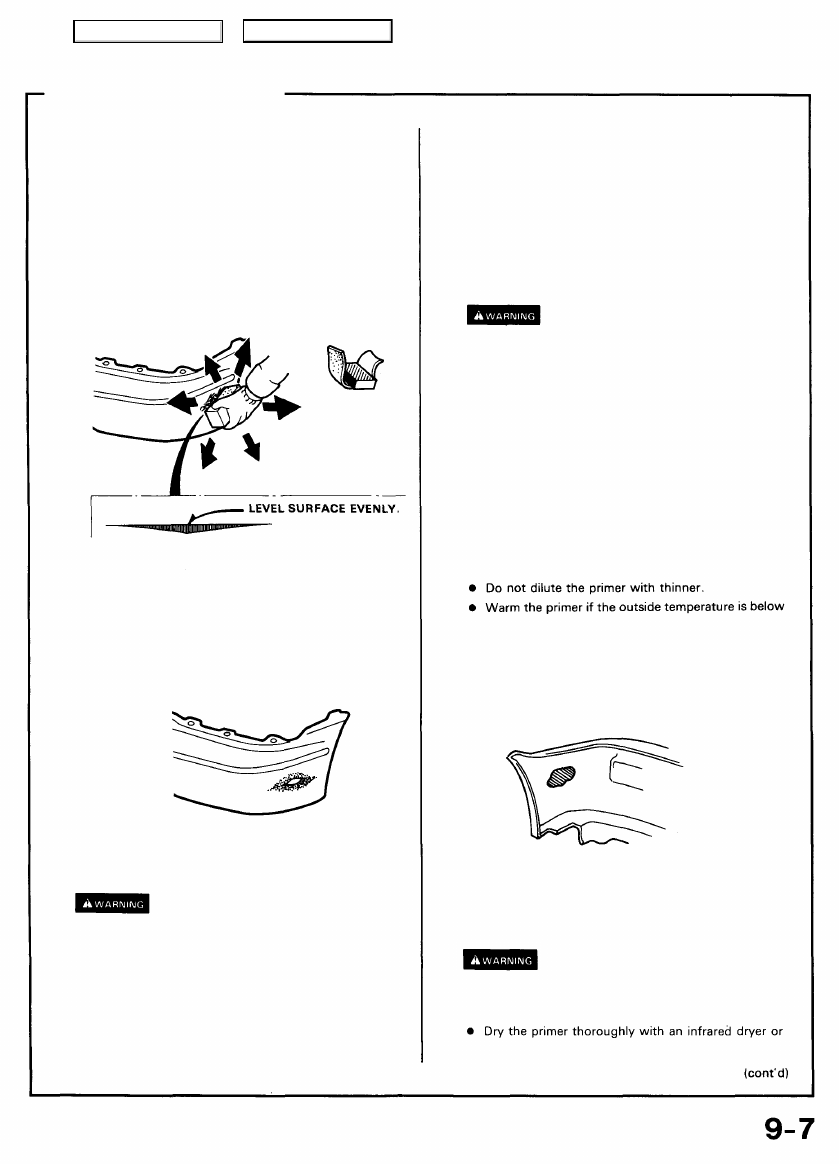
1. Sanding damaged areas
Shallow scratch:
• Level and finish damaged areas with #240-#400
sandpaper.
• Polish the leveled area with #400 sandpaper.
NOTE:
• Use a flexible block to sand the surface evenly.
• Do not remove too much material.
NOTE: Be sure to use a tack cloth. Dust and dirt are
electrostatically drawn to the surface.
3. Applying bumper primer (clear type).
• Stir thoroughly before applying the primer. Use a
spray gun or brush depending on working condi-
tions.
• Ventilate when spraying paint. Most paint
contains substances that are harmful if inhaled
or swallowed. Read the paint label before
opening the paint container.
• Avoid contact with skin. Wear an approved
respirator, gloves, eye protection and
appropriate clothing when painting.
• Paint is flammable. Store it in a safe place, and
keep it away from sparks, flames or cigarettes.
• Cover as wide an area as possible, except for shallow
grooves (2-3 coats).
NOTE:
50°F (10°C).
• Apply the primer to the back of the bumper if the
damage is a tear or hole.
Deep groove/tear:
• Level and finish burrs and other irregularities with
#240 sandpaper. Keep the surface as even as
possible.
2. Degreasing/Cleaning
• Do not use high air pressure; use only an ap-
proved, 210 kPa (2.1 kgf/cm
2
,30 psi) air nozzle.
• Wear goggles or safety glasses to prevent eye
injury.
• Clean with wax and grease remover and dry with
compressed air.
surface with a tack cloth.
4. Drying bumper primer.
Body parts being dried with an
industrial dryer can get hot enough to cause injury.
Do not touch parts being dried.
• Dry the primer thoroughly with an infrared dryer or
other dryer suitable for the purpose.
Main Menu
Table of Contents
Нет комментариевНе стесняйтесь поделиться с нами вашим ценным мнением.
Текст