Mazda Training manual — part 218

TC001-18-01H
INTRODUCTION TO M-MDS
13 - Retrieving DTCs and Freeze Frame Data
Activity 13- Page 9
Activity 13
(Continued)
18. Click
the
“blue bars” icon on the upper right, then select Exit in the
pop-up window. Now press enter or click tick in the pop-up window to exit.
19. The following screen displays the vehicle specifications.
TC001-18-01H
INTRODUCTION TO M-MDS
13 - Retrieving DTCs and Freeze Frame Data
Activity 13- Page 10
Activity 13
(Continued)
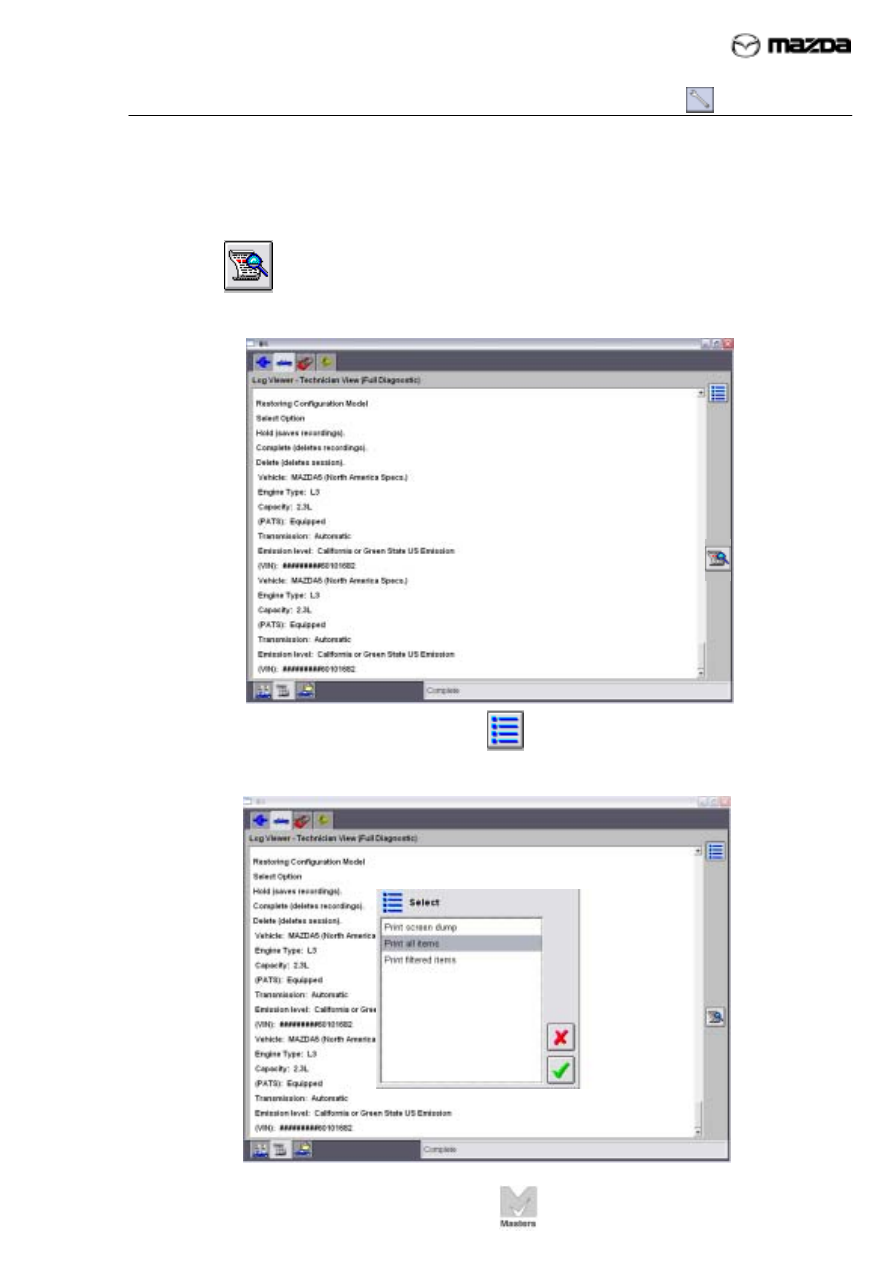
20. To view / print Freeze Frame Data and the vehicle session log, click
the
Log Viewer icon on the right of the screen. Use the scroll bar on the
right to view additional data.
21. To print the vehicle session, click the
“blue bars” icon. Then select Print
all items in the pop-up window and click tick.
TC001-18-01H
INTRODUCTION TO M-MDS
13 - Retrieving DTCs and Freeze Frame Data
Activity 13- Page 11
Activity 13
(Continued)
NOTE
Make sure you print the Freeze Frame Data for this activity. You will need to turn
the printout in to your instructor.
22. Click
the
Close Session tab in the lower left corner, then select Delete
and press enter or click tick.
NOTE
Depending on the repairs made to the vehicle you may need to select Hold or
Complete to save recordings for future reference.
23. Click
the
X
in the upper right corner to close the window.

TC001-18-01H
INTRODUCTION TO M-MDS
13 - Retrieving DTCs and Freeze Frame Data
Activity 13- Page 12
Activity 13
(Continued)
24. Click tick in the pop-up window to exit IDS and return to the desktop.
Conclusion:
In this activity, you used M-MDS to retrieve DTCs and read Freeze Frame Data.
Printed Freeze Frame Data verified? Check __Yes or __No
Instructor Sign-off: ________________________________
Нет комментариевНе стесняйтесь поделиться с нами вашим ценным мнением.
Текст