Mazda Training manual — part 195

TC001-18-01H
INTRODUCTION TO M-MDS
05 – Reading and Printing Freeze Frame Data (FFD)
Activity 05- Page 7
Activity 05
(Continued)
Print Freeze Frame Data
20. Place the PDA in the cradle attached to the
same PC that you previously used.
21. The Microsoft ActiveSync pop-up window will display on the PC’s desktop. This
window indicates the PDA and PC are communicating.
If all files do not
synchronize click on the
Sync icon as
needed until the pop-up
window displays
“Synchronized” under
Connected on the top
half of the window.
22. Click
the
X
in the upper
right corner to close the
pop-up window.
23. Double-click the Pocket_PC [number] My Documents folder.

TC001-18-01H
INTRODUCTION TO M-MDS
05 – Reading and Printing Freeze Frame Data (FFD)
Activity 05- Page 8
Activity 05
(Continued)
24. Double-click
the
PDS folder.
25. Double-click
the
WriteTraceFiles folder.
26. Double-click
the
Trace File [number].txt file you wrote down in step 15 on
page 5.
TC001-18-01H
INTRODUCTION TO M-MDS
05 – Reading and Printing Freeze Frame Data (FFD)
Activity 05- Page 9
Activity 05
(Continued)
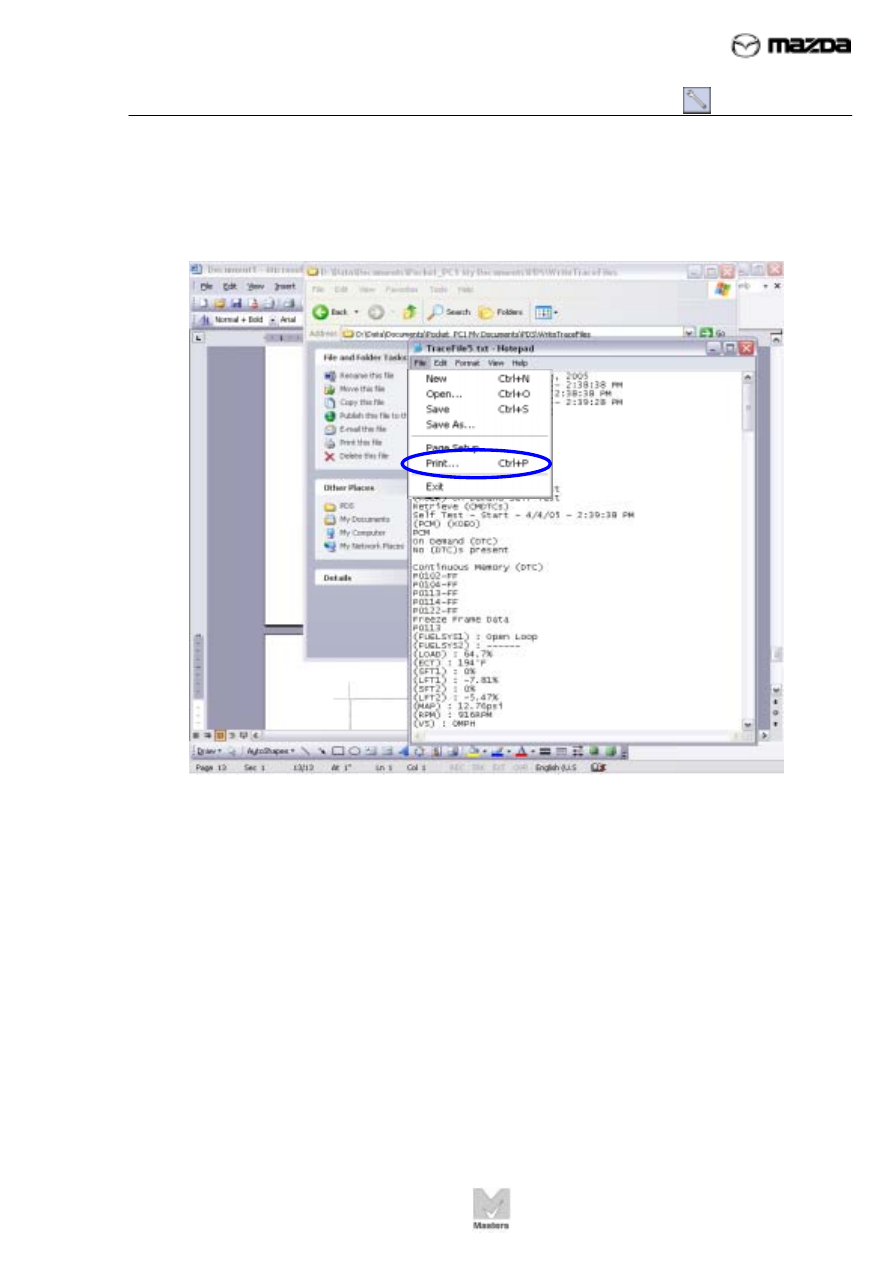
27. Click on the File menu in the TraceFile pop-up window, then click Print.
TC001-18-01H
INTRODUCTION TO M-MDS
05 – Reading and Printing Freeze Frame Data (FFD)
Activity 05- Page 10
Activity 05
(Continued)
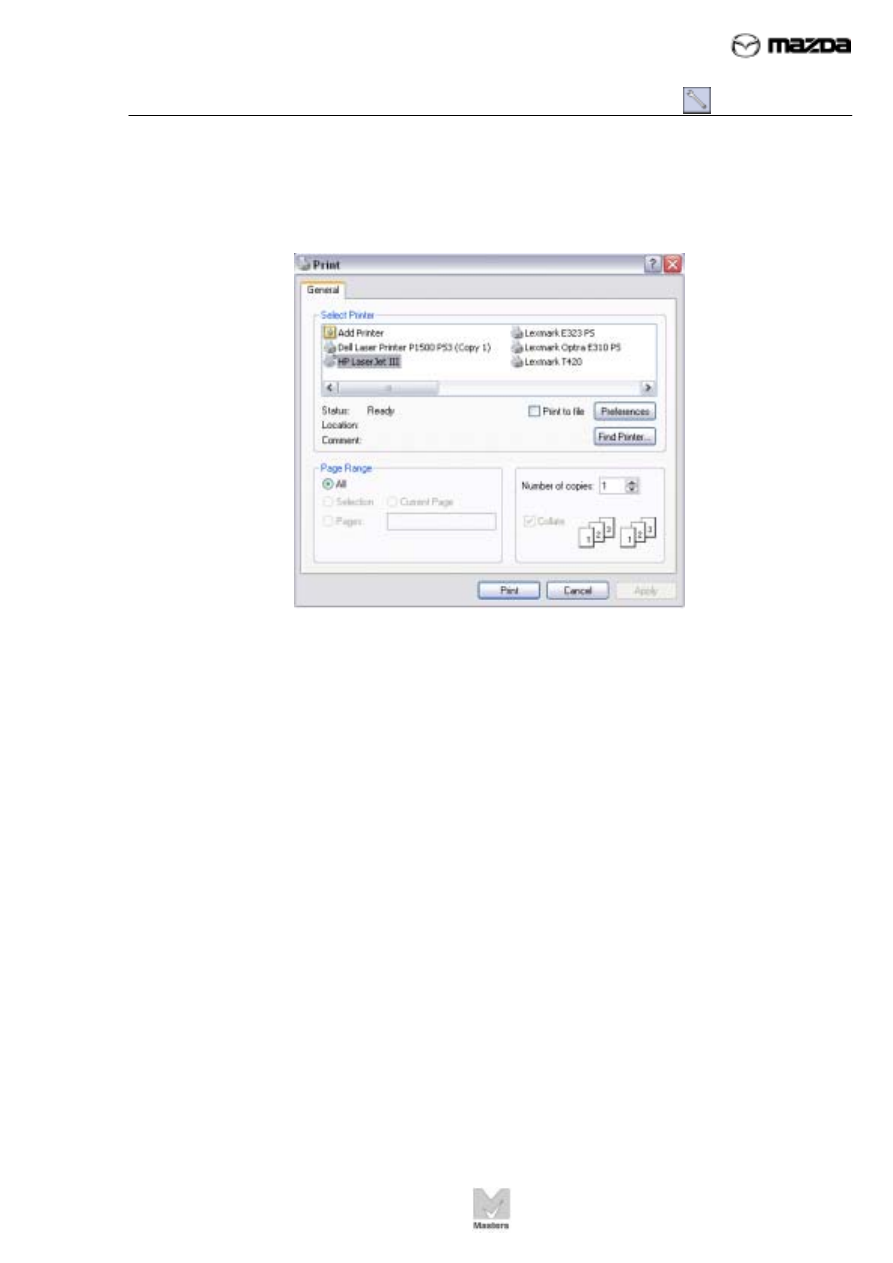
28. When the Print window displays, click Print to print the FFD.
The FFD is now printed. Bring this activity and the printed FFD page to your
instructor to sign off this activity.
Conclusion:
In this activity, you used M-MDS to read and print FFDs.
Instructor Sign-off: _________________________________
Нет комментариевНе стесняйтесь поделиться с нами вашим ценным мнением.
Текст