Defender (1999-2002). Manual — part 63
19
FUEL SYSTEM
10
REPAIR
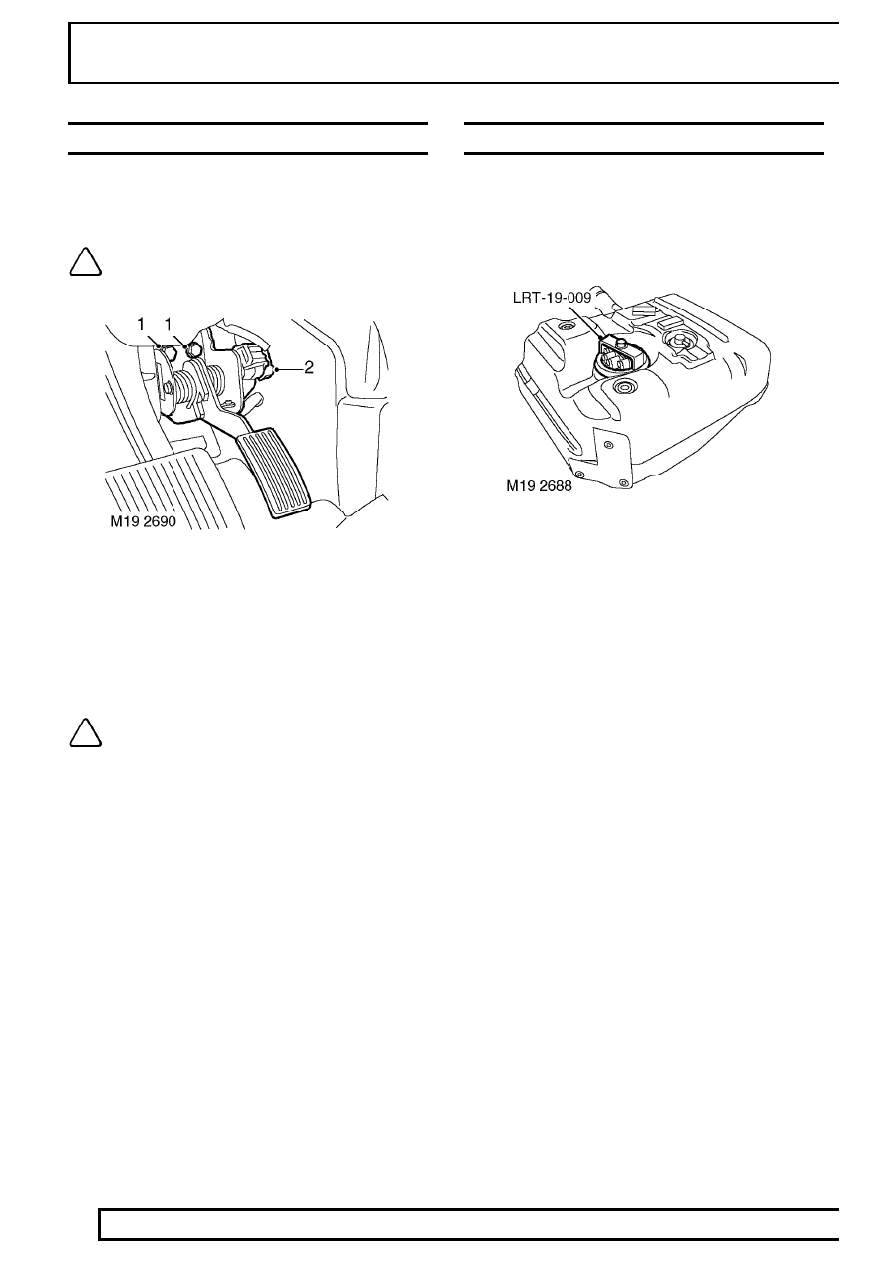
POTENTIOMETER - THROTTLE
Service repair no - 19.30.14
Remove
NOTE: The throttle potentiometer is an
integral part of the throttle pedal assembly
and must not be dismantled.
1. With assistance remove 2 nuts and bolts
securing throttle pedal to body.
2. Disconnect multiplug from throttle potentiometer
and remove throttle pedal.
Refit
NOTE: From Vin 607225 a three track
throttle potentiometer was fitted in place
of a two track potentiometer. Three track
potentiometers cannot be fitted to vehicles
previously fitted with two track potentiometers.
Two track potentiometers can be fitted to vehicles
previously fitted with three track potentiometers,
but TestBook must be used to configure the ECM.
3. Connect multiplug to throttle potentiometer.
4. Position throttle pedal assembly, tighten nuts
and bolts to 25 Nm (18 lbf.ft).
PUMP - FUEL
Service repair no - 19.45.08
Remove
1. Remove fuel tank. See this Section.
2. Using LRT-19-009 remove locking ring from fuel
pump housing.
3. Remove fuel pump from tank and discard
sealing ring.
Refit
4. Clean pump housing and mating face on fuel
tank.
5. Fit seal to pump housing.
6. Fit pump to fuel tank and secure with locking
ring.
7. Fit fuel tank. See this Section.

FUEL SYSTEM
11
REPAIR
REGULATOR - FUEL PRESSURE
Service repair no - 19.45.06
Remove
1. Remove battery cover.
2. Disconnect battery negative lead.
3. Remove 3 bolts and remove engine acoustic
cover.
4. Release hose from fuel cooler.
5. Release fuel hoses from pressure regulator.
CAUTION: Plug the connections.
6. Disconnect multiplug from fuel temperature
sensor.
7. Remove 3 bolts, remove pressure regulator from
cylinder head and collect gasket and ’O’ring.
8. Remove fuel filter from cylinder head.
9. Remove fuel temperature sensor and discard
sealing washer.
10. Remove fuel hose and fuel pipe and discard ’O’
rings.
Refit
11. Clean fuel pressure regulator, mating face and
fuel filter.
12. Clean fuel pipe unions.
13. Fit fuel pipe and fuel hose to pressure regulator
using new ’O’ rings.
14. Fit fuel temperature sensor using new sealing
washer and tighten to 14 Nm (11 lbf.ft) .
15. Fit fuel filter to cylinder head.
16. Using a new gasket and ’O’ ring position
pressure regulator and tighten bolts to 25 Nm
(18 lbf.ft) .
17. Connect fuel temperature sensor.
18. Connect fuel hoses to pressure regulator and
fuel cooler.
19. Fit engine acoustic cover.
20. Reconnect battery negative lead.
21. Fit battery cover.
19
FUEL SYSTEM
12
REPAIR
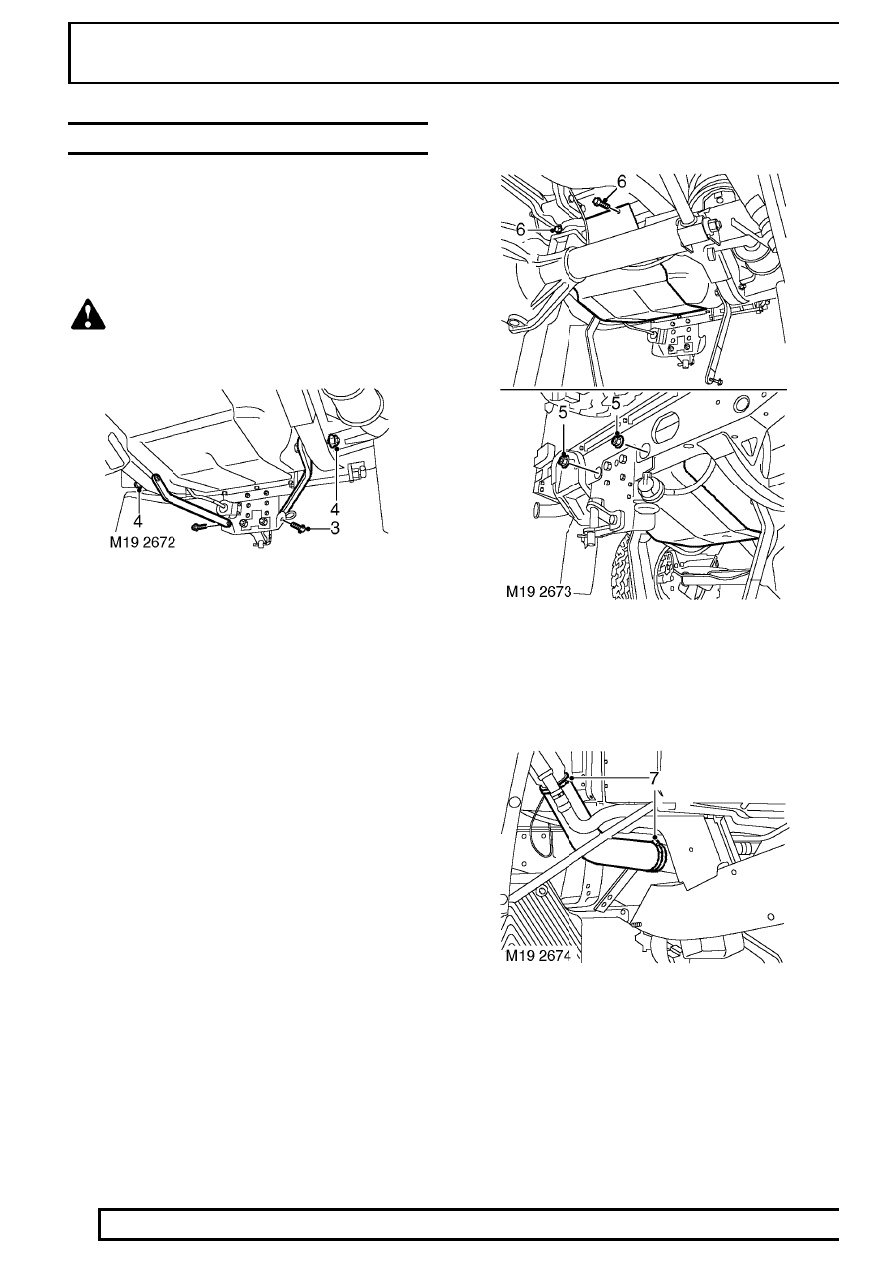
FUEL TANK
Service repair no - 19.55.01
Remove
1. Drain fuel tank. See Adjustment.
2. Raise rear of vehicle.
WARNING: Support on safety stands.
Vehicles fitted with tow bar
3. Remove 2 bolts securing support bars to drop
plate.
4. Loosen 2 nuts securing support bars to chassis.
All Vehicles
5. Remove 2 nuts securing fuel tank support to rear
chassis member.
6. Remove 2 bolts securing fuel tank support plate
to chassis member.
7. Release clip securing filler hose and release
hose from filler neck.
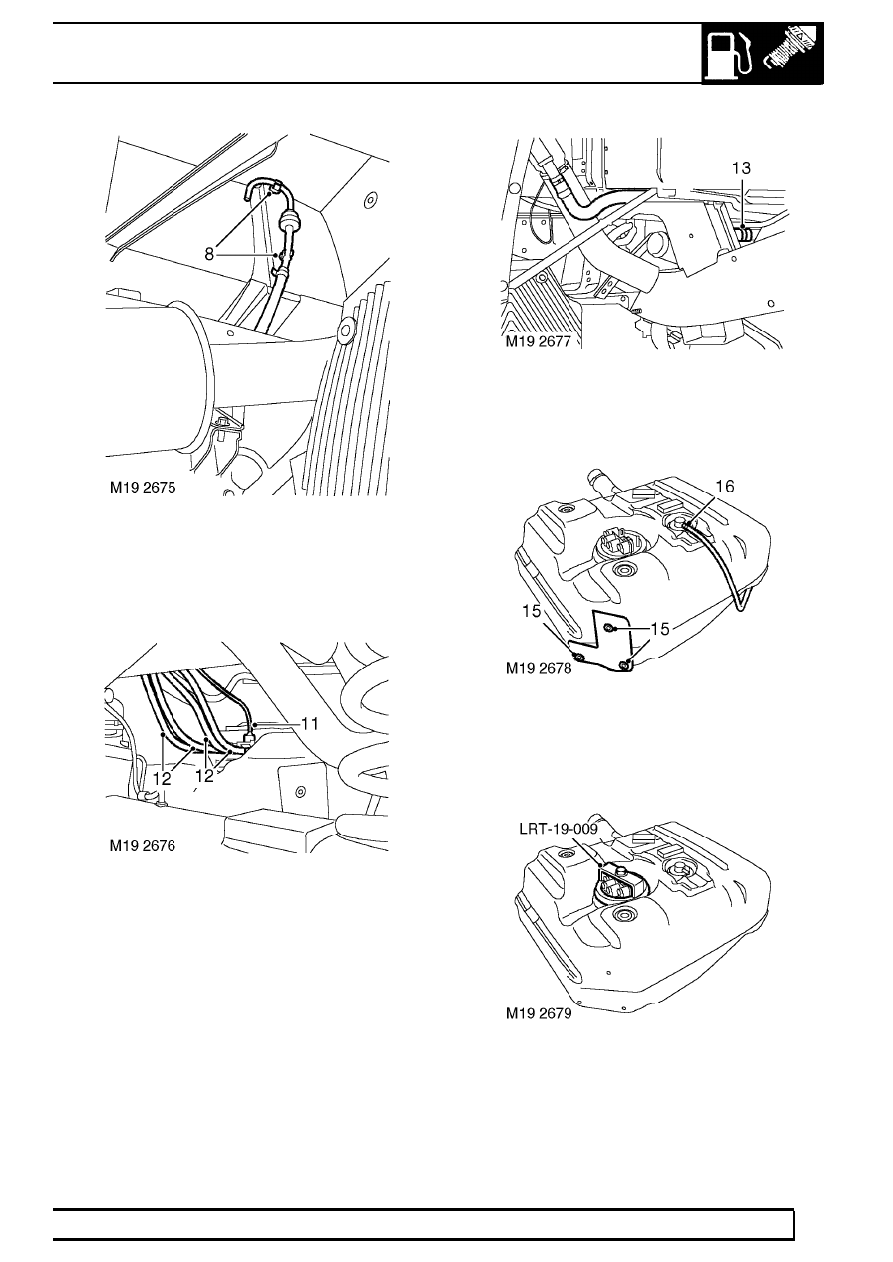
FUEL SYSTEM
13
REPAIR
8. Disconnect vent hose from clips on rear chassis
member.
9. Support weight of fuel tank.
10. With assistance, lower fuel tank and remove
support plate.
11. Disconnect multiplug from fuel pump.
12. Noting their fitted position, disconnect 4 fuel
hoses from fuel pump.
13. Release clip and disconnect filler neck breather
from fuel tank.
14. With assistance, lower and remove fuel tank.
15. Remove 2 scrivits securing heat shield remove
heat shield.
16. Release clip securing breather hose to tank and
remove hose.
17. Using LRT-19-009 remove fuel pump locking
ring.
18. Remove fuel pump and discard sealing ring.
Нет комментариевНе стесняйтесь поделиться с нами вашим ценным мнением.
Текст