Defender. Manual — part 11
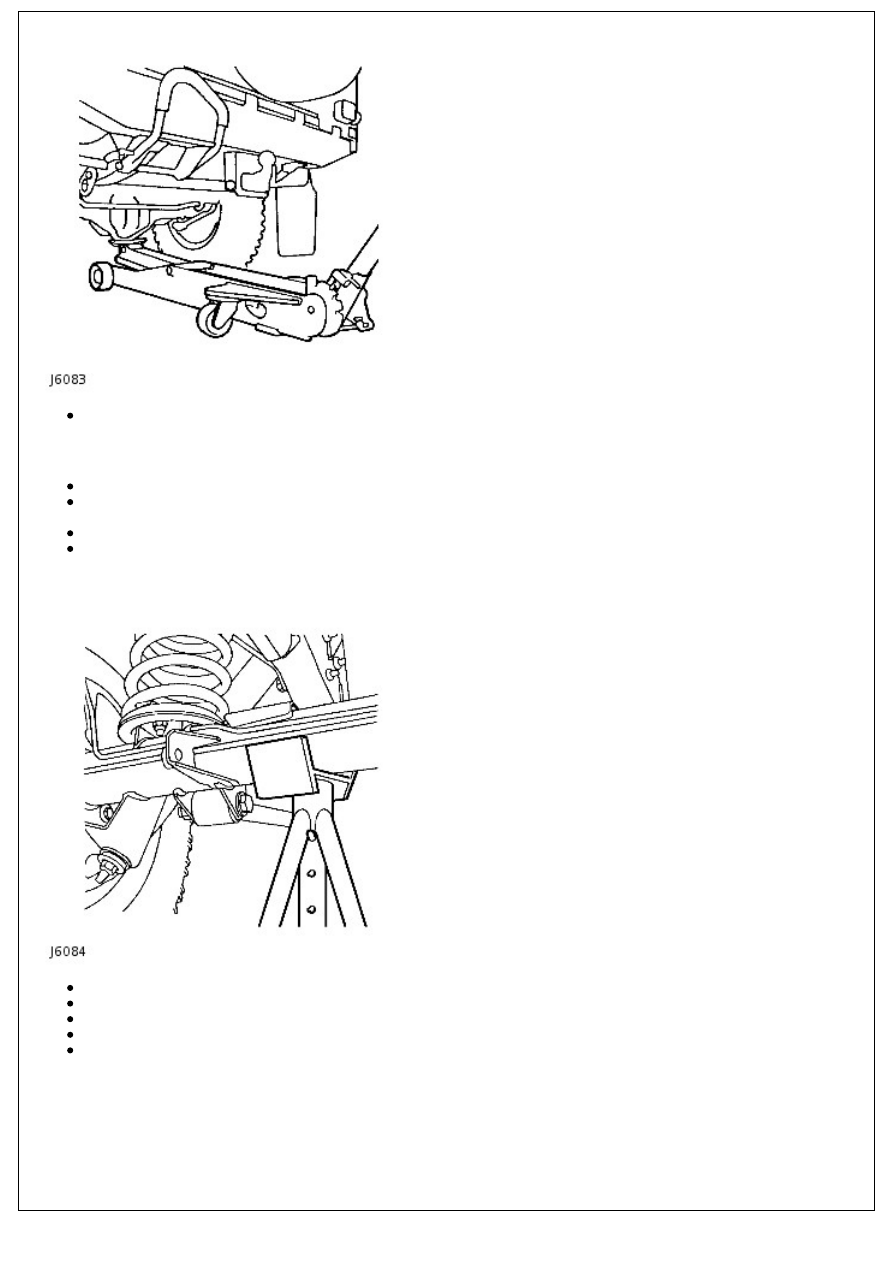
Position cup of hydraulic arm under differential casing.
• NOTE: The differential casing is not central to the axle. Care should be taken when raising the front road wheels off
the ground as the rear axle has less sway stiffness.
Raise front road wheels to enable an axle stand to be installed under left hand axle tube.
Position an axle stand under right hand axle tube, carefully lower jack until axle sits securely on both axle stands,
remove trolley jack.
Before commencing work on underside of vehicle re-check security of vehicle on stands.
Reverse procedure when removing vehicle from stands.
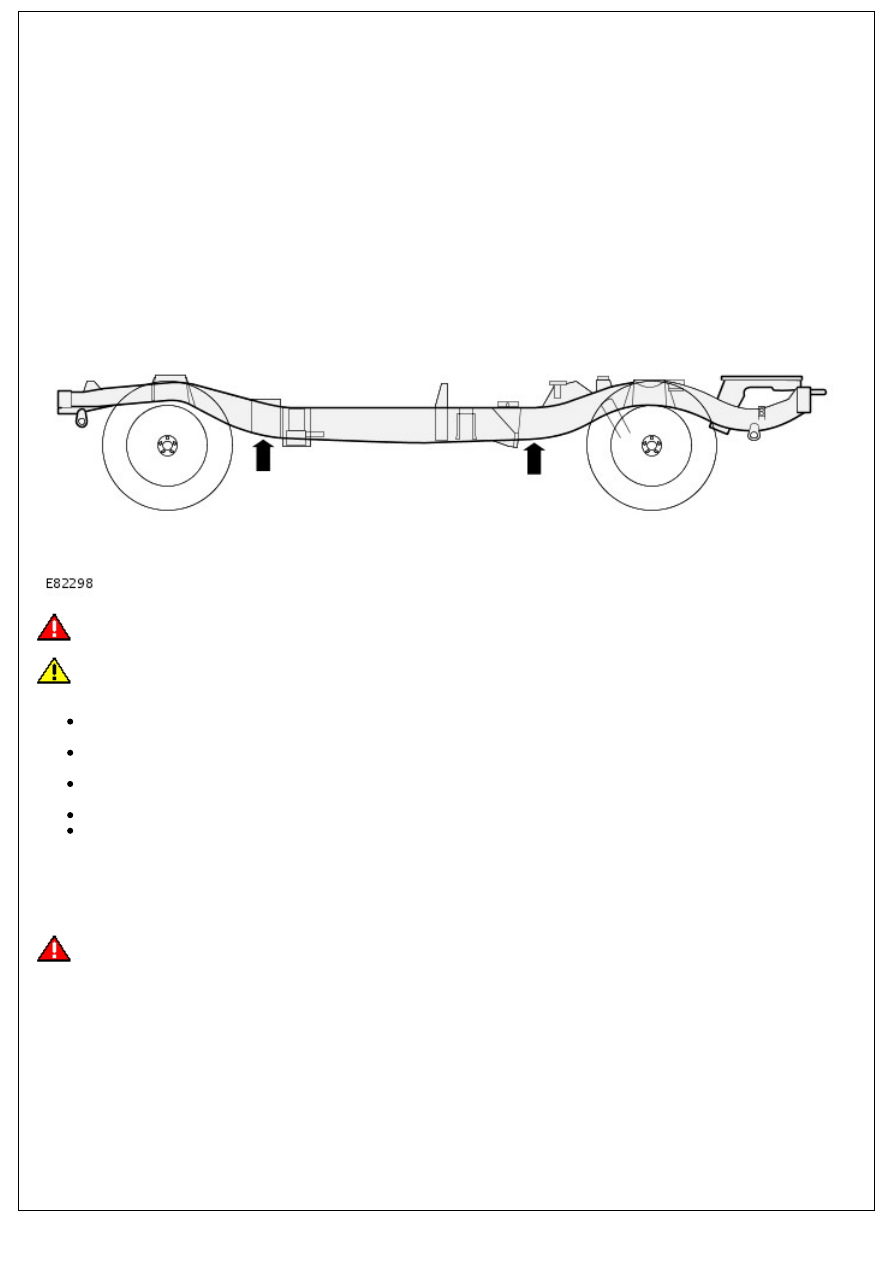
Raising the Rear of the Vehicle
Position cup of hydraulic arm under differential casing.
Raise vehicle to enable axle stands to be installed under left and right hand axle tubes.
Lower jack until axle sits securely on axle stands, remove trolley jack.
Before commencing work on underside of vehicle re-check security of vehicle on stands.
Reverse procedure when removing vehicle from stands.
Jacking and Lifting - Lifting
Description and Operation
Four post vehicle ramps
Position the vehicle on the ramp with the front and the rear of the vehicle equidistant from the ends of the ramp. Chock
the wheels, select neutral on the transmission and where practicable apply the parking brake.
If a wheel free condition is required, use a wheel-free system which supports beneath the axle casings.
Two post vehicle ramps
WARNING: When raised to the desired height, make sure the vehicle is stable before starting work.
CAUTION: If the drive shafts are to be disconnected, release the parking brake and select neutral on the
transmission in order that the shaft(s) can be rotated when the vehicle is raised to the desired height.
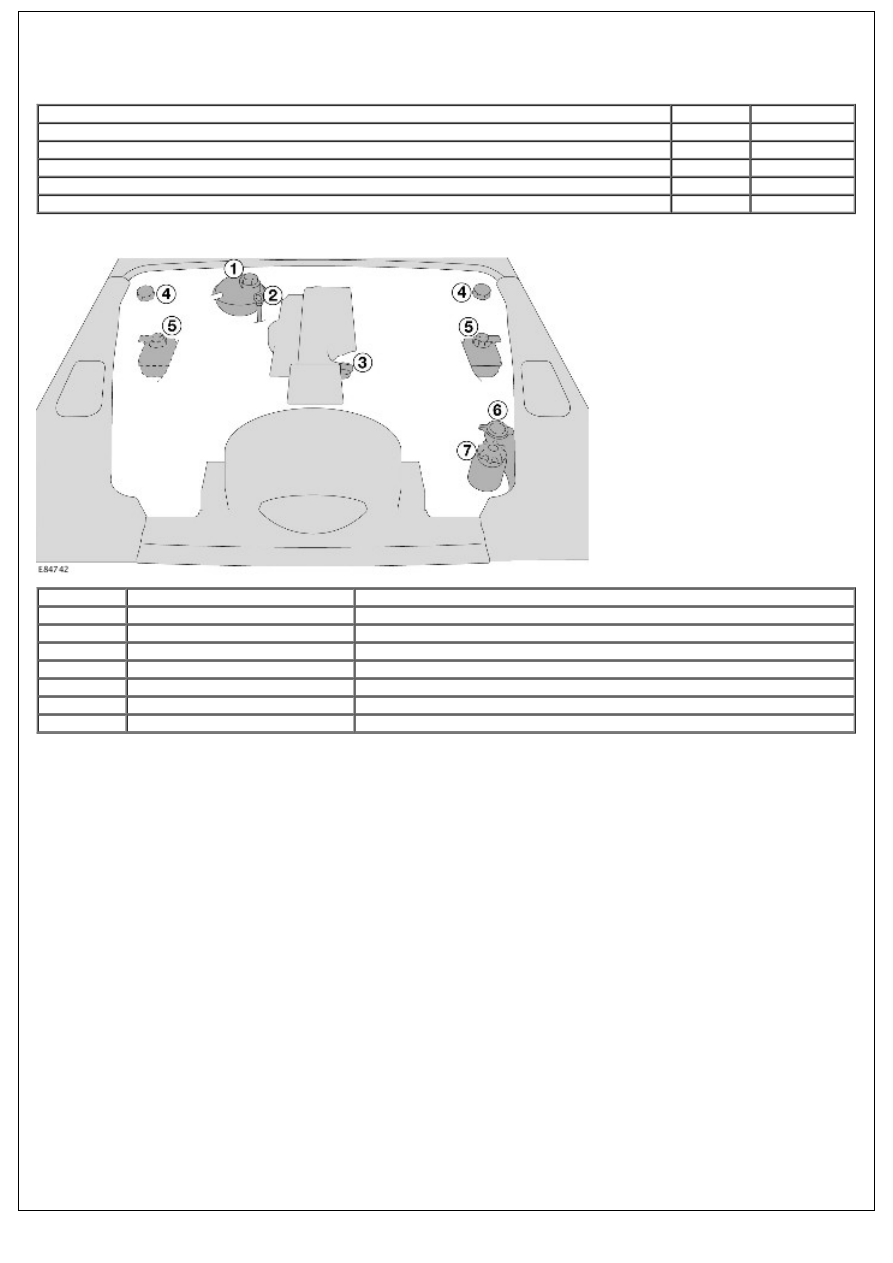
Position the vehicle with the centre of the lifting pillars aligned with the front of the driver/passenger seat
cushions.
Extend the lifting arms and position the pads of each lifting arm beneath the body frame longitudinal lifting
points, arrowed in the illustration.
Raise the vehicle until the wheels are just clear of the ground and check that the pads of each lifting arm are still
correctly positioned and are in full contact with the body frame longitudinals.
Raise the vehicle to the desired height.
Ensure that the vehicle is correctly supported on all four lifting pads, that the pads are still correctly positioned
and are in full contact with the body frame longitudinals.
Road roller testing
Four wheel Rolling Road
WARNING: DO NOT attempt to drive individual wheels with vehicle supported on floor jacks or stands.
Provided that front and rear rollers are rotating at identical speeds and that normal workshop safety standards are
applied, there is no speed restriction during testing except any that may apply to the tyres.
Two wheel rolling road
IMPORTANT: Use a four wheel rolling road for brake testing if possible.
If brake testing on a two wheel rolling road is necessary, it must be carried out with propeller shaft to the stationary
axle removed and neutral selected in BOTH main gearbox and transfer gearbox. When checking brakes, run engine at
idle speed to maintain brake servo vacuum.
Maintenance Schedules - Maintenance Schedules - Diesel Engines
Description and Operation
Torque Specifications
Description
Nm
lb-ft
Wheel nuts - steel wheels
100
80
Wheel nuts - alloy wheels
130
96
Wheel nuts - Heavy duty wheels
170
125
Transfer box filler plug
30
22
Transfer box drain plug
30
22
Under Bonnet View
Item
Part Number
Description
1
-
Coolant expansion tank
2
-
Engine oil dipstick
3
-
Engine oil filler cap
4
-
Clutch fluid reservoir filler cap
5
-
Brake fluid reservoir filler cap
6
-
Windscreen washer reservoir
7
-
Power steering fluid reservoir
Seats and Safety Belts
1. Check seat frames are secured to floor and show no signs of movement.
2. Check operation of seat slide and tilt mechanisms, making sure there is no excessive play between seat cushion and
seat back.
3. Check tightness of accessible seat fixings.
4. Fully extract seat belt and allow it to return under its own recoil mechanism.
5. Check entire length of seat belt webbing for signs of fraying or damage. Repeat for all belts.
6.Check security of seat belt upper mountings.
7. Check security of seat belt buckle mountings.
8. Connect each belt to the correct buckle, check seat belt buckle and tongue are secure. Release seat belt buckle and
check for correct operation.
9. Check tightness of accessible seat belt mountings
Lamps, Horns and Warning Indicators
1. Check side, head, fog, reversing and tail lamps for correct operation.
2. Check operation of headlamp automatic levelling system - if installed.
3. Check turn signals and hazard warning lamps for correct operation.
4. Check brake (stop) lamps for correct operation.
5. Check all exterior lamp lenses for clarity and condition; pay particular attention to headlamp and fog lamp lenses for
stone chips or damage.
6. Check horn for loud, clear sound.
7. Switch on headlamps and check that side/headlamp reminder warning sounds when door is opened.
8. Check operation of interior courtesy lamps.
9. Check operation of all instrument pack warning and indicator lamps.
Washers and Wipers
1. Operate screen washer and switch on wipers. Check washer jets are correctly aimed and check for smooth seamless
operation across screen of wiper blades at all speeds, including intermittent.
2. Repeat operation for rear screen wipers and washers.
3. Check all wiper blades for condition and signs of splits or damage.
4. Check security of wiper arms.
Нет комментариевНе стесняйтесь поделиться с нами вашим ценным мнением.
Текст