Defender. Manual — part 102
37.
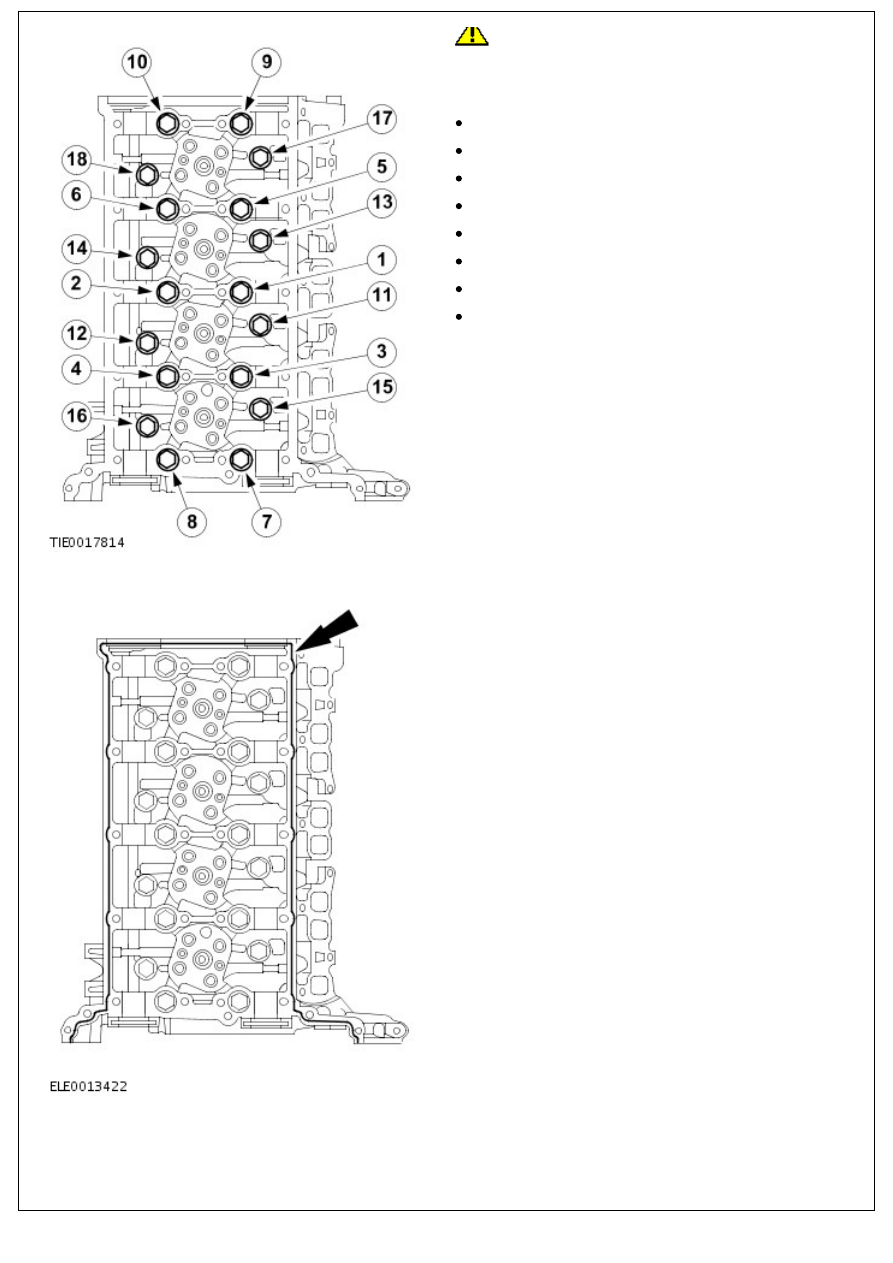
CAUTION: Install new cylinder head bolts.
• NOTE: Clean the component mating face.
Install the cylinder head.
Tighten the bolts in the sequence shown in six stages.
Stage 1: Tighten bolts 1 through 10 to 20 Nm.
Stage 2: Tighten bolts 11 through 18 to 10 Nm.
Stage 3: Tighten bolts 1 through 10 to 40 Nm.
Stage 4: Tighten bolts 11 through 18 to 20 Nm.
Stage 5: Tighten bolts 1 through 10 to 180 degrees.
Stage 6: Tighten bolts 11 through 18 to 180 degrees.
Stage 7: Tighten the M6 bolt to 10 Nm (7 lb.ft).
38. NOTE: Clean the component mating face.
Apply a 2.5 mm (0.1 inches) diameter bead of the specified
sealant to the cylinder head.
39. NOTE: Clean the component mating faces.
39. NOTE: Clean the component mating faces.
Install the camshafts.
Lubricate the camshaft journals and the camshaft lobes
with clean engine oil.
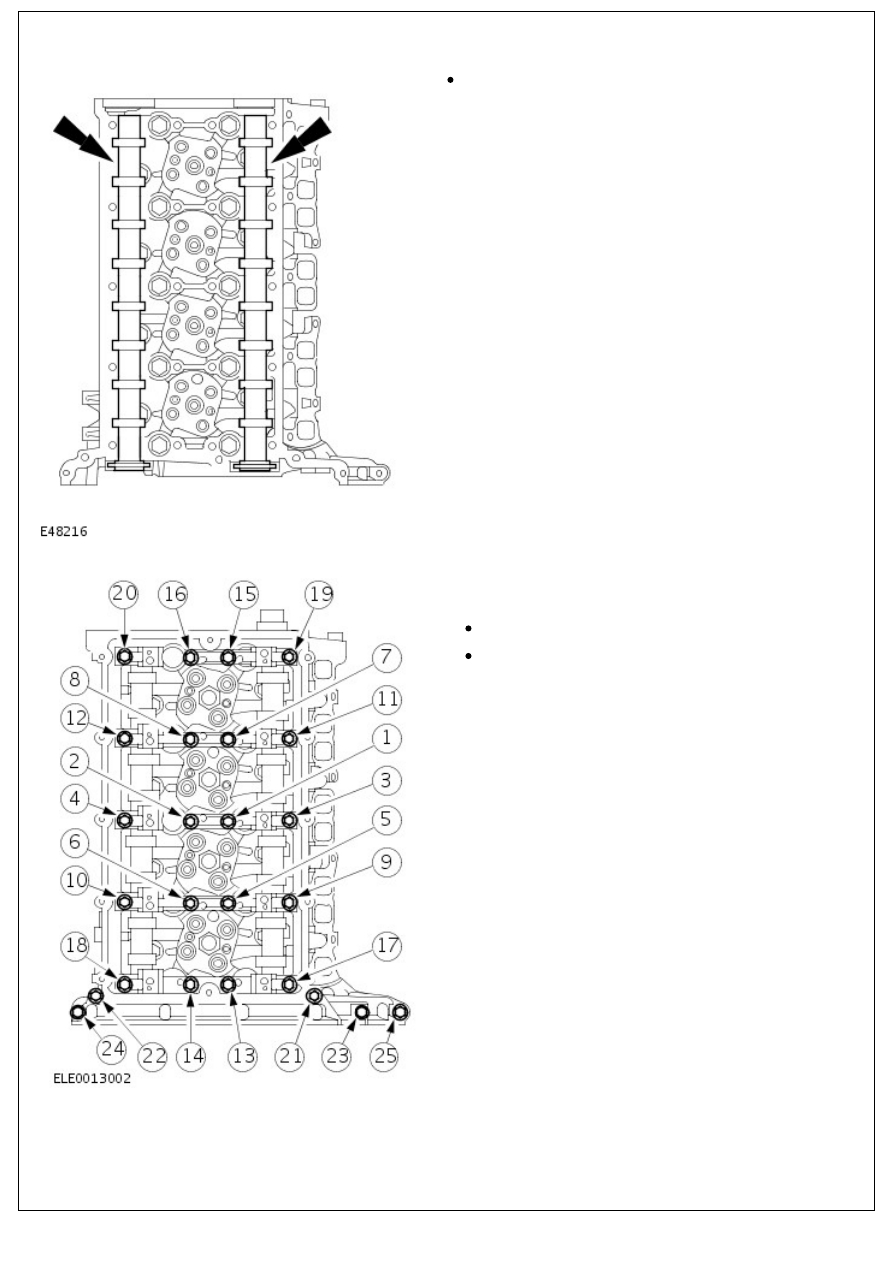
40. NOTE: Tighten the bolts in the sequence shown in two
stages.
Install the camshaft carrier.
Stage 1: Tighten bolts 1 through 22 to 23 Nm.
Stage 2: Tighten bolts 23 through 25 to 10 Nm.
41. Using suitable 6 mm bar, lock the camshaft sprockets.
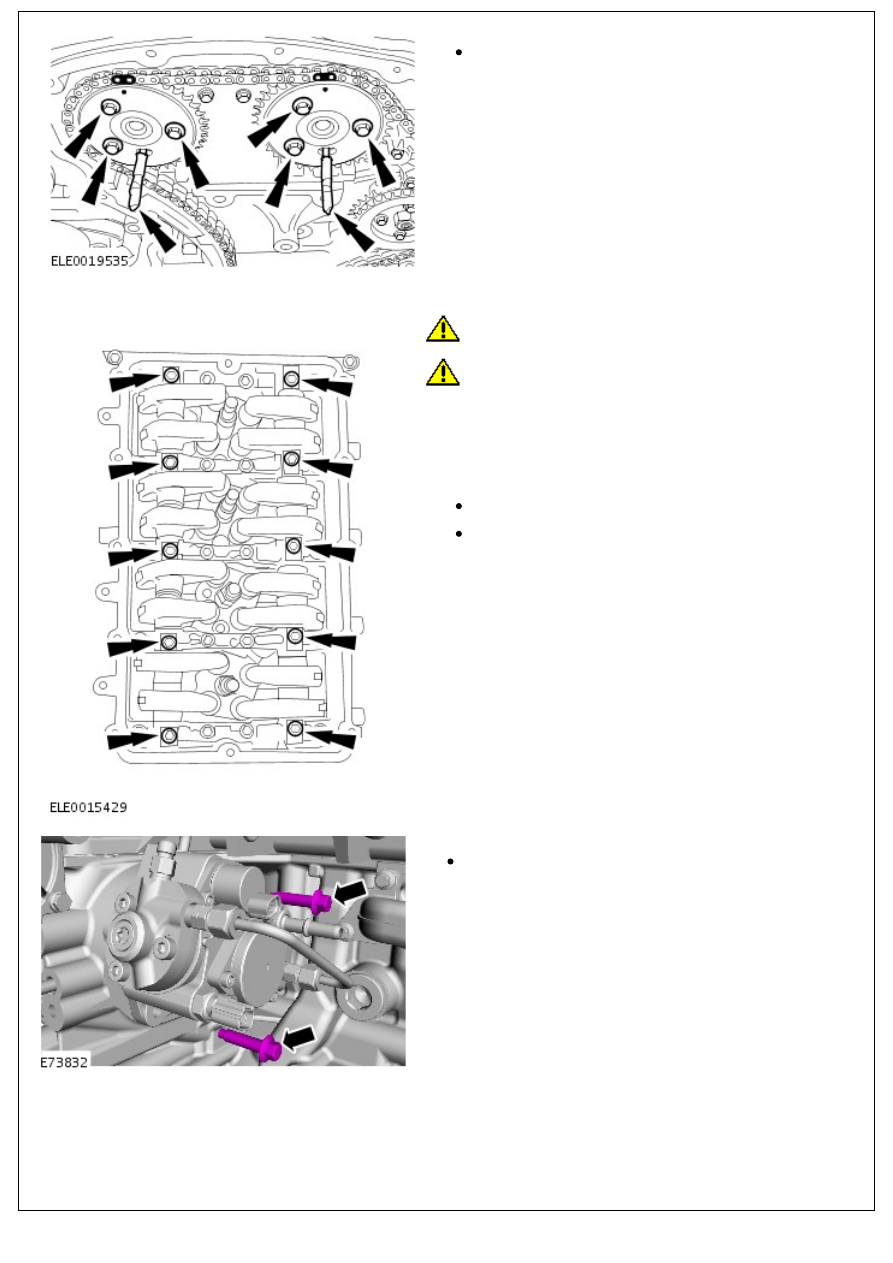
41. Using suitable 6 mm bar, lock the camshaft sprockets.
Loosely install the camshaft sprocket bolts.
42. CAUTIONS:
New bolts must be installed.
Tighten the bolts in the stages shown.
• NOTE: Lubricate the rocker shafts with clean engine oil.
• NOTE: The oil supply holes in the rocker shafts must point
down.
Install the rocker shafts.
Stage 1: Tighten the bolts to 13 Nm (10 lb.ft).
Stage 2: 45 degrees.
43. Install the fuel injection pump.
Tighten the bolts to 22 Nm (16 lb.ft).
44. NOTE: Do not tighten the bolts at this stage.
44. NOTE: Do not tighten the bolts at this stage.
Install the fuel injection pump sprocket.
Loosely install the bolts.
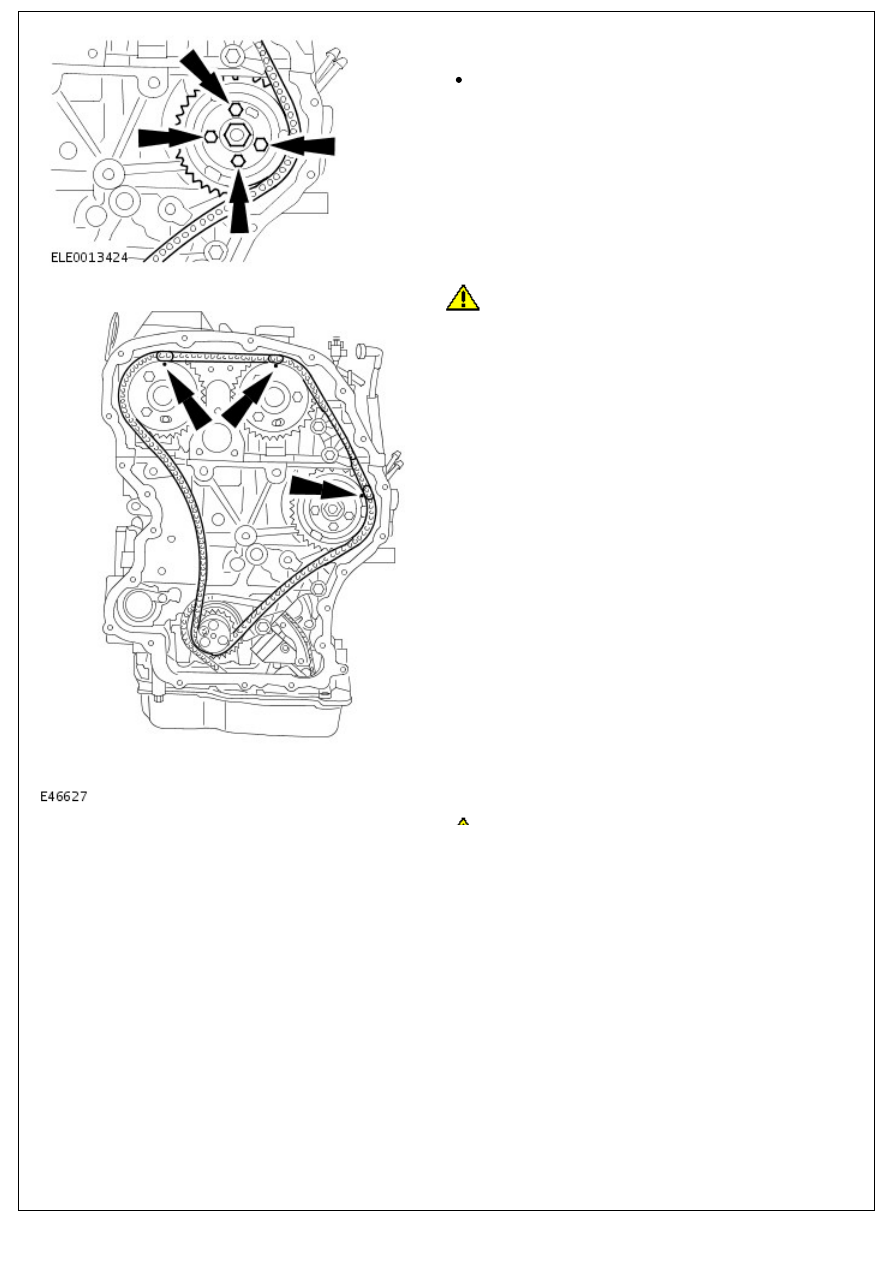
45.
CAUTION: Make sure the colored links align to the
timing marks. Failure to follow this instruction may result in
damage to the vehicle.
Install the timing chain.
CAUTION: Make sure the timing chain tensioner is
Нет комментариевНе стесняйтесь поделиться с нами вашим ценным мнением.
Текст