Defender. Manual — part 84
7. Remove the LH engine mount nut.
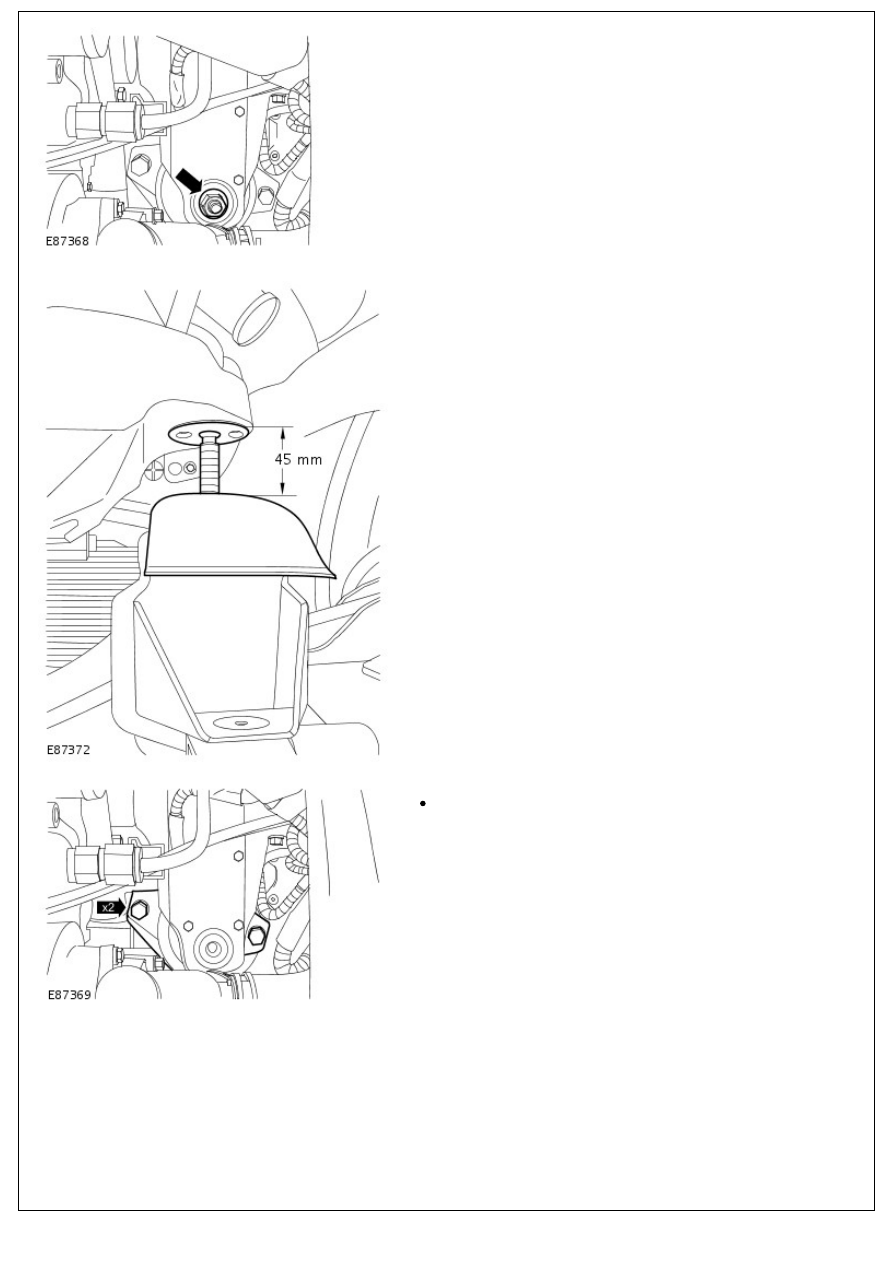
8. Using a suitable hydraulic jack, raise the engine to a
maximum of 45 mm (1.77 inches).
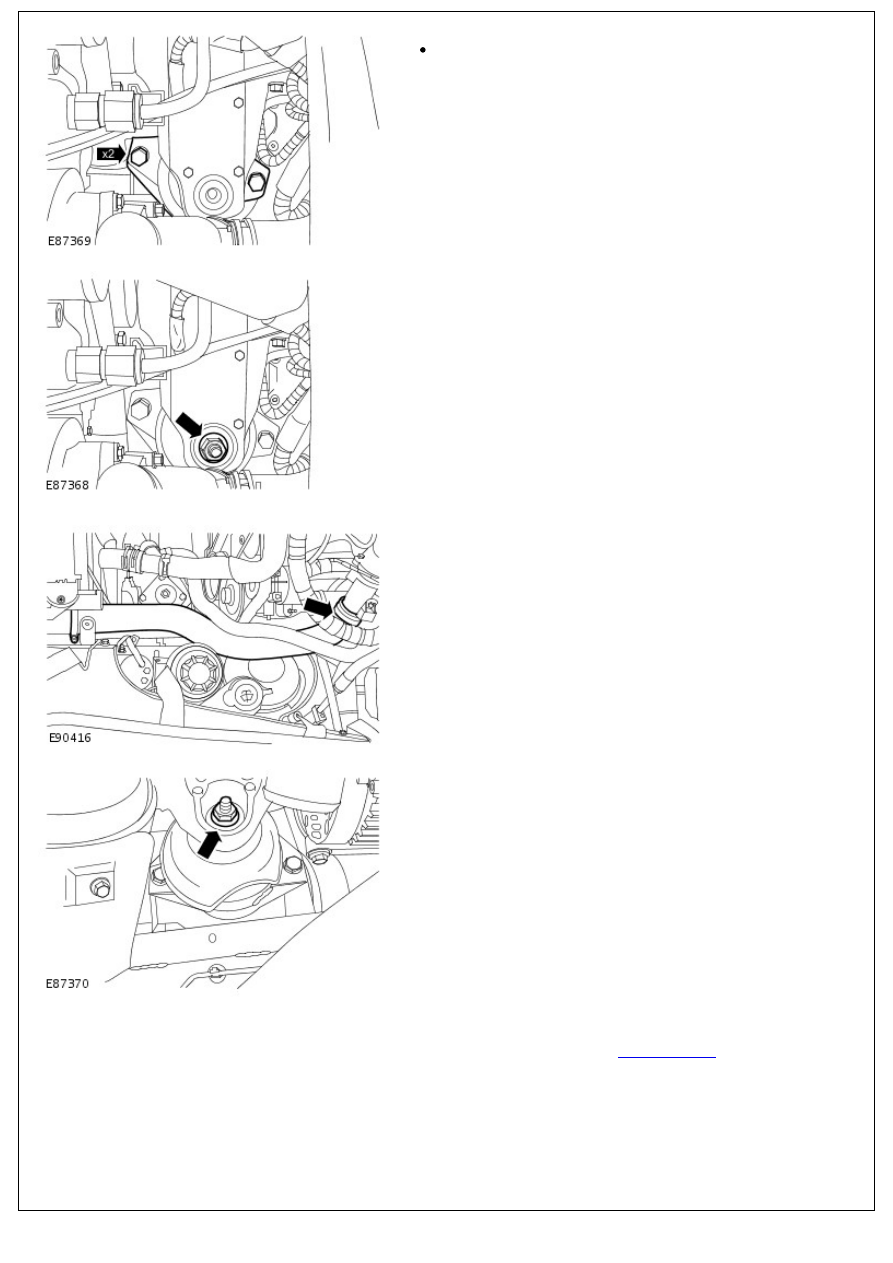
9. Remove the LH engine mount.
Remove the 2 bolts.
Installation
1. To install, reverse the removal procedure.
1. To install, reverse the removal procedure.
Tighten to 80 Nm (59 lb.ft).
2. Tighten to 80 Nm (59 lb.ft).
3. Tighten to 3 Nm (2 lb.ft).
4. Tighten to 80 Nm (59 lb.ft).
5. Connect the battery ground cable.
For additional information, refer to:
Battery Connect
(414-01
Battery, Mounting and Cables, General Procedures).
Engine - 2.4L Duratorq-TDCi HPCR (103kW/140PS) - Puma - Engine Mount
RH
In-vehicle Repair
Removal
1. Disconnect the battery ground cable.
For additional information, refer to:
Battery Disconnect and
Connect
(414-01 Battery, Mounting and Cables, General
Procedures).
2. Remove the hood.
For additional information, refer to:
Hood
(501-02 Front End
Body Panels, Removal and Installation).
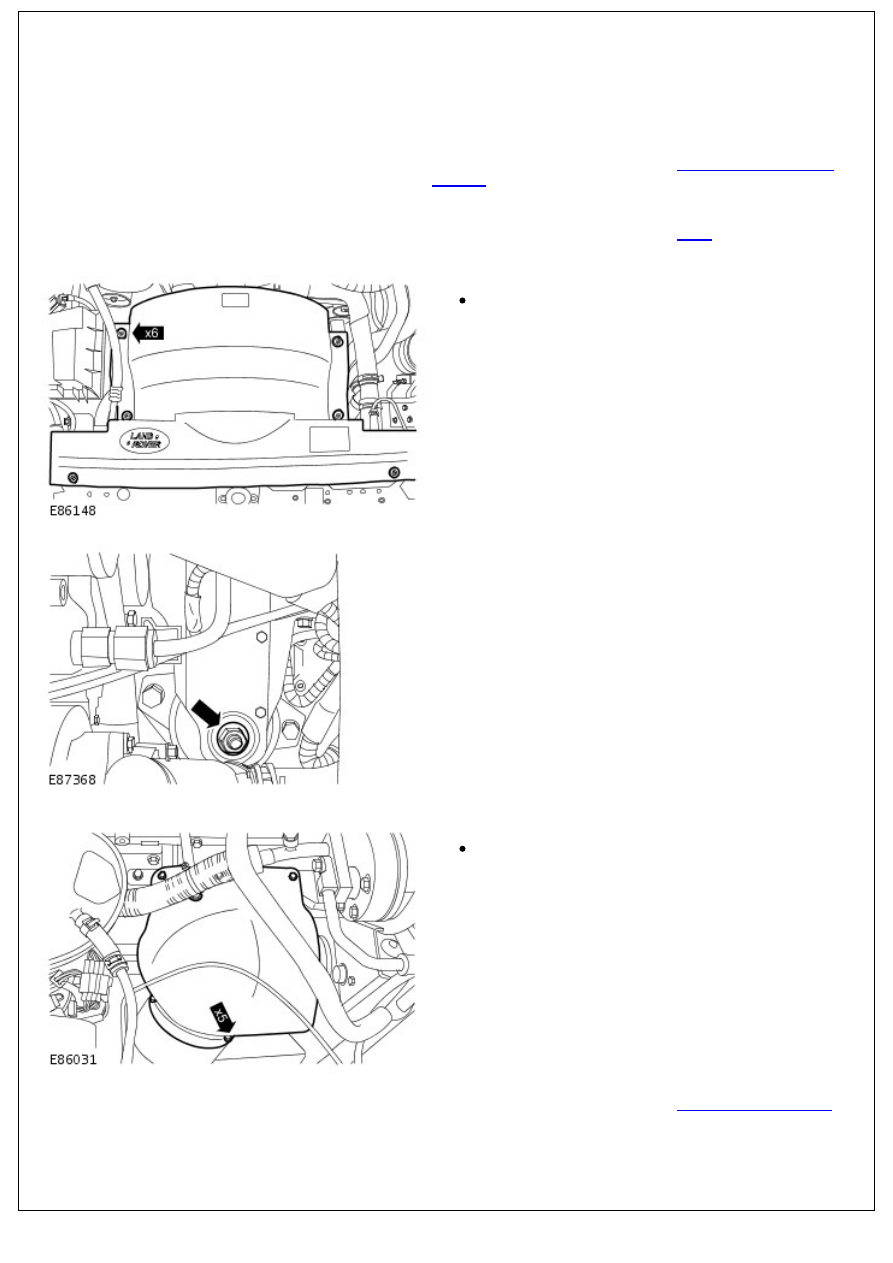
3. Remove the cooling fan upper shroud.
Release the 6 clips.
4. Remove the LH engine mount nut.
5. Remove the turbocharger heat shield.
Remove the 5 bolts.
6. Remove the air cleaner outlet pipe.
For additional information, refer to:
Air Cleaner Outlet Pipe
(303-12 Intake Air Distribution and Filtering - 2.4L Duratorq-
TDCi HPCR (103kW/140PS) - Puma, Removal and
Installation).
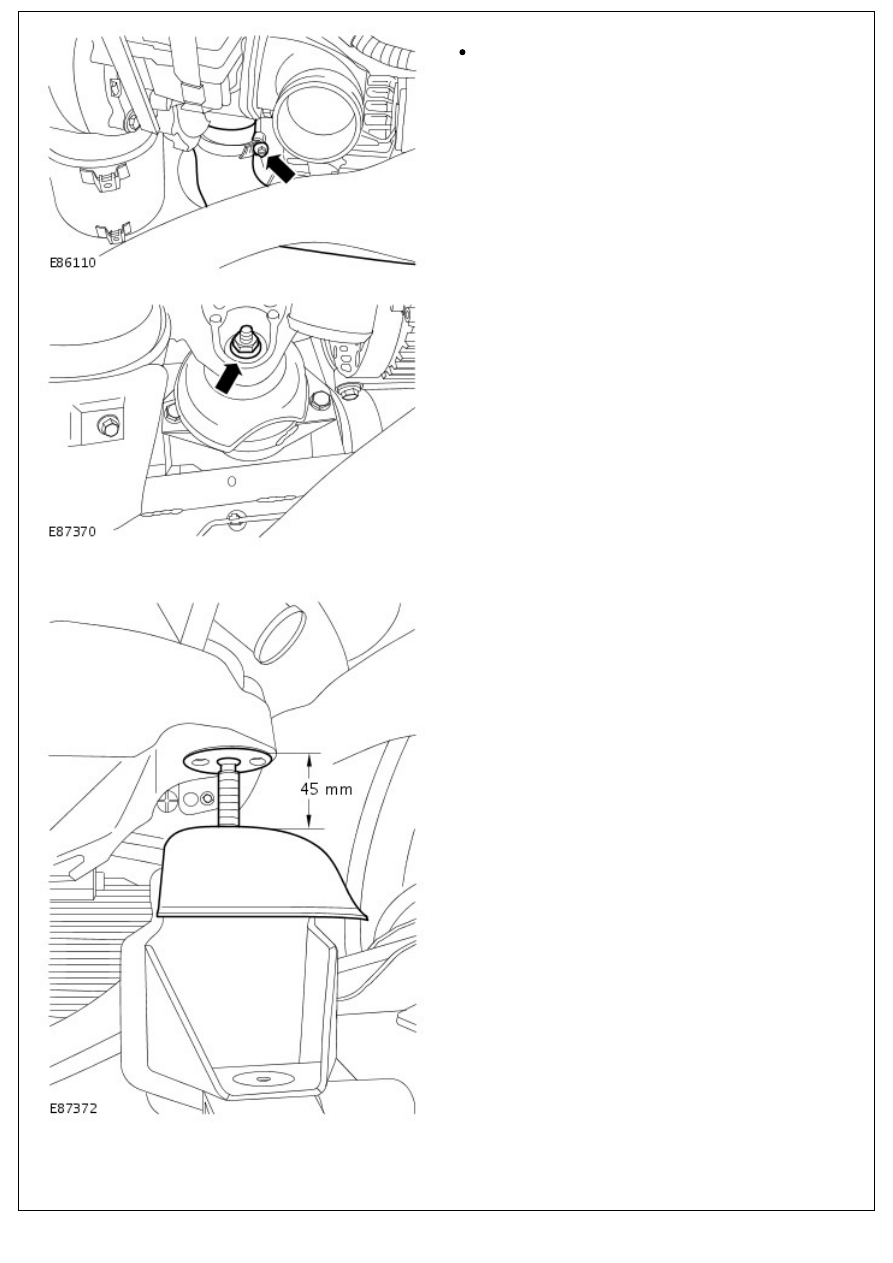
7. Disconnect the charge air cooler inlet hose.
7. Disconnect the charge air cooler inlet hose.
Release the clip.
8. Remove the RH engine mount nut.
9. Using a suitable hydraulic jack, raise the engine to a
maximum of 45 mm (1.77 inches).
10. Remove the RH engine mount.
Нет комментариевНе стесняйтесь поделиться с нами вашим ценным мнением.
Текст