Defender. Manual — part 111

Engine Cooling - 2.4L Duratorq-TDCi HPCR (103kW/140PS) - Puma -
Coolant Expansion Tank
Removal and Installation
Removal
1. WARNINGS:
Release the cooling system pressure by slowly turning the
coolant expansion tank cap a quarter of a turn. Cover the
expansion tank cap with a thick cloth to prevent the possibility
of scalding. Failure to follow this instruction may result in
personal injury.
Since injury such as scalding could be caused by escaping
steam or coolant, do not remove the filler cap from the coolant
expansion tank while the system is hot.
CAUTION: Engine coolant will damage the paint finished
surfaces. If spilt, immediately remove the coolant and clean the
area with water.
Release the cooling system pressure.
2. Disconnect the coolant hose.
Clamp the hose to minimize coolant loss.
Position a container to collect the fluid spillage.
Release the clip.
3. Disconnect the radiator bleed hose.
Release the clip.
4. Remove the coolant expansion tank.
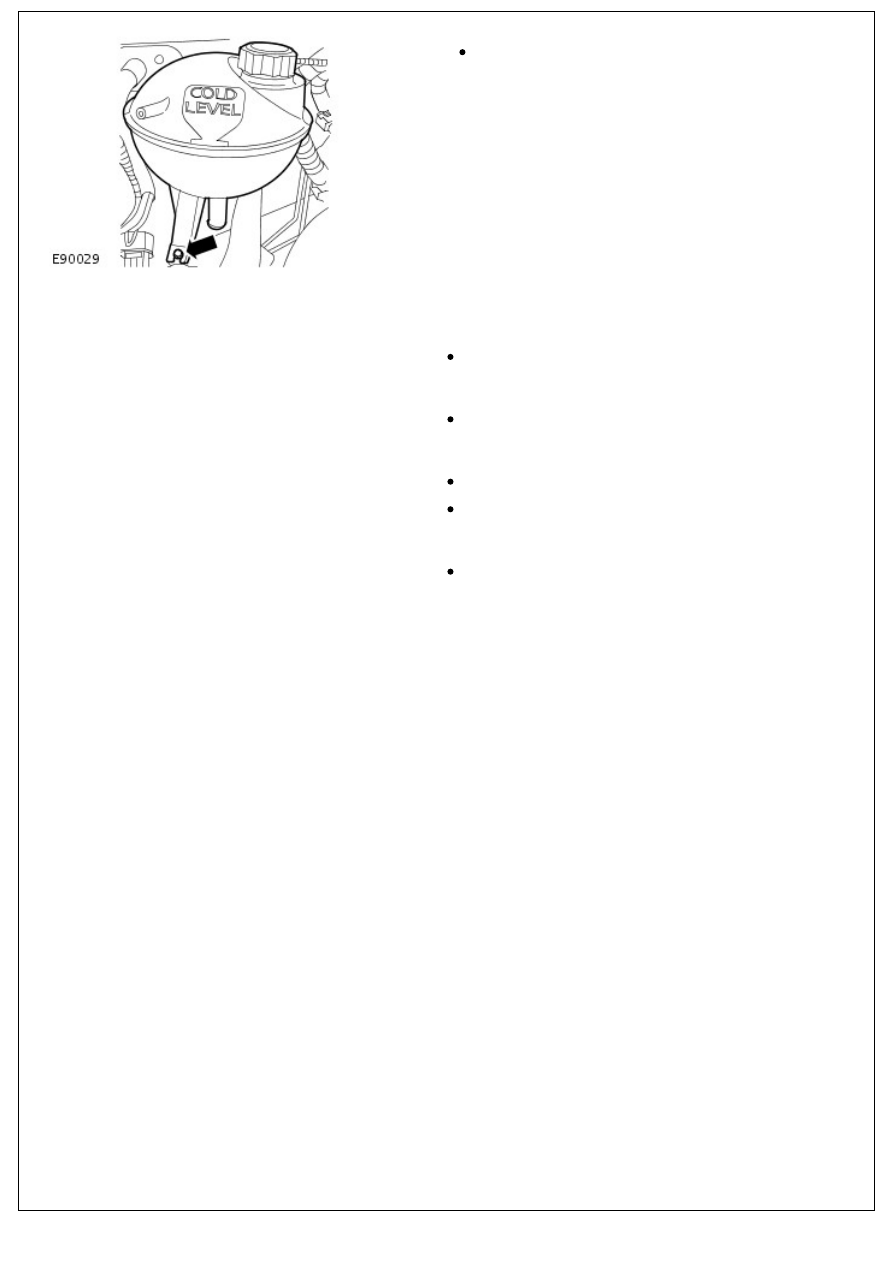
4. Remove the coolant expansion tank.
Remove the bolt.
Installation
1. Install the coolant expansion tank.
Tighten the bolt to 10 Nm (7 lb.ft).
2. Connect the radiator bleed hose.
Secure with the clip.
3. Connect the coolant hose.
Secure with the clip.
Remove the hose clamp.
4. Check and top up the coolant.
Remove the container.
Engine Cooling - 2.4L Duratorq-TDCi HPCR (103kW/140PS) - Puma -
Cooling Fan
Removal and Installation
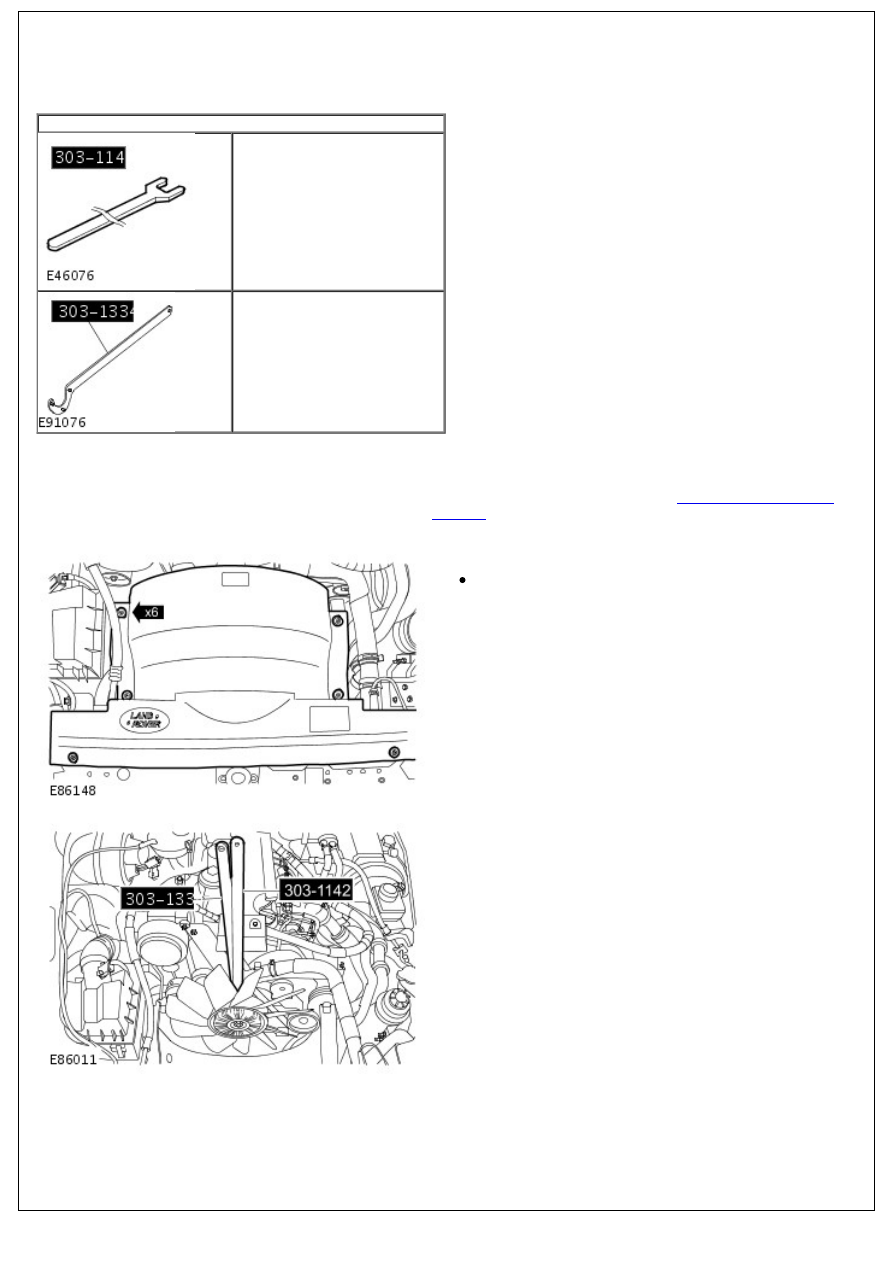
Special Tool(s)
303-1142
Cooling fan spanner
303-1334
Cooling fan retaining tool
Removal
1. Disconnect the battery ground cable.
For additional information, refer to:
Battery Disconnect and
Connect
(414-01 Battery, Mounting and Cables, General
Procedures).
2. Remove the cooling fan upper shroud.
Release the 6 clips.
3. Using the special tools, remove the cooling fan.
4. NOTE: Do not disassemble further if the component is
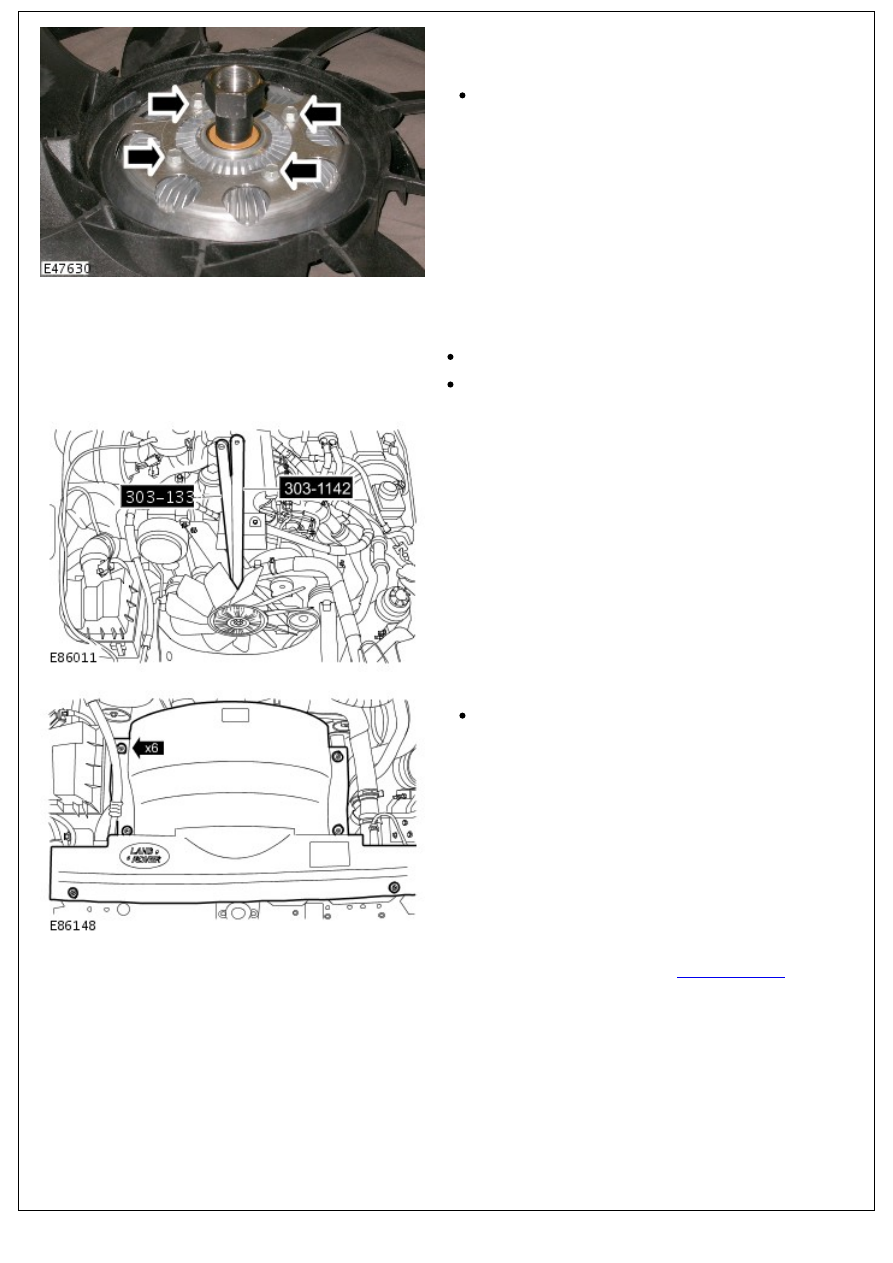
4. NOTE: Do not disassemble further if the component is
removed for access only.
Remove the viscous coupling.
Remove the 4 bolts.
Installation
1. Install the viscous coupling.
Clean the component mating faces.
Tighten the bolts to 10 Nm (7 lb.ft).
2. Using the special tools, install the cooling fan.
3. Install the cooling fan upper shroud.
Secure the 6 clips.
4. Connect the battery ground cable.
For additional information, refer to:
Battery Connect
(414-01
Battery, Mounting and Cables, General Procedures).
Нет комментариевНе стесняйтесь поделиться с нами вашим ценным мнением.
Текст