Frelander 2. Manual — part 336
Release the LH halfshaft.
30.
Release the RH halfshaft.
31.
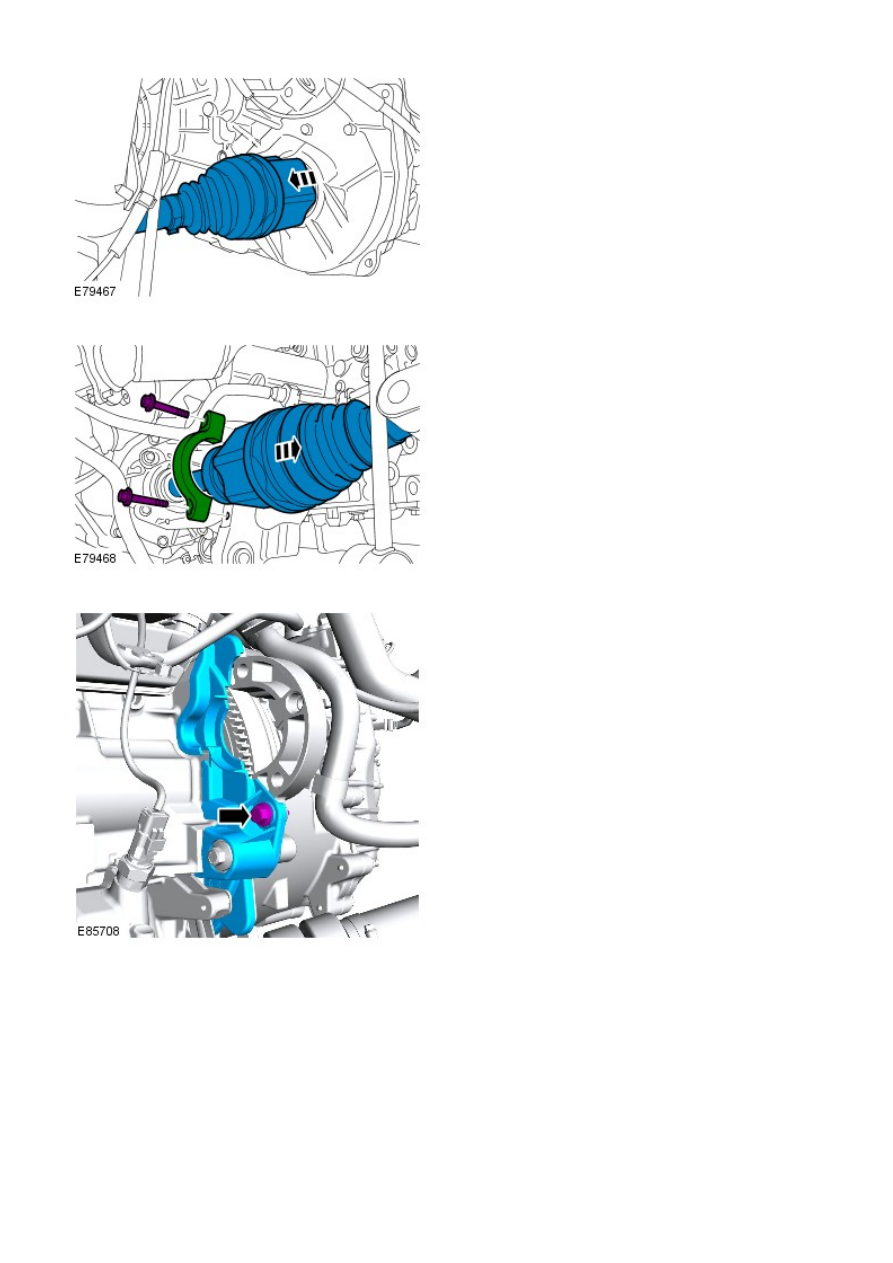
Remove the access cover.
32.
33. NOTE: Discard the bolts.
Remove and discard the torque coverter bolts.
33.
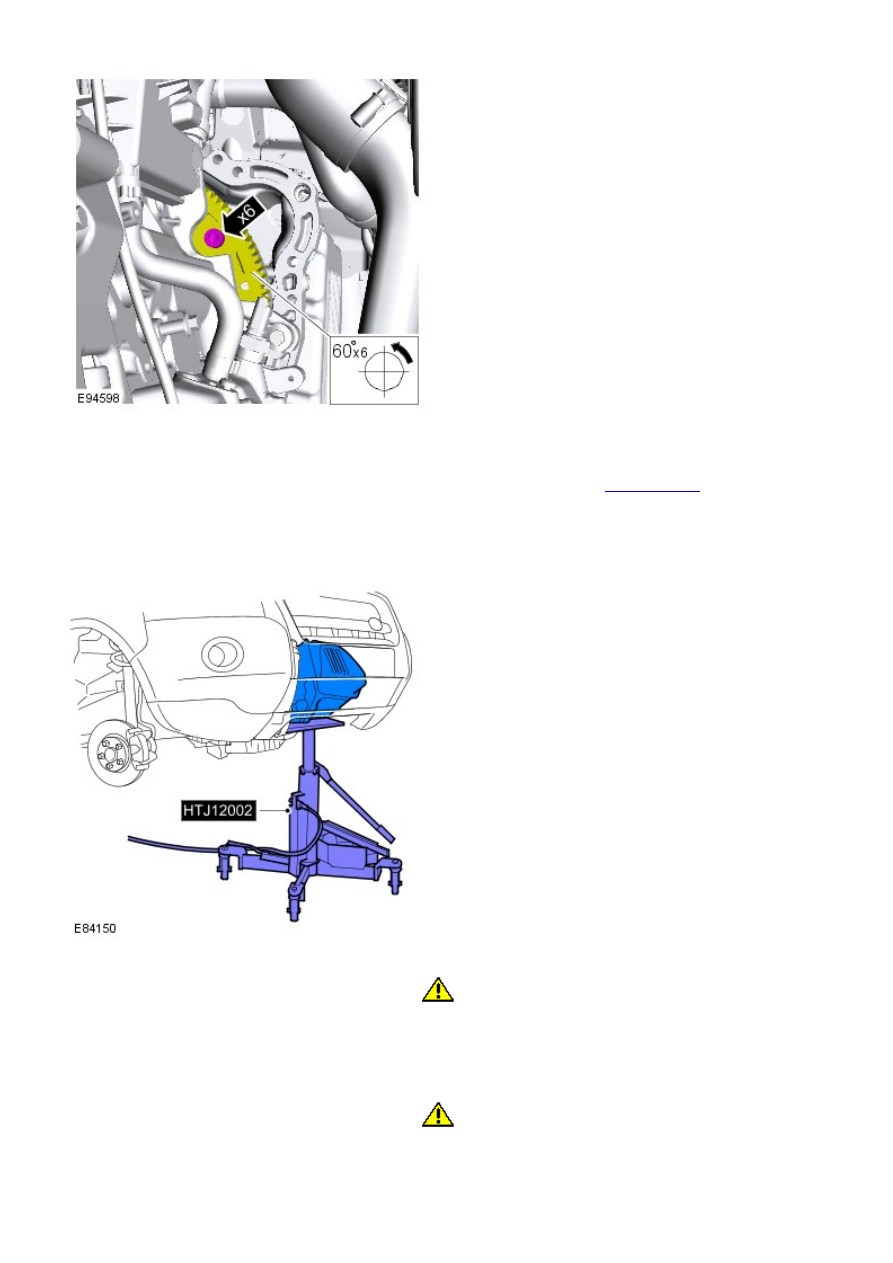
Support the transmission.
General Equipment:
Powertrain Jack
34.
35.
CAUTION: Make sure that the torque converter remains in
the transmission.
• NOTE: This step requires the aid of another technician.
Remove the transmission and converter.
35.
36.
CAUTION: Make sure that the dowels are still located on
the engine and not the transmission.
Install the torque converter retainer.
36.

Automatic Transmission/Transaxle - TransmissionI6 3.2L Petrol
Installation
General Equipment
Powertrain Jack
Install the TCM.
Torque: 24 Nm
1.
Install the transmission selector lever.
Torque: 13 Nm
2.
Install the transmission fluid cooler.
Torque: 10 Nm
3.
Remove the torque converter retainer.
4.
5. CAUTIONS:
Make sure that the torque converter remains in the
transmission.
Make sure that the component is correctly located on the
locating dowels.
Make sure that the mating faces are clean and free of
corrosion and foreign material.
• NOTE: This step requires the aid of another technician.
Install the transmission and converter.
5.
Install the transmission retaining bolts.
Torque: 47 Nm
6.
Remove the transmission support.
General Equipment:
Powertrain Jack
7.
Install the engine mount bracket.
Torque: 90 Nm
8.
Install the engine mount LH.
Torque: 175 Nm
9.
10.
WARNING: Make sure that new nuts are installed.
Install the bracket.
Torque:
M12 80 Nm
M8 25 Nm
10.
Remove the engine support.
11.

Stage 1:
Stage 2:
Secure and connect the selector lever cable.
12.
Install the transmission oil cooler.
13.
Connect the transmission fluid cooler coolant hoses.
14.
Install the power steering pump.
Torque: 25 Nm
15.
Install the coolant pump inlet pipe.
Torque: 10 Nm
16.
Attach the flexplate.
Torque: 47 Nm
17.
Install the access cover.
Torque: 10 Nm
18.
Remove the crankshaft locking tool.
19.
20.
CAUTION: Make sure that the mating faces are clean and
free of foreign material.
• NOTE: This step requires the aid of another technician.
Install the power transfer unit.
Torque: 65 Nm
20.
Install the power transfer unit support bracket.
Torque: 65 Nm
21.
Install both the halfshafts.
22.
Install the RH halfshaft support.
Torque: 25 Nm
23.
24.
CAUTION: Make sure that new bolts are installed.
Torque:
45 Nm
80°
24.
Install the crankshaft front oil seal.
Refer to:
Engine Front Seal
(303-01A Engine - I6 3.2L Petrol,
Removal and Installation).
25.
Install the front subframe.
Refer to:
Front Subframe
(502-00 Uni-Body, Subframe and Mounting
System, Removal and Installation).
26.
Нет комментариевНе стесняйтесь поделиться с нами вашим ценным мнением.
Текст