Frelander 2. Manual — part 56
18.
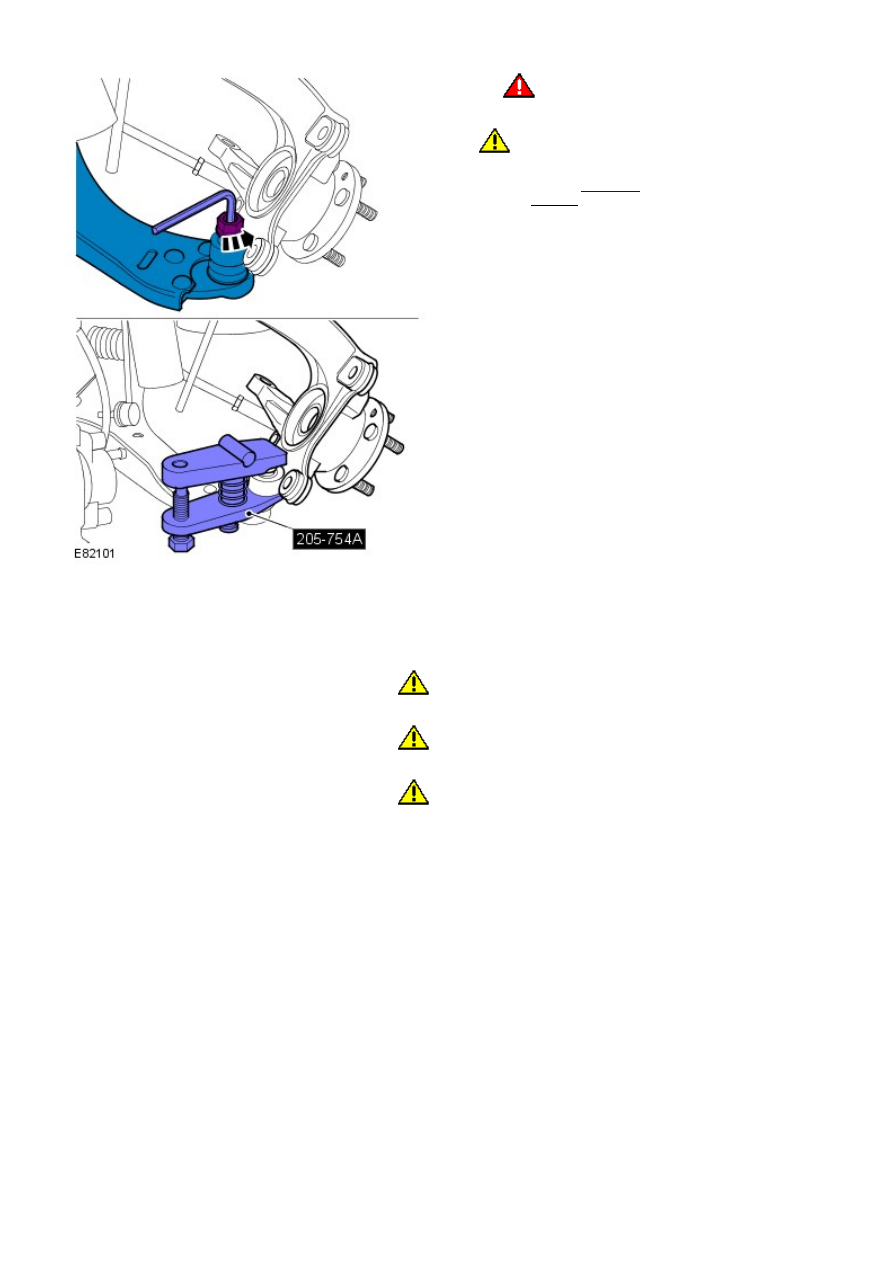
WARNING: Make sure that a new lower arm
ball joint nut is installed.
CAUTION: Make sure that the ball joint ball does
not rotate.
Special Tool(s):
205-754A
Torque: 100 Nm
18.
Installation
1. CAUTIONS:
Make sure that the brake hose is not twisted and is correctly
located.
Nuts and bolts must be tightened with the weight of the
vehicle on the suspension.
Install the halfshaft bolt finger tight.
• NOTE: Make sure that all the component mating faces are clean.
To install, reverse the removal procedure.
1.
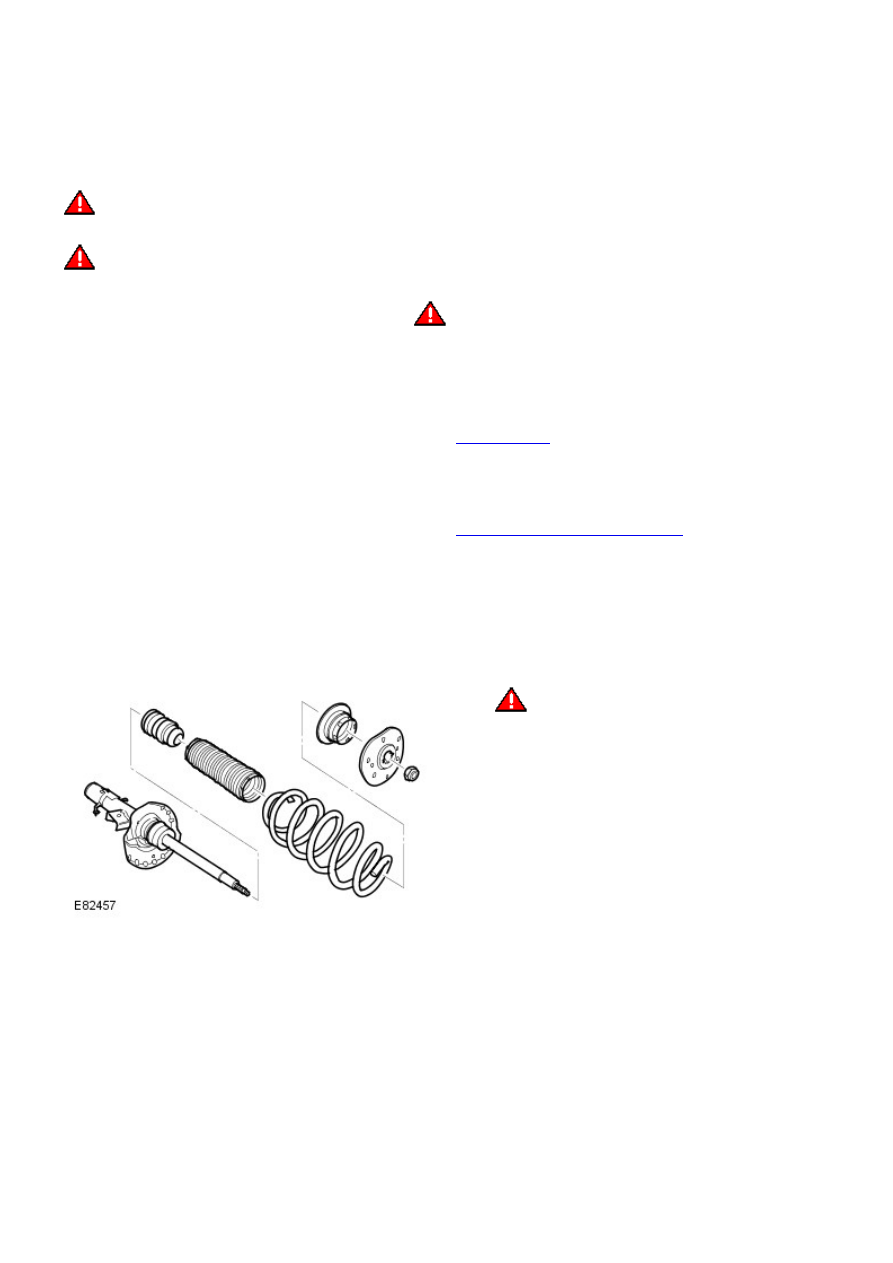
Front Suspension - Front Shock Absorber
Removal and Installation
Removal
• W ARNINGS:
Ensure the spring compressor Safe W orking Load (SWL) meets or exceeds the spring rating quoted in the
Specifcations section.
Always follow the spring compressor manufacturer's instructions.
1.
WARNING: Do not work on or under a vehicle supported only
by a jack. Always support the vehicle on safety stands.
Raise and support the vehicle.
1.
Remove the road wheel.
Refer to:
Wheel and Tire
(204-04 W heels and Tires, Removal and
Installation).
2.
Remove the spring and damper assembly.
Refer to:
Shock Absorber and Spring Assembly
(204-01 Front
Suspension, Removal and Installation).
3.
Install the spring compressor in a vise.
4.
Install the shock absorber and spring assembly in the spring
compressor.
5.
6.
WARNING: Make sure that a new nut is
installed.
6.
Installation
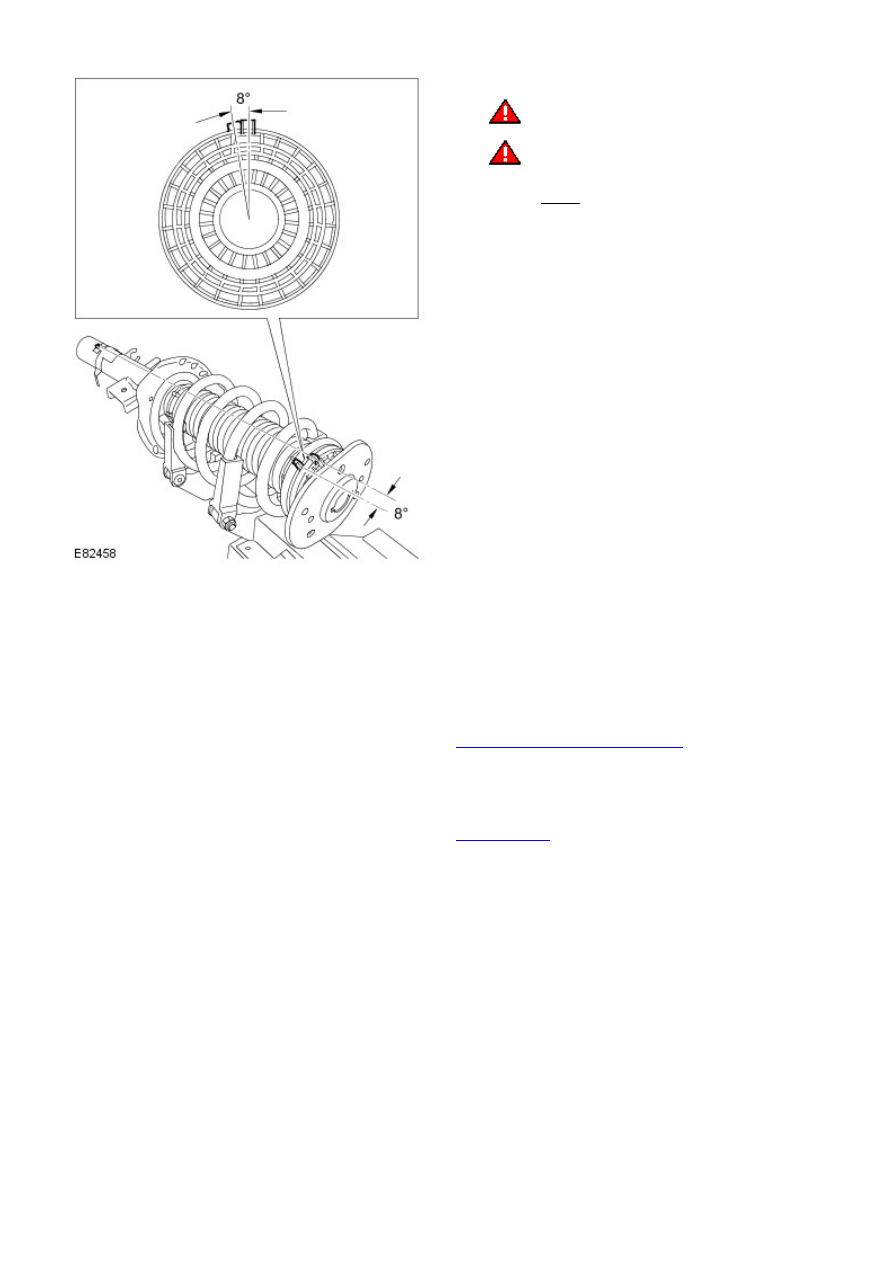
1. WARNINGS:
Make sure that a new nut is installed.
It is imperative that the timing marks are
aligned as shown in illustration.
Torque: 80 Nm
1.
Release the tension from the spring and damper assembly and
remove from the special tool.
2.
Remove the spring compressor from a vise.
3.
Install the spring and damper assembly.
Refer to:
Shock Absorber and Spring Assembly
(204-01 Front
Suspension, Removal and Installation).
4.
Install the road wheel.
Refer to:
Wheel and Tire
(204-04 W heels and Tires, Removal and
Installation).
5.
Front Suspension - Shock Absorber and Spring Assembly
Removal and Installation
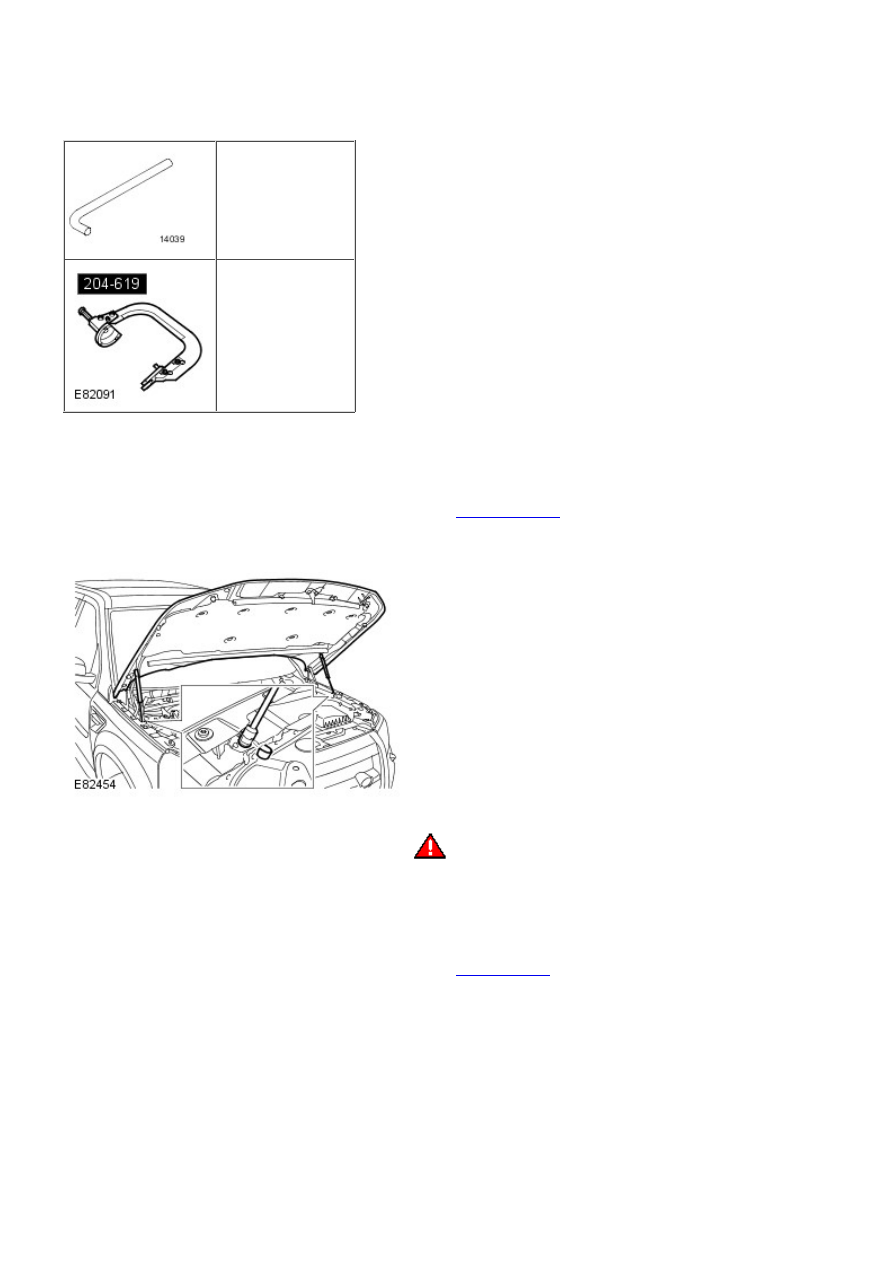
Special Tool(s)
204-159
Lever, Wheel Knuckle
204-619
G-Clamp
Removal
Remove the plenum chamber panel.
Refer to:
Plenum Chamber
(412-01 Climate Control, Removal and
Installation).
1.
Release the hood support struts and secure the hood in
an upright position.
2.
3.
WARNING: Make sure to support the vehicle with axle
stands.
Raise and support the vehicle.
3.
Remove the wheel and tire.
Refer to:
Wheel and Tire
(204-04 W heels and Tires, Removal and
Installation).
4.
Нет комментариевНе стесняйтесь поделиться с нами вашим ценным мнением.
Текст