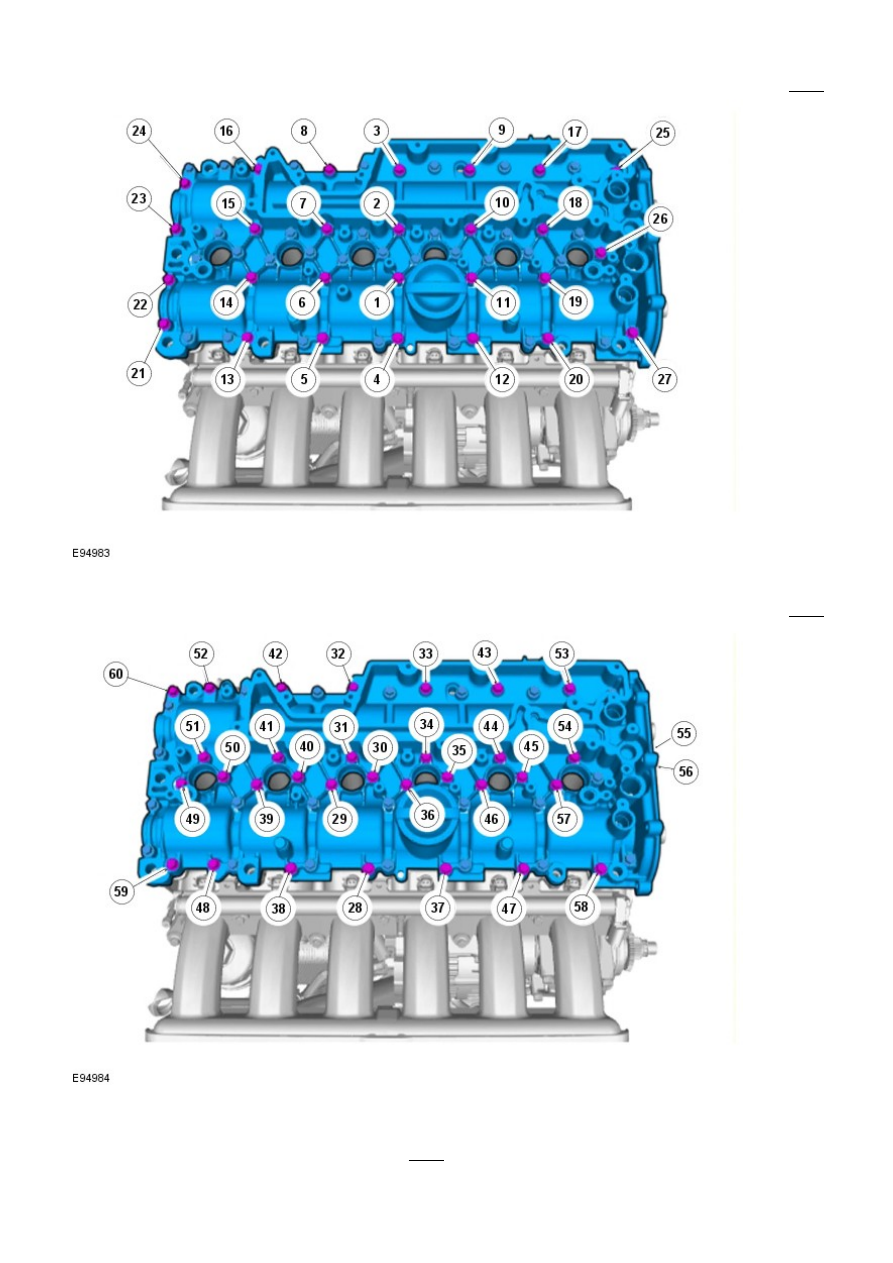
Frelander 2. Manual — part 168
Torque:
16 Nm
9.
Torque:
16 Nm
10.
Install the lifting brackets.
Torque: 48 Nm
11.
Secure the cylinder head wiring harness.
12.

Torque: 6 Nm
13. CAUTIONS:
Extreme cleanliness must be exercised when handling this component.
A new O-ring seal is to be installed.
Install the CPS solenoids.
Torque: 10 Nm
13.
Connect the CPS solenoids.
14.
15. CAUTIONS:
Apply clean engine oil to the VVT solenoid shaft.
Extreme cleanliness must be exercised when handling this component.
A new O-ring seal is to be installed.
Install the VVT solenoid.
Torque: 10 Nm
15.
Connect the VVT solenoid.
16.
Install the CMP sensors.
Torque: 10 Nm
17.
Connect and secure the CMP sensor electrical connectors.
18.
Connect the fuel injector electrical connectors.
19.
Connect the ground cable.
Torque: 6 Nm
20.
Install the engine mount.
Refer to:
Engine Mount RH
(303-01A Engine - I6 3.2L Petrol, Removal and
Installation).
21.
Install the ignition coil-on-plugs.
Refer to:
Ignition Coil-On-Plug
(303-07A Engine Ignition, Removal and
Installation).
22.
Install the crankcase vent oil separator.
Refer to:
Crankcase Vent Oil Separator
(303-08A Engine Emission Control - I6 3.2L
Petrol, Removal and Installation).
23.
Install the timing component housing.
Refer to:
Timing Components Housing
(303-01A Engine - I6 3.2L Petrol, Removal
and Installation).
24.
Connect the battery ground cable and install the cover.
Refer to:
Specifications
(414-00 Battery and Charging System - General
Information, Specifications).
25.
Engine - I6 3.2L Petrol - Camshafts
Removal and Installation
Removal
1.
WARNING: Make sure to support the vehicle with axle
stands.
Raise and support the vehicle.
1.
Remove the cover and disconnect the battery ground cable.
Refer to:
Specifications
(414-00 Battery and Charging System -
General Information, Specifications).
2.
Remove the camshaft bearing housing.
Refer to:
Valve Cover
(303-01A Engine - I6 3.2L Petrol, Removal and
Installation).
3.
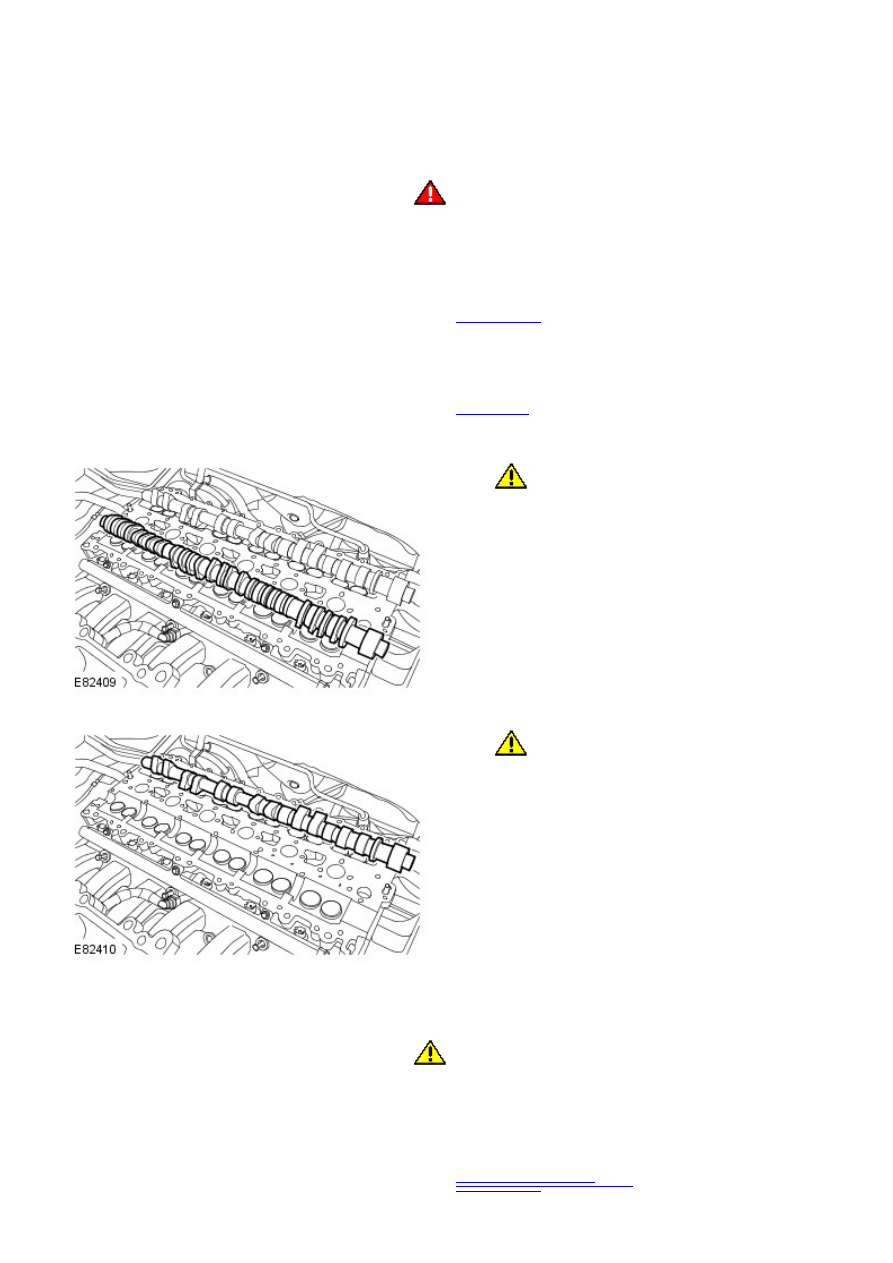
4.
CAUTION: Extreme cleanliness must be
exercised when handling this component.
Remove the intake camshaft.
4.
5.
CAUTION: Extreme cleanliness must be
exercised when handling this component.
Remove the exhaust camshaft.
5.
Installation
1.
CAUTION: Extreme cleanliness must be exercised when
handling these components.
Install the camshafts.
1.
Check the valve clearances.
Refer to:
Valve Clearance Check
(303-01A Engine - I6 3.2L Petrol,
General Procedures).
2. Install the camshaft bearing housing.
Refer to:
Timing Components Housing
(303-01A Engine - I6 3.2L
Petrol, Removal and Installation).
3. Connect the battery ground cable and install the cover.
Refer to:
Specifications
(414-00 Battery and Charging System -
4.
Engine - I6 3.2L Petrol - Timing Chain
Removal and Installation
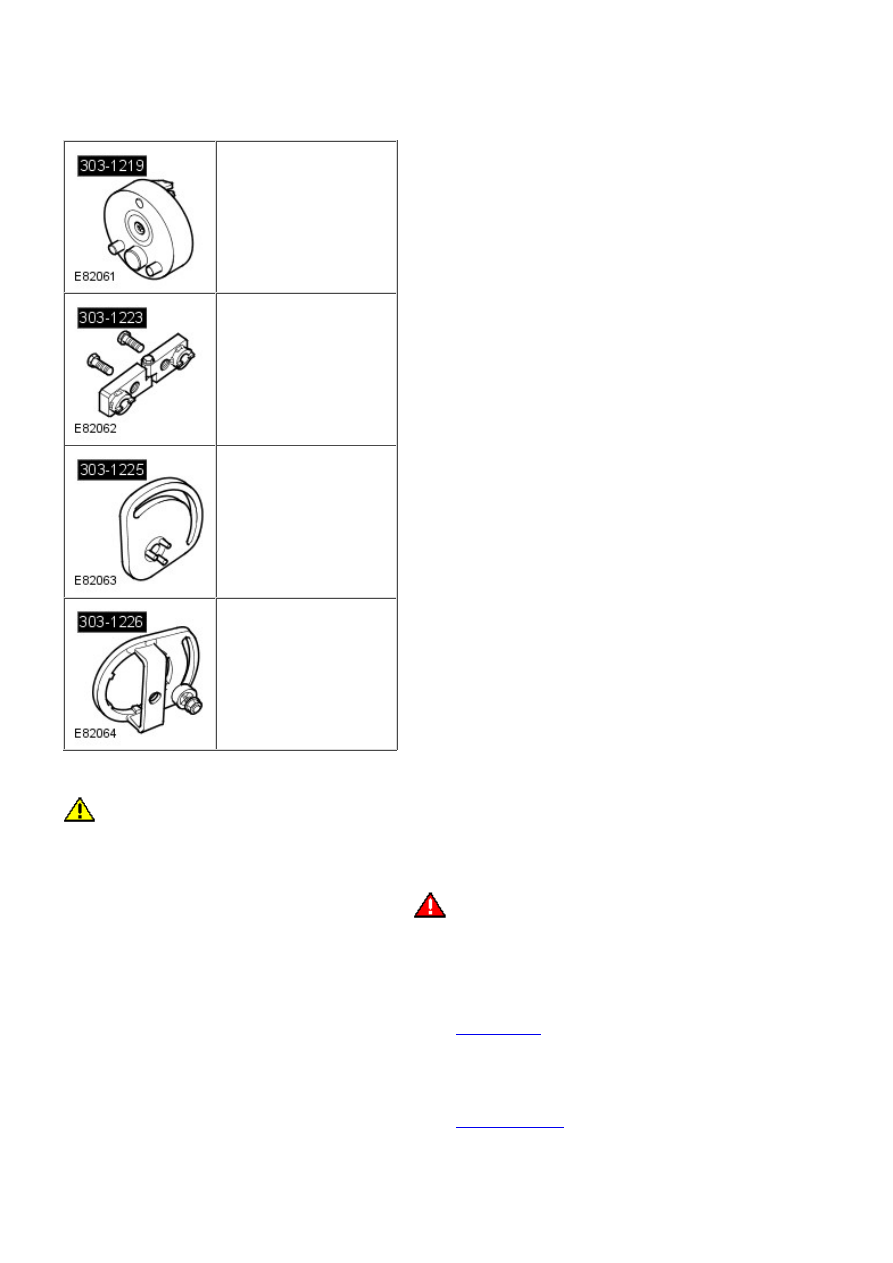
Special Tool(s)
303-1219
Locking Tool, Crankshaft
303-1223
Locking Tool, Camshaft
303-1225
Locking Tool, Camshaft Tool
303-1226
Locking Tool, Camshaft Tool
Removal
CAUTION: Extreme cleanliness must be exercised when handling these components.
• NOTE: Make sure the timing chain free length is on the tensioner run of the chain before releasing the tensioner locking
device.
1.
WARNING: Make sure to support the vehicle with axle
stands.
Raise and support the vehicle.
1.
Remove the cover and disconnect the battery ground cable.
Refer to:
Specifications
(414-00 Battery and Charging System -
General Information, Specifications).
2.
Remove the crankshaft front oil seal.
Refer to:
Engine Front Seal
(303-01A Engine - I6 3.2L Petrol,
Removal and Installation).
3.
Remove the RH engine mount.
4.
Нет комментариевНе стесняйтесь поделиться с нами вашим ценным мнением.
Текст