Frelander 2. Manual — part 477
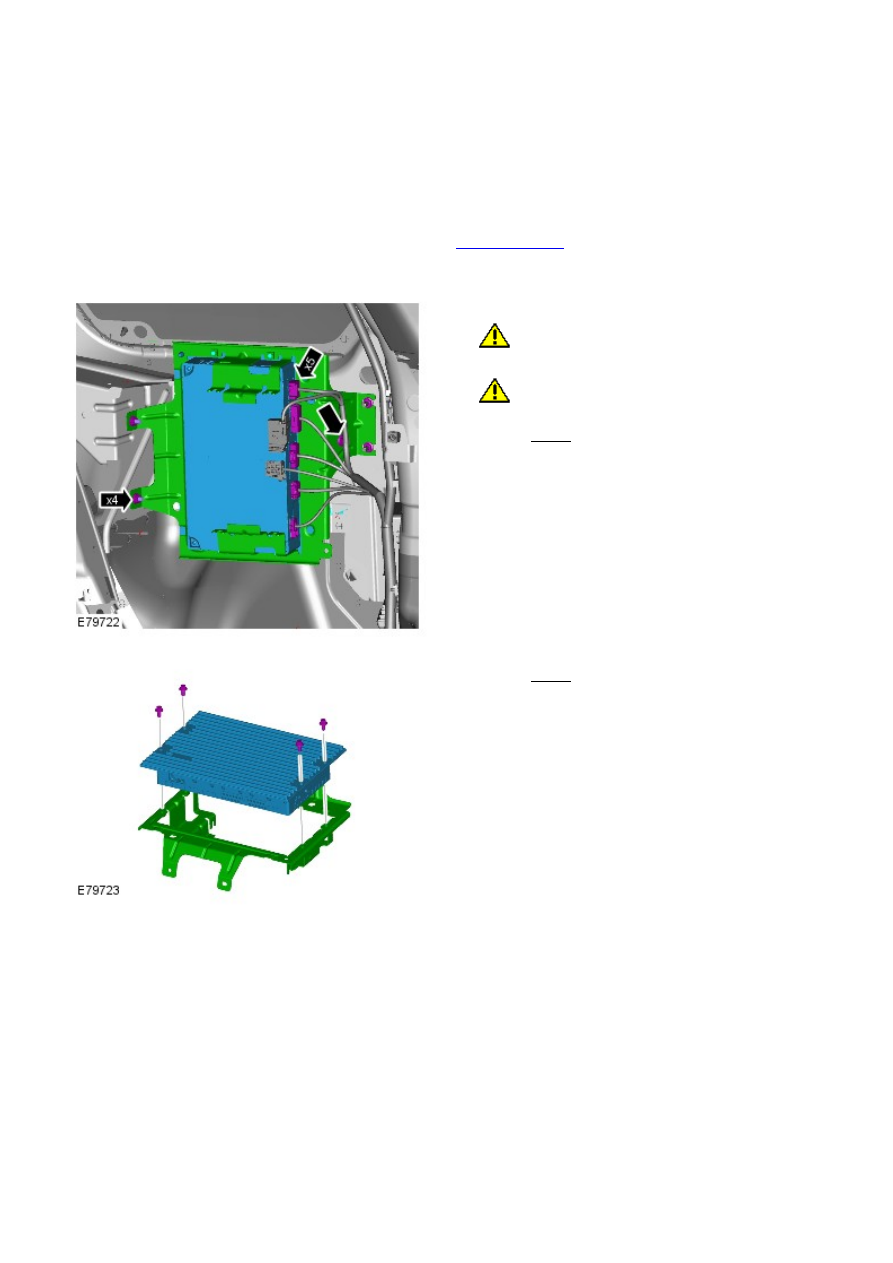
Information and Entertainment System - Subwoofer Amplifier
Removal and Installation
Removal
• NOTE: Removal steps in this procedure may contain installation details.
Remove the bluetooth module.
Refer to:
Bluetooth Module
(415-01 Information and Entertainment
System, Removal and Installation).
1.
2. CAUTIONS:
Make sure that the fiber optic cables are not bent
to a radius of less than 25 mm.
Make sure that the optical connectors are clean
and free of foreign material.
Torque: 10 Nm
2.
Torque: 10 Nm
3.
Installation
To install, reverse the removal procedure.
1.
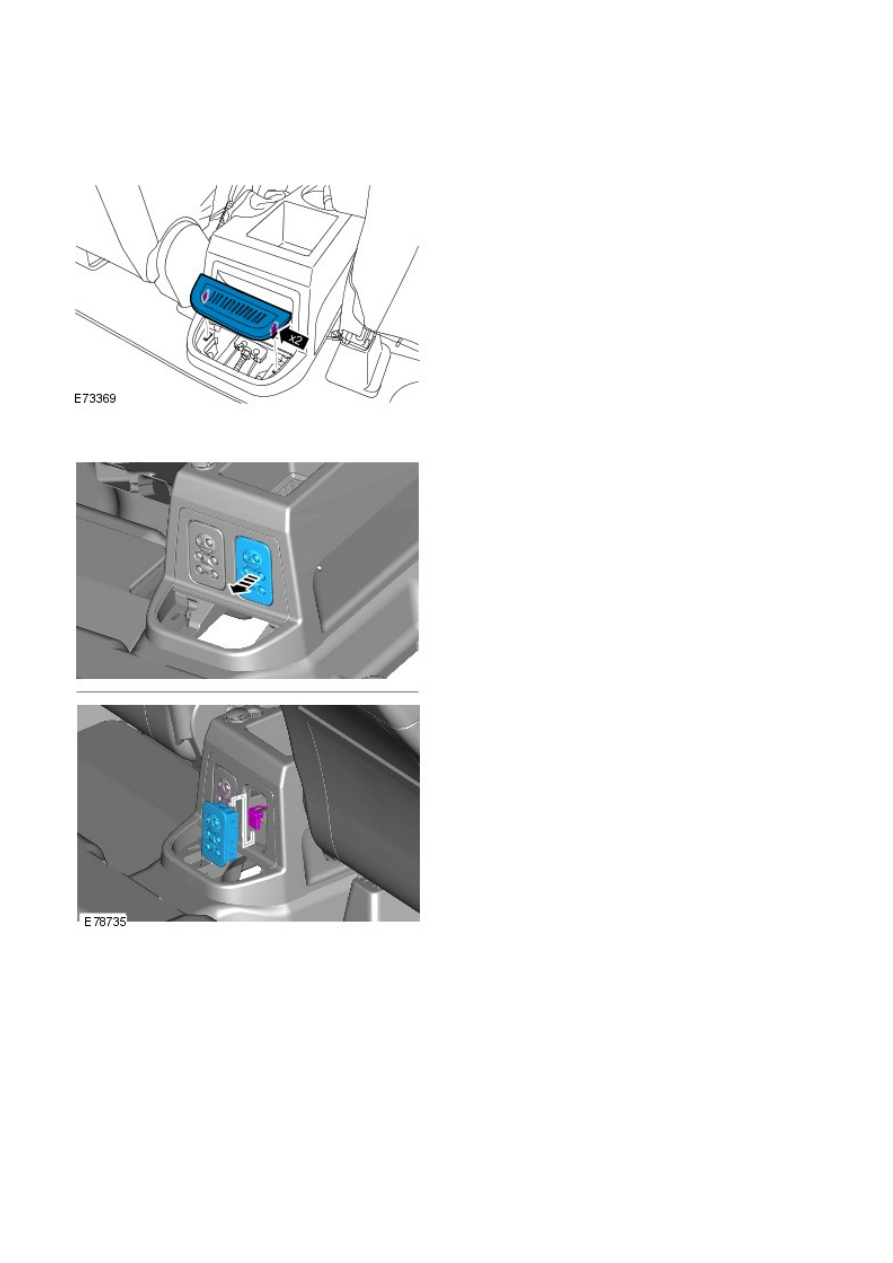
Information and Entertainment System - Rear Auxiliary Audio Controls
Removal and Installation
Removal
Remove the coin tray.
1.
Remove the audio control switch.
2.
Installation
To install, reverse the removal procedure.
1.

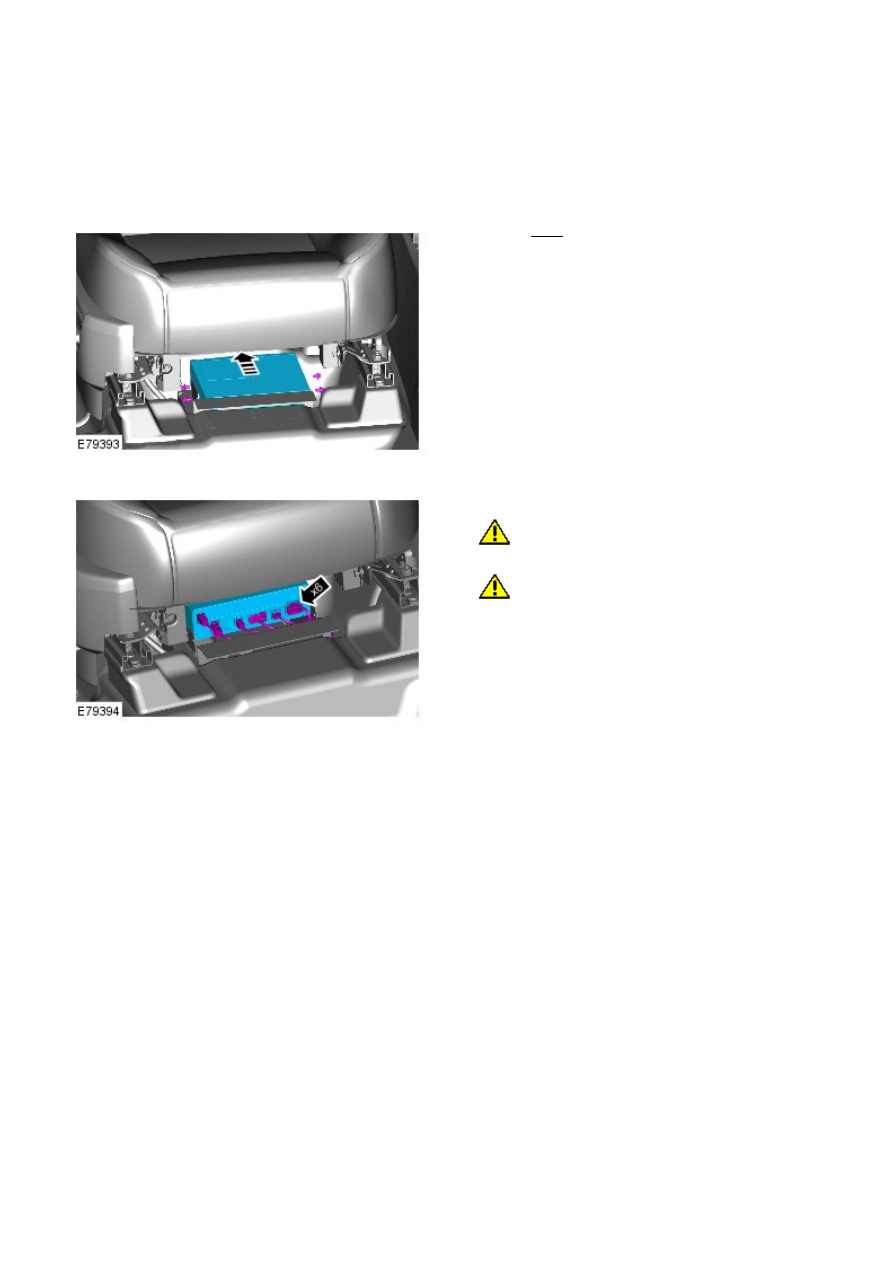
Information and Entertainment System - Bluetooth Module
Removal and Installation
Removal
• NOTE: Removal steps in this procedure may contain installation details.
Remove the RH rear quarter trim panel.
Refer to:
Rear Quarter Trim Panel
(501-05 Interior Trim and
Ornamentation, Removal and Installation).
1.
2. CAUTIONS:
Make sure that the fiber optic cables are not bent
to a radius of less than 25 mm.
Make sure that the optical connectors are clean
and free of foreign material.
Torque: 10 Nm
2.
Installation
To install, reverse the removal procedure.
1.
If a new component is to be installed, configure using IDS.
2.
Information and Entertainment System - Navigation System Digital
Versatile Disc (DVD) Unit
Removal and Installation
Removal
• NOTE: Removal steps in this procedure may contain installation details.
Torque: 6 Nm
1.
2. CAUTIONS:
Make sure that the fiber optic cables are not bent
to a radius of less than 25 mm.
Make sure that the optical connectors are clean
and free of foreign material.
2.
Installation
To install, reverse the removal procedure.
1.
If a new component is to be installed, configure using Land Rover
approved diagnostic equipment.
2.
Нет комментариевНе стесняйтесь поделиться с нами вашим ценным мнением.
Текст