Frelander 2. Manual — part 502

46. NOTE: RHD illustration shown, LHD is similar.
46.
47. NOTE: RHD illustration shown, LHD is similar.
47.
48. NOTE: RHD illustration shown, LHD is similar.
48.
49. NOTE: RHD illustration shown, LHD is similar.
49.
50. NOTE: LHD illustration shown, RHD is similar.
50.
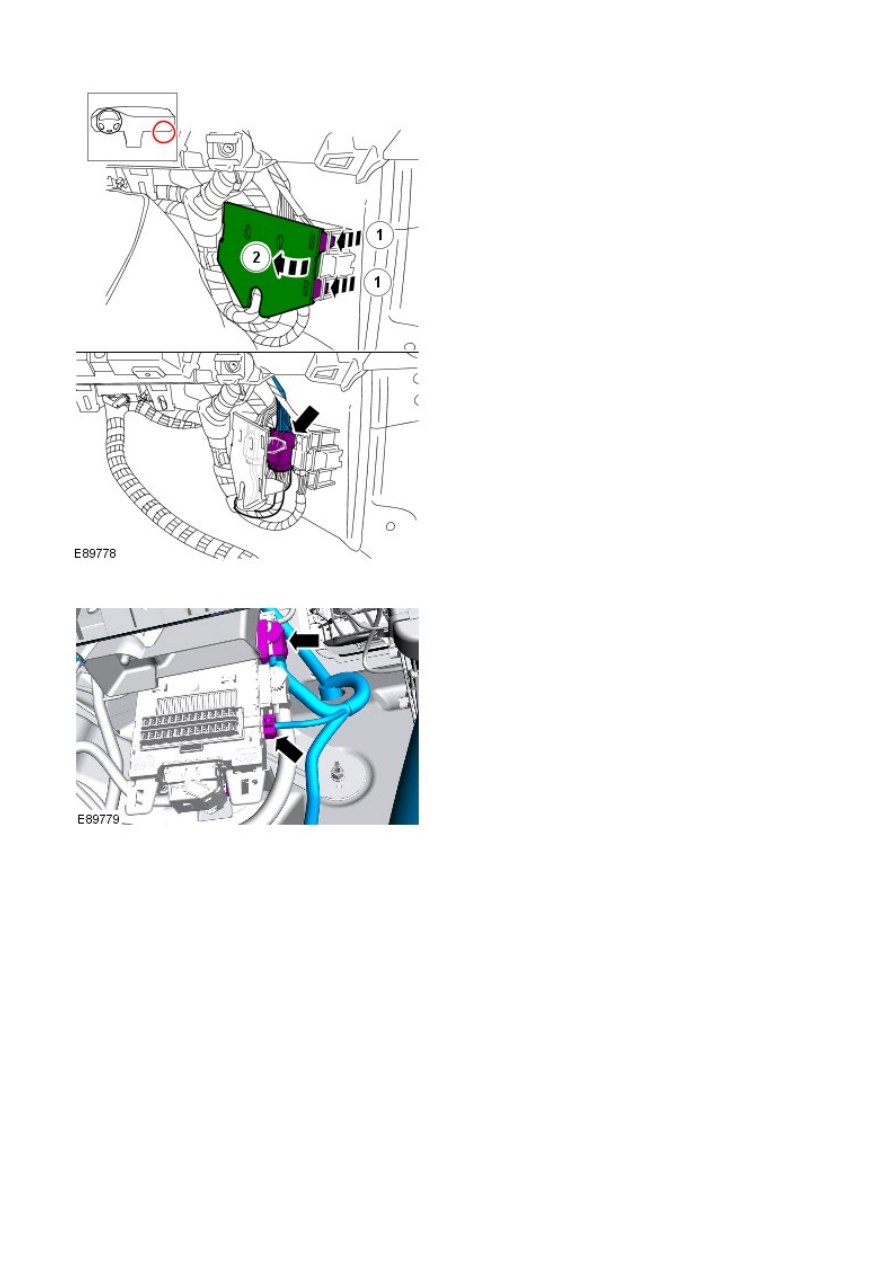
51. NOTE: RHD illustration shown, LHD is similar.
51.
52. NOTE: RHD illustration shown, LHD is similar.
W ith assistance, release the harness.
52.
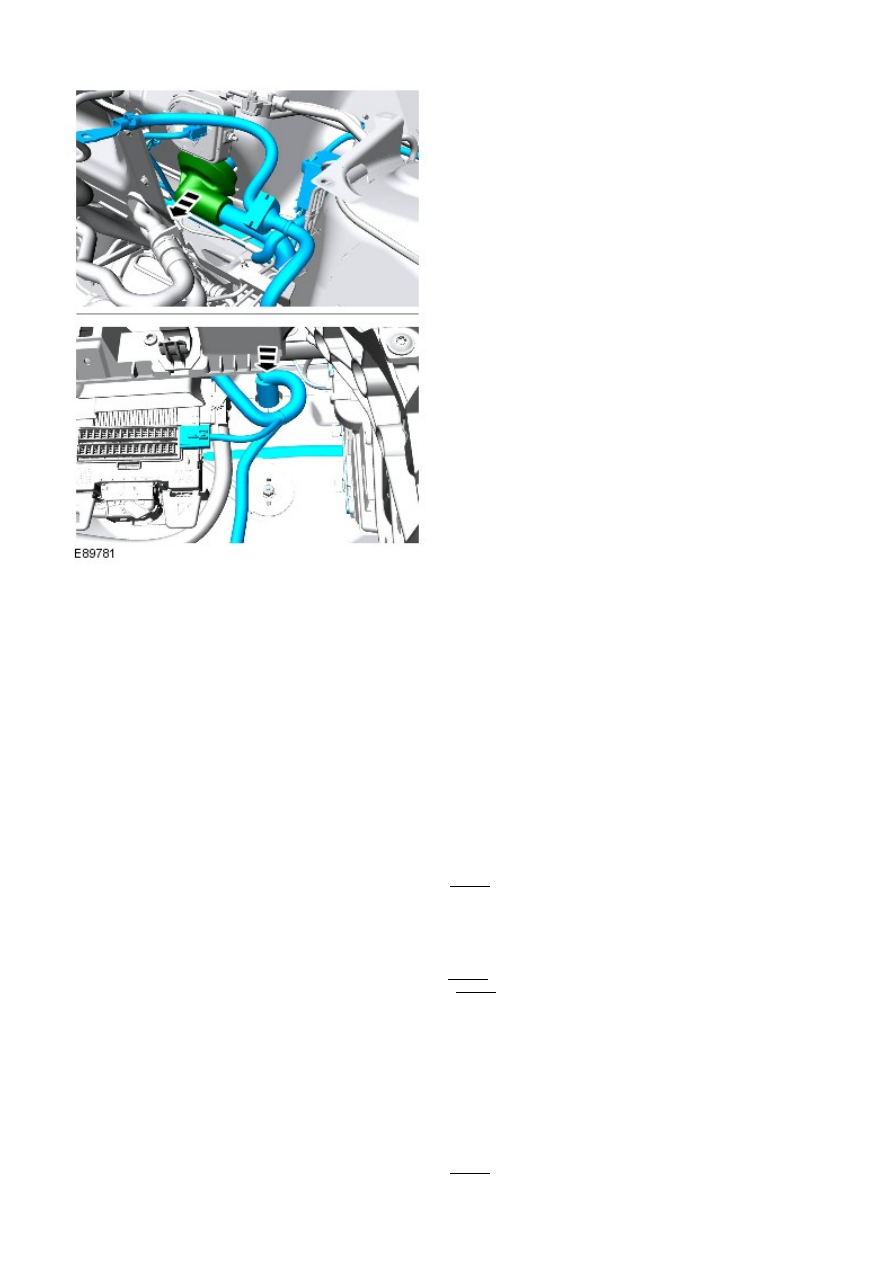
53. NOTE: With assistance remove the component.
Remove the engine compartment harness.
53.
Installation
Place harness to vehicle plenum, feed connectors into inside of
vehicle and install grommet. Use assistance inside vehicle to pull
connectors through.
1.
Secure harness tray clips and secure rubber grommet to vehicle
body.
2.
Install and secure fusebox to body.
Torque: 10 Nm
3.
Install the engine mounting plate.
Torque:
M8 24 Nm
M12 80 Nm
4.
Secure the engine harness to the fusebox.
5.
Connect the two electrical connectors to the BJB.
6.
Install and secure the battery lead to the fusebox and install the
small battery lead cover.
Torque: 10 Nm
7.
Secure the 3 earth points and secure the harness clips to the vehicle
body.
Torque: 10 Nm
8.
Secure the battery lead to the battery terminal clamp.
Torque: 25 Nm
9.
Install the fuse box cover.
10.
Install the harness cover to the suspension turret.
11.
Feed harness under the air cleaner duct and secure the duct to the
grommet.
12.
Secure headlamp and bumper harness clips.
13.
Connect the height sensor electrical connector and secure the
harness with the clips.
14.
Install headlamp mounting plate.
Torque: 10 Nm
15.
Connect the side repeater electrical connector.
16.
Connect the heated washer jet electrical connection and secure the
harness to the vehicle body.
17.
Connect the ABS sensor and secure the harness to the vehicle body.
18.
Secure the washer pipe to the harness and secure the harness to the
body.
19.
Connect the crash sensor electrical connectors.
20.
Connect the the bonnet lock electrical connector
21.
Secure the harness to the body and then secure the bonnet release
cable to the harness.
22.
Secure the washer pipe to the washer bottle.
23.
Install the washer bottle and connect the electrical connections.
Torque: 10 Nm
24.
Secure the 3 ground cables to the vehicle body.
Torque: 10 Nm
25.
Secure the harness to the vehicle body.
26.
Connect the coolant level sensor electrical connector.
27.
Нет комментариевНе стесняйтесь поделиться с нами вашим ценным мнением.
Текст