Frelander 2. Manual — part 576
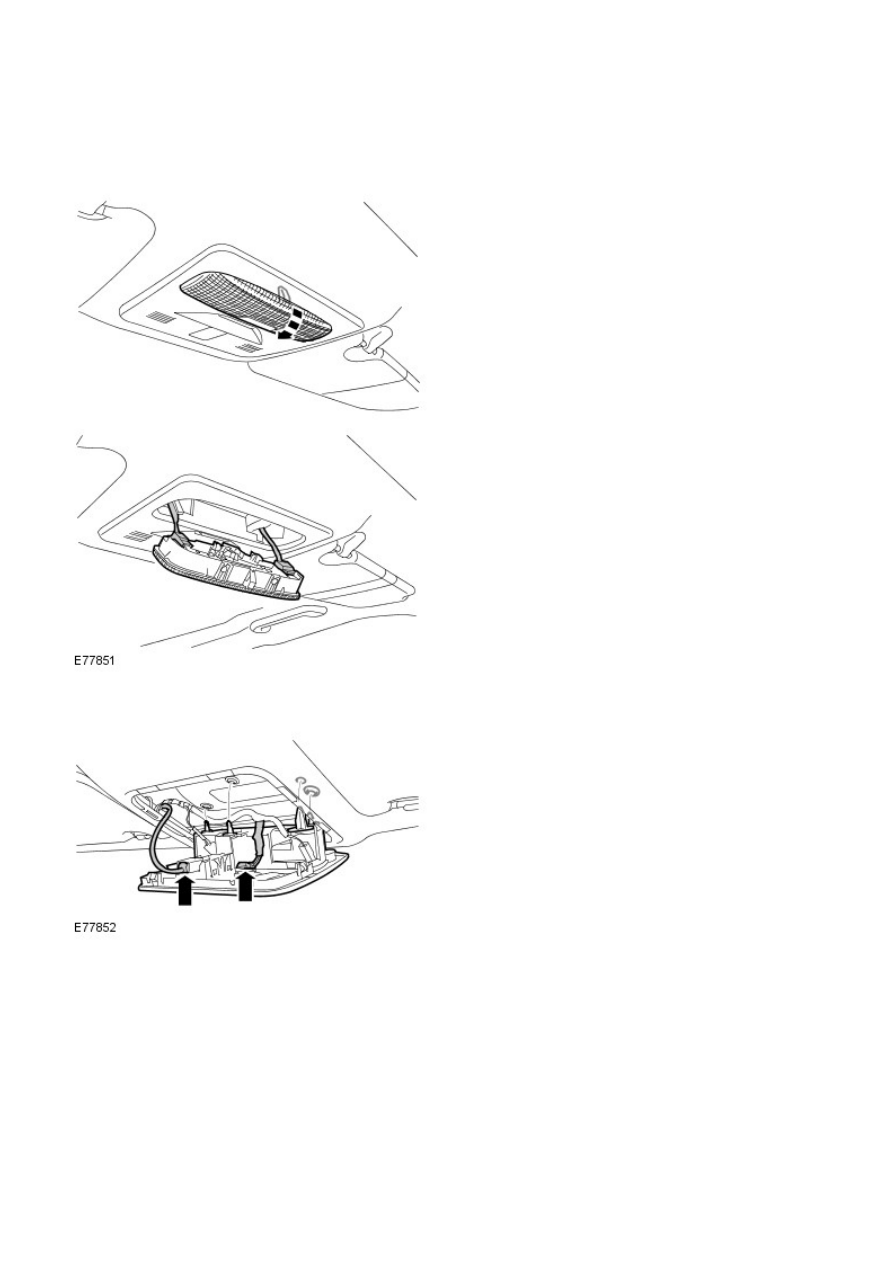
Instrument Panel and Console - Overhead Console
Removal and Installation
Removal
1.
2.
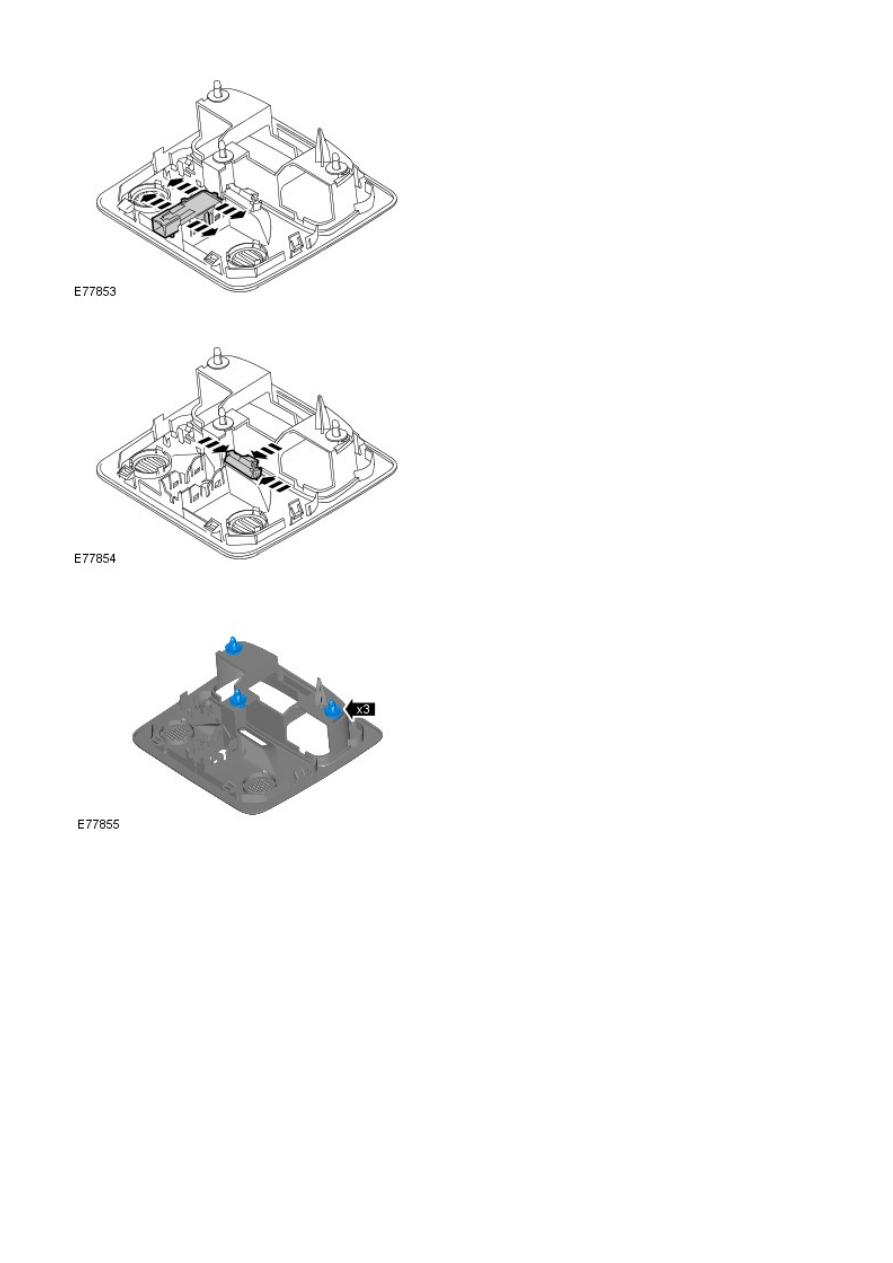
3. NOTE: Do not disassemble further if the component
is removed for access only.
3.
Remove the passenger air bag deactivation warning
lamp.
4.
5.
Installation
To install, reverse the removal procedure.
1.
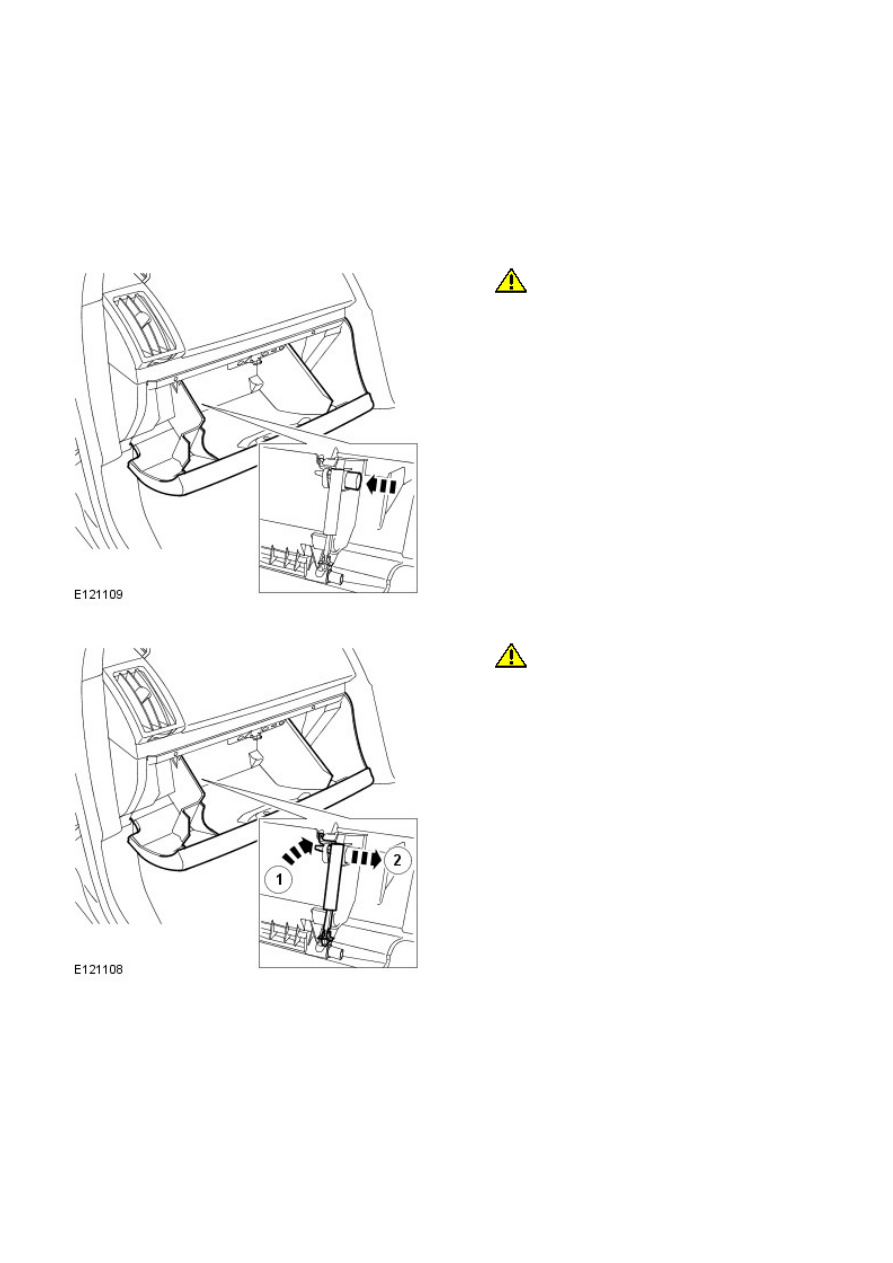
Instrument Panel and Console - Glove Compartment
Removal and Installation
Removal
Position the front seat fully rearwards.
1.
Open the glove compartment to the service condition.
2.
3.
CAUTION: Make sure that excessive force is not
used to release the glove compartment. Failure to
follow these instructions may result in damage to the
vehicle.
Release the glove compartment.
3.
4.
CAUTION: Make sure that excessive force is not
used to release the glove compartment. Failure to
follow these instructions may result in damage to the
vehicle.
Release the glove compartment damper.
4.
Remove the glove compartment.
5.
Installation
To install, reverse the removal procedure.
1.

Handles, Locks, Latches and Entry Systems -
Torque Specifications
Description
Nm
lb-ft
Front door latch Torx screws
10
7
Hood latch interior release handle bolt
10
27
Hood latch to slam panel bolts
10
7
Hood safety hook bolts
10
7
Liftgate handle bolts
4
3
Liftgate latch Torx screws
20
15
Liftgate striker bolts
25
18
Rear door latch Torx screws
10
7
Нет комментариевНе стесняйтесь поделиться с нами вашим ценным мнением.
Текст