Frelander 2. Manual — part 656
Side Panel Sheet Metal Repairs - B-Pillar Reinforcement
Removal and Installation
Removal
• CAUTIONS:
The B-Pillar reinforcement is BH300, (Bake Hardened steel). It must be MIG plug welded to the B-Pillar inner, the
rocker panel inner reinforcement and the cantrail reinforcement. Spot welds must not be used.
Ensure that all welded joints are suitably sealed and waterproofed, particularly in the areas where the original panel
adhesive / sealer cannot be replicated. Where necessary, seal the joints prior to the fitment of outer panels.
• NOTE: The B-Pillar reinforcement is unpicked from the side panel reinforcement, 'ring-frame', it is not serviced
separately.
• NOTE: There is a NVH element located between the B-Pillar reinforcement and the B-Pillar inner.
1. The B-Pillar reinforcement is replaced in conjunction with:
Front door
Rear door
Headlining
B-Pillar outer panel
2. For additional information relating to this repair procedure
please see the following:
For additional information, refer to:
Body and Frame
(501-26
Body Repairs - Vehicle Specific Information and Tolerance
Checks, Description and Operation) /
Standard Workshop Practices
(100-00 General Information,
Description and Operation).
3. Remove the B-Pillar outer panel.
For additional information, refer to:
B-Pillar Outer Panel
(501-29 Side Panel Sheet Metal Repairs, Removal and
Installation).
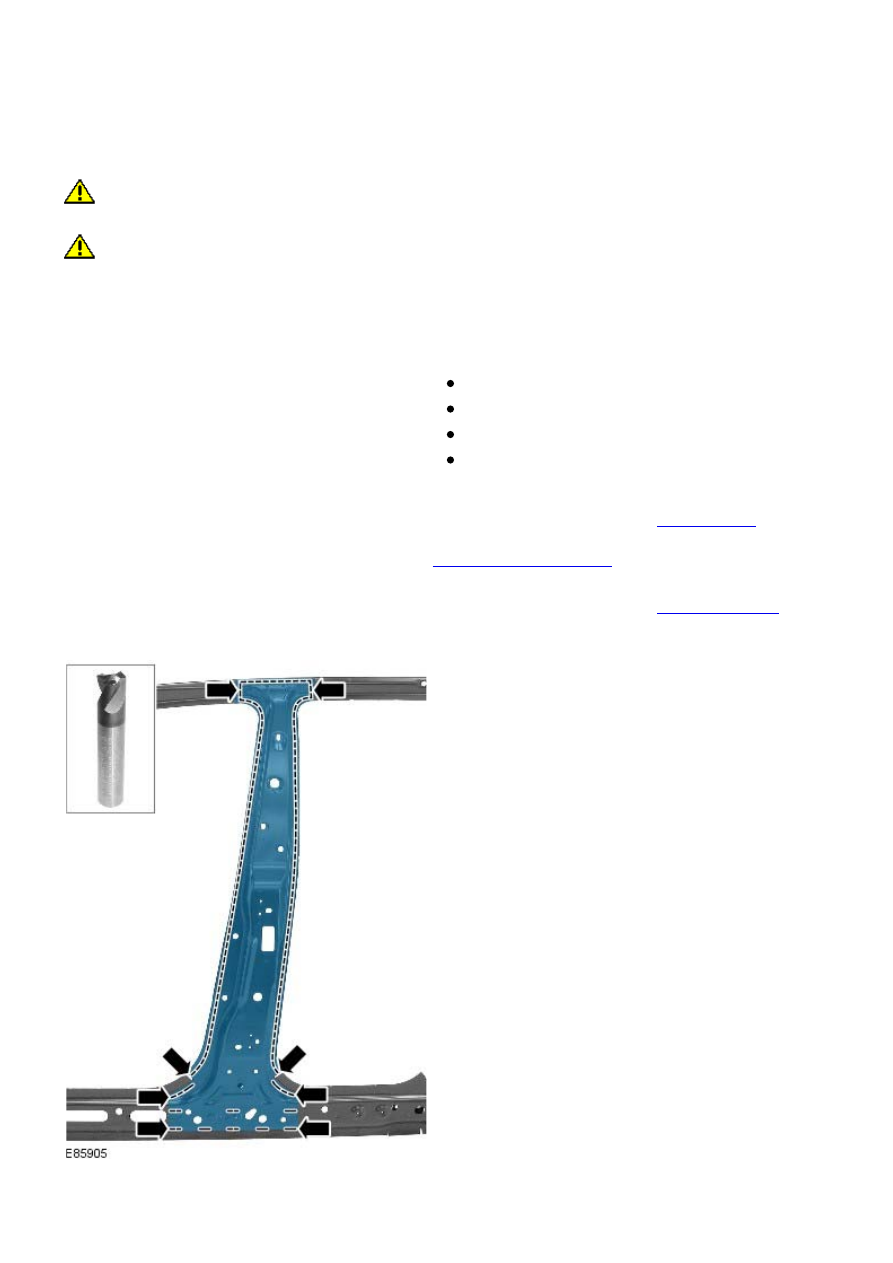
4. NOTE: It will be necessary to use a HSS spot weld drill bit
on the A-Pillar upper / cantrail and rocker panel areas.
• NOTE: Holes should be drilled through the B-Pillar
reinforcement and the B-Pillar inner panel at the door
apertures. This enables MIG plug welds to be installed through
the inner panel.
Mill out the spot welds.
5. Separate the joints and remove the old panel, also releasing
the NVH element.

Installation
1. Remove the B-Pillar reinforcement part from the ring frame
service panel. Mill out the spot welds using a HSS spot weld
drill bit.
2. Prepare the old and new panel joint surfaces.
3. Offer up the new panel and clamp into position. Check
alignment, if correct, proceed to next step, if not, rectify and
recheck before proceeding.
4. Remove the new panel.
5. If necessary, renew the NVH element.
6. Apply sealer adhesive to the NVH element.
7. Offer up the new panel and clamp into position.
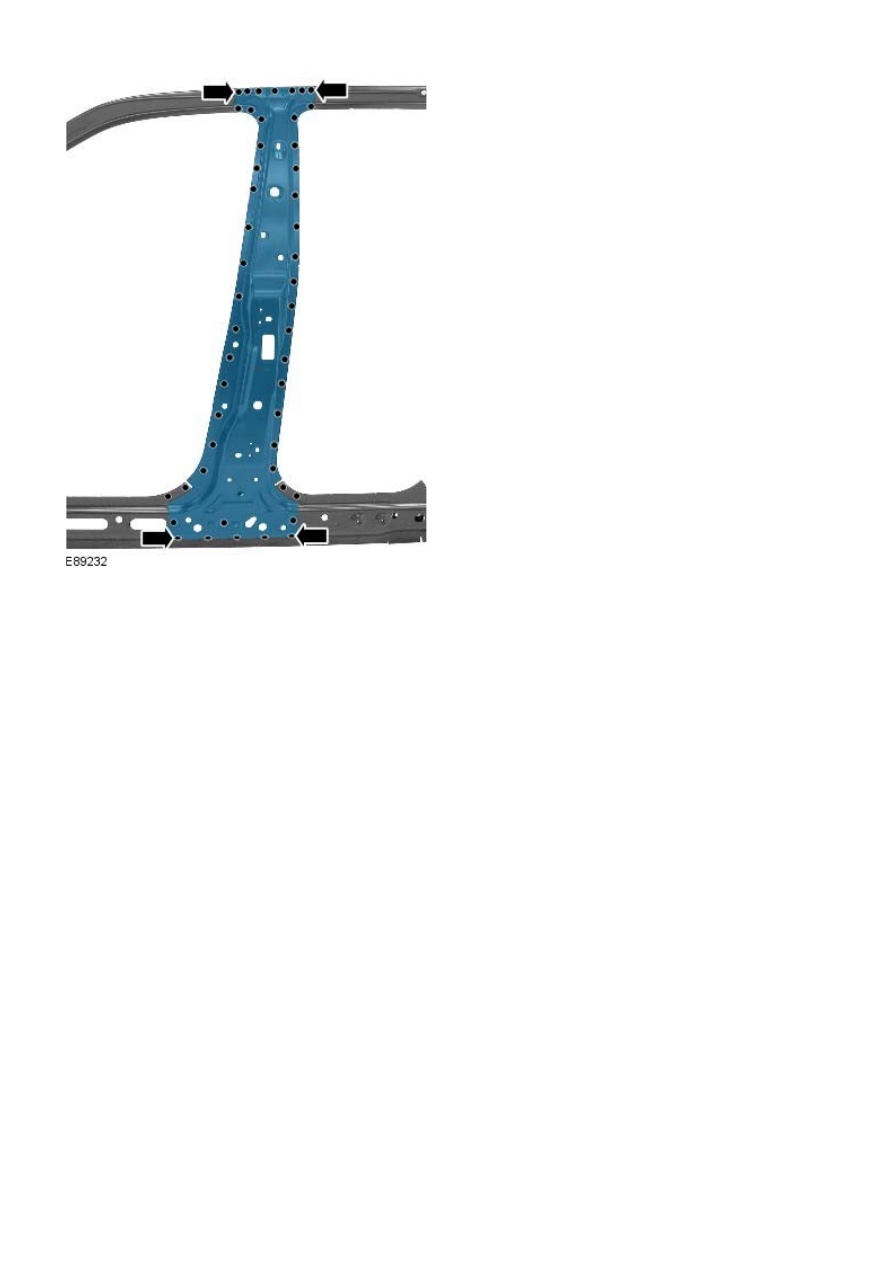
8. NOTE: Holes for MIG plugs would be created during the old
panel removal and separation of the service panel.
• NOTE: MIG plug welds should be installed through the inner
panel at the door apertures.
MIG plug weld.
9. Dress all welded joints.
10. The installation of associated panels and mechanical
components is the reverse of removal.
Side Panel Sheet Metal Repairs - B-Pillar Inner Panel
Removal and Installation
Removal
• NOTE: The B-Pillar inner panel is serviced as a separate weld-on panel.
1. The B-Pillar reinforcement is replaced in conjunction with:
Front door
Rear door
Headlining
B-Pillar outer panel
B-Pillar reinforcement
2. For additional information relating to this repair procedure
please see the following:
For additional information, refer to:
Body and Frame
(501-26
Body Repairs - Vehicle Specific Information and Tolerance
Checks, Description and Operation) /
Standard Workshop Practices
(100-00 General Information,
Description and Operation).
3. Remove the B-Pillar reinforcement.
For additional information, refer to:
B-Pillar Reinforcement
(501-29 Side Panel Sheet Metal Repairs, Removal and
Installation).
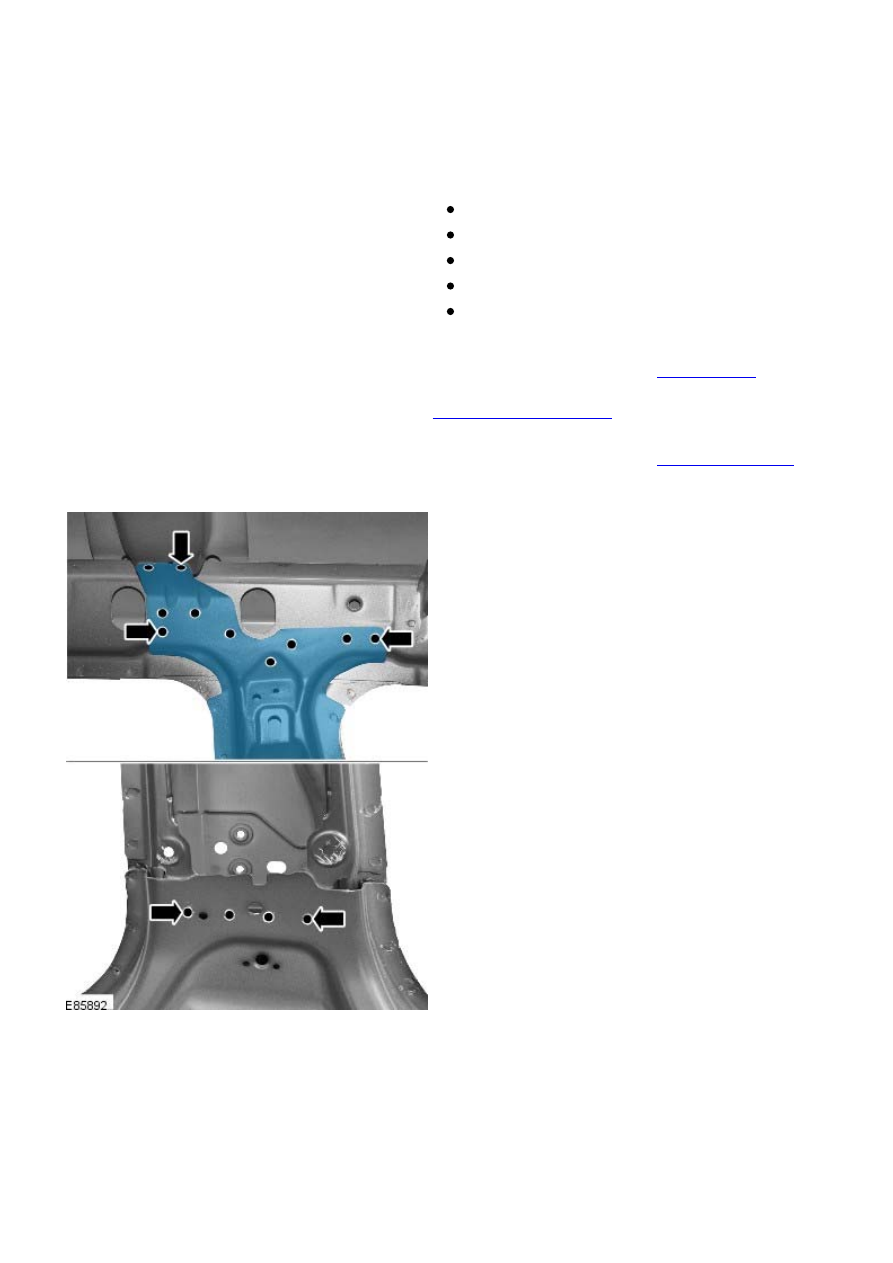
4. Mill out the spot welds.
5. Separate the joints and remove the panel.
Installation
1. Prepare the old and new panel joint surfaces.
Нет комментариевНе стесняйтесь поделиться с нами вашим ценным мнением.
Текст