Discovery 2. Manual — part 610
FRONT SUSPENSION
REPAIRS
60-37
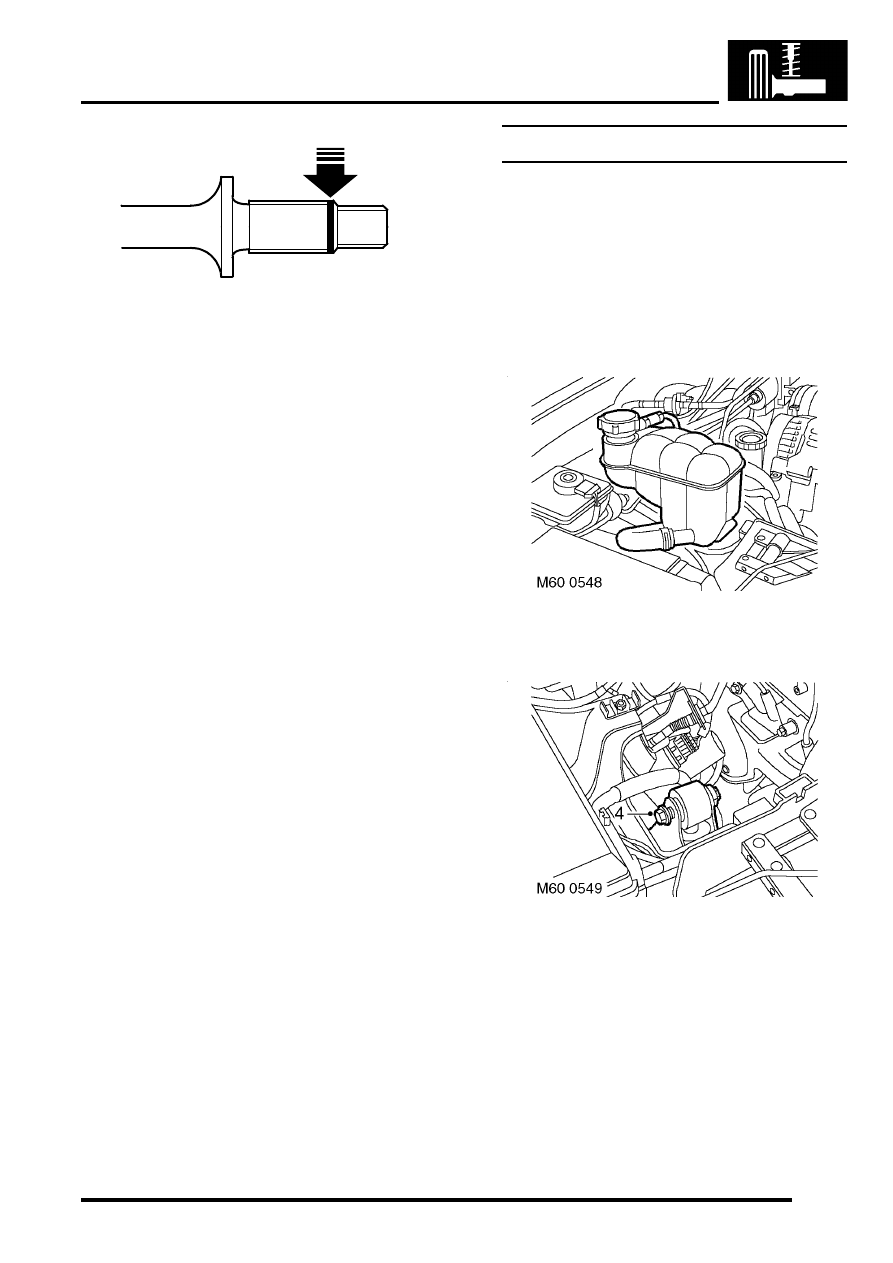
6. Apply a 3 mm (0.125 in) wide bead of Loctite
640 around drive shaft circumference, as
illustrated.
7. Ensure ABS harness is located in cut out in
steering knuckle.
8. Fit wheel hub to drive shaft and align steering
knuckle. The Loctite will smear along the length
of the splines as the wheel hub is fitted to the
drive shaft.
9. Fit wheel hub bolts and tighten to 100 Nm (74
lbf.ft).
10. Fit new drive shaft nut and lightly tighten.
11. Fit front brake disc.
12. With assistance, final tighten drive shaft nut to
490 Nm (360 lbf.ft). Stake drive shaft nut. The
drive shaft nut must be tightened before
Loctite has cured.
13. Secure ABS sensor harness to brackets and
secure grommet to inner wing.
14. Fit road wheel and tighten nuts to 140 Nm (103
lbf.ft).
15. Remove stand(s) and lower vehicle.
16. Connect ABS sensor multiplug.
Damper - front
$% 60.30.02
Remove
1. Raise front of vehicle.
WARNING: Do not work on or under a
vehicle supported only by a jack. Always
support the vehicle on safety stands.
2. Remove road wheel.
3. RH damper: Release coolant reservoir and
position aside.
4. Loosen through bolt securing damper to turret.
WARNING: Make sure the axle cannot move
when the damper is disconnected. The
damper limits the downward movement of
the axle. If the axle is not restrained,
disconnecting the damper will allow
unrestricted movement which may cause
personal injury or damage to equipment.
M51 0058
FRONT SUSPENSION
60-38
REPAIRS
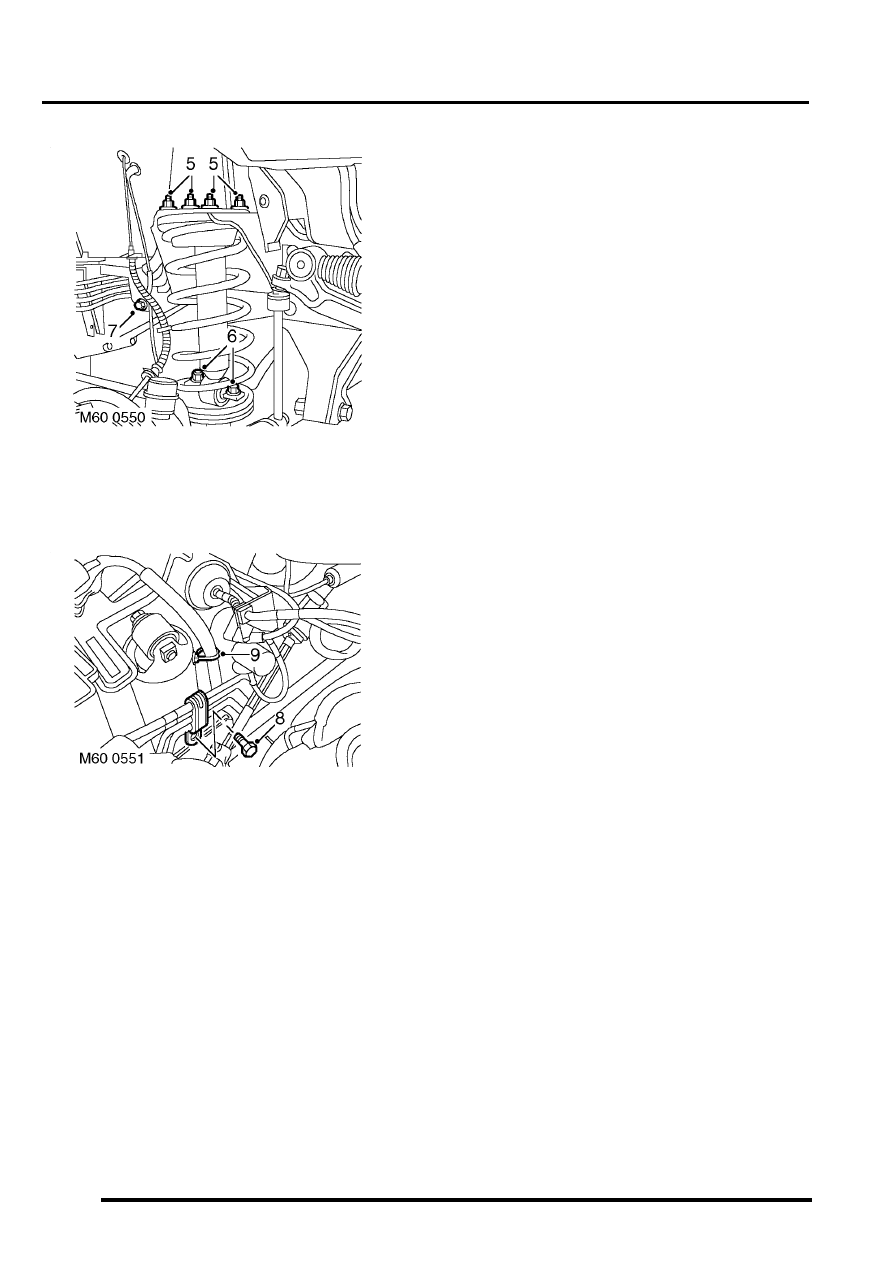
5. Remove 4 nuts securing turret base to chassis.
6. Remove 2 bolts securing damper to axle.
7. ACE models: Remove bolt securing ACE pipe
clamp to chassis.
8. ACE models: Remove bolt securing ACE pipe
clamp to turret.
9. Release harness clip from turret.
10. Raise turret and remove through bolt.
11. Compress damper and manoeuvre turret from
engine bay.
12. Remove damper.
Refit
1. Position damper and manoeuvre turret into
position. Raise damper and align to turret. Fit
through bolt but do not tighten at this stage.
2. Align damper assembly to spring seat.
3. Fit bolts securing damper to axle and tighten to
45 Nm (33 lbf.ft).
4. Fit nuts securing turret to chassis and tighten
to 23 Nm (17 lbf.ft).
5. Tighten through bolt to 125 Nm (92 lbf.ft).
6. ACE models: Position ACE pipe clamp to
chassis and secure with bolt.
7. ACE models: Position ACE pipe clamp to
turret and secure with bolt.
8. Secure harness to turret.
9. RH damper: Reposition coolant reservoir.
10. Fit road wheel and tighten nuts to 140 Nm (103
lbf.ft).
11. Remove stand(s) and lower vehicle.
FRONT SUSPENSION
REPAIRS
60-39
Bushes - radius arm
$% 60.35.18
Remove
1. Raise front of vehicle.
WARNING: Do not work on or under a
vehicle supported only by a jack. Always
support the vehicle on safety stands.
2. Remove road wheel.
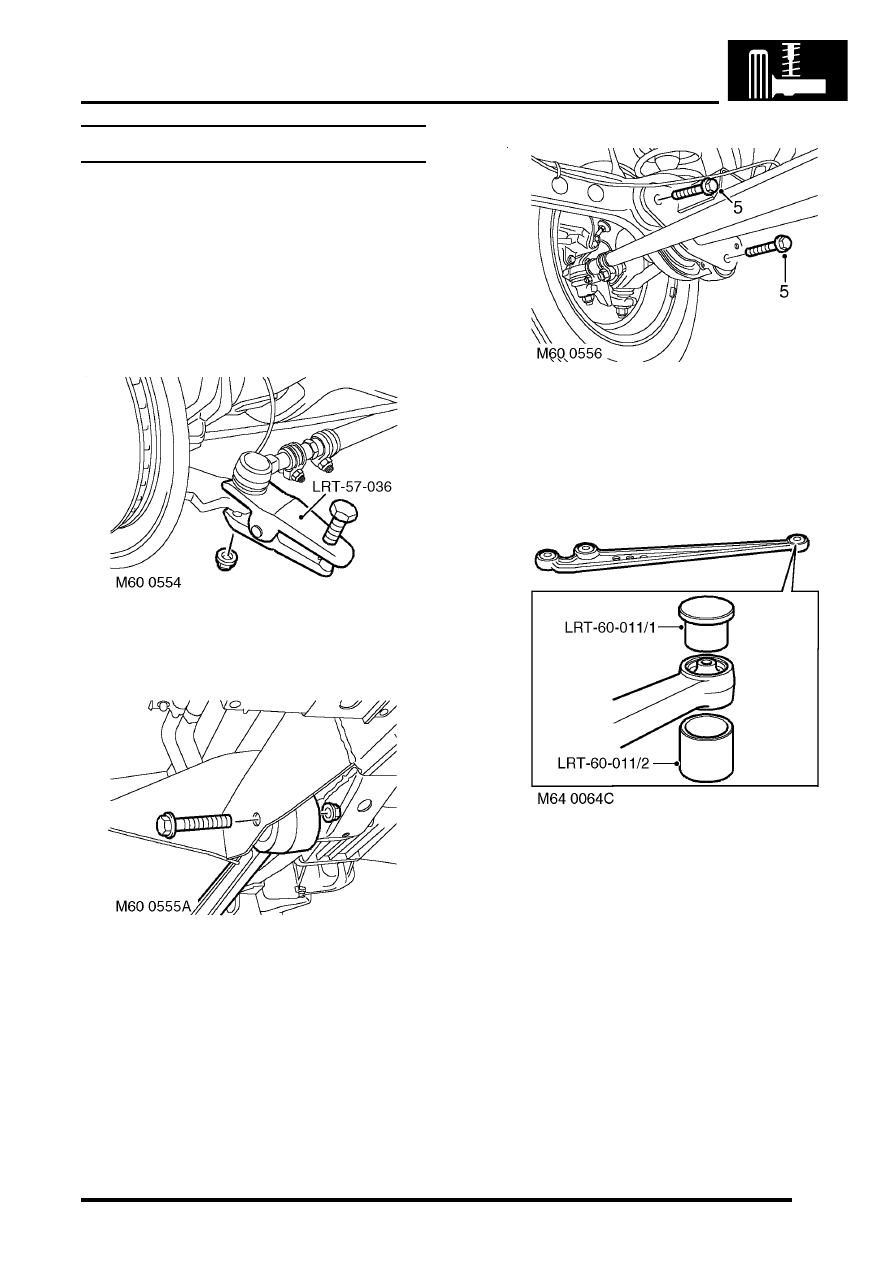
3. Remove nut securing track rod to steering
knuckle. Use LRT-57-036 to break taper, then
release track rod and position aside.
4. Remove nut and bolt securing radius arm to
chassis.
5. Remove nuts securing radius arm to axle.
Remove rear bolt and lower the radius arm.
Remove front bolt and remove radius arm from
vehicle.
6. Press out bushes from axle end of radius arm
using a length of steel tubing.
7. Press out bush from rear of radius arm:
l
Use LRT-60-011/1 and LRT-60-011/2 to
remove bush.
FRONT SUSPENSION
60-40
REPAIRS
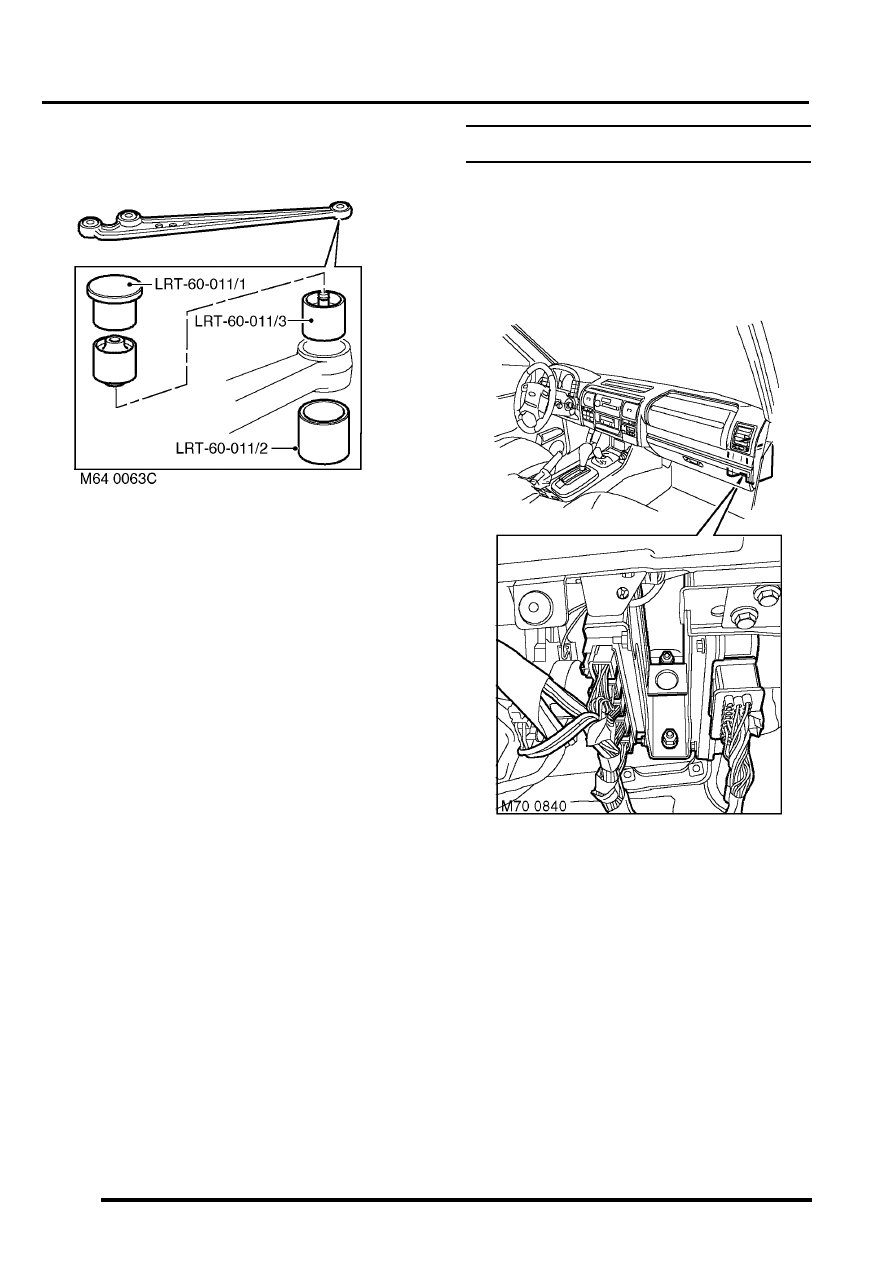
Refit
1. Clean bush locations in radius arm.
2. Press bushes into radius arm:
l
Use LRT-60-011/1, LRT-60-011/2 and
LRT-60-011/3 to fit bush at rear of radius
arm.
3. Position radius arm to vehicle. Fit securing
bolts and nuts but do not tighten at this stage.
4. Fit track rod to steering knuckle. Fit and tighten
nut to 125 Nm (92 lbf.ft).
5. Fit road wheel and tighten nuts to 140 Nm (103
lbf.ft).
6. Remove stand(s) and lower vehicle.
7. Tighten radius arm nuts and bolts to 230 Nm
(170 lbf.ft).
CAUTION: Nuts and bolts must be tightened
with weight of vehicle on suspension.
ECU - ACE
$% 60.60.01
Remove
1. Remove BCU.
2. Remove 5 multiplugs from SLABS ECU.
3. Remove multiplug from ACE ECU.
4. Remove lower nut and loosen upper nut
securing SLABS and ACE ECU bracket to
body.
5. Remove ECU's and bracket assembly.
Нет комментариевНе стесняйтесь поделиться с нами вашим ценным мнением.
Текст