Discovery 2. Manual — part 195
FRONT SUSPENSION
REPAIRS
60-63
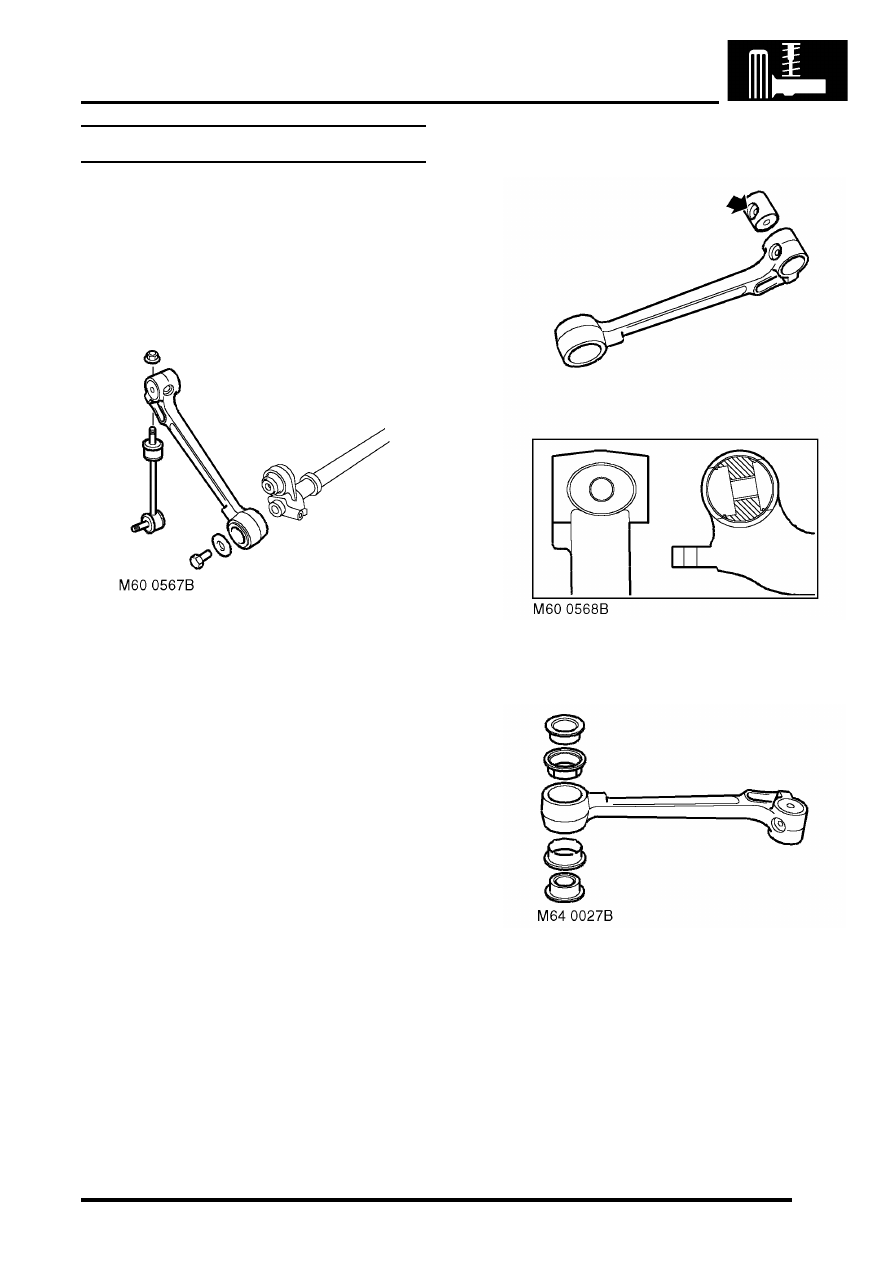
Bushes - front long arm - ACE
$% 60.60.46
Remove
1. Remove ACE front actuator.
2. Remove securing nut and remove anti-roll bar
link from torsion bar.
3. Restrain torsion bar and remove long arm
securing bolt and washer. Remove long arm
from torsion bar.
CAUTION: The short arm and torsion bar
are supplied as an assembly and must not
be separated.
4. Use a suitable drift to remove both halves of
slipper bush from long arm.
5. Use suitable adaptors to press actuator rod end
bush from long arm.
Refit
1. Clean bush locations in long arm.
2. Use suitable adaptors to press new actuator
rod end bush into long arm. Ensure hole in bush
is correctly aligned with hole in long arm.
3. Align slots in new slipper bush halves with
those in long arm. Carefully press both halves
of slipper bush into long arm. Ensure the
sealing rings on the slipper bush faces are not
damaged.
4. Clean long arm and mating face on torsion bar.
5. Fit long arm to torsion bar. Restrain torsion bar
and tighten bolt to 180 Nm (133 lbf.ft).
6. Fit anti-roll bar link to long arm and tighten nut
to 50 Nm (37 lbf.ft).

REAR SUSPENSION
DESCRIPTION AND OPERATION
64-1
Deze pagina werd opzettelijk niet gebruikt
Cette page est intentionnellement vierge
Questa pagina è stata lasciata in bianco di proposito
Diese Seite ist leer
Esta página foi deixada intencionalmente em branco
Esta página fue dejada en blanco intencionalmente
This page is intentionally left blank
REAR SUSPENSION
DESCRIPTION AND OPERATION

REAR SUSPENSION
64-2
DESCRIPTION AND OPERATION
Rear suspension component layout
(vehicles with SLS)
1 Air pressure pipe connector
2 Damper RH
3 Watts linkage
4 Anti-roll bar link LH
5 Air spring LH
6 Damper LH
7 Torsion/Anti-roll bar
8 Radius arm LH
9 ACE short arm (if fitted)
10 ACE actuator (if fitted)
11 ACE long arm (if fitted)
12 Anti-roll bar link RH
13 Radius arm RH
14 Rear axle
15 Air spring RH
Нет комментариевНе стесняйтесь поделиться с нами вашим ценным мнением.
Текст