Discovery 2. Manual — part 312
LIGHTING
REPAIRS
86-2-3
REPAIRS
Lamp - front repeater - up to 03MY
$% 86.40.42
Remove
1. For RH repeater lamp: Release fixings and
remove battery cover.
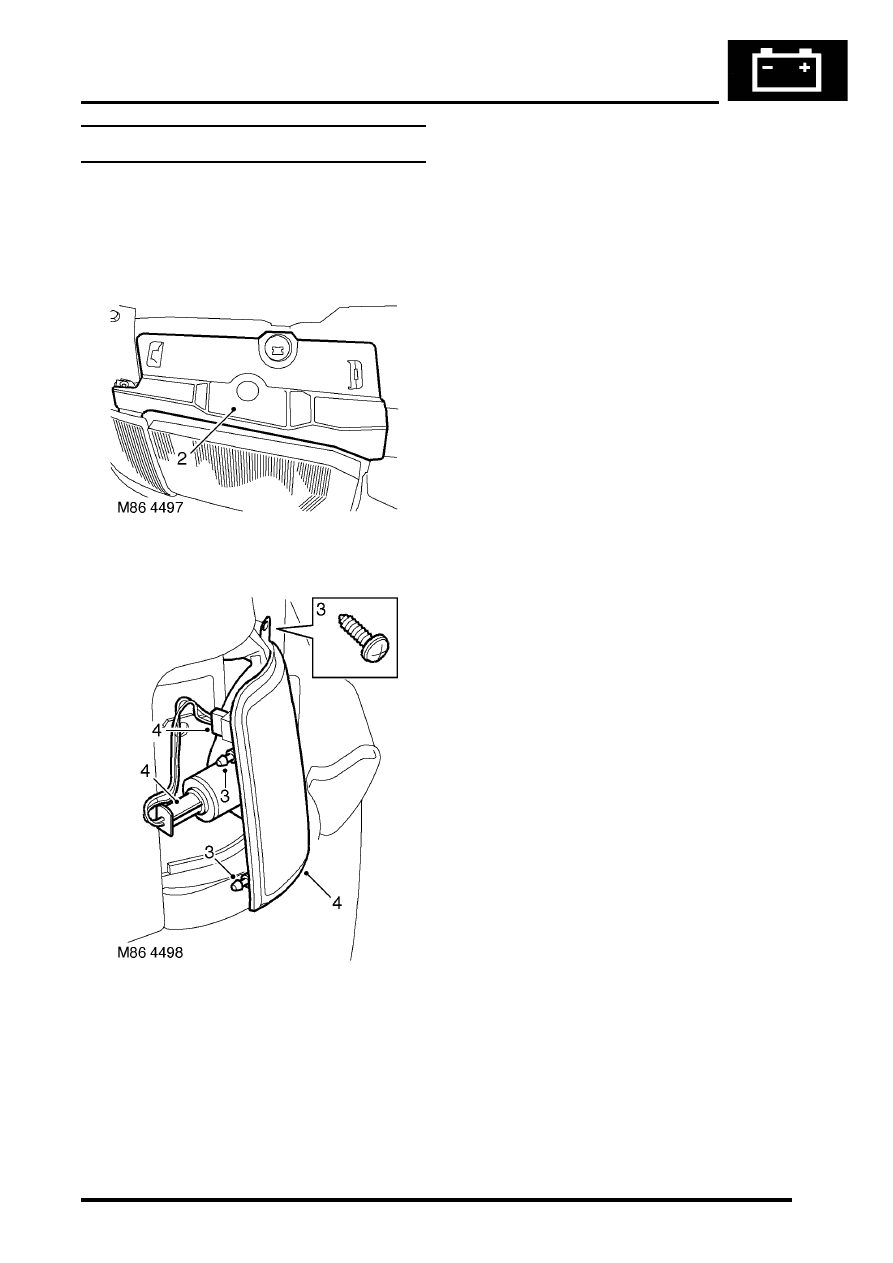
2. Remove headlamp access cover from body.
3. Remove screw securing repeater lamp to body
and release lamp from 2 locating peg sockets in
wing.
4. Disconnect 2 multiplugs from repeater lamp
and remove lamp.
Refit
1. Position new repeater lamp and connect
multiplugs.
2. Fit repeater lamp to body and tighten screw.
3. Fit headlamp access cover.
4. For RH repeater lamp: Fit battery cover and
secure fixings.
LIGHTING
86-2-4
REPAIRS
Headlamp - up to 03MY
$% 86.40.49
Remove
1. For RH headlamp: Release fixings and
remove battery cover.
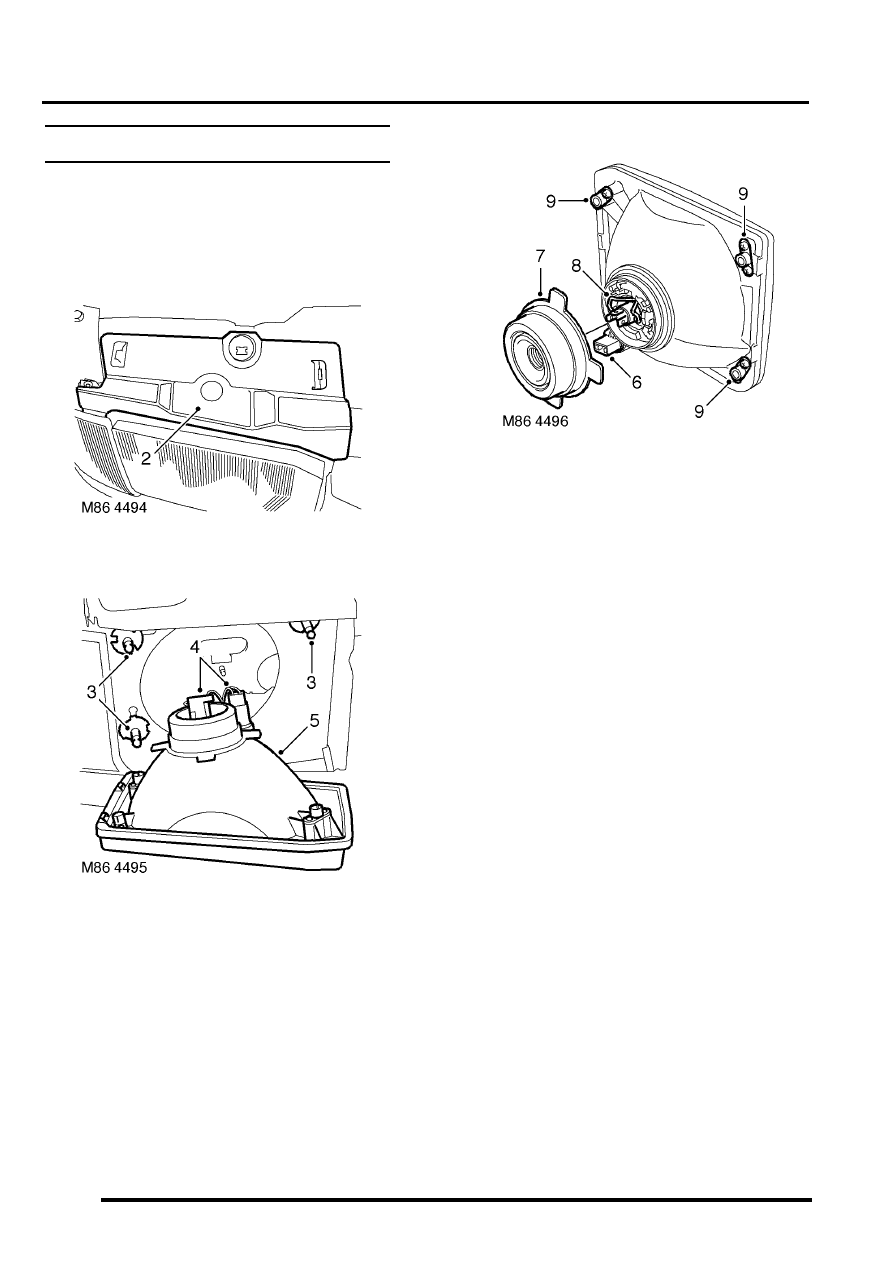
2. Remove headlamp access cover from body.
3. Release headlamp from locating sockets.
4. Disconnect multiplugs from headlamp and side
lamp bulbs.
5. Remove headlamp.
NOTE: Do not carry out further dismantling if
component is removed for access only.
6. Remove side lamp bulb holder from headlamp.
7. Remove rubber cover from headlamp.
8. Release headlamp bulb retaining clip and
remove headlamp bulb.
9. Remove 6 screws and remove headlamp
retaining sockets.
Refit
1. Fit retaining sockets to new headlamp and
secure with screws.
2. Fit headlamp bulb and secure with clip.
3. Fit rubber cover.
4. Fit side lamp bulb holder.
5. Position headlamp and connect multiplugs.
6. Fit headlamp onto locating pins.
7. Check headlamp beam alignment.
Headlamps beam alignment - up to 03MY.
8. Fit headlamp access cover.
9. For RH headlamp: Fit battery cover and
secure with fixings.
LIGHTING
REPAIRS
86-2-5
Headlamp - from 03MY
$% 86.40.49
Remove
1. Remove front grille.
2. Protect bumper.
CAUTION: Always protect paintwork when
removing or refitting any body trims or
bumpers.
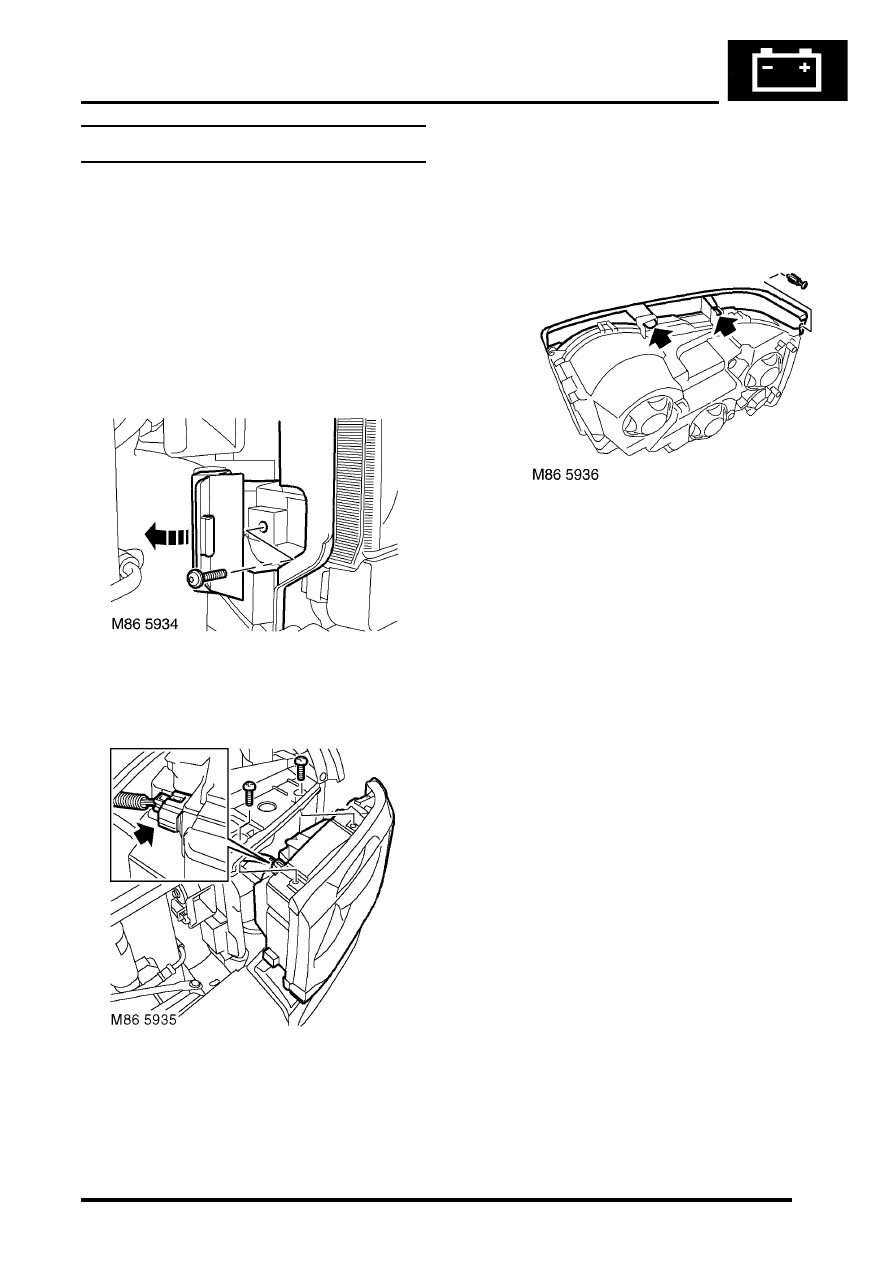
3. Open air deflector access panel and remove
Torx screw securing headlamp assembly to the
front panel.
4. Remove 2 screws securing headlamp
assembly to the bonnet locking platform.
5. Release headlamp assembly from wing,
disconnect multiplug and remove the headlamp
assembly.
NOTE: Do not carry out further dismantling if
component is removed for access only.
6. Remove scrivet securing headlamp finisher to
headlamp assembly, release and remove the
finisher.
Refit
1. Fit and secure headlamp finisher to the
headlamp assembly.
2. Position headlamp assembly to front panel and
connect the multiplug.
3. Secure headlamp assembly to the front wing.
4. Fit and tighten screws securing headlamp
assembly to the bonnet locking platform.
5. Fit and tighten Torx screw securing headlamp
assembly to the front panel. Close the air
deflector access panel.
6. Remove bumper protection.
7. Fit front grille.
8. Check headlamp alignment - adjust if
LIGHTING
86-2-6
REPAIRS
Lamp - tail
$% 86.40.70
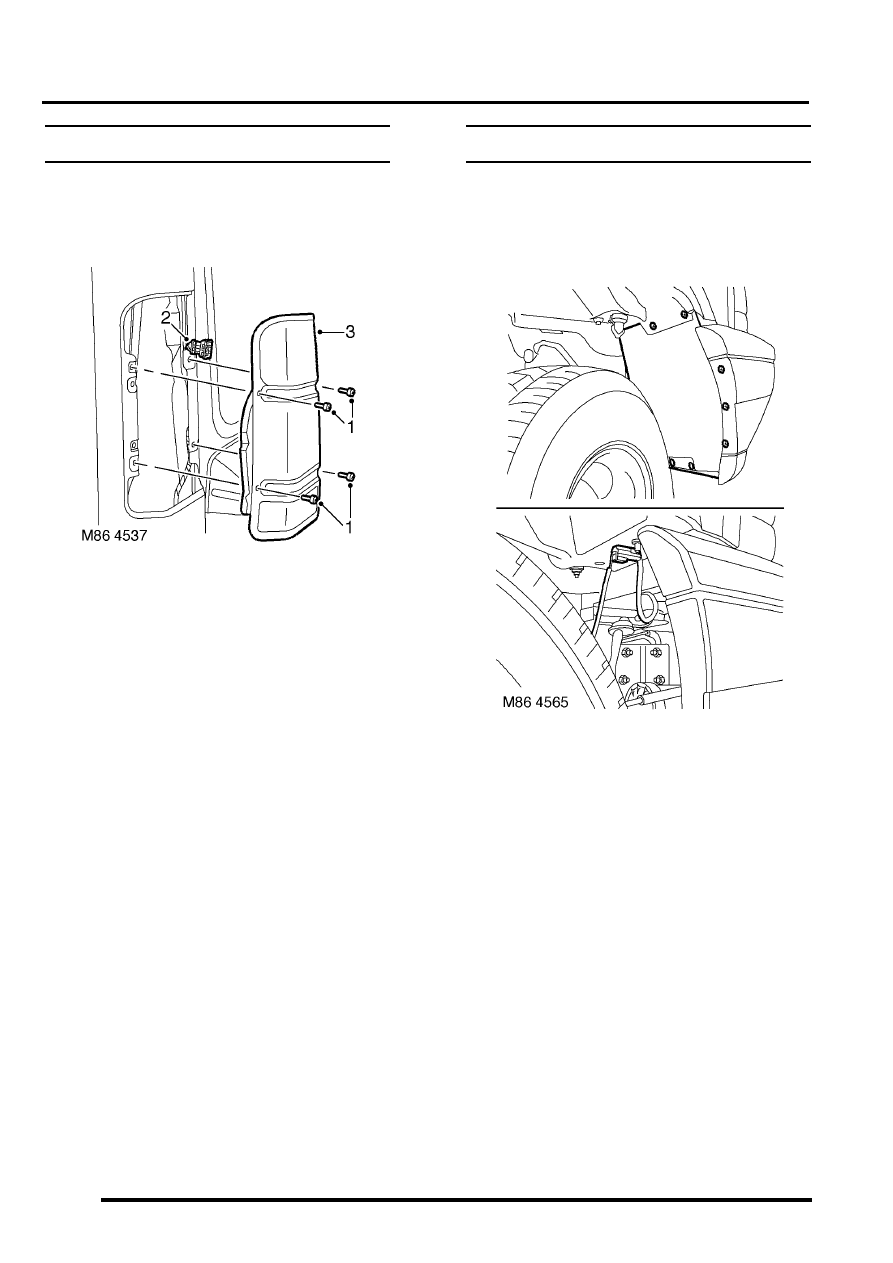
Remove
1. Remove 4 screws securing tail lamp to body.
2. Disconnect multiplug from tail lamp.
3. Remove tail lamp.
Refit
1. Position tail lamp to body and connect
multiplug.
2. Secure tail lamp to body with screws.
Lamp - front fog up to 03MY
$% 86.40.95
Remove
1. Raise front of vehicle, one side.
2. For RH lamp: Remove 7 screws securing
wheel arch liner extension to liner and bumper
valance and remove liner extension.
Disconnect lamp multiplug from harness.
3. For LH lamp:Remove front bumper assembly.
Нет комментариевНе стесняйтесь поделиться с нами вашим ценным мнением.
Текст