Discovery 2. Manual — part 230
EXTERIOR FITTINGS
REPAIRS
76-2-1
EXTERIOR FITTINGS
REPAIRS
Wing - front - up to 03MY
$% 76.10.24
Remove
1. Remove front repeater lamp.
LIGHTING, REPAIRS, Lamp - front
2. Remove front wheel arch liner.
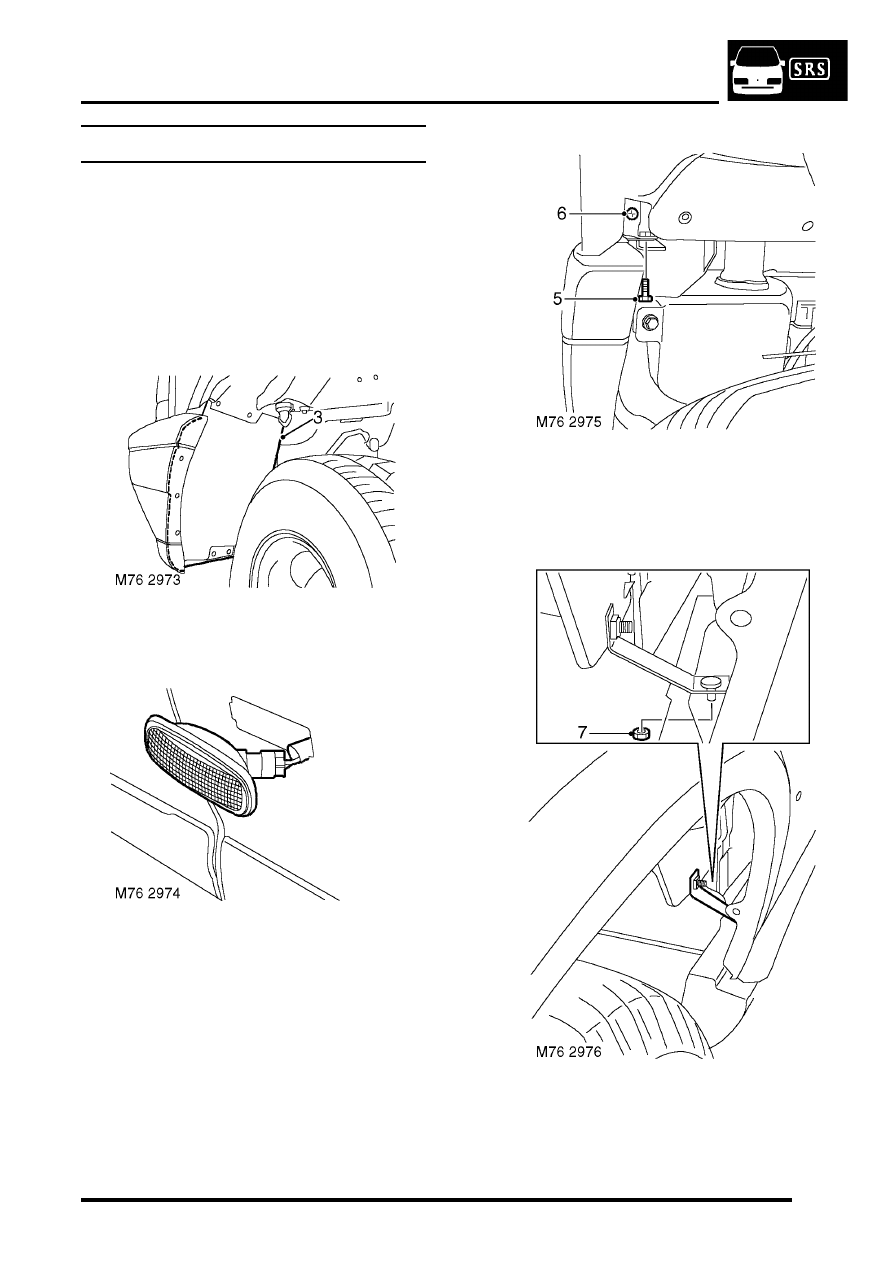
3. Remove 5 screws securing wheel arch liner
extension to bumper valance and remove liner.
4. Remove side repeater lamp from wing,
disconnect multiplug and remove lamp.
5. Remove bolt securing front of wing to bracket
on body.
6. Remove screw securing headlamp surround
panel to wing.
7. Remove nut securing wing to bracket on sill
finisher.
EXTERIOR FITTINGS
76-2-2
REPAIRS
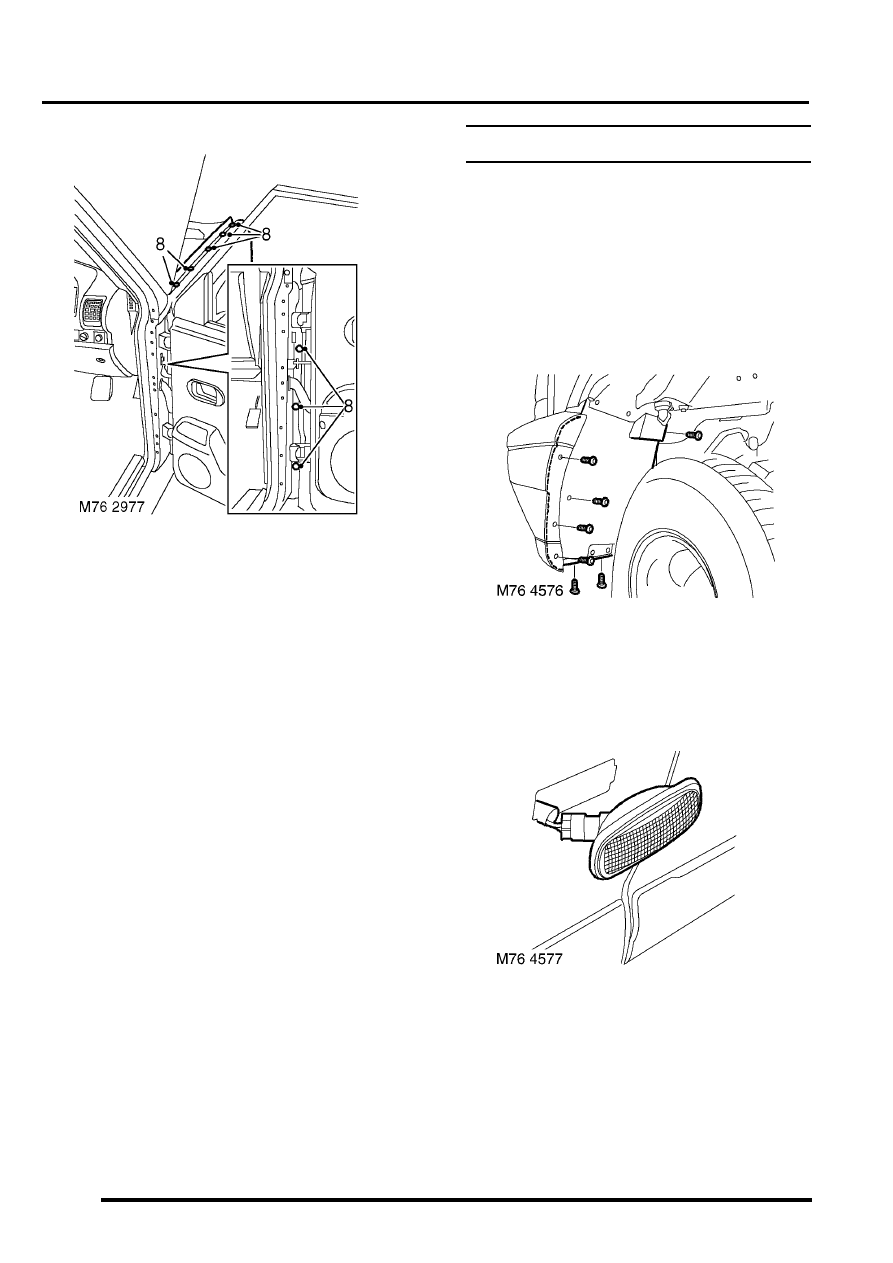
8. Remove 8 bolts securing wing to body and
remove wing.
Refit
1. Position wing to body.
2. Connect side repeater lamp to multiplug and fit
to wing.
3. Position wing to body, align wing to bonnet and
front door so that the correct gaps are achieved
and tighten bolts to 17 Nm (13 lbf.ft).
4. Check alignment of wing to bonnet and front
door. If necessary, adjust wing to achieve
correct gaps.
5. Fit and tighten nut securing wing to bracket on
sill finisher to 17 Nm (13 lbf.ft).
6. Fit and tighten screw securing wing to
headlamp surround panel.
7. Fit and tighten bolt securing front of wing to
bracket on body to 17 Nm (13 lbf.ft).
8. Fit wheel arch liner extension to bumper and
secure with screws.
9. Fit front wheel arch liner.
10. Fit front repeater lamp.
LIGHTING, REPAIRS, Lamp - front
Wing - front - from 03MY
$% 76.10.24
Remove
1. Remove the headlamp assembly.
2. Remove the front wheel arch liner.
3. Remove screw securing wheel arch liner
extension panel to the inner wing.
4. Remove 6 screws securing wheel arch liner
extension panel to the front bumper and
remove the extension panel.
5. Release side repeater lamp from front wing,
disconnect the multiplug and remove the lamp.
EXTERIOR FITTINGS
REPAIRS
76-2-3
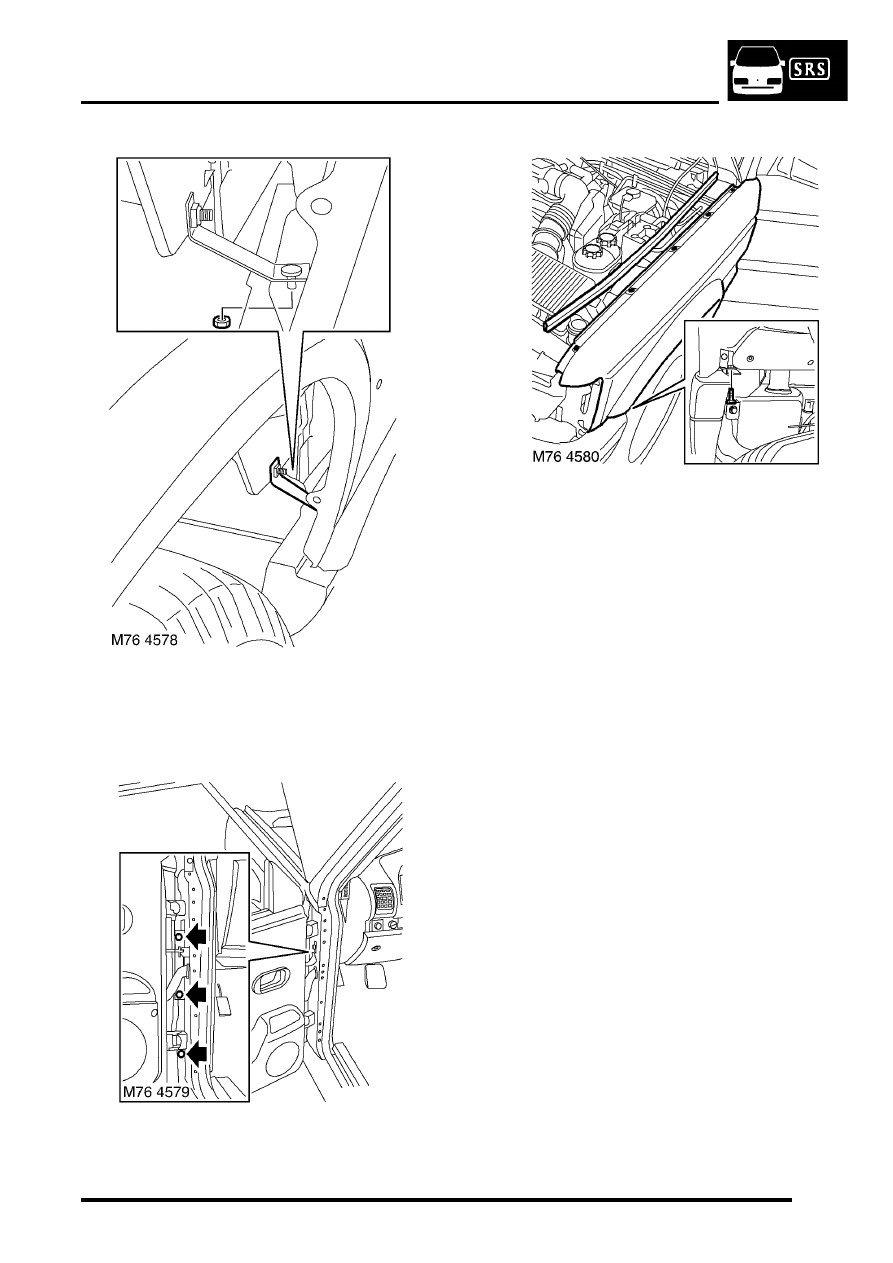
6. Remove bolt securing front wing lower support
bracket to the body.
7. Remove nut securing sill finisher to the front
wing lower support bracket.
8. Remove 3 bolts securing front wing rear edge
to the body and collect the bracket.
9. Remove bonnet sealing rubber from the front
wing flange.
10. Remove bolt securing front wing to the front
support bracket.
11. Remove 5 bolts securing front wing to the body
and remove the front wing.
NOTE: Do not carry out further dismantling if
component is removed for access only.
12. Remove nut securing lower support bracket to
the front wing and remove the bracket.
13. Remove the front wing wheel arch finisher.
EXTERIOR FITTINGS
76-2-4
REPAIRS
Refit
1. Clean front wing body mounting brackets.
2. Fit and secure the front wheel arch finisher to
the front wing.
3. Position lower support bracket to the front wing,
fit nut and tighten to 8 Nm (6 lbf.ft).
4. Position front wing to body, fit bracket and bolts
but do not tighten at this stage.
5. Check and adjust alignment of the front wing to
the bonnet and door.
6. Tighten the front wing retaining bolts to 8 Nm (6
lbf.ft).
7. Fit bonnet sealing rubber to the front wing
flange.
8. Fit bolt securing lower support bracket to the
body and tighten to 8 Nm (6 lbf.ft).
9. Fit nut securing sill finisher to the front wing
lower support bracket and tighten to 8 Nm (6
lbf.ft).
10. Fit bolt securing front wing to the front support
bracket and tighten to 8 Nm (6 lbf.ft).
11. Fit side repeater lamp to the front wing and
connect the multiplug.
12. Fit front wheel arch liner extension panel to the
front bumper and secure with screws.
13. Fit and tighten screw securing front wheel arch
liner extension panel to the inner wing.
14. Fit the front wheel arch liner.
15. Fit the headlamp assembly.
Rear folding step
$% 76.10.41
Remove
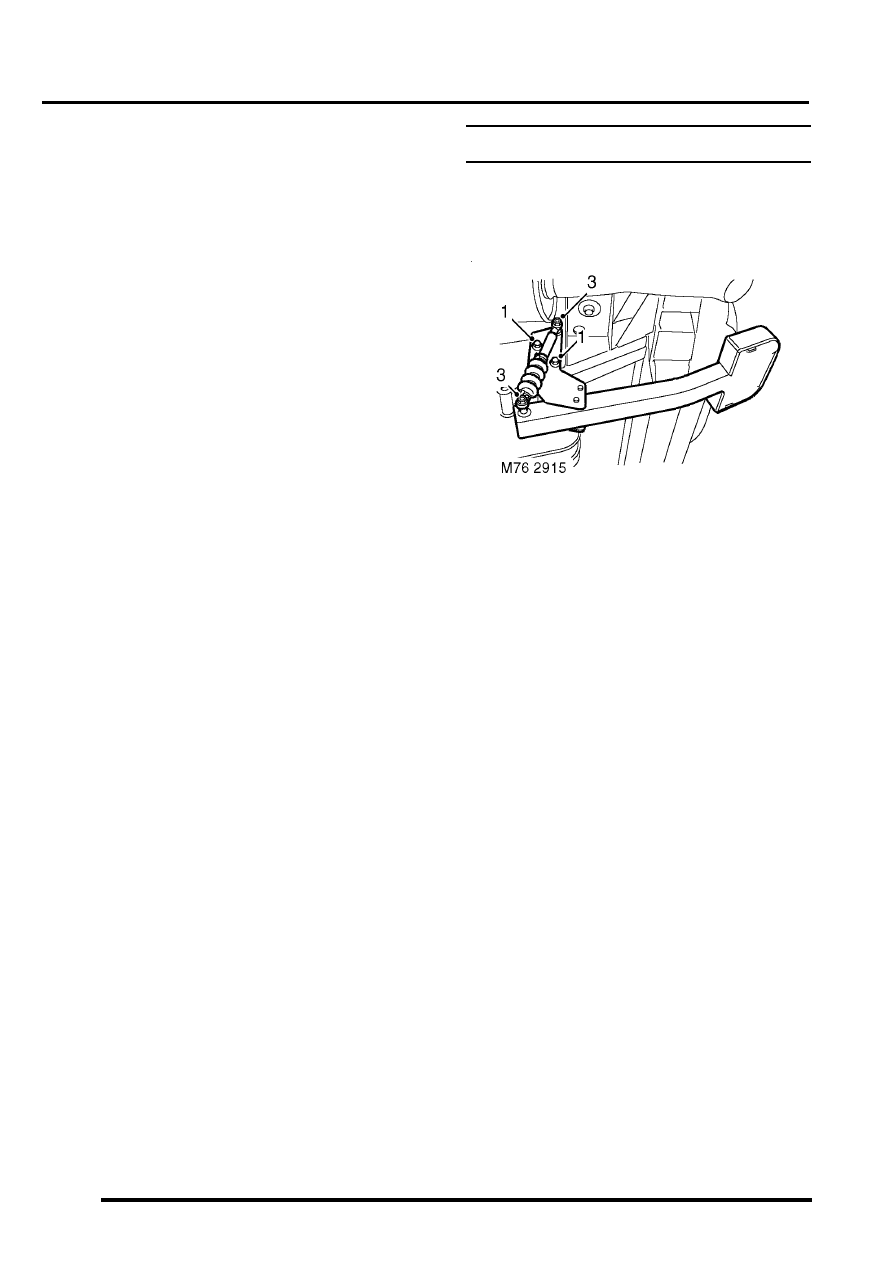
1. Remove 2 bolts securing step and damper
assembly to chassis.
2. Remove step and damper assembly.
3. Remove 2 patch lock nuts securing damper to
step and discard nuts.
4. Remove damper from step.
Refit
1. Fit damper to step and secure with new patch
lock nuts. Tighten nuts to 17 Nm (13 lbf.ft).
2. Position step and damper assembly to chassis
and secure with bolts. Tighten bolts to 45 Nm
(33 lbf.ft).
Нет комментариевНе стесняйтесь поделиться с нами вашим ценным мнением.
Текст