Discovery 2. Manual — part 477
ENGINE MANAGEMENT SYSTEM - TD5
REPAIRS 18-1-51
Sensor - mass air flow (MAF)
$% 19.22.25
Remove
1. Disconnect multiplug from MAF sensor.
2. Loosen clip and release air intake hose from
MAF sensor.
3. Release 2 clips and remove sensor from air
cleaner.
Refit
1. Position sensor to air cleaner and secure clips.
2. Position air intake hose and tighten clip.
3. Connect multiplug to MAF sensor.
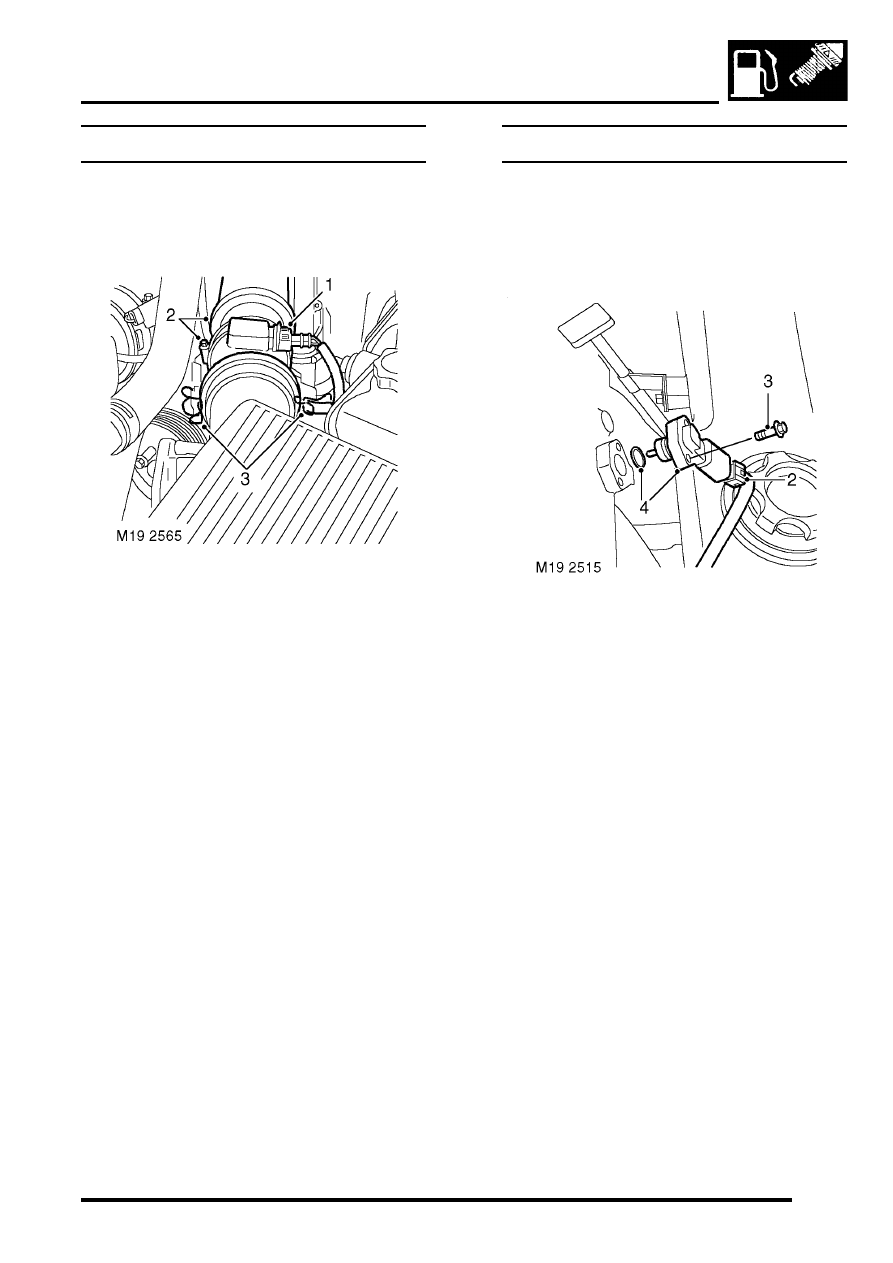
Sensor - combined MAP and IAT
$% 19.22.26
Remove
1. Remove 3 bolts and remove engine acoustic
cover.
2. Disconnect multiplug from combined MAP and
IAT sensor,
3. Remove 2 bolts securing sensor to inlet
manifold.
4. Remove sensor and discard 'O' ring.
Refit
1. Clean sensor and inlet manifold mating face.
2. Fit new 'O' ring and position sensor to manifold.
3. Fit bolts securing MAP and IAT sensor and
tighten to 9 Nm (7 lbf.ft).
4. Fit engine acoustic cover and secure with
fixings.
ENGINE MANAGEMENT SYSTEM - TD5
18-1-52 REPAIRS
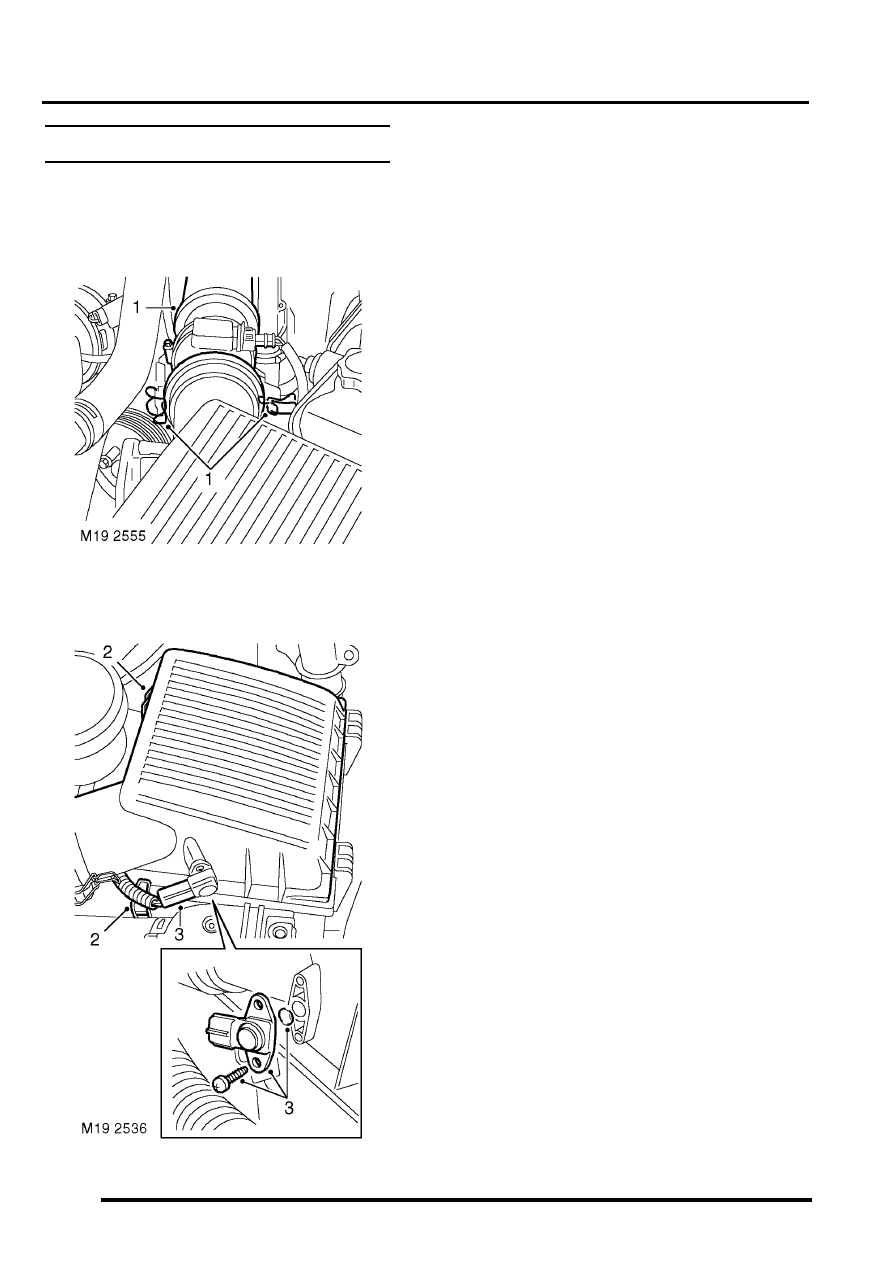
Sensor - ambient air pressure (AAP)
$% 19.22.27
Remove
1. Release 2 clips and disconnect MAF sensor
from air cleaner cover.
2. Release 2 clips and release cover from air
cleaner.
3. Disconnect multiplug from AAP sensor, remove
2 screws, remove sensor and discard 'O' ring.
Refit
1. Clean AAP sensor and air cleaner cover.
2. Fit new 'O' ring, fit sensor and tighten screws.
3. Position air cleaner cover and secure clips.
4. Connect multiplug to AAP sensor.
5. Position MAF sensor and secure clips.
ENGINE MANAGEMENT SYSTEM - TD5
REPAIRS 18-1-53
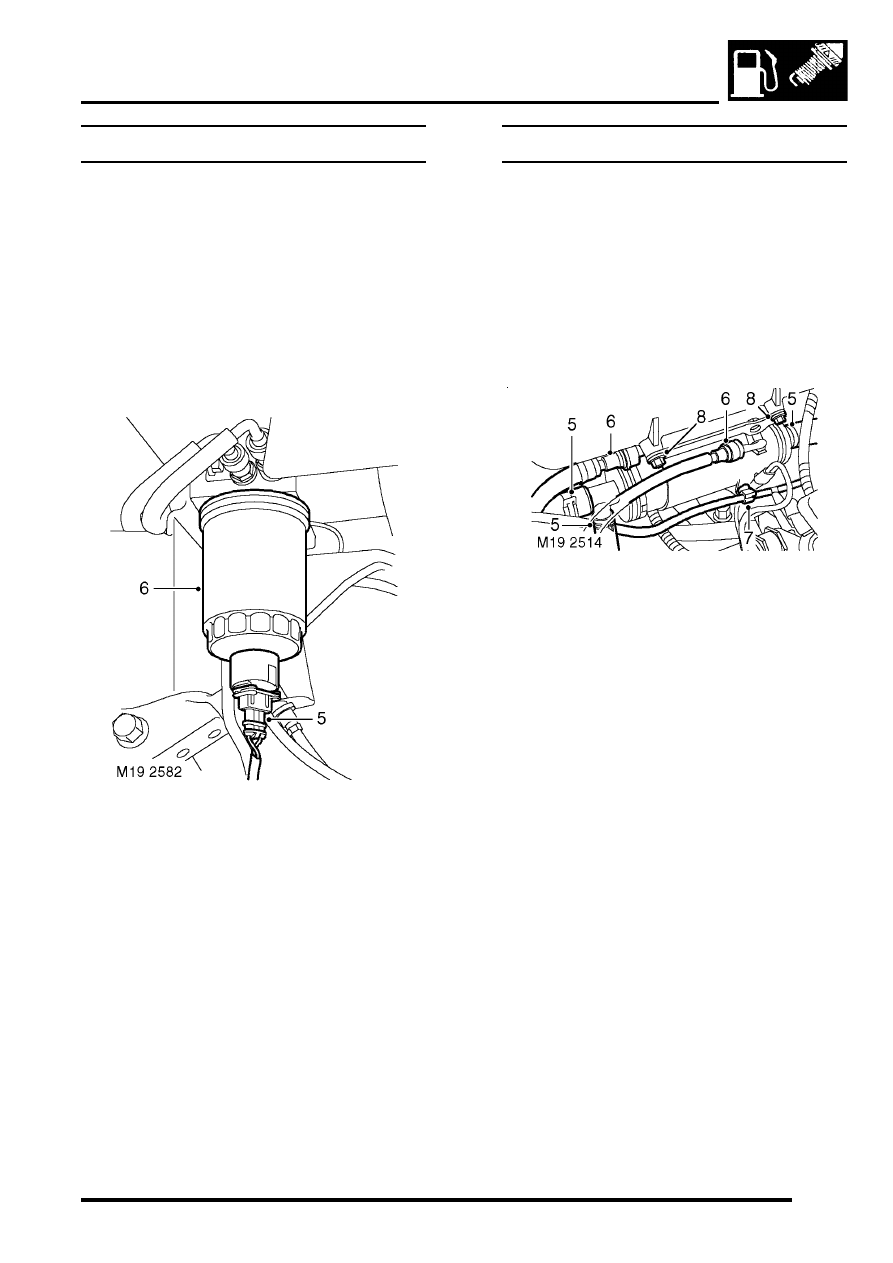
Element - fuel filter
$% 19.25.07
Remove
1. Release turnbuckles and remove battery cover.
2. Disconnect battery earth lead.
3. Raise rear of vehicle.
WARNING: Do not work on or under a
vehicle supported only by a jack. Always
support the vehicle on safety stands.
4. Clean area around fuel filter.
5. Disconnect multiplug from filter element.
6. Remove fuel filter element.
Refit
1. Clean fuel filter and mating face.
2. Fit new fuel filter element and connect
multiplug.
3. Remove stand(s) and lower vehicle.
4. Connect battery earth lead.
5. Fit battery cover and secure the fixings.
Cooler - fuel
$% 19.25.30
Remove
1. Remove 3 bolts and remove engine acoustic
cover.
2. Remove battery cover.
3. Disconnect battery earth lead.
4. Drain cooling system.
ADJUSTMENTS, Drain and refill.
5. Release 3 clips and disconnect 3 coolant hoses
from fuel cooler.
6. Release 2 fuel hoses from fuel cooler.
CAUTION: Always fit plugs to open
connections to prevent contamination.
7. Release vacuum pipe clip from fuel cooler.
8. Noting which bolts are removed from the upper
fixing holes, remove 4 bolts securing fuel cooler
to inlet manifold. Remove cooler.
Refit
1. Clean fuel hose connections.
2. Apply Loctite 242 to the two upper bolts.
3. Position fuel cooler to inlet manifold, fit bolts
and tighten the upper bolts to 18 Nm (13 lbf.ft)
and the lower bolts to 25 Nm (18 lbf.ft).
4. Connect fuel hoses to fuel cooler.
5. Connect coolant hoses to fuel cooler, secure
with clips.
6. Secure vacuum hose to fuel cooler.
7. Refill cooling system.
ADJUSTMENTS, Drain and refill.
8. Fit engine acoustic cover and secure with
fixings.
9. Connect battery earth lead.
10. Fit battery cover.
ENGINE MANAGEMENT SYSTEM - TD5
18-1-54 REPAIRS
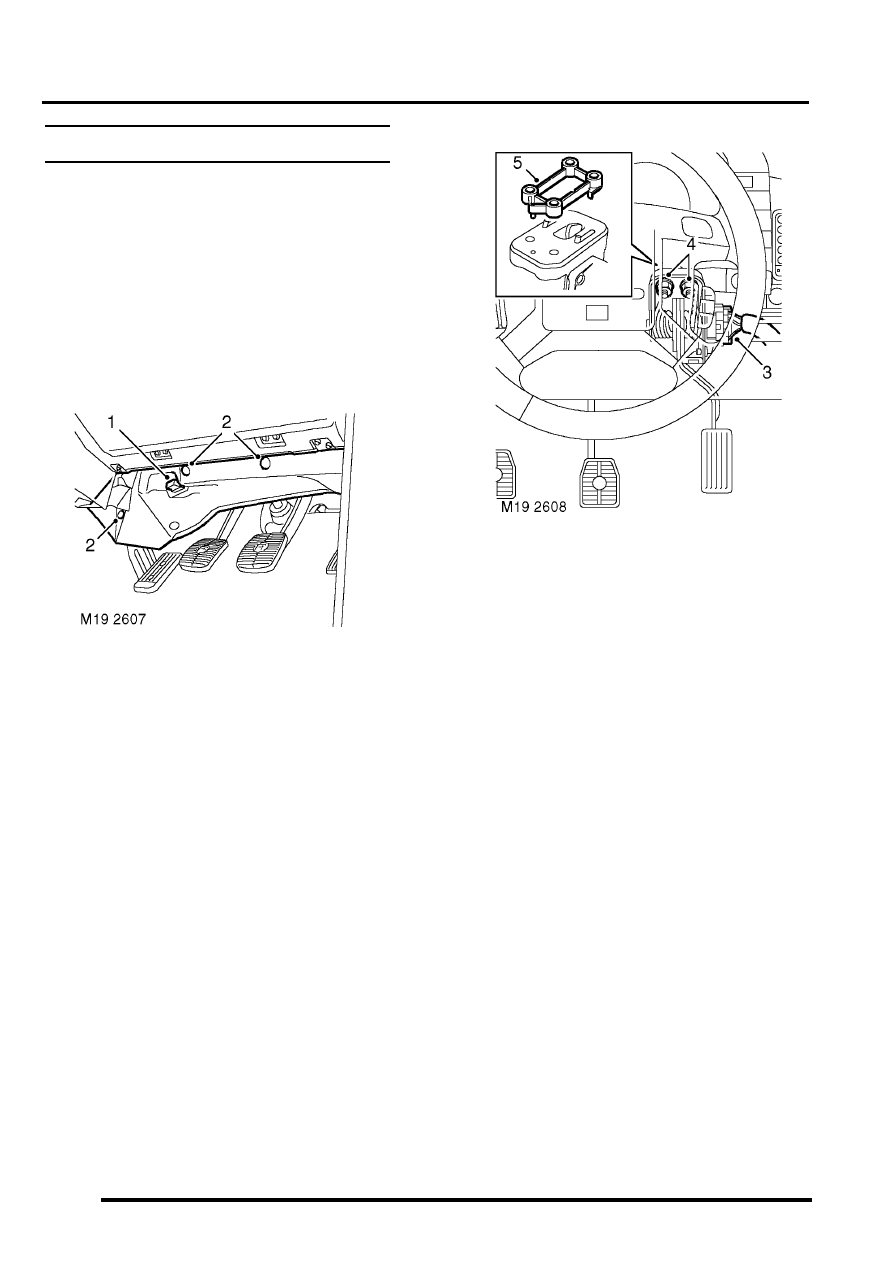
Sensor - Throttle position (TP)
$% 19.30.14
The TP sensor is integral with the throttle pedal
assembly and must be renewed as an assembly.
Three track TP sensors were introduced from VIN
297137.
Three track TP sensors cannot be fitted to vehicles
previously fitted with two track TP sensors.
Remove
1. Release diagnostic socket from driver's closing
panel.
2. Remove 3 trim retaining studs and remove
closing panel.
3. Disconnect multiplug from TP sensor, release
harness from throttle pedal bracket and
position harness aside..
4. Remove 2 nyloc nuts and remove throttle pedal
assembly. Discard nuts.
5. Remove spacer block from pedal bracket.
Refit
1. Position spacer block to pedal bracket.
2. Position throttle pedal assembly and tighten
new nyloc nuts to 13 Nm (10 lbf.ft).
3. Fit and secure harness to pedal bracket and
connect multiplug to TP sensor.
4. Position closing panel, connect diagnostic
socket and fit retaining studs.
Нет комментариевНе стесняйтесь поделиться с нами вашим ценным мнением.
Текст